BenQ L32-6000 Series User manual

L32-6000 / L42-6000 Series
LED Backlight TV
User Manual
L32_L42-6000 - EN.book Page 1 Monday, August 29, 2011 3:10 PM

English
Copyright
Copyright 2011 by BenQ Corporation. All rights reserved. No part of this
publication may be reproduced, transmitted, transcribed, stored in a retrieval system
or translated into any language or computer language, in any form or by any means,
electronic, mechanical, magnetic, optical, chemical, manual or otherwise, without the
prior written permission of BenQ Corporation.
All other logos, products, or company names mentioned in this manual may be the
registered trademarks or copyrights of their respective companies, and are used for
informational purposes only.
Disclaimer
BenQ Corporation makes no representations or warranties, either expressed or
implied, with respect to the contents hereof and specifically disclaims any warranties,
merchantability or fitness for any particular purpose. Further, BenQ Corporation
reserves the right to revise this publication and to make changes from time to time in
the contents hereof without obligation of BenQ Corporation to notify any person of
such revision or changes.
This user manual aims to provide the most updated and accurate information to
customers, and thus all contents may be modified from time to time without prior
notice. Please visit http://www.benq.com for the latest version of this manual.
is a trademark of SRS Labs, Inc.
TruSurround HD technology is incorporated under license from
SRS Labs, Inc.
BenQ ecoFACTS
BenQ has been dedicated to the design and development of greener product as part
of its aspiration to realize the ideal of the "Bringing Enjoyment 'N Quality to Life"
corporate vision with the ultimate goal to achieve a low-carbon society. Besides
meeting international regulatory requirement and standards pertaining to
environmental management, BenQ has spared no efforts in pushing our initiatives
further to incorporate life cycle design in the aspects of material selection,
manufacturing, packaging, transportation, using and disposal of the products. BenQ
ecoFACTS label lists key eco-friendly design highlights of each product, hoping to
ensure that consumers make informed green choices at purchase. Check out BenQ’s
CSR Website at http://csr.BenQ.com/ for more details on BenQ’s environmental
commitments and achievements.
L32_L42-6000 - EN.book Page 2 Monday, August 29, 2011 3:10 PM

Safety, Warning, and Notice 3
English
Safety, Warning, and Notice
To prevent potential dangers and prolong the service life of the TV, please
observe the following points when installing, operating, and cleaning the TV.
For wall mounting, have a
qualified and experienced
technician mount it safely. Use
only a recommended wall
bracket (optional accessory) for
this TV and ensure that the
bracket is securely screw fixed to
the wall structure, and not just
the wall render, lining or
cladding.
Observe all warnings and
cautions as labeled on the TV.
Do not place the TV near water,
like a spa or pool, or in a
position which will allow the
splashing or spraying of water
onto the display.
Do not place the TV in direct
sun or spot lighting will shine
onto the TV.
Do not place the TV near or
above sources of heat, such as
radiators, heaters, fuel stoves
and other heat-generating items
(including audio amplifiers).
Do not place the TV on an
uneven, sloping or unstable
surface (such as a trolley) where
it may fall and cause damage to
itself or others.
For wall mounting, allow
appropriate space on top for
attaching the TV to the wall
bracket.
Do not place the TV in an
enclosed place without allowing
for ventilation.
If recessed into a wall opening,
you must leave appropriate free
space both top and bottom for
mounting and removing the TV.
All Liquid Crystal Display (LCD)
screens have a very thin
protective layer of glass which is
liable to marking or scratching,
and cracking if struck or
pressured. The liquid crystal
substrate is also liable to damage
under excessive force or
extreme temperatures. Please
handle with care.
L32_L42-6000 - EN.book Page 3 Monday, August 29, 2011 3:10 PM

Care and cleaning information4
English
Care and cleaning information
• Always turn off and disconnect the TV from the mains power before cleaning.
• Do not use cream, liquid, aerosol or spray cleaners. Use only a slightly damp well
wrung-out (drip-free) and lint-free, clean soft cloth and lightly wipe the TV.
• If necessary, use a pH-neutral liquid dish-washing detergent diluted with water on a
separate clean lint-free cloth to remove oil or grease marks. Wipe over again with a
clean dry lint-free cloth to remove any smear marks.
• When cleaning the TV (including the frame around the screen), please use a proper
cleaning tool harmless to the materials used by the TV in order to avoid possible
scratches or damages.
• Under close examination and in certain circumstances, you may notice that a few
non-active pixels appear on the screen as a fixed point of color. Please note that this
does not affect the performance of your product as it is usually not visible at normal
viewing distances.
• If the TV is not going to be used for an extended period of time (like when you are
going away for holidays), it should be switched off and unplugged from the wall
outlet. You should also consider removing the batteries from the remote control (as
they may leak).
• The TV is not suitable for installation on certain transportation vehicles (such as
cars, yachts, and so on) to avoid possible damage to the TV because of vibration.
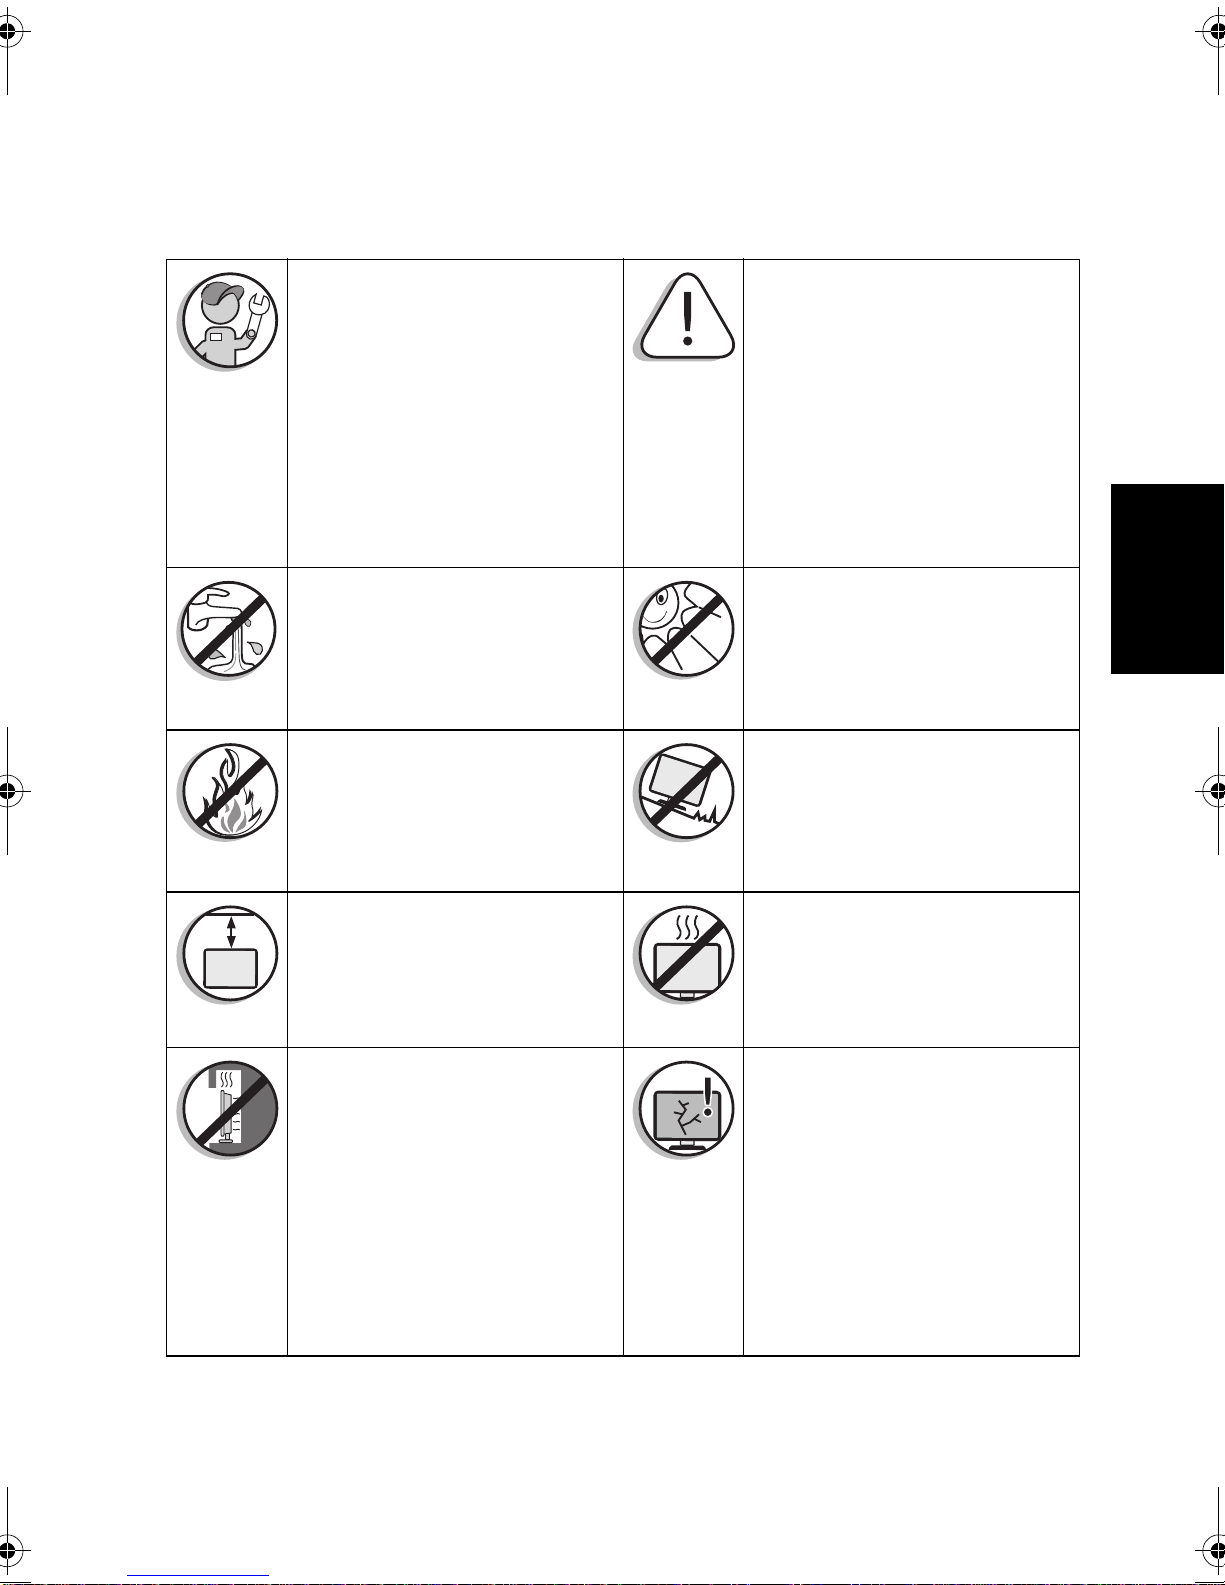
Do not cover or block the vents
and openings while the TV is
switched on.
To prevent the spread of fire,
keep candles or other open
flames away from the TV at all
times.
Do not insert your fingers or any
foreign objects into the hinge
and its surrounding area to avoid
possible injury to you or damage
to the TV.
Do not apply excessive force or
place heavy stuff on the TV to
avoid possible damage.
• Only use the power cord supplied with the TV. Never use a power cord which appears
damaged or frayed, or change the plug type on the power cord.
• Use only a properly grounded plug and receptacle. -- An improper ground may cause
electric shock or equipment damage (Class l Equipment only).
• Be aware of the total loading when using extension cords or multiple outlet power
boards.
• When installing the TV, incorporate a readily accessible disconnect device in the fixed
wiring, or connect the power cord to socket-outlet which must be provided near the
TV and easily accessible. If a fault should occur during operation of the unit, operate
the disconnect device to switch the power supply off, or disconnect the power cord.
• This TV has been engineered and manufactured with the highest priority on safety,
however, IMPROPER HANDLING OR USE CAN RESULT IN POTENTIAL
ELECTRICAL SHOCK OR FIRE HAZARD. Please handle this TV with care. If
damaged, turn off the power and unplug the power cord from the TV. Transport the
TV to your nearest BenQ authorized service center for repair.
• There are no user serviceable parts in this TV. Never unscrew or remove any covers.
There are dangerous voltages inside. Turn off the power and unplug the power cord
before moving the TV.
L32_L42-6000 - EN.book Page 4 Monday, August 29, 2011 3:10 PM

Safety notice for batteries 5
English
• LCD (Liquid Crystal Display) screens, like plasma (PDP) and conventional CRT
(Cathode Ray Tube) screens, are also susceptible to “screen burn-in” or “image
retention” which can be found on the screen as visible fixed lines and shades and
cannot be removed. To avoid such permanent damage to the screen, please take the
following preventive measures when using your TV:
(1) Avoid displaying still images (like On-Screen Display menus, TV station logos,
fixed/inactive text or icons) for more than two hours.
(2) Change the aspect ratio from time to time. Fill the entire screen with the image
and eliminate the black bars whenever possible. Avoid displaying images in 4:3
aspect ratio over a long period of time, otherwise there may be visible burn
marks on the screen as two vertical lines.
(3) Turn on the ECO Mode function when displaying PC input image.
(4) This TV is designed for home use only. Do not use it as a commercial display in
public areas.Please note that the product warranty does not cover any screen
damages that result from the failure to take the measures above.
Please note that the product warranty does not cover any screen damages
that result from the failure to take the measures above.
Safety notice for batteries
The use of the wrong type of batteries may cause chemical leaks or
explosion. Please note the following:
• Always ensure that the batteries are inserted with the positive and negative
terminals in the correct direction as shown in the battery compartment.
• Different types of batteries have different characteristics. Do not mix different types.
• Do not mix old and new batteries. Mixing old and new batteries will shorten battery
life or cause chemical leaks from the old batteries.
• When batteries fail to function, replace them immediately.
• Chemicals which leak from batteries may cause skin irritation. If any chemical matter
seeps out of the batteries, wipe it up immediately using a dry cloth, and replace the
batteries as soon as possible.
• Due to varying storage conditions, the battery life for the batteries included with
your TV may be shortened. Replace them within 3 months or as soon as you can
after initial use.
Safety notice for remote control
If the TV comes with a remote control, please note the following:
• Do not put the remote control in the direct heat, humidity and avoid fire.
• Do not drop the remote control.
• Do not expose the remote control to water or moisture. Failure to do so could
result in malfunction.
• Confirm there is no object between the remote control and the remote control
sensor of the TV.
• If the remote control will not be used for an extended period, remove the batteries.
Many of the electronic components used by the TV contain high tension coils, and thus
inductance occur when circuits pass through these components. This inductance is a
normal physical phenomenon, which can be found in many electronic devices in daily life
such as computers and fluorescent lights. Therefore, there is no concern or worry about
the use and safety of this TV.
L32_L42-6000 - EN.book Page 5 Monday, August 29, 2011 3:10 PM

Safety notice for remote control6
English
<Note>
L32_L42-6000 - EN.book Page 6 Monday, August 29, 2011 3:10 PM

Table of Contents 7
English
Table of Contents
Copyright ................................................................................................2
Disclaimer................................................................................................2
BenQ ecoFACTS....................................................................................2
Safety, Warning, and Notice ................................................................3
Care and cleaning information............................................................4
Safety notice for batteries....................................................................5
Safety notice for remote control........................................................5
Getting to know your TV ....................................................................9
Front view................................................................................................................. 9
Remote Control (Option 1)...............................................................................10
Remote Control (Option 2)...............................................................................13
Remote control usage tips ...........................................................................16
Control panel ...........................................................................................17
Rear view (L32-6000) ..........................................................................................18
Rear view (L42-6000) ..........................................................................................19
Connecting power................................................................................................20
Initial setup ................................................................................................21
Adjusting aspect ratio ..........................................................................................21
Navigating the OSD menu ................................................................ 22
Picture menu .................................................................................... 23
Sound menu ..............................................................................................24
TV menu ....................................................................................................25
L32_L42-6000 - EN.book Page 7 Monday, August 29, 2011 3:10 PM

Table of Contents8
English
Time ...........................................................................................................26
Setup ...........................................................................................................27
Viewing images/videos or listening to the music .........................28
Supported devices and file formats:................................................................. 28
Photo playback ............................................................................................... 29
Music playback................................................................................................ 29
Video playback................................................................................................ 30
Text playback.................................................................................................. 30
Reference...............................................................................................31
Dimensions ............................................................................................................ 31
Specifications.........................................................................................33
Supported component (YPbPr) video timing ....................................34
Supported HDMI video timing .......................................................................... 34
Supported HDMI (for connecting with a computer) input signal
resolutions ................................................................................................35
Supported computer (D-sub/VGA) input signal resolutions...................... 35
Setting up appropriate output resolution on a computer.................... 36
Troubleshooting ...................................................................................37
L32_L42-6000 - EN.book Page 8 Monday, August 29, 2011 3:10 PM

Getting to know your TV 9
English
Getting to know your TV
Front view
123 4
No. Name Description
1Speakers Left and right speakers for reproducing high-quality
stereo audio.
2Remote control
sensor window Receives command signals from the remote control.
3Power/status
indicator
• Lights up blue when the TV is powered on.
• Lights up red when the TV is in standby mode.
4Hard off switch
(L42-6000 only)
Turns off the TV without any power consumption. Use
it when you want to shut down the TV for a long time.
L32_L42-6000 - EN.book Page 9 Monday, August 29, 2011 3:10 PM

Getting to know your TV10
English
Remote Control (Option 1)
1 Power / Standby
Press this button to power the TV
on or put it to the standby mode.
2 Freeze
Press this button to freeze the
image on the screen. Press the
button again to resume viewing in
real time.
3 (No function)
4 (No function)
5 (No function)
6 Favorite List
Press this button to jump to one of
the favorite channels you have
stored.
7 When Dynamic Backlight is off, you
can set the backlight brightness.
8 0-9 Channel selection
Press these buttons to select the
program you wish to view.
9 Recall
Press to toggle between the
current channel and the previous
one.
10 INFO
Press this button to display the
input source information.
11 MENU
Press this button to display the
OSD menu for commands and
settings. Press it again to close.
1
3
5
7
8
11
10
12
15
18
16
14
4
6
9
2
9
17
21
22
23
24
26
25
28
29
31
32
20
27
30
19
13
L32_L42-6000 - EN.book Page 10 Monday, August 29, 2011 3:10 PM

Getting to know your TV 11
English
12 ////OK
When the OSD (On-Screen
Display) menu displays on-screen:
• Press /or to select settings.
• Press /or to adjust settings.
• Press BACK to execute
selections.
13 (No function)
14 Senseye menu / Green
Enters Senseye related menu.
Green: Runs the command labelled
green in the OSD menu when
showing files on a connected USB
device or editing channels.
15 Sleep Timer / Red
Sleep Timer: Press this button to
set the automatic shut-off timer.
Red: Runs the command labelled
red in the OSD menu when
showing files on a connected USB
device or editing channels.
16 (No function)
17 +/- Volume
Press these buttons to raise or
lower the volume level.
18 Mute
Press this button to mute the sound
output. Press it again to restore the
sound output.
19 Navigation Controls
Used when showing files on a
connected USB device.
20 TV
Press this button to switch directly
to the (traditional) analog TV mode
to view ATV channels.
21 INPUT
Press these buttons to sequentially
change channels.
1
3
5
7
8
11
10
12
15
18
16
14
4
6
9
2
9
17
21
22
23
24
26
25
28
29
31
32
20
27
30
19
13
L32_L42-6000 - EN.book Page 11 Monday, August 29, 2011 3:10 PM

Getting to know your TV12
English
22 Aspect Ratio
Aspect Ratio: Press this buttonto
adjust the screen image aspect
ratio.
23 (No function)
24 Audio
To select a sound mode.
25 Confirms channel.
26 BACK
In the OSD menu, press this button
to return to the previous menu
page.
27 Sound mode
Press to toggle among available TV
sound modes (may vary from your
TV sound system).
28 (No function)
29 Blue
Runs the command labelled blue in
the OSD menu when showing files
on a connected USB device or
editing channels.
30 Picture / Yellow
Picture: Press this button to select
a desired preset picture mode
Yellow: Runs the command labelled
yellow in the OSD menu when
showing files on a connected USB
device or editing channels.
31 Channel
Press these buttons to sequentially
change channels.
32 SRS TruSurround HD
Press these buttons to turn on/off
the SRS TruSurround HD sound
effect.
1
3
5
7
8
11
10
12
15
18
16
14
4
6
9
2
9
17
21
22
23
24
26
25
28
29
31
32
20
27
30
19
13
L32_L42-6000 - EN.book Page 12 Monday, August 29, 2011 3:10 PM

Getting to know your TV 13
English
Remote Control (Option 2)
1 Power/Standby
Press this button to power the TV
on or put it to the standby mode.
2 Senseye / Green
• When showing files on a
connected USB device or editing
channels, runs the command
labelled green in the OSD menu.
• To access the Senseye related
menu, press the MENU button on
the remote control and select
Picture > Senseye Settings.
3 Sleep Timer / Red
• Sleep Timer: Press this button to
set the automatic shut-off timer.
• Red: Runs the command labelled
red in the OSD menu when
showing files on a connected USB
device or editing channels.
4 (No function)
5 (No function)
6 (No function)
7 (No function)
8 (No function)
9 (No function)
10 0-9 Channel selection
Press these buttons to select the
program you wish to view.
1
3
5
7
8
11
10
12
15
20
16
14
4
6
9
221
13
23
24
25
26
28
27
22
9
17
19
29
30
18
L32_L42-6000 - EN.book Page 13 Monday, August 29, 2011 3:10 PM

Getting to know your TV14
English
11 Recall
Press to toggle between the current
channel and the previous one.
12 Audio
To select a sound mode.
13 +/- Volume
Press these buttons to raise or
lower the volume level.
14 SRS TruSurround HD
Press this button to turn on/off the
SRS TruSurround HD sound effect.
15 ////OK
When the OSD (On-Screen
Display) menu displays on-screen:
• Press /or to select settings.
• Press /or to adjust settings.
• Press BACK to execute
selections.
16 MENU
Press this button to display the
OSD menu for commands and
settings. Press it again to close.
17 Navigation Controls
Used when showing files on a
connected USB device or editing
channels.
18 Favorite List
Press this button to jump to one of
the favorite channels you have
stored.
19 (No function)
20 INPUT
Press these buttons to sequentially
change channels.
21 Picture/ Yellow
Picture: Press this button to select a
desired preset picture mode
Yellow: Runs the command labelled
yellow in the OSD menu when
showing files on a connected USB
device or editing channels.
1
3
5
7
8
11
10
12
15
20
16
14
4
6
9
221
13
23
24
25
26
28
27
22
9
17
19
29
30
18
L32_L42-6000 - EN.book Page 14 Monday, August 29, 2011 3:10 PM

Getting to know your TV 15
English
22 Blue
Runs the command labelled blue in
the OSD menu when showing files
on a connected USB device or
editing channels.
23 (No function)
24 Freeze
Press this button to freeze the
image on the screen. Press the
button again to resume viewing in
real time.
25 Aspect Ratio
Aspect Ratio: Press this buttonto
adjust the screen image aspect
ratio.
26 Confirms channel.
27 Channel
Press these buttons to sequentially
change channels.
28 Mute
Press this button to mute the
sound output. Press it again to
restore the sound output.
29 INFO
Press this button to display the
input source information.
30 BACK
In the OSD menu, press this button
to return to the previous menu
page.
1
3
5
7
8
11
10
12
15
20
16
14
4
6
9
221
13
23
24
25
26
28
27
22
9
17
19
29
30
18
Functions on the remote control may vary depending on different sales regions.
L32_L42-6000 - EN.book Page 15 Monday, August 29, 2011 3:10 PM

Getting to know your TV16
English
Remote control usage tips
• The remote control must be held at an
angle within 30 degrees of the TV's
remote control sensor window to
function correctly. The distance
between the remote control and the
sensors should not exceed 6 meters.
• Do not cover the sensor window on
the front of the TV, or place objects in
front of it which will block the direct
line-of-sight between the remote
control and the sensor window on TV.
30 degrees
6 meters
• Do not let the remote control become wet, or place it in humid environments (like
bathrooms.)
• If the remote control sensor window on the TV is in direct sunlight or strong light, the
remote control may not operate properly. In this situation, change the light source or
readjust the angle of your TV, or operate the remote control from a location closer to
the remote control sensor window on the TV.
L32_L42-6000 - EN.book Page 16 Monday, August 29, 2011 3:10 PM

Getting to know your TV 17
English
Control panel
No. Name Description
1MENU button Displays the On-Screen Display (OSD) menu if not visible,
or exits the current menu if displayed.
2VOL (Volume)
-/+button
• Adjusts the volume level of the built-in speakers.
• In the OSD menu, moves the selection highlight left or
right or changes settings.
3CH (Channel)
/button
• Sequentially selects the previous or next tuned TV
channel.
• In the OSD menu, moves the selection highlight up or
down or changes settings.
4INPUT button
• Cycles through input signal sources.
• In the OSD menu, executes selections or to enter a
submenu you have selected.
5(Power/
standby button) Toggles the TV between standby mode and on.
12 34
5
L32_L42-6000 - EN.book Page 17 Monday, August 29, 2011 3:10 PM

Getting to know your TV18
English
Rear view (L32-6000)
1
7
3
4
2
5
6
8
No. Name Description
1 RF IN (Antenna/TV) Connects to an antenna TV/CATV cable system.
2AV1IN Connects to the outputs (composite video and
audio) on a connected device.
3 YPbPr IN
YPbPr: Connects to the Component Video (Y Pb
Pr) output of an appropriate source device.
Audio (L: left; R: right): Connects to the audio
output of an appropriate source device to match
that of the Component Video output.
4 DC IN Connects to the power cable.
5 PC AUDIO IN (or DVI) Connects to the audio output to match that of the
PC video (D-Sub) or DVI output.
6 VGA Connects to the video (D-Sub) output of a PC.
7HDMI Connects to the HDMI digital audio/video or DVI
digital video output of your digital source device.
8USB Connects to USB external storage devices so that
you can use the TV to view digital photos.
L32_L42-6000 - EN.book Page 18 Monday, August 29, 2011 3:10 PM

Getting to know your TV 19
English
Rear view (L42-6000)
1
7
3
4
2
5
6
911
8
10
No. Name Description
1USB Connects to USB external storage devices so that
you can use the TV to view digital photos.
2 RF IN (Antenna/TV) Connects to an antenna TV/CATV cable system.
3 SPDIF Connects to the SPDIF digital audio input of a
connected device.
4 Headphone output Connects to stereo headphones.
5AVOUT Connects to the inputs (composite video and audio)
on a connected device.
6AV2IN Connects to the outputs (composite video and
audio) on a connected device.
L32_L42-6000 - EN.book Page 19 Monday, August 29, 2011 3:10 PM

Getting to know your TV20
English
Connecting power
L32-6000
L42-6000
7 VGA Connects to the video (D-Sub) output of a PC.
8 PC AUDIO IN Connects to the audio output to match that of the
PC video (D-Sub) output.
9AV1IN Connects to the outputs (composite video and
audio) on a connected device.
10 YPbPr IN
YPbPr: Connects to the Component Video (Y Pb
Pr) output of an appropriate source device.
Audio (L: left; R: right): Connects to the audio
output of an appropriate source device to match
that of the Component Video output.
11 HDMI Connects to the HDMI digital audio/video or DVI
digital video output of your digital source device.
Front views, rear views, available jacks, jack names, and their locations may be different
depending on the TV models available in your country or region.
Pr
Pb
Y
AV
LR
USB1USB2
RFIN
AVO UT
AV2IN
SPDIF
VGA
AUDIO IN
PC
YPbPrIN AV1IN
HDMI1
HDMI2HDMI3
L32_L42-6000 - EN.book Page 20 Monday, August 29, 2011 3:10 PM
This manual suits for next models
1
Table of contents