SWEDX SS-42K15 User manual

Design and specifications are subject to change without notice.
User’s Guide
SS-42K15
SS-50K15
SS-58K15
SS-65K15
www.swedx.com

Design and specifications are subject to change without notice.
SWEDX wave SWEDX TV-Stand ﺔﯾﻟزﻧﻣ ﺎﻣﻧﯾﺳ
SWEDX Direct
SWEDX Blade Wooden Wall-mount
SWEDX shelves
SWEDX Soundbar
SWEDX Matrix Screens
SWEDX offers a wide
range of LED-TVs and
digital signage products
and its accessories. For
more information please
visit
www.swedx.com

3Design and specifications are subject to change without notice.
INDEX Page
Introduction 4
Safety precaution 4
Basic operation 5
Contents 6
Control buttons 6
Inputs 6
Remote Control Notice 7
Remote control buttons 8
Main Operations 9
Volume Control 9
OSD Menu Operations 9
OSD Menu Structure: 9
Menu > OPTION 10
Menu > Channel 11
Menu > Picture 15
Menu > Sound > Sound 15
Menu > Time 16
USB Media Player 17
Supported file formats and codecs 18
Text-TV / Teletext 19
Product base assembly 20
Wall mount assembly 21
Troubleshooting 22
Warranty and Service 23
How to get service 24
Limitation of liability 24

4
Introduction
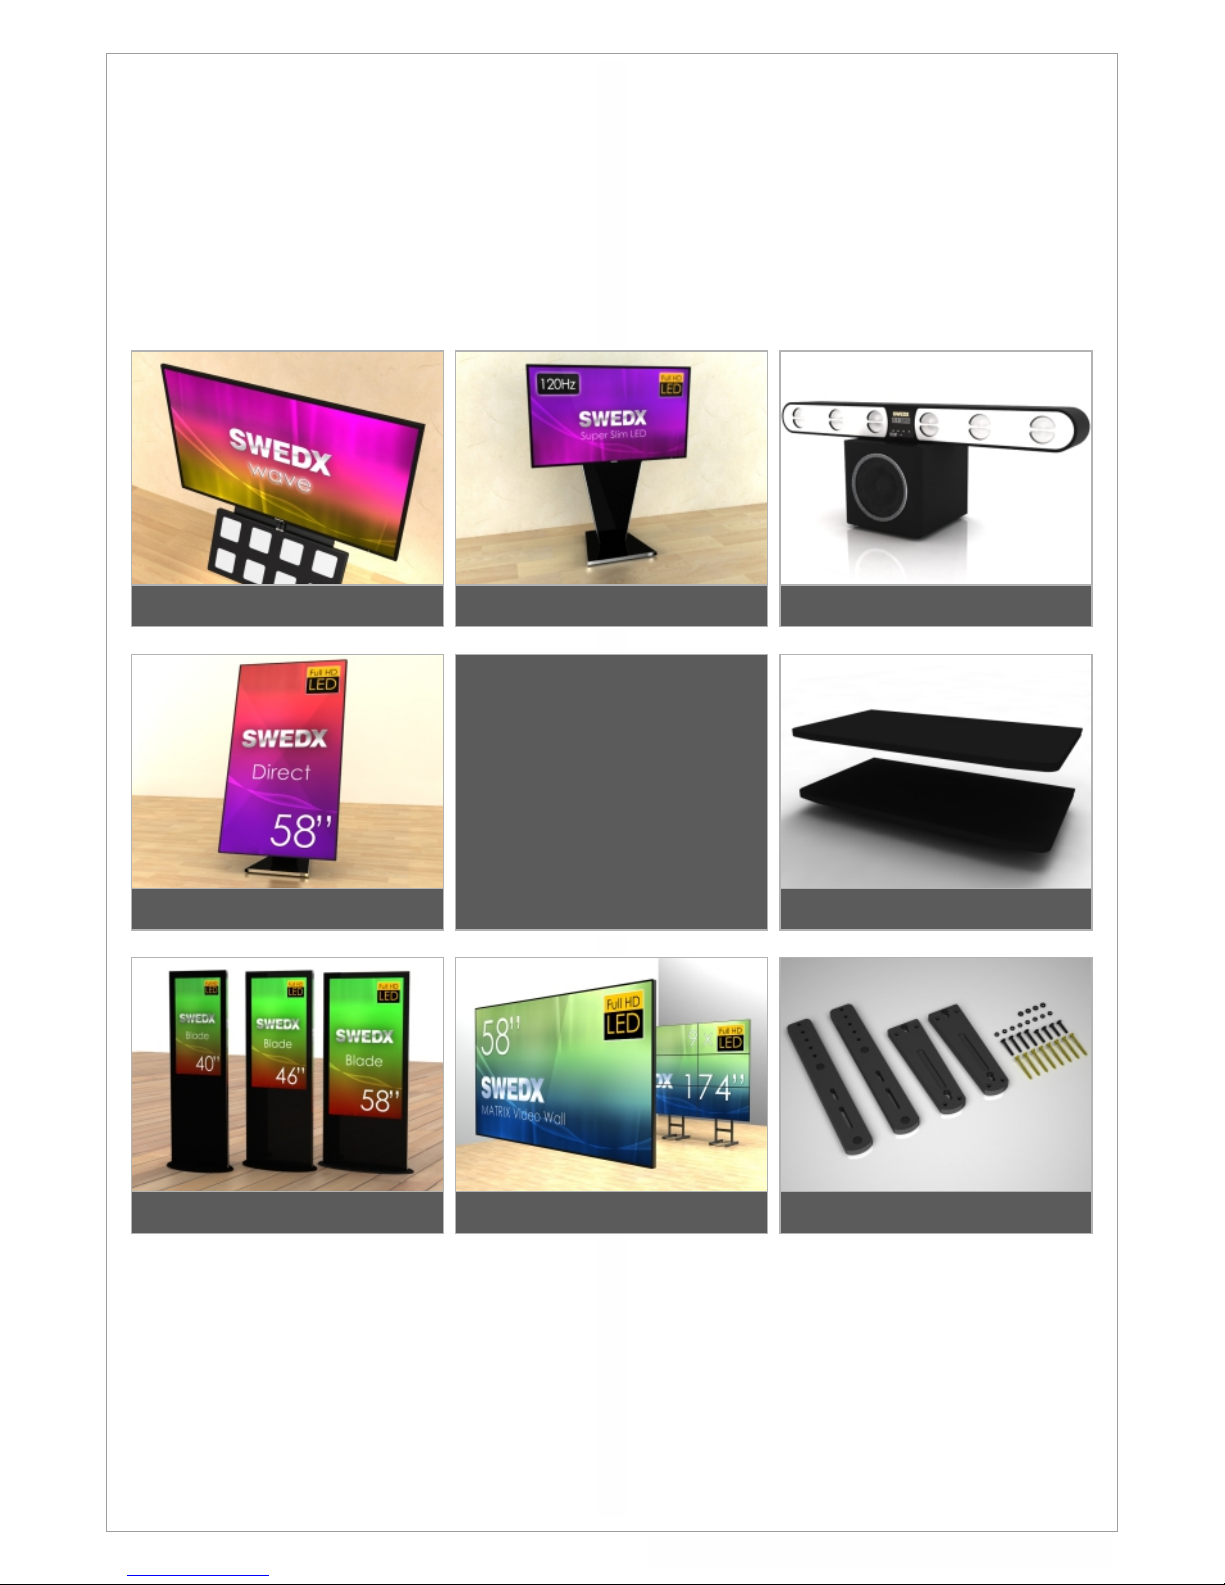
Thank you for choosing SWEDX LED/LED-TV.
Please read this manual thoroughly before
operating the product. Make sure the display was
not damaged in transit. Should the product be
damaged, please contact your dealer and do not
install it. Check that you have all the accessories
according to the model.
Safety precaution
• Do not place the product on unstable places,
from which it may fell off
• Do not expose the product to extreme
temperature and humid environment
• Avoid subjecting the product to direct sunlit
and other heat sources
• Do not put the product into any liquid
• Do not put anything inside the product, or
place water container on top of the it
• In thunder rainy days (especially with
lightening), please unplug the power and
antenna cables
• Do not step on the power cable, or tangle
them together
• Avoid overload of the exterior electric outlet
to prevent fire hazard of electric shock
• Clean the product with dry and soft fabric
• lf your product is broken, do not repair it by
yourself, but contact the maintenance
personnel
• lf the remote control is left unused for a
longtime, please take the batteries out and
store them in dry places
• Avoid dropping the remote control
• lf the product is installed for exhibition
purpose, please do not place the overheated
part on the ground or carpet to prevent
accident
• The apparatus shall not be exposed to
dripping or splashing and that no object filled
with liquids, such as vases, shall be placed
on the apparatus
• Where the MAINS plug or an appliance
coupler is used as a disconnect device, the
disconnect device shall remain readily
operable
• Battery shall not be exposed to excessive
heat such as sunshine, fire or the like
• Excessive sound pressure from earphones
and headphone can cause hearing loss
Please install the product at proper position, such
as wall or ceiling. Please install it under the
guidance of professional staff.
This device complies with Part 15 of the FCC
Rules. Operation is subject to the following two
conditions:
1. This device may not cause harmful
interference
Design and specifications are subject to change without notice.
2. This device must accept any interference
received, including interference that may
cause undesired operation
Please disconnect the power cord if this
equipment will not be used for a long time.
Precautions When Displaying a Still Image
A still image may cause permanent damage to
the screen
• Do not display a still image on the screen for
more than 2 hours as it can cause screen
image retention. This image retention is also
known as "screen burn". To avoid such image
retention, reduce the degree of brightness
and contrast of the screen when displaying a
still image
• Watching the screen in 4:3 format for a long
period of time may leave traces of borders
displayed on the left, right and center of the
screen caused by the difference of light
emission on the screen. Playing a DVD or a
game console may cause a similar effect to
the screen. Damages caused by the above
effect are not covered by the Warranty.
• Displaying still images from Video games and
PC for longer than a certain period of time
may produce partial after-images. To prevent
this effect, reduce the ‘brightness’ and
‘contrast’ when displaying still images
WARNING
To prevent the spread of fire, keep candles or
other open flames away from this product at
all times

5
Basic operation
• Use AC 100-240V 50~60 Hz power outlet for
the product power supply.
• lf the screen of the product is not on, please
press the power button on the remote control
or on the product.
• lf you want to shut off the product temporary,
please press the power button on the remote
control.
• lf you want to shut off the product completely,
please disconnect the power cable.
• In all modes except PC mode, the product
will enter idle state if there is no signal input
within 3 minutes.
• ln PC state, the product will enter idle state if
there is no signal input within 2 minutes.
• The setting and tuning of picture and sound
will be saved when the product is shut off,
which will be working in the pre-shut off state
when the product is turned on again.
• lf PC signal source is used, please first set
the resolution of the PC display card as the
following modes:
For HDMI (3840x2160 @ 30Hz)
For PC (1920 x 1080 @ 60Hz)
• lf there is progressive output of the signal
used by the user, signal source with
progressive output is recommended.
Preparation
• Put the product on a stable surface.
• Do not fix the product with others fixations than
those provided or suggested by the
manufacturer.
• If you have a wall mount, check that it is
steady.
• Do not place any material on the product.
• Do not block or cover the ventilation
openings on the product.
• The product must be plugged with a tension
source of 110-240 volts and 50~60 Hz.
• Power cord and cables must be properly
routed and protected to prevent from
stepping on them.
• Keep the power cord away from any heat
source. Possible fire hazard.
Heating sources and humidity
• Keep the product dry and away from
humidity.
• Keep the product away from heat sources.
Cleaning and maintenance
• Unplug the product before cleaning it. Do not
use solvents or liquids to clean the product.
• Only clean the product with a soft and dry
fabric.
• In case of troubleshooting, do not use spare
parts other than those suggested by the
manufacturer. Using inadequate spare parts
can lead to electric shocks, short-circuits fire
or others incidents. Please contact a
technical authorized by SWEDX brand.
WARNING:
TO REDUCE THE RISK OF FIRE OR ELECTRIC
SHOCK, DO NOT EXPOSE THIS APPARATUS
TO RAIN OR MOISTURE.
WARNING
RISK OF ELECTRIC SHOCK
DO NOT OPEN
CAUTION:
TO REDUCE THE RISK OF ELECTRIC SHOCK, DO NOT
REMOVE COVER(OR BACK). REFER SERVICING TO
QUALIFIED SERVICE PERSONNEL
Departure in holidays
• Unplug the product during lightning storms or
when unused for long periods of time.
Design and specifications are subject to change without notice.

Design and specifications are subject to change without notice.
6
Contents
Included items:
2 x CR2025 Battery
Notice! / Information
G
P
E
F
A
V
OK
INFO
9
CH
VOL
ARC AUDIO SUB. TV/RADIO
HDMI USB AV TV
.
L
I
S
T
C
H
Notice AC Cable
Remote Control LED/LED-TV
1 2 3 4 5
7
6
128 9 10 11
Inputs
1. YPBPR
Input for Component/YPBPR
2. CI-Module
Input for CA-module (card reader)
3. AV
Input for audio/video sources, 3.5 mm plug
*Component/YPBPR and AV shares the same
audio input
4. USB
Input for USB Media Player/Firmware upgrade
5. HDMI 1,2 and 3
Input 1,2 and3 for HDMI sources
6. Power Input
Input for 100-240 V power 50~60Hz
7. Headphone
Output for headphone devices
8. PC Audio
Input for PC audio when PC input is connected
9. PC
Input for PC or VGA sources
10. SCART
Input for SCART sources
11. DTV/TV
Input for DVBT/T2/C and analog TV signal
12. Digital Audio
Output for digital audio signal (coaxial)
Base + Screws
CAUTION
Danger of explosion if battery is incorrectly
replaced. Replace only with the same or
equivalent type.
CR 2025 Battery
CAUTION
The batteries shall not be exposed to
excessive heat such as sunshine, fire or the like.
CR 2025 Battery

Design and specifications are subject to change without notice.
7Design and specifications are subject to change without notice.
G
P
E
F
A
V
OK
9
CH
VOL
ARC AUDIO SUB. TV/RADIO
HDMI USB AV TV
.
L
I
H
S
T
C
Remote Control Notice
The remote control included is based on 2.4 GHz
and infrared. To switch between 2.4 GHz and
infrared do the following:
Press and hold for 5 seconds.
The red LED lamp will flash and alter the
current mode. When pressing any key on the
remote control the correspondent LED lamp will
it. In 2.4 GHz mode the LED lamp will lit red and
in Infrared mode the LED lamp will lit blue.
When the remote is in 2.4 GHz mode it can be
used without targeting the screen because the
receiver is built in. Each screen has a paired
remote control meaning that if you have several
screens the remote control will apply to the
paired screen only and will not apply to any other
screen.
If for some reason you need to pair the remote
with the screen do the following:
1. Connect the screen to power outlet
2. Press buttons on the remote control
simultaneously for about 4 seconds
The red lamp on the top edge of the remote will
flash indicating that the remote is paired with the
screen.
OK

Design and specifications are subject to change without notice.
8
Remote control buttons
1. On/Off button
2. Number buttons for
direct channel access
3. Display additional
information
4. List TV-channels
5. EPG (Electronic
Program Guide)
6. Navigation button UP
7. Navigation/adjust button
LEFT
8. Menu display. In OSD
sub-menu press to
access previous menu
9. Available sources
selection
10. Picture freeze
11. Volume increase
12. Volume decrease
13. Enter sleep mode in
certain chosen time
14. Start/Pause play,
Start/Paus time
shift/alter Teletext mix
15. Stop play/activate
Teletext
16. Fast forward/Teletext
index
17. Fast backward/ Teletext
cancel
18. Fast-text topic selection
in Teletext GREEN
19. Fast-text topic selection
in Teletext RED
20. Choose Audio/ language
in DTV/USB media
player
21. Aspect Ratio selection
22. Shortcut to USB
23. Shortcut to HDMI1,2,3
24. Mute the built-in
speakers
25. Previous TV channel in
DTV/TV
26. Display favorite channels
list
27. Confirm/activate button
28. Navigation/adjust button
RIGHT
29. Exit the OSD
30. Navigation button
DOWN
31. Next channel. When
the channel list is
displayed, it scrolls
down to next page in
the list
32. Previous channel.
When the channel list
is displayed, it scrolls
up to previous page in
the list
33. Instant Recording/
Teletext size selection
34. Display Recorded
List/Hold Teletext
35. Previous Title/Display
time in Teletext
36. Next Title and Reveal
Teletext
37. Fast-text topic
selection in Teletext
Yellow
38. Fast-text topic
selection in Teletext
Blue
39. Activate subtitles in
DTV/USB media
player
40. Alter TV/Radio
Channels mode
41. Shortcut to AV
42. Shortcut to DTV/TV
G
P
E
F
A
V
OK
9
CH
VOL
ARC AUDIO SUB. TV/RADIO
HDMI USB AV TV
.
L
I
H
S
T
C
1
2
3
4
5
6
7
8
9
10
11
12
13
14
15
16
17
18
19
20
21
22
23
25
26
29
30
28
31
32
33
34
35
36
37
38
39
40
41
42
24
27

9
Main Operations
Turning On And Off
Press Power button on the remote control
or the On/Off button on the control
buttons. The product will turn on and will
be ready to be used.
Select Source
Press Source button on the remote
control. Then you can see the
source list menu shown to the right.
Press Navigation Up/down button on the remote
control to select the source and confirm by
pressing Enter.
Volume Control
Press VOL+ / VOL- button on the remote control
to adjust the
volume level.
Press MUTE button on the remote control when
you need to mute the sound.
OSD Menu Structure
• OSD (On Screen Display) allows users to
control or adjust various features and
settings in accordance with his/her
preferences.
•Press the MENU button on the
remote control to see the main
OSD menu.
OSD Menu Operation:
• Main Menu: Press the MENU button on the
remote control to enter the main OSD menu.
First, choose Main menu item you need with
the buttons ◄ & ►.
To select a Main menu items, just press OK
button or Navigation button ▼ on the Remote
Control.
• Sub Menu: Each menu item has its own sub
menu items to set.
• Sub Menu items:
A: If there is no value to adjust it means there
is a sub menu which you can access by
pressing OK button and modify the menu
values.
Select sub-menu item with ▲ & ▼ buttons on
the remote control and press Enter button to
enter the submenu or change the value.
B: If there is no ► part, the item has
adjustable values. Use the ◄ & ► buttons to
adjust the values.
C: If the sub-menu item is grey colored, it
means this item is not available in the
particular mode.
OSD Menu Operation
• Press MENU button on the remote control to
access the OSD Menu. Pressing the same
button again will move you backward in the
OSD structure.
• Press OK button to confirm/select.
• Use LEFT & RIGHT buttons to navigate or
change the parameters of the current
sub-menu.
• Use UP & DOWN buttons to navigate in the
OSD Menu.
• Press EXIT button to exit the OSD Menu.
PICTURE
Move Menu
MENU OK
OK Exit
EXIT
Picture Mode
Contrast
Brightness
Color
Sharpness
Tint
Standard
50
50
50
50
50
DTV
ATV
AV
SCART
YPBPR
HDMI1
HDMI2
Input Source
Menu
MENU Quit
EXIT
Move
HDMI3
PC
USB
20
G
P
E
F
A
V
OK
.
L
I
H
S
T
C
Design and specifications are subject to change without notice.

Design and specifications are subject to change without notice.
10
Menu > OPTION
In this Menu you can choose the setup settings
for your product.
OSD Language
Choose the OSD language
Audio Languages 1st
Choose the first preferred audio language (for
digital channels)
Audio Languages 2nd
Choose the second preferred audio language (for
digital channels)
Subtitle Languages 1st
Choose the first preferred subtitle language (for
digital channels)
Subtitle Languages 2nd
Choose the second preferred subtitle language
(for digital channels)
OSD Duration
Options: 5/10/15/20/25/30/30/40 seconds
Choose the OSD Menu duration in time
Blue Screen
Options: Off/On
When is activated (ON) a blue screen will be
displayed when no signal is received
Country
Choose your country to load predefiened
parameters matching your country
HDMI CEC
Options: Off/On
Activate CEC over HDMI
MEMC
Option: Off, Low, Middle, High.
Enhancement to compensate the difference
between the screens refresh rate and program
frame rate
OPTION
Move Menu
MENU OK
OK Exit
EXIT
OSD Language
Audio Languages 1st
Audio Languages 2nd
Subtitle Languages 1st
Subtitle Languages 2nd
OSD Duration
Country
Restore Factory Default
English
English
English
English
English
30s
UK
Energy Mode
Options: Home/Max
Home mode will reduce the back light intensity in
order to save energy
Max mode will increase the back light intensity to
the maximum
Restore Settings
This function will restore the product to the
default settings

Design and specifications are subject to change without notice.
11
Menu > Channel (DTV)
In this Menu you can search for TV-channels
manually or automatically, manage the TV
channels such as deleting, adding to favorites,
skipping and locking. You can also use the PVR
function which allows to record or time shift TV-
programs
The TV model of this product is equipped with the
following Tuners
Analog TV Tuner, supports Pal and Secam
DVB-T/T2, supports [email protected]
DVB-C,supports 16,32,64,128 and 256-QAM
Supports H.264MP/[email protected] SD and HD
decoding
In this menu you can search for TV channels and
manage them.
Antenna
Options: Air/Cable
Check with your Cable-TV service provider what
system type is connected where the TV will be
used. For DVB-T/T2 choose Air. For DVB-C
choose Cable
Auto Scan
Use the Auto Scan menu to search for TV-
channels. You can choose to search for ATV and
CHANNEL
Move Menu
MENU OK
OK Exit
EXIT
Antenna
Auto Scan
DTV Manual Tuning
Programme Edit
Signal information
CI Information
Software Update(USB)
Record Start
Recorded List
Recorded Mode
Schedule List
PVR File System
Country
Exit
EXIT
Move
DVB Select type
Auto Scan
DVB-T
Sweden
Tune Type ATV+DVB
Scan type
DVB/C Scan Menu
Full
Frequency Auto
Network ID Auto
Symbol(ks/k) Auto
OK
OK
or DTV. If you care searching DVB-C channels
and it is necessary to input the search
parameters please input it in the relevant section.
Regardless which kind of searching you do, the
found channels will be saved in the
correspondent channel lists (DTV and ATV).
To access the DTV channels, press SOURCE
button on the remote control and choose DTV
from the source list, press then CH.LIST button
on the remote to access the DTV channel list.
To access the ATV channels, press SOURCE
button on the remote control and choose ATV
from the source list, press then CH.LIST button
on the remote to access the ATV channel list.
DTV Manual Tuning
You can perform a manual channel search for
digital channels (DTV). You will need to provide
the information about Channel, Frequency and
Bandwidth (in AIR mode) or Frequency,
SymbolRate and Modulation (QAM) (In CABLE)
mode.
ATV Manual Tuning
You can perform a manual channel search for
analog channels (ATV). You can choose the
channel you want to save to and also use Fine
Tune to adjust the tuning for the channel to get
better picture. You can also change the Sound
system (BG, DK, I, L, L’) for the channel.
DTV Manual Tuning
UHF CH 21
DTV 9
Radio 5
Bad
Save Exit
EXIT
Move
Normal Good
Data 2
ATV Manual Tuning
System BG
Current CH 4
Search
Fine-Tune
Save Exit
EXIT
Move
Storage To X
Frequency 100.00

Design and specifications are subject to change without notice.
12
The first time you connect a USB-memory or
external hard drive you will need to format it in
the PVR File System. All data on the USB-
memory or external hard drive will be erased,
therefore please backup any data before
formatting in the PVR File System.
To access PVR File System Menu do the
following
Press Menu. Choose Channel Menu
Press Enter or Move down with the down arrow
Choose PVR File System and press Enter
Select Disk: Choose the disk you want to use
Check PVR File System: Choose to check the
disk status and compatibility
USB Disk: It provides information if the disk is
status
Format: Choose to format the disk. Two
formatting standards are available, FAT32 and Hi
Speed FS. You can also choose the PVR File
System Size you want to format. After formatting
the LED will report the estimated recording time
for the formatted disk both for Standard Definition
and High Definition recording and let you choose
the Time Shift Size (see Time Shift Function for
more information)
Programme Edit
In Program Edit Menu you can:
Delete a channel (use Red button)
Move a channel (press Yellow button, choose
new position, press Enter)
Skip a channel (use Blue button)
Rename a channel (press Green button, change
the channel name using the arrow buttons)
Add a channel to favorits list (use FAV button)
Signal Information
Choose Signal Information Menu to display
detailed information about the signal quality,
strength and other details.
CI Information
Choose CI Information Menu to display detailed
information about the Common Interface Module
you have inserted in the CI-slot.
To watch paid channels, the “CI or CI+ CARD”
must be inserted. If you don’t insert the “CI or CI+
CARD,” some channels will display the message
“Scrambled Signal”.
Software Update(USB)
Use to update the LED-TV firmware obtained
from SWEDX
PVR File System
Use the PVR File System Menu to prepare your
LED-TV to record DVB-T programs and use the
Time Shift function. In order to record or time shift
programs you need to connect a USB-memory or
an Externa Hard Drive to your LED-TV.
CH.NAME
Delete FAV
FAV
Move
0 C-05
SKIP FAV TYPE
1 C-06
2 C-07
3 C-08
4 C-09
5 C-10
Move Skip Rename
Back
MENU
Select
OK
ATV
ATV
ATV
ATV
ATV
ATV
PVR File System
Select Disk
Check PVR File System
USB Disk
Time Shift Size
Exit
EXIT
Move
Format
C:
Start
Speed
Select
OK
PVR File System
Select Disk
Check PVR File System
USB Disk
Time Shift Size
Exit
EXIT
Move
Format
C:
Success
Pass
Speed
Pass
1 GB
3432 KB/sHD Support
Select
OK

Design and specifications are subject to change without notice.
13
Recorded Mode
Use the Recorded Mode Menu to schedule
recordings. In the Recorded Mode Menu you can
choose the following
Channel to Record
Recording Mode: Once, daily, weekly, auto
Time to start the recording
Time to end the recording
All scheduled recordings will be listed in the
recording list.
Note: You can turn off the LED-TV after
scheduling the recordings. The LED-TV will
execute the recording schedule while it is off.
While recording the LED-TV’s LED (power
indicator) will flash.
Schedule List
In the Schedule List Menu you can review the
scheduled recordings and reminders
A reminder can be scheduled in the EPG Menu
Press the RED button to delete a recording or a
reminder
Record Start
Use the Record Start Menu to start recording a
program. When you start the recording a menu
will be displayed where you can control the
recording and get information about the current
recording time, max recording time and channel
number and name. When you stop the recording
the LED will save the recording to the disk. The
file format for saving is .TS (MPEG-2 transport
stream)
You can start the recording instantly
by pressing the recording button on the
remote control
Recorded List
Use the Recorded Start List Menu to display a
list of the recorded programs. The Recorded List
Pressing the RED button will delete the recorded
program
Pressing Enter button will play the recorded
program
Pressing Info button will display information about
the recorded program such as date, time,
duration, program title, channel name and
program description
Pressing the Recorded List button will change the
sorting. 3 types of sorting alternatives are
available, by channel name, time and program
title.
Prev. Next Stop
FBPlay FF Pause
Max Recording Time: [0001:51:40]Recording Time: [0000:25:10]
005 Channel Name
Idol
60 Minutes
Recorded List
Select
OK Record List
Name
Info
INFO
Delete
BBC
Once
10 Dec 10:27
Select
OK
Recorded Mode
Mode
Start Time
Minute
Hour
Date
Month
Minute
Hour
Date
Month
End Time
00
21
12
Dec
05
22
12
Dec
Move Back
MENU
Mode
Once
Time
18:00
Delete
Move
Date
Mon 12 Dec
Programme Title Channel Name
BBC
Back
MENU Exit
EXIT
Schedule List
Result
60 Minutes
15:30 12th Dec
Once 13:00 Mon 13 Dec Tv5
Idol

Design and specifications are subject to change without notice.
14
EPG Function
The EPG (Electronic Program Guide) function
displays the programs information. In this menu
you can schedule a recording or a reminder.
Press the GREEN button to schedule a reminder.
The LED will switch automatically to the
scheduled program when the reminder is due.
Press the RECORD button to schedule a
recording. The LED will switch automatically to
the scheduled program and record it when the
recording is due.
Time Shift Function
With the Time Shift Function you can pause a
program while it is broadcasted and continue to
watch it again at your convenience. The
maximum time shift depends on the USB-
memory or hard drive size.
To start the Time Shift while watching a program
press the PLAY/PAUSE button to start the time
shift, the LED will start recording the program and
a menu indicating that is displayed. To continue
watching the program press PLAY/PAUSE again
and the LED will continue to play the program
from where it was paused and a menu will be
displayed where you can control differenct
functions such as pause, fast forward and stop
etc.
12 Dec 18:00
100 TV1 News
Index
INDEX
Move ScheduleRemind
Quit
MENU
Select
OK
Programme Guide
Time
101 TV2 Sport
102 TV3 Movie
103 TV4 TV-serie
104 TV5 Entertainment
Information about the
current program
Record
Prev. Next Stop
FBPlay FF Pause
Shift Time/Max Shift Time: [01:51:40/00:01:50]
Prev. Next Stop
FBPlay FF Pause
Shift Time/Max Shift Time: [01:51:40/00:01:50]
S

Design and specifications are subject to change without notice.
15
Menu > Picture
Use the Picture menu to adjust the picture
settings to meet your requirements:
Picture mode
Choose between predefined settings:
Standard: Suitable for a normal room
Dynamic: Suitable for a bright room
Mild: Suitable for a dark room
User: In Personal mode you can adjust the
Contrast, Brightness, Color, Sharpness and Tint
to meet your own requirements.
Color Temperature
Choose between predefined settings (User, Cool,
Medium, Warm). In User mode you can adjust
the Colors Red, Green and Blue.
Aspect Ratio
Choose the desired Aspect Ratio. Available
options are Auto, 4:3, 16:9, Zoom1, Zoom2,
Panorama and Just Scan (1:1).
In PC Mode, only "16:9" and "4:3" mode can be
adjusted.
Noise Reduction
Choose to activate noise reduction. Available
options are On, Mild, Medium, High and Off.
If the broadcast signal received by your TV is
weak, you can activate the Noise Reduction
feature to help reduce any static and ghosting
that may appear on the screen.
PICTURE
Move Menu
MENU OK
OK Exit
EXIT
Picture Mode
Contrast
Brightness
Color
Sharpness
Tint
Standard
50
50
50
50
50
Screen
Horizontal Pos.
Vertical Pos.
Size
Phase
Menu
MENU Exit
EXIT
Move
50
50
50
50
PICTURE
Move Menu
MENU OK
OK Exit
EXIT
Color Temperature
Red
Green
Blue
Aspect Ratio
Noise Reduction
Screen
User
50
50
50
Just Scan
On
SOUND
Move Menu
MENU OK
OK Exit
EXIT
Sound Mode
Treble
Bass
Balans
Auto Volume
Surround Sound
SPDF Mode
Standard
50
50
0
Off
SRS TruSurround
Auto/PCM/OFF
Screen (only in PC mode)
When the TV is in PC-Mode additional settings
are available for PC-Setup.
Horizontal Pos.: Adjust the PC’s screen
positioning horizontally
Vertical Pos.: Adjust the PC’s screen positioning
vertically
Size: Adjust the screen size
Phae: Adjust the signal phase
Menu > Sound
Use the Sound menu to adjust the sound settings
to meet your requirements:
Menu > Sound > Sound Mode
Choose between predefined settings:
Standard: Suitable for normal programs
Movie: Suitable for movies
Sports: Suitable for sport programs
Music: Suitable for music program
User: In Personal mode you can adjust the
Treble and Bass to meet your own requirements.
Balance
Adjust the sound output balance between left and
right speaker.

Design and specifications are subject to change without notice.
16
Clock
Adjust the time.
Off Time
Set a certain time to turn off the TV
automatically. The available time intervals are
Once, Everyday, Mon-Fri, Mon-Sat, Mon-Sun
and Sunday.
On Time
Set a certain time to turn On the TV
automatically. The available time intervals are
Once, Everyday, Mon-Fri, Mon-Sat, Mon-Sun
and Sunday.
When the Time On function is activated you
can choose the following parameters
Source: Which source to be activated when
the LED-TV turns on
Volume: Audio volume level when the LED-TV
turns on
Sleep Timer
Set the TV to turn off after a certain time. The
time intervals are 240, 180, 120, 90, 60, 30, 20
and 10 min.
Auto Sleep
When set to ON the TV will turn off automatically
if no input signal is detected otherwise the TV will
remain ON even if no input signal is detected.
No Action Auto Standby
Options: Off/2/3/4/5/6 hrs
Define the time duration when the LED-TV will
turn on after the last interaction.
Time Zone
Adjust the Time Zone according to GMT
Standard.
Daylight Saving
Options: Off/On
Activate the Daylight Saving Time if it is
applicable for your country (also called Summer
Time).
100
75
50
25
0
50 50 50 50 50 50 50
120Hz 200Hz 500Hz 1.2KHz 3KHz 7.5KHz 12KHz
Adjust Menu
MENU Exit
EXIT
Move
Auto Volume
Each broadcasting station has its own signal
conditions, and so it is not easy to adjust the
volume every time the channel is changed. This
feature lets you automatically adjust the volume
of the desired channel by lowering the sound
output when the modulation signal is high or by
raising the sound output when the modulation
signal is low.
Surround Sound
When ON it delivers a compelling, virtual
surround sound experience through any two-
speaker playback system, including internal
television speakers. It is fully compatible with all
multichannel formats.
SPDIF Mode
Choose the output mode for the SPDIF signal.
Choose between Auto, PCM an Off.
Menu > Sound > EQ
Choose the equalizers to do fine tuning for the
audio output. Not available in all models.
Menu > Time
Use the Time menu to set the TV time and adjust
some other settings related to time settings.
TIME
Move Menu
MENU OK
OK Exit
EXIT
Clock
Off Time
On Time
Sleep Timer
Auto Sleep
Time Zone
01/Jan 00:00
Off
Off
Off
On
+1 GMT

Design and specifications are subject to change without notice.
17
Functions
Repeat the file
Go to defined time position in the file
Repeat the file. Choose between
ALWAYS, ONCE or NO REPEAT
Play audio files while displaying images
Display the Playlist
Display current file’s information
Press to rotate 90 degrees CW
Press to Zoom IN
Press to Zoom OUT
Press to MOVE in ZOOM mode
Define a part of a video to be repeated
Change aspect ratio
Play step forward in a video
Play slowly forward in a video
USB Media Player
This product is equipped with high end USB
Media Player. It is capable of playing music,
movies (up to 1080p and with subtitle support),
and display photos or text documents.
To Enter USB mode
Press Source
Choose USB
Press Enter
In USB mode you can choose between:
Photos: Enables you to display several formats
of photos and images
Music: Enables you to play several formats of
music and audio files
Movie: Enables you to play several formats of
movies and video files
Text: Enables you to display TXT files
Remote Control Keys used in USB Mode
The INFO button will display available controllers
where it is possible to i.e. rotate an image. The
controllers may vary depending on the USB
mode.
Navigation Key to navigate in the different
position of the menu and press enter to activate
the function.
The AUDIO button will alter audio track (if several
audio tracks are available in the played file).
The SUB-T button will alter the subtitles or turn it
off (if several subtitles languages are available in
the played file).
The subtitle file should be saved in UNICODE In
order to display the correct characters.
Disk C:
Move Menu
MENU Play
OK Exit
EXIT
MOVIE
Repeat A..
Repeat A..
A
Playlist
Info.
Move view
Zoom in
Zoom out
Rotate
Rotate
Music
Set A
AB
Step Fo..
Slow Fo..
Aspect Re..
Goto TL.

Design and specifications are subject to change without notice.
1818
Video
Format Video codec Audio
codec Resolution Frame Rate Mbit/s
AVI
MJPEG
Mp3,
WMA,
AAC,
Mp2,
PCM
1080p@30fps
23.976~30
≤ 10Mbps
DIVX 3.11/DIVX4/DIVX5 ≤ 10Mbps
XVID/MPEG-2/MPEG4/H.264
≤ 20Mbps
Mp4 MPEG-2/MPEG4/H.264
MPEG2
≤ 40Mbps
MPG MPEG-1/MPEG-2
≤ 20Mbps
MOV
MPEG-4/H.264
MKV
1920x1080
≤ 16Mbps
1920x1080
Image
Format Max resolution Recommended
resolution Colors
BMP 9600x9600 px 1920x1080 px 16, 256, 16 bit, 24 bit, 32 bit
JPEG 8192x8192 px 1920x1080 px
PNG 3000x3000 1920x1080px
Audio
MP3
WMA
ADPCM, LPCM
Supported file formats and codecs
The built-in media player (USB mode) supports the following file formats:
640x480
TS
VOB 720x576
ASF VC1
FLV
MPEG1
AC3
AAC
CDDA
Realaudio8
DD51
DDPlus
WMA7, VMA8, VMA9 STD
Layer1,2
HE-AAC
*.wav
LBR
All trademarks and registered trademarks are the property of their respective owners.

Design and specifications are subject to change without notice.
19
Text-TV / Teletext
Most television stations provide written
information services via Teletext. The index page
of the teletext service gives you information on
how to use the service. In addition, you can
select various options to suit your requirements
by using the remote control buttons.
TTX ON
Press TTX ON to enter Text-TV
Press TTX ON to exit Text-TV
INDEX
Used to display the index (contents) page at any
time while you are viewing teletext.
SIZE
Press to display the double-size letters in the
upper half of the screen. For lower half of the
screen, press it again. To display. normal screen,
press it once again.
REVEAL
Used to display the hidden text (answers to quiz
games, for
example). To display normal screen, press it
again.
MIX
Press to activate teletext mode after selecting the
channel providing the teletext service. Press it
twice to overlap the teletext with the current
broadcasting screen.
HOLD
Used to hold the display on a given page if the
selected page is linked with several secondary
pages which follow on automatically. To resume,
press it again.
CANCEL
Used to display the broadcast when searching for
a page.
Red/Green/Yellow/Blue
If the FASTTEXT system is used by a
broadcasting company, the different topics
covered on a teletext page are color coded and
can be selected by pressing the colored buttons.
Press one of them corresponding to the required.
The page is displayed with other colored
information that can be selected in the same way.
To display the previous or next page, press the
corresponding colored button.

Design and specifications are subject to change without notice.
20
Product base assembly
The product base contains the following parts
A. Wooden base
B. Metal part
C. M6 screw, 4 pcs, 10mm (Part No. 064-0178-00)
D. M6 screw, 4 pcs , 16mm (Part No. 064-0147-00)
Assemble the base with the LED-TV according to
the following illustrations:
A
B
C
D
D
CWall mount assembly
SWEDX offers several wall mount devices which
can be purchased from your dealer or
www.swedx.com
Below is the Wall mounting parameters
DB
A
C
This manual suits for next models
3
Table of contents
Other SWEDX LED TV manuals