Berner BHPC 150-2 User manual
Instruction manual
Instruktionsbog
Instruksjonsbok
Instruktionsbok
Käyttöohje
Betriebsanleitung
Manuel d’Instructions
Gebruikershandleiding
Manuale di istruzioni
Manual de Instrucciones
Manual de Instruções
Návod k obsluze
Üzemeltetési útmutató
,QVWUXNFMDREVáXJL
English
Dansk
Norsk
Svenska
Suomalainen
Deutsch
Français
Nederlands
Italiano
Espanõl
Português
ýHãWLQD
Magyar
Polski
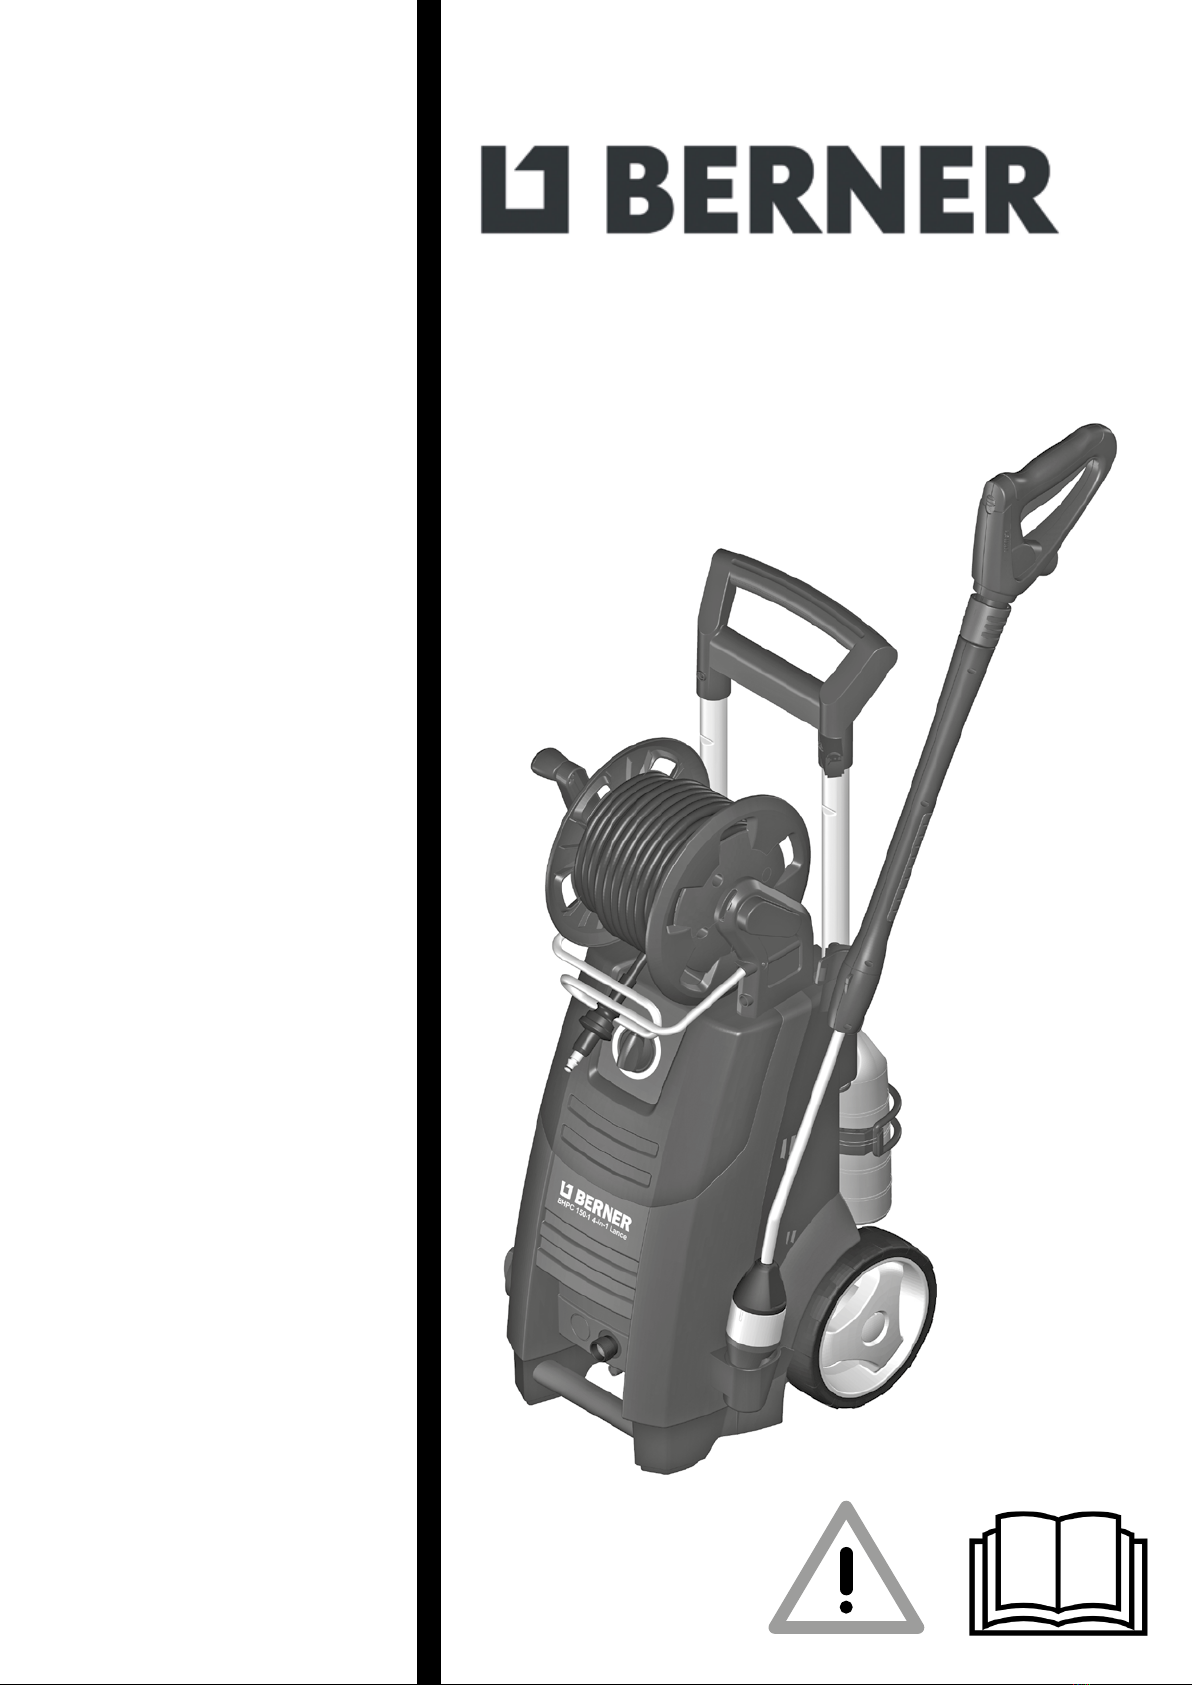
BHPC 150-2 4-in-1 Lance
Art. 420561

Printed in China
Copyright © 2022 BERNER
Instruction manual........................................................3 - 21
Instruktionsbog...........................................................22 - 40
Instruksjonsbok ..........................................................41 - 59
Instruktionsbok...........................................................60 - 79
Käyttöohje ..................................................................80 - 98
Betriebsanleitung .......................................................99 - 119
Manuel d’Instructions ...............................................120 - 141
Gebruikershandleiding .............................................142 - 162
Manuale di istruzioni ................................................163 - 183
Manual de Instrucciones ..........................................184 - 204
Manual de Instruções...............................................205 - 225
Návod k obsluze.......................................................226 - 244
Üzemeltetési útmutató .............................................245 - 264
,QVWUXNFMDREVáXJL .....................................................265 - 285

3
Original Instructions
Contents
1 Introduction.................................................................................................. 4
1.1 Symbols used to mark instruction.......................................................................4
2 Safety precautions and working techniques................................................4
3 Description................................................................................................. 10
3.1 Application ........................................................................................................10
3.2 Operation elements and model survey.............................................................10
4 Before you start using your pressure washer ........................................ 11
4.1 Mounting of holders for spray lance..................................................................11
4.2 Mounting of hose hook (only models without hose reel)...................................11
4.3 Mounting of hose reel handle (only models with hose reel)..............................11
4.4 Mounting of quick coupling ...............................................................................12
4.5 Mounting of high pressure hose .......................................................................12
5 Operating your pressure washer ............................................................. 12
5.1 Connection of high pressure hose....................................................................12
5.2 Mounting of spray lance....................................................................................13
5.3 Water connection..............................................................................................13
5.4 Telescopic handle .............................................................................................13
5.5 Start and stop of the machine (when connected to a water supply).................14
5.6 Start the machine (when connected to open containers (suction mode)).........14
5.7 Pressure regulation...........................................................................................14
5.8 Operation with detergents.................................................................................15
5.9 Regulation of pressure / water volume (only models with button for
regulation of pressure and water volume) ........................................................15
6 Fields of application and working methods............................................ 16
6.1 General.............................................................................................................16
7 After using your pressure washer ........................................................... 17
7.1 Storing the washer............................................................................................17
7.2 Winding up of electric cable and high pressure hose .......................................17
7.3 Storage of accessories .....................................................................................17
8 Maintenance............................................................................................... 18
&OHDQLQJRIZDWHULQOHW¿OWHU ..............................................................................18
8.2 Cleaning of nozzle ............................................................................................18
8.3 Cleaning of machine vents ...............................................................................18
8.4 Greasing of couplings.......................................................................................18
9 Trouble-shooting ....................................................................................... 19
10 Further information ................................................................................... 20
10.1 Service and Maintenance ...............................................................................20
11 Main Technical Data .................................................................................. 20
12 EC/EU Declaration of Conformity ............................................................21

4 Original instructions
1 Introduction
1.1 Symbols used to mark instruction
All pictograms attached to the high pressure washer and its components are shown and ex-
plained in this manual.
Safety instructions marked with this symbol must be observed to prevent personal injury or
serious damage to property.
Caution where there is a risk of damaging the machine or its individual components.
This symbol indicates tips and instructions to simplify work and to ensure a safe operation of
the high pressure washer.
2 Safety precautions and working techniques
%HIRUHVWDUWLQJXS\RXUPDFKLQHIRUWKH¿UVWWLPHWKLVLQVWUXFWLRQPDQXDOPXVWEHUHDGWKURXJK
carefully. Save the instructions for later use.
WARNING!
• Inhalation of aerosols can be hazardous to health.
Where applicable use a device in order to avoid or re-
GXFHDHURVROVSURGXFWLRQHJDVKLHOGFRYHULQJWKH
nozzle. For protection against aerosols use a respira-
tory mask of class FFP 2 or higher.
• The high water pressure generated by the machine
and the power connection are particular sources of
danger.
• Machines shall not be used by children or untrained
personnel. Children should be supervised to ensure
that they do not play with the machine.
• Do not use the machine within range of persons un-
less they wear protective clothing.
• Before starting up your machine please check it care-
IXOO\IRUDQ\GHIHFWV,I\RX¿QGDQ\GRQRWVWDUWXS
\RXUPDFKLQHFRQWDFW\RXU%(51(5GLVWULEXWRU7KH
insulation of the electric cable should be faultless and
ZLWKRXWDQ\FUDFNV,IWKHHOHFWULFFDEOHLVGDPDJHG
an authorized BERNER distributor should replace it.
• Always unplug the power plug before cleaning or
maintenance and when replacing parts or converting
the machine to another function.
,
5Original Instructions
• 2EVHUYHWKHQDWLRQDOVDIHW\UHJXODWLRQVLVVXHGIRU
H[DPSOHE\WKHHPSOR\HUVOLDELOLW\LQVXUDQFHDVVRFLD-
WLRQVRFLDOVHFXULW\LQVWLWXWLRQVRFFXSDWLRQDOVDIHW\
and health authorities or other organizations.
Accessories and spare parts
• To ensure the machine safety only use original spare
parts from BERNER or approved by BERNER.
• +LJKSUHVVXUHKRVHV¿WWLQJVDQGFRXSOLQJVDUHLPSRU-
WDQWIRUWKHVDIHW\RIWKHPDFKLQH2QO\XVHKRVHV¿W-
tings and couplings recommended by BERNER.
Physical, sensory or mental conditions
• This machine is not intended for use by persons
LQFOXGLQJFKLOGUHQZLWKUHGXFHGSK\VLFDOVHQVR-
ry or mental capabilities or lack of experience and
knowledge. If the machine is used by people with re-
GXFHGSK\VLFDOVHQVRU\RUPHQWDOFDSDELOLWLHVRUODFN
of experience and knowledge they shall have been
given supervision or instruction concerning use of the
machine in a safe way and understand the hazards
involved.
Applications
This machine has been developed for domestic use
such as:
• &DUPRWRUELNHERDWFDUDYDQWUDLOHUSDWLRGULYHIXUQL-
WXUHODZQPRZHU
Any other use is considered as improper use. BERNER
accepts no liability for any damage resulting from such
use. The risk for such a use is borne solely by the user.
3URSHUXVHDOVRLQFOXGHVSURSHURSHUDWLRQVHUYLFLQJ
DQGUHSDLUVDVVSHFL¿HGLQWKLVLQVWUXFWLRQ
Clothing and equipment
Always take action to protect yourself when operating
the machine.
• Wear shoes with non-slip soles.
• :HDUJRJJOHVHDUSURWHFWLRQDQGSURWHFWLYHFORWKHV
during operation.
,

6 Original instructions
Transporting the high pressure washer
• :KHQWUDQVSRUWLQJWKHPDFKLQHLQRURQDYHKLFOHLW
PXVWEHVHFXUHGHJZLWKVWUDSVVRWKDWLWFDQQRW
slip or tip over.
• BERNER recommends that the machine is positioned
KRUL]RQWDOO\RQWKHEDFNVLGHZKHQWUDQVSRUWHGLQRU
on a vehicle.
Detergents
• This machine has been designed for use with clean-
ing agents supplied or recommended by BERNER.
The use of other cleaning agents or chemicals may
DGYHUVHO\DႇHFWWKHIXQFWLRQRIWKHPDFKLQH
Before starting the work
Inspecting the machine
• Do not use the machine if a supply cord or important
SDUWVRIWKHPDFKLQHDUHGDPDJHGHJVDIHW\GH-
YLFHKLJKSUHVVXUHKRVHDQGVSUD\KDQGOHDQGVSUD\
attachments.
• The trigger of the spray handle must move easily and
automatically return to its starting position when re-
leased.
• Always keep high pressure hose and spray attach-
PHQWLQJRRGFRQGLWLRQFOHDQPRYLQJHDVLO\DQGFRU-
rectly assembled.
Electrical connection
WARNING!
Minimize the risk for electrical shock:
• Voltage and frequency of the machine (see rating
plate) must match the voltage of and frequency of the
mains supply.
• Only connect the machine to electrical installation made
E\DFHUWL¿HGHOHFWULFLDQDQGFRPSO\ZLWK,(&
• It is recommended that the electrical supply to the ma-
chine should include a residual current device that will
interrupt the supply if the leakage current to earth ex-
ceeds 30 mA for 30 ms.
,
,

7Original Instructions
• 8VHPRWRUVWDUWGHOD\HGIXVHVZLWKFKDUDFWHULVWLF&RU
'DFFRUGLQJWR,(&(1,(&RUFRUUH-
sponding standards outside IEC.
• Due to the high power consumption of the machine an
appropriate mains fuse is required.
• Inadequate extension cables can be dangerous. If an
H[WHQVLRQFDEOHLVXVHGLWVKDOOEHVXLWDEOHIRURXWGRRU
XVHDQGWKHFRQQHFWLRQKDVWREHNHSWGU\DQGRႇWKH
ground.
• BERNER recommends use of an extension cable
drum when cable extension is needed which keeps
the socket at least 60 mm above the ground.
• ,IWKHHOHFWULFFDEOHLVGDPDJHGLWPXVWEHUHSODFHG
by an authorized BERNER distributor or similar quali-
¿HGSHUVRQLQRUGHUWRDYRLGDKD]DUG
• Connecting the high pressure washer to a supply
V\VWHPWKHPD[DOORZHGLPSHGDQFHLV ȍ
(Zmax). Consult with the supply authority that the
equipment is connected only to a supply of that im-
pedance or less.
Water connection
• This high pressure washer is only allowed to be con-
QHFWHGZLWKWKHGULQNLQJZDWHUPDLQVZKHQDQDSSUR-
SULDWHEDFNÀRZSUHYHQWHUKDVEHHQLQVWDOOHG7\SH%$
according to EN 60335-2-79.
• 7KHEDFNÀRZSUHYHQWHUFDQEHRUGHUHGXQGHUQXPEHU
106411177.
• $VVRRQDVGULQNLQJZDWHUKDVÀRZQWKURXJKWKHEDFN-
ÀRZSUHYHQWHULWLVQRORQJHUUHJDUGHGDVGULQNLQJZDWHU
• Operation by suction (e.g. a rainwater vessel) is car-
ULHGRXWZLWKRXWDEDFNÀRZSUHYHQWHU±VHH³Connec-
ting to a pressureless water supply”. The machine
can be connected to water mains with a max. inlet-
SUHVVXUHRI03DEDUVDQGPD[&
8 Original instructions
Safety devices
Locking device on spray handle:
• The spray handle features a locking device. When the
SDZOLVDFWLYDWHGWKHVSUD\KDQGOHFDQQRWEHRSHUDWHG
Thermal sensor:
• A thermal sensor protects the motor against overload-
ing. The machine will restart after a few minutes when
the thermal sensor has cooled.
Pressure safety device:
• An integrated hydraulic safety valve protects the
system from excessive pressure.
During work
WARNING!
• It is not allowed to clean asbestos-containing surfaces
with high pressure.
• 5LVNRIH[SORVLRQ±'RQRWVSUD\ÀDPPDEOHOLTXLGV
• 1HYHUGUDZLQÀXLGVFRQWDLQLQJVROYHQWVHJJDVR-
OLQHKHDWLQJRLOSDLQWWKLQQHURUDFHWRQH7KHVHVXE-
stances damage the materials used in the machine.
7KHLUVSUD\LVKLJKO\FRPEXVWLEOHH[SORVLYHDQGSRL-
sonous.
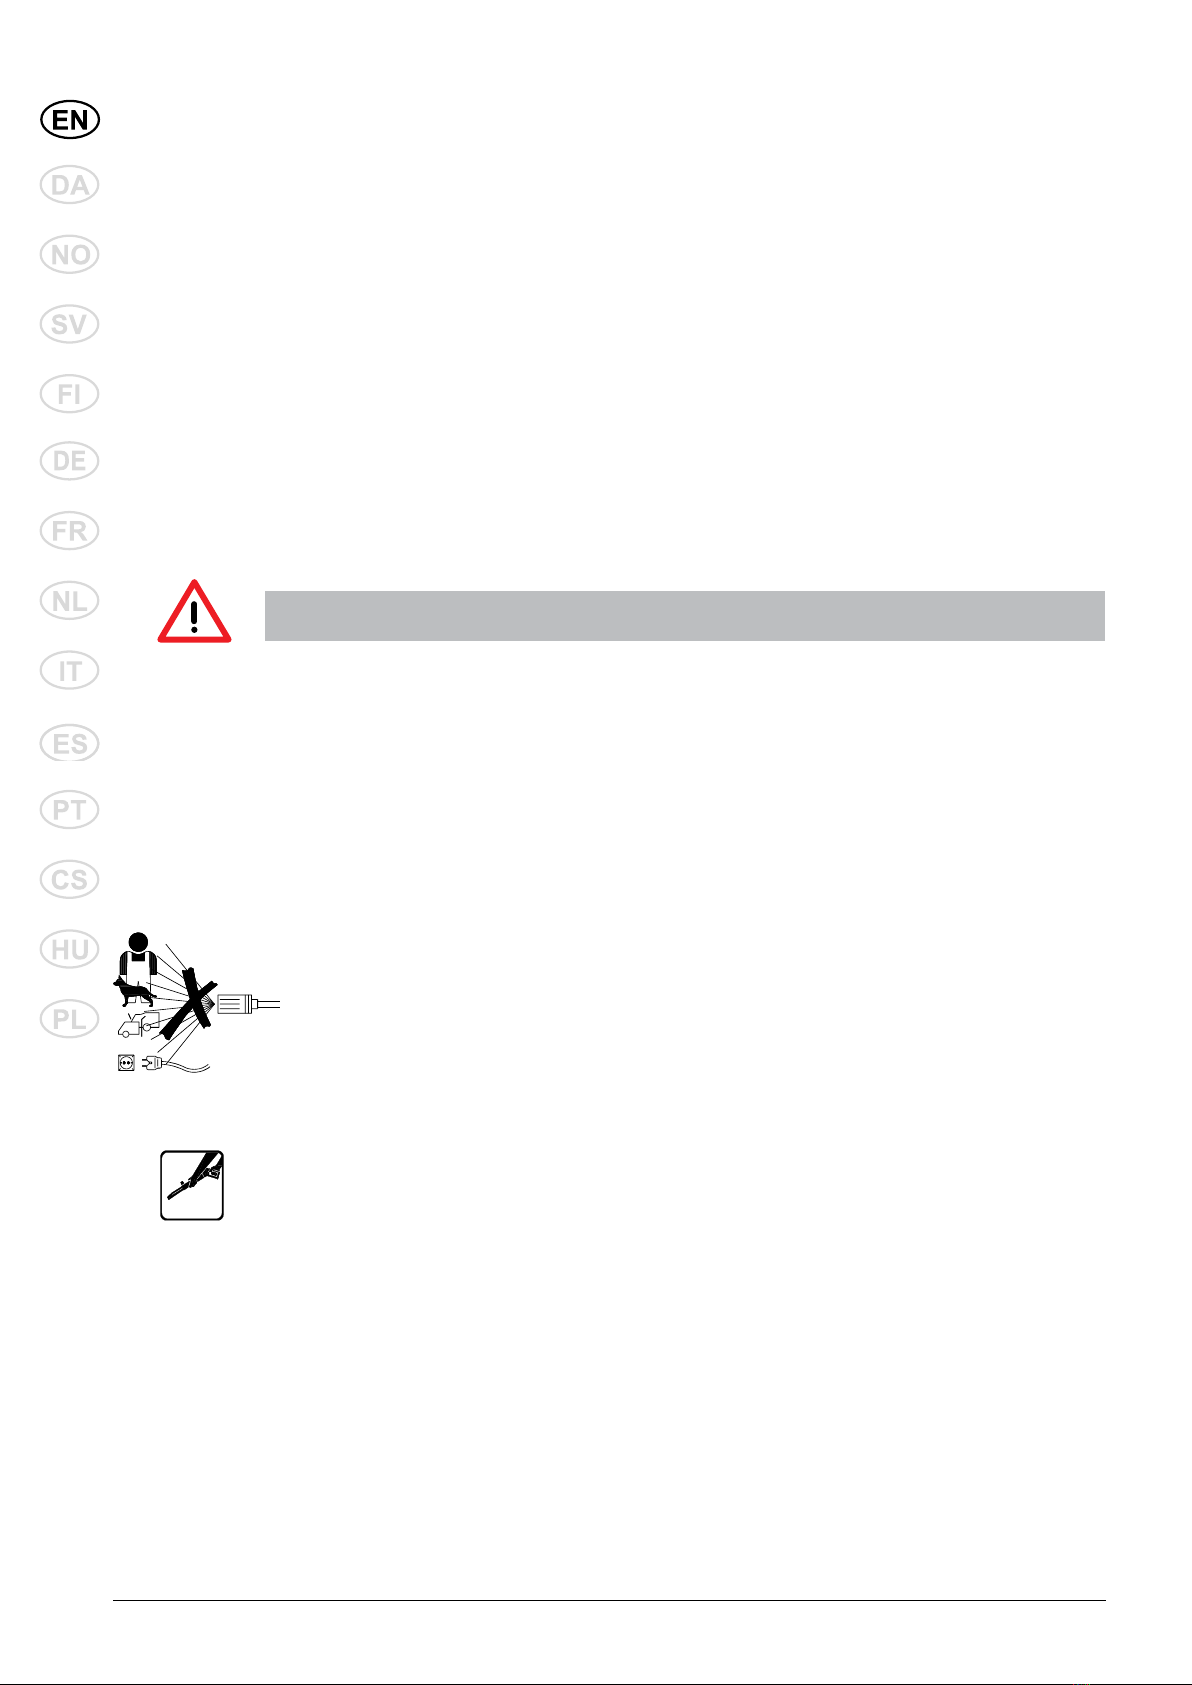
• 1HYHUGLUHFWWKHZDWHUMHWDW\RXUVHOIRWKHUSHUVRQV
QRWHYHQWRFOHDQFORWKLQJRUIRRWZHDU±risk of injury.
• Never direct the water jet at pets or other animals.
• Never direct the water jet at live electrical equipment
RUWKHPDFKLQHLWVHOI±danger of short-circuiting.
• +ROGWKHVSUD\ODQFH¿UPO\ZLWKERWKKDQGV7KH
VSUD\ODQFHLVDႇHFWHGE\DWKUXVWRIXSWR1DQG
a sudden torque when activating the trigger of the
spray handle during operation.
• Never start up a frozen machine. Frost damages are
not covered by the guarantee!
• $OZD\VHQVXUH¿UPDQGVDIHIRRWLQJ
• The machine shall be operated in an upright position.
• ,IWKHPDFKLQHLVOHIWRUQRWXVHGIRUPLQXWHVLWPXVW
EHVZLWFKHGRႇRQWKHVWDUWVWRSVZLWFK³O” (1).

9Original Instructions
$IWHU¿QLVKLQJWKHZRUN
WARNING!
• $OZD\VVZLWFKRႇWKHPDFKLQHDQGXQSOXJWKHSRZHU
plug from the socket after work and when leaving the
machine unattended.
• Disconnect water inlet hose between machine and
water supply.
• $OZD\VHPSW\SXPSKRVHDQGDFFHVVRULHVRIZDWHU
after use of the machine and prior to storing.
Maintenance and repairs
WARNING!
• Always disconnect the electrical plug from the socket
SULRUWRPDLQWHQDQFHFOHDQLQJDQGUHSDLU
• Any repair should always be made in BERNER autho-
rized workshop with original BERNER spare parts.
• Do not attempt any maintenance not described in the
instructions.
• ,IWKHPDFKLQHUHIXVHVWRVWDUWVWRSVSXOVDWHVSUHV-
VXUHÀXFWXDWHVPRWRUEXVVHVIXVHEORZVRUQRZD-
WHUFRPHVRXWFKHFNWKHWURXEOHVKRRWLQJGLDJUDP
LQWKHVHLQVWUXFWLRQV,QFDVHRWKHUSUREOHPVRFFXU
please contact your local BERNER distributor.
• Cleaning and user maintenance shall not be made by
children without supervision.
Correct disposal of this product:
This marking indicates that this product should not be
disposed with other household wastes throughout the
EU. To prevent possible harm to the environment or hu-
PDQKHDOWKIURPXQFRQWUROOHGZDVWHGLVSRVDOUHF\FOHLW
responsibly to promote the sustainable reuse of mate-
ULDOUHVRXUFHV7RUHWXUQ\RXUXVHGGHYLFHSOHDVHXVH
the return and collection systems or contact the retailer
where the product was purchased. They can take this
product for environmental safe recycling.
10 Original Instructions
3 Description
This high-pressure washer has
been developed for semiprofes-
sional routine cleaning:
– Professional craftsman jobs,
cleaning of vehicles, boat,
caravan and minor cleaning
jobs within building and con-
struction
Section 6 describes the use of
the high-pressure washer for
various cleaning jobs.
Only use the high-pressure
washer for purposes described
in this manual.
The safety precautions must be
observed to prevent damage
WRWKHPDFKLQHWKHVXUIDFHWR
be cleaned or severe personal
injuries.
3.1 Application
3.2 Operation elements and
model survey
See illustration at the end of
this manual.
6WDUWVWRSVZLWFK
:DWHULQOHWZLWK¿OWHU
3 High pressure connection
(only machines without
hose reel)
4 High pressure hose
5 Electric cable
6 Button for regulation of
pressure and water volume
(not standard)
7 Ergo 2000 spray handle
with lock (7a)
8 Flexopower Plus spray
lance (standard models)
9 4-in-1 spray lance (T and
XT models)
10 Detachable detergent con-
tainer
11 Nozzle cleaning tool
12 Hose reel
13 Hose hook (only machines
without hose reel)
14 Model tag
15 Button for telescopic handle
16 Telescopic handle
17 Turnable cable hook
6SHFL¿FDWLRQV See model tag
(14) of machine.
We reserve the right to alter the
VSHFL¿FDWLRQV
This manual suits for next models
1
Table of contents
Languages:
Other Berner Pressure Washer manuals


