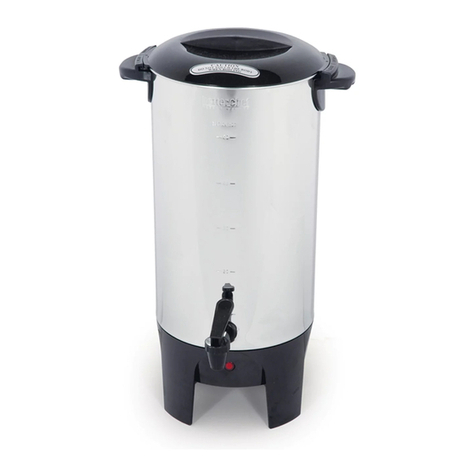
better chef IM-111W Installation instructions

READ AND SAVE THIS USE AND CARE BOOK
CONSERVER CE GUIDE D’ENTRETIEN ET D’UTILISATION
POR FAVOR LEA ESTE INSTRUCTIVO ANTES DE USAR EL PRODUCTO
Model no. iM-111W, iM-112B & iM-114R
12-cup coFFeeMAKeR
CAFETIèRE DE 12 TASSES
CAFETERA DE 12 TAzAS
IM-111W (White) IM-112B (Black) IM-114R (Red)
®

SAFETY PRECAUTIONS
SAVE THESE
INSTRUCTIONS
FOR HOUSEHOLD USE
ONLY
WARNING
To reduce the risk of fire or electrick shock, do not remove the bottom cover of the cof-
feemaker. There are no serviceable parts inside. Repair should be done by authorized service
personnel only.
POLARIZED PLUG
This appliance has a polarized plug (one blade is wider than the other.) As a safety feature,
this plug fits in a polarized outlet only one way. If the plug does not fit into the outlet,
reverse the plug and try again. If it still does not fit, contact a qualified electrician. Do not
attempt to defeat this safety feature.
ELECTRICAL CORD
The cord of this appliance was selected to reduce the possibility of tangling in or tripping
over a longer cord. If more length is needed, use an extension cord rated no less than
15 amperes. When using an extension cord, do not let it drape over the working area or
dangle where someone could accidentally trip over it. Handle cord carefully for longer life;
avoid jerking or straining it at outlet and appliance connections.
2 English
When you use this electrical equipment, please
follow these necessary safety measures to avoid
any hazards:
1. Carefully read all instructions before using
your appliance.
2. Keep the electrical components (i.e. plug,
heating elements, power switch) of your
appliance dry. Handle these components
with dry hands.
3. Practice caution when handling hot liquids
or when near hot surfaces.
4. Close supervision is necessary when any ap-
pliance is used by or near children.
5. Do not operate any appliance with a damaged
cord or plug or after the appliance malfunc-
tions, or has been damaged in any manner.
Return the appliance to the nearest autho-
rized service facility for examination, repair,
or adjustment. See warranty section of this
manual for details.
6. Do not use outdoors.
7. Do not place on or near a hot gas or electric
burner or in a heated oven.
8. Unplug from outlet when not in use and be-
fore cleaning. Allow to cool before putting on
or taking off parts and before cleaning the
appliance.
9. In order to maintain the warranty of your
appliance, please do not dismantle the appli-
ance without authorization.
10. To protect against electrical shock, do not
place cord, plug or appliance in water or
other liquids.
11. Be especially careful when using extension
cords. Make sure the extension cord has
at least the same electrical rating as your
appliance (i.e. UL approval, same wattage).
As a further precaution, make sure that
neither the appliance cord nor the extension
cords are hanging where they might become
snagged or pulled on by children or pets.
12. This appliance is intended for household
use only.
WARNING! Do not operate appliance if the
line cord shows any damage or if appliance
works intermittentlyor stops working entirely.

1 Housing
2 Lid
3 Filter Basket
4 Water Spigot
5 Water Tank
6 Water Level
Indicator
7 Carafe
8 Carafe Handle
9 Carafe Lid
10 Switch
11 Drip Stop Valve
12 Warming Plate
English 3
PARTS
1
2
5
7
8
9
12
10
11
6
BEFORE FIRST USE
• Removepackagingmaterials,labelsandstick-
ers from coffee maker.
• Cleancoffeemakerthoroughlybeforeusing
for the first time (Cleaning).
NOTE: To clear the coffee maker of any resi-
dues fill it to the maximum level mark with
fresh water. Boil and empty the coffee maker
at least 2 times.
The coffeemaker is only for brewing coffee.
• Openlid(2).Turnthewaterspigottothe
back and lift out the filter basket (3).
• Place12-cupU-typepaperltersintothe
filter basket (3) and replace the filter basket to
the coffeemaker.
• Addthedesiredamountofgroundcoffee
to the filter (suggested amount for each cup
of coffee is 1 to 1.5 level measuring spoon;
depending on taste).
USING THE
COFFEEMAKERS
OPERATION
• Turnthewaterspigot(4)tothelterbasket’s
center.
• Fillcarafe(7)withdesiredamountofwater
(check the water level indicator (6) on coffee
maker). Pour water into the water tank (5).
• Replacecarafe(7)onthewarming/heating
plate (12).
• Pressthefrontofthecoffeemakerlid(2)
down until it locks in place.
• Insertpowerplugintoastandard120VAC
wall outlet.
• Turnontheswitch(1)anditwilllight.The
brewing begins.
• Whenthecoffeestopsowingthebrewing
cycle is complete.
• Whenthecoffeemakerisnishedbrewing,
turn the switch off and unplug the unit. (The
switch light will turn off when the unit is
switched off).
NOTE: To interrupt brewing, press the switch
once. The LED light will switch off.
CAUTION
• Toavoidriskofinjury,donottouchthe
warming plate!
• Toreducetheriskofscalding,donot
open the lid when coffee is brewing!
3
4

4 English
EXTRA FEATURES
• Thedripstopvalve(11)functionallowsyou
to remove carafe (7) while brewing to serve
a cup of coffee. Note: Replace carafe (7) back
on the warming plate within 30 seconds.
• Usethecordstorageonthebottomofthecof-
feemaker for easy storage and if the appliance
is not in use for a long time.
CLEANING
• Propermaintenancewillensureyearsof
service of your appliance. Clean the appliance
after every use. This appliance contains no
user serviceable parts and requires little main-
tenance. Leave servicing repairs or repairs to
qualified personnel.
WARNING: Unplug the appliance and allow
to cool before cleaning.
CAUTION!
• Donotimmersethecoffeemaker,thepower
cord, and the plug into water or any liquids.
• Cleanthehousingandwarmingplate(12)
with a clean, damp cloth.
• Donotuseabrasivepadsoralcohol.
• Removethecarafe(7),paperlterandthe
filter basket (3) from the coffeemaker.
• Thecarafe(7)isdishwasher-safe.Washcarafe
(7), carafe lid (9) and filter basket (3) in hot,
soapy water. Rinse and dry.
• Usebakingsodaormildcleaningagentto
remove stains on the carafe (7). If stains are
hard to remove, fill carafe (7) with hot water
and add 2 tablespoons of dishwater detergent.
Wash and rinse after leaving water with deter-
gent in carafe (7) overnight.
• Ensureallpartsarecompletelydryafter
washing and before use.
• Donotdrytheinsideofthewatertank(5)
with a cloth as it may leave lint inside the cof-
feemaker.
• Aftercleaning,reassemblecoffeemaker.
WARRANTY
Length of Warranty
1 year from date of purchase
Within 1 year from date of purchase,
1) Return product to place of purchase
(if your dealer allows)
OR
2) Send product postage pre-paid to:
I.E.A.C.
3030 East Vernon Avenue
Vernon, California, USA 90058
Please include original dated receipt,
explanation of defect and return name
and address as well as a contact phone
number.
We will, within 10 days of receiving
your product, return a new or refur-
bished (at our discretion) product at NO
ADDITIONAL CHARGE.
We will also return your receipt. If prod-
uct is found to be in working condition,
we will return product postage collect.
PACK YOUR PRODUCT WELL!
We will not be responsible for damages
incurred as a result of improper pack-
ing.
Or contact us via e-mail at
customerservice@betterchefimpress.com

Français 5
INSTRUCTIONS DE SÉCURITÉ
AVERTISSEMENT
And’éviterlesrisquesd’incendieoudesecoussesélectriques,nepasrretirerlecouvercle
delacafetière.L’utilisateurnepeutrépapreraucunedespiécesinternes.Enconerlesrépa-
rationsuniquementaupersonneld’uncenterdeserviceautorisé.
FICHE POLARISEÉ
L’appareilestmunid’unechepolarisée(unelamepluslargequel’autre).Anderéduire
lesrisquesadesecoussesélectriques,cegenredechen’entrequed’unefaçondansune
prisepolarisée,parmesuredesécurité.Lorsqu’onnepeutinsérerlacheàfonddans
laprise,ilfauttenterdelafaireaprésavoirinverséleslamesdecôté.Silachen’entre
toujourspasdanslaprise,ilfautcommuniqueravecunélectriciencertié.Ilnefautpas
neutralisercedispositifdesécurité.
CORDON
Lalonguerducordondel’appareilaétéchoisieafind’eviterlesrisquesd’enchevêtrement
etdetrébuchementqueprésenteunlongcordon.Toutcordonderallonged’aumoins15
ampèrespeutserviraubesoin.Lorsqu’onutiliseuncordonderallonge,s’assurerqu’ilne
traversepaslasurfacedetravailniqu’ilpenddefaçonqu’onpuissetrébucherdessuspar
inadvertance.Manipulerlecordonavecsoinafind’enprolongerladurée;éviterdetirer
dessusetdelesoumettreàdescontraintesprèsdesprisesoudesconnexionsdel’appareil.
Enutilisantcettemachineélectrique,suivezces
mesuresdesécuriténécessairespourévitertout
danger:
1.Lisezprécisémenttouteslesinstructions
avantd’utilisersamachine.
2.Maintenezcescomposantsélectriques
(c’est-à-dire,che,élémentsdechaleur,
interrupteur) secs de sa machine. Utilisez ces
composants avec les mains sèches.
3.Utilisezavecprécautionlesliquideschauds
ou lesquels sont près de surfaces chaudes.
4.Onrequiertunesupervisionimmédiatesion
utilise toute machine près des enfants.
5.N’utilisezpaslamachineavecuncordon
oucheendommagéeouaprèsdemauvais
fonctionnements de la machine, ou si elle
aétéendommagéed’unecertainemanière.
Envoyezlamachineàl’agencedeservice
autoriséeplusprochepoursonévaluation,
réparationouajustements.Pourdeplus
grandsdétails,voirlasectiondegarantie
dans le manuel.
6.N’utilisezpascettemachineàl’extérieur.
7.Nelaplacezpassurouprèsd’unecuisinière
chaudeàgazouélectriqueoudansunfour
réchauffé.
8.Déconnectezdelaprisedecourantquand
elle ne se trouve pas en utilisation et avant de
la nettoyer. Laissez refroidir avant de placer
ou retirer les parties et avant de la nettoyer.
9. Afin de maintenir la garantie de sa machine,
onneladésarmepassansautorisation.
10.Pourprotégerdeschocsélectriques,ne
placez pas le cordon, la fiche ou la machine
eneauoud’autresliquides.
11.Teniezdesprécautionsspécialesenutilisant
descordonsd’extension.Assurezquele
cordond’extensionaitaumoinslamême
capacitéélectriquequesamachine(c’est-
à-dire,approbationUL,mêmewattage).
Commeprécautionadditionnelle,assurez
quenilamachinenilescordonsd’extension
sontprispuisqu’ilspeuventêtreaccrochés
oujetésparlesenfantsoulesmascottes.
12.Cettemachineestseulementàusagemé-
nager.

6 Français
1 Carrosserie
2 Couvercle
3 Porte filtre
4Robinetd’eau
5Réservoird’eau
6 Indicateur de
niveaud’eau
7 Pot
COMPOSANTS
1
2
5
7
8
9
12
10
11
6
AVANT LA PREMIÈRE
UTILISATION
•Retirerlesmatériauxd’emballage,les
étiquettesetlesautocollantsdelacafetière.
•Nettoyezlacafetièresoigneusementavantde
l’utiliserpourlapremièrefois.Remplissezle
réservoird’eaufroideaumaximumetfaites
fonctionner votre cafetière sans mouture.
Videzlepotetrépétezl’opérationaumoins
2 fois.
CONSERVER CES
INSTRUCTIONS
POUR UNE UTILISA-
TION DOMESTIQUE
8PoignéeduPot
9 Couvercle du Pot
10Interrupteurarrêt/
marche avec voyant
lumineux
11 Stop Goutte
12 Plaque chauffante
3
4
•Ouvrezlecouvercle(2).Tournezlerobinet
d’eauversl’arrièreetsoulevezleporte-ltre
(3).
•Placezunltreenpapier(12-tasses)dansle
porte-filtre (3) et replacez ce dernier dans son
support.
•Versezlaquantitédemouturedésiréedansle
ltre(suggestion:1à1½dosettepartasse,
selon les goûts).
•Tournezlerobinetd’eau(4)verslecentredu
porte-filtre.
•Remplissezlepot(7)aveclaquantitéd’eau
souhaitéeetversezladansleréservoir(5)en
vériantl’indicateurdeniveaud’eau(6)
•Replacezlepot(7)surlaplaquechauffante
(12).
•Appuyezsurledevantducouverclede
l’appareil(2)jusqu’àilsoitenplaceet
verrouillé.
•Branchezl’appareiluniquementsurcourrant
de 120 V AC
•Pourmettrel’appareilenmarche,appuyezsur
l’interrupteur(1)Levoyants’allumera.
•Votrecafetièreestéquipéed’unstop-goutte
(11) permettant de se servir une tasse de
caféavantlepassagecompletdel’eau.N.B.:
Remplacez le pot (7) sur la plaque chauffante
dans les 30 secondes.
•Lorsquel’eaucessedecouler,lecaféest
terminé.
•Apresl’écoulementcompletducaféouaprès
l’avoirmaintenuauchaud,éteignezvotre
cafetière(levoyantlumineuxs’éteindra)et
débranchezla.
N.B.: Pour interrompre le fonctionnement,
appuyezsurl’interrupteurunefois(voyant
lumineuxéteint)
FONCTIONNEMENT

Français 7
NETTOYAGE
•Votreappareilassureradesannéesdeservice
avec un bon entretien. Nettoyez le après
chaque utilisation. Cet appareil ne contient
aucunepièceremplaçableparl’utilisateur
etnécessitepeuderéparationsquidevront
exécutéesparleservicederéparationagréé
ouparunpersonnelqualié.
•Débranchezl’appareiletlaisserrefroidiravant
de le nettoyer.
ATTENTION: Ne pas plonger la cafetière, le
cordond’alimentation,oulachedansl’eau
ou autres liquides.
•Nettoyezlacarrosserieetlaplaquechauffante
(12) avec un chiffon humide et propre.
•N’utilisezpasdetamponsabrasifs,nid’alcool.
•Retirezlepot(7),leltreenpapieretle
porte-filtre (3) de la cafetière.
•Lepot(7)estlavableenlave-vaisselle.Lavez
le pot (7), son couvercle (9) et le porte-filtre
(3)dansdel’eauchaudesavonneuse.Rincer
lesetsécherles.
•Utilisezdubicarbonatedesoudeouun
détergentdouxquandlepot(7)esttaché.Si
lestachessontdifcilesàenlever,remplissez
lepot(7)avecdel’eauchaudeetajoutezy2
cuillèresàsoupedeliquidevaisselle.Lavezet
rincez après avoir laisser tremper une nuit.
•S’assurerquetouteslespiècessontcomplète-
ment sèches après lavage et avant utilisation.
•Nepassécherl’intérieurduréservoird’eau
(5) avec un chiffon qui pourrait y laisser des
fibres.
•Aprèsnettoyage,replacerlesélémentsdela
cafetière.
OPTIONS DE
LA GARANTIE
Durée de la Garantie
Uneannéedepuisladated’achatpen-
dantune(1)année
(1)Depuisladated’achat,
1)Retournezleproduitaulieud’achat
(si votre agent commercial le permit)
OU
2)Envoyezleportduproduitpréal-
ablementpayéà:
I.E.A.C.
3030 East Vernon Avenue
Vernon, California, USA 90058
Envoyezlaquittanceoriginaledatée
ci-joint,l’expositiondel’imperfectionet
dévolution,nometadresseainsiqu’un
téléphonedecontacte.
Dansdix(10)joursàlaréception
du produit, on retourne un produit
nouveauouréparé(àsonavis)sansun
DÉBIT ADDITIONNEL.
Également, on retournerait la quittance.
Sileproduitestenbonétat,onretourn-
erait le port payable du produit.
EMPAQUETEZ BIEN SON PRODUIT!
Nous ne sommes pas responsables sur
dommagescommerésultatd’unempa-
quetageinadéquat.
Oucontacternousparcourrielà
customerservice@betterchefimpress.com
RANGEMENT
•Pourfaciliterlerangementdevotrecafetière
lorsqu’ellen’estpasutiliséependantuncer-
taintemps,enroulezlecordond’alimentation
danslecompartimentàsabase

8 Español
INSTRUCCIONES DE SEGURIDAD
Alutilizaresteartefactoeléctrico,sigaestas
medidas de seguridad necesarias para evitar
cualquier peligro:
1. Lea cuidadosamente todas las instrucciones
antes de utilizar su artefacto.
2.Mantengaloscomponenteseléctricos(es
decir, enchufe, elementos de calor, interrup-
tor) de su artefacto secos. Manipule estos
componentes con las manos secas.
3. Manipule con precaución los líquidos calien-
tes o que se encuentren cerca de superficies
calientes.
4. Se requiere una supervisión inmediata si se
utiliza cualquier artefacto cerca de los niños.
5. No utilice el artefacto con un cable o enchufe
dañadoodespuésdemalosfuncionamientos
del artefacto, o si se ha dañado de alguna
manera. Envíe el artefacto a la oficina de
servicio autorizada más cercana para su
evaluación, reparación o ajustes. Para mayores
detalles,véaselaseccióndegarantíadeeste
manual.
6. No utilice este artefacto a la intemperie.
7. No lo coloque sobre o cerca de una cocina
calienteagasoeléctricaoenunhorno
caliente.
8.Desconéctelodeltomacorrientecuandonose
encuentreenusoyantesdelimpiarlo.Déjelo
enfriar antes de colocar o retirar las partes y
antes de limpiarlo.
9. Con el fin de mantener la garantía de su arte-
facto, no lo desarme sin autorización.
10.Paraprotegercontrachoqueseléctricos,no
coloque el cable, el enchufe o el artefacto en
agua u otros líquidos.
11. Tenga especial cuidado al utilizar cables de
extensión. Asegúrese de que el cable de ex-
tensión tenga al menos la misma capacidad
eléctricaquesuartefacto(esdecir,aprobac-
ión UL, mismo vataje). Como precaución
adicional, asegúrese de que ni el artefacto
niloscablesdeextensiónesténcolgandoya
que se pueden enganchar o ser tirados por
los niños o mascotas.
12. Este artefacto es solamente para uso do-
méstico.
PRECAUCION
Parareducirelriesgodeincendioodechoqueeléctrico,noretirealcubiertadelacafetera.
No contiene por dentro partes reparables por el consumidor. Cualquier reparación deberá ser
efectuada únicamente por personal autorizado.
ENCHUFE POLARIZADO
Esta unidad tiene un enchufe polarizado en el que un contacto es más ancho que el otro.
Como medida de seguridad, el enchufe puede introducirse en la toma de corriente polarizada
solamenteenunsentido.Sielenchufenoentraenelcontacto,inviértalo.Siaúnasinose
ajusta, busque la ayuda de un electricista. Por ningún punto trate de alterar esta medida
de seguridad.
EL CABLE ELECTRICO
El cable de esta unidad fue seleccionado con el fin de evitar la posibilidad de que alguien
se enrede o se tropiece en uno más largo. De ser necesaria una extensión, use un cable de
extensión enlistado po UL (Underwriters Laboratories), NOM, o uno aprobado por una agen-
cia apropriada. Cuando use un cable de extensión, no permita que cuelgue sobre el área de
trabajo para evitar que alguien se tropice en ella accidentalmente.
CONSERVE ESTAS
INSTRUCCIONES
SOLAMENTE PARA
USO DOMÉSTICO

Español 9
1 Carcasa
2 Tapa
3 Cesta para el
filtro
4 Cabezal de goteo
5 Depósito de
agua
6 Indicador del
PARTES
1
2
5
7
8
9
12
10
11
6
ANTES DEL
PRIMER USO
•Retiretodoelembalaje,etiquetasypegatinas
de la cafetera.
•Limpieaconciencialacafeteraantesdeusarla
por primera vez (Limpieza).
NOTA: Para eliminar cualquier residuo de
lacafetera,llénelahastalamarcadenivel
máximoconaguafresca.Llévelaaebullición
y vacíe la cafetera por lo menos.
nivel de agua
7 Jarra de cristal
8 Asa de la jarra
9 Tapa de la jarra
10 Interruptor
11 Válvula anti-goteo
12 Plato calentador
3
4
USO DE LA CAFETERA
Utiliceestacafeterasolamenteparahacercafé.
•Abralatapadellenadodecafé(2).Gireel
cabezal de goteo hacia atrás y levante la cesta
para el filtro (3).
•Inserteunltrodepapeltipo12copaUen
cesta para el filtro (3), recoloque a cesta para
el filtro en la cafetera.
•Añadalacantidaddeseadadecafémolidoen
el filtro (se sugiere usar entre 1 y 1,5 niveles
decafédelacucharillademediciónparacada
tazadecafé,dependiendodesugusto).
•Gireelcabezaldegoteo(4)haciaelcentrode
la cesta del filtro.
•Llenelajarra(7)conlacantidaddeaguade-
seada (fijese en el indicador de nivel de agaua
(6) en la cafetera). Vierta agua en el depósito
de agua (5).
•Vuelvaacolocarlajarra(7)sobreelplato
calentador (12).
•Presionelapartefrontaldelatapa(2)hacia
abajo hasta que quede fijada.
•Inserteelenchufeenunatomadecorriente
alterno estándar de 120V.
•Enciendaelinterruptor(10)yseencenderá.
El proceso de infusión se habrá completado.
•Cuandohayaterminadoconelcafé,apague
el interruptor y desconecte la unidad. (La luz
en el interruptor se apagará cuando la unidad
estéapagada).
NOTA: Para interrumpir la infusión, pulse
(1) de nuevo, y la luz se apragará.
PRECAUCION!
•¡Notoqueelplatocalentador!Riesgode
quemaduras.
•¡Parareducirelriesgodeescaldarse,
no abra la rapa durante el proceso de
infusión!
•¡Hayvaporcalientadebajodelatapa,
no toque la tapa durante el proceso de
infusión.

10 Español
FUNCIONES
ADICIONALES
•Lafuncióndeválvulaanti-goteo(11)le
permite retirar la jarra (17) durante la un-
fusiónparaservirunatazadecafé(vuelvaa
colocar la jarra (7) dentro de los próximos 30
segundos).
•Cuentaconunguarda-cablesparaguardar
el cable fácilmente si la cafetera no va usarse
durante un período extendido de tiempo.
LIMPIEZA
•Unmantenimientoadecuadoaseguraráaños
de funcionamiento de su aparato. Limpie el
aparatodespuésdecadauso.Esteaparatono
contiene piezas raparables por el usuario y
necesita poco mantenimiento. Deje el man-
tenimiento o las rparaciones para el personal
cualificado.
ADVERTENCIA: Desenchufe el aparato
ydéjeloenfriarcompletamenteantesde
limpiarlo.
•Nosumerjalacafetera,oelcabledecorriente
con el enchufe en agua o en otros líquidos.
•Limpielacarcasayelplatocalentador(12)
con un trapo limpio y húmedo.
•Nouseestropajosabrasivosoalcohol.
•Retirelajarradecristal(7),elltroperman-
ente y la cesta para el filtro (3) de la cafetera.
•Lajjaradecristal(7)sepuedeenellavava-
jillas. Limpie la jarra (7), la tapa de la jarra
(9) y la cesta del filtro (3) en agua caliente y
jabonasa. Enjuague y seque.
•Usebicarbonatoounagentelimpiadorsuave
para eliminar las manchas de la jarra (7). Si
las manchas son difíciles de eliminar, llene la
jarra (7) con agua caliente y añada 2 cuchara-
das de detergente lavavajillas. Lave y enjuague
despuésdehaberdejadoelaguacondeter-
gente en la jarra (7) durante toda la noche.
•Compruebequetodaslaspiezasestántotal-
mentesecasdespuésdelavarlasyantesde
usarlas.
NOTA: No seque el interior del depósito de
agua (5) con un paño, ya que puede dejar
pelusa.
Despuésdelimpiar,vuelvaamontarla
cafetera.
Duración de Garantía:
1 año desde la fecha de compra
En un (1) año desde la fecha de compra,
1) Retorne el producto al lugar de
compra (si su agente lo permite)
O
2) Envíe el porte del producto previa-
mente cancelado a:
I.E.A.C.
3030 East Vernon Avenue
Vernon, California, USA 90058
Adjunte el recibo fechado original, la
explicación del defecto y devolución,
nombre y dirección así como un número
deteléfonodelcontacto.
Dentro de los diez (10) días de haber
recibido su producto, devolveremos
un producto nuevo o restaurado (a su
criterio) sin CARGO ADICIONAL.
Asimismo le devolveremos su recibo.
Si el producto se encuentra en buenas
condiciones, devolveremos el porte a
pagar del producto.
EMPAQUE BIEN SU PRODUCTO!
No nos haremos responsables de los
daños incurridos como resultado de un
empaque inadecuado.
O contactenos por correo electrónico al
customerservice@betterchefimpress.com
OPCIONES DE
GARANTÍA

This manual suits for next models
2
Table of contents
Languages:
Other better chef Coffee Maker manuals