bewello BW2024 User manual

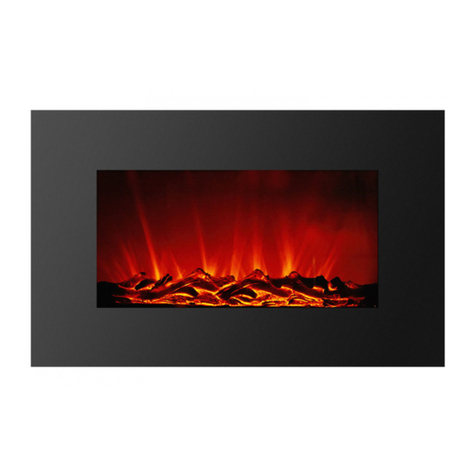
Electric Wall Fireplace
Heater + LED
Elektrischer Wandkamin
Heizlüfter + LED
Elektromos fali kandalló
Hősugárzó + LED
Elektrický nástěnný krb
Ohřívač + LED
Elektrický nástenný krb
Ohrievač + LED
Şemineu electric de perete
cu radiator de căldură + LED
USER MANUAL
HUEN ROSKCZDE
Product Nr. BW2024
IP20
EF-14A

2
EN
Electric Wall Fireplace - Heater + LED
Dear Customer! Thank you for choosing our product, we hope you enjoy using it for a long time.
There is nothing better than to cuddle with our loved one in front of the fireplace on a cold winter day. This multifunctional
recessed fireplace is the perfect replica of the original fireplaces: it contains realistic, flaming effects and glowing, smoldering
pieces of wood, but it can also be used as a radiator. A romantic atmosphere is guaranteed. On cold winter nights, you can adjust
the intensity of the radiator (950 W, 2000 W) at two power levels on request, which is suitable for occasional, intermittent
heating of a room of up to 30 m².This way, not only the sight but also the feeling of warmth will be realistic. Precise temperature
control is ensured by a built-in thermostat, which can be set using the accessory’s remote control. The flame effect can be used
independently of the heating function, so you can admire the magical atmosphere of a„burning fire”in the fireplace at any time
of the year. The accessory crystals give an even more exclusive look to the „combustion chamber” of the fireplace.
• It can be operated safely • Rugged frame
•There is no re, spark, soot • Recessed design
• It is characterized by two heating capacities and
high heating power
•The light eect can be switched separately,
adjustable brightness
•Weekly timing • Romantic atmosphere from the rst minute of switching on
• Overheating protection • It is deceptively similar to real replaces
Attention! Some points on the cover may overheat due to heat radiation!
Design: Recessed Inbuilt temperature adjustment: Yes, manual
Power supply: AC 220 - 240V, ~ 50/60 Hz Protection: IP20
LED eciency: 1.6W Overheating protection: Yes
Heating eciency: 950 - 2000W Noise level: 50 dB
Recommended use: max. 30 m² helyiségben Power cord: 140 cm
Operationg temperature: 15 °C - 30 °C Material: Metal + glass
Storing temperature: 15 °C - 30 °C Size: 88 x 56 x 15 cm
Direct heat eciency: 950 - 2000W Color: Black
Energy class (EU2021): Class„G”
USER MANUAL
Safety regulations, warnings
DANGER!
General advice: Danger of suocation! Please keep the packaging of the appliance out of the reach of children as it may lead to
suocation. The appliance may only be used by adults, the storage location must be chosen in such a way that children cannot
accidentally access it. Children should be supervised to ensure that they do not play with the appliance.
Danger of electric shock: Never operate the appliance with wet, wet hands!Touching the device, including the power plug and cable,
with wet hands is strictly prohibited! The device may only be connected to AC power with the correct voltage. Do not point the device
directly at electrical equipment, as hot air may enter and cause damage. Do not use the appliance near a bathtub, shower, swimming
pool or sink containing water. Unplug the appliance only by grabbing the mains plug.
Operation: Make sure of environmental regulations before use! Do not use the device near explosive material! When used in special
places (eg petrol station, pools…) the local safety regulations must be followed! Place the appliance horizontally and stably, make sure

3
that the appliance does not tilt or tip over! Do not cover the appliance with anything (sheets, blankets…)! To reduce the risk of re, do
not place the appliance closer than 2 m to furniture, objects or walls! The appliance must not be operated from a socket with a timer!
The appliance is not suitable as a primary heating source for rooms.The appliance is designed for intermittent (short-term) heating.
WARNING
General advice: The device may only be used for its intended purpose!When using, pay attention to the physical safety and safety of
those around you (especially children).The device may only be used by persons who have read, understood and are able to operate this
device accordingly! Persons with reduced mental, physical or sensory capabilities should not use the device! Children should not use the
appliance! After using the appliance, make sure that the hot appliance can cool down in a well-ventilated place in a way they won’t cause
personal injury to anyone! Inform those around you about the operating status of the device.
Risk of electric shock: Only connect the appliance to a mains socket that is safe to operate or has been installed by a specialist in
accordance with IEC 60364-1. Before each use, make sure that the appliance and the mains cable and connectors are intact! Only use
undamaged devices! If you experience any damage, do not use the appliance, contact a specialist! During use, pay attention to the
integrity of the mains cable, avoid edges or objects that can damage the surface of the cable. Avoid the use of extension cords or splitters,
as they are a source of danger during operation. Always unplug the appliance when not in use! Maintenance work must only be carried
out with the mains plug removed!
Operation: Risk of burns! Never touch the part of the radiator (bottom) or point it at close range to other people or animals! To
avoid burns, always allow the appliance to cool down before you touch it!The device may only be operated when fully assembled with
the factory accessoriesIf any part is damaged, it must be replaced before use. Allow the appliance to cool down completely in a well-
ventilated place before storing it. During use, periodically check that the appliance is not overheated and that the ventilation openings
are not blocked.
CAUTION
General advice: Do not use the device if you have previously dropped or struck it and it is visibly damaged! It is strictly forbidden to,
modify or disable safety devices, you must use as intended!
Operation: Always operate and store the device as described always check the integrity of the appliance, cable, plug and accessories In
the event of damage, do not use the device!
ATTENTION
Operation: Use the appliance only at freezing temperatures above 0 °C to avoid condensation and electric shock. Never leave the
appliance unattended when it is connected to the mains! Protect the device from moisture and water! Do not store the device outdoors
in high temperature uctuations.
ATTENTION!
Certain parts of the product may become hot and cause burns. Requires increased attention near children.
ATTENTION!
The device may only be installed in recessed form in a plasterboard wall or in a wooden wall or box specially
designed for this purpose. Ensure that the device is properly ventilated during installation. Internal circuits and
components are cooled through the ventilation openings at the top and bottom of the replace.
To ventilate them, an air space of appropriate size must be provided, this part must not be insulated or covered.
ATTENTION!
You should only deviate from this if you choose to place the device outside the wall. In this case, it is also possible to
x it on brick, concrete, silicate and other walls.
ATTENTION!
The device may only be installed by a specialist!Two people are required for a safe installation!

4
ATTENTION!
The radiator does not include a device to control the temperature of the rooms. Do not use it unattended in a room with people who
cannot leave.
ATTENTION!
Leave at least 100 cm free space above the radiator and 200 cm in front of the radiator. Never use the radiator in a room with ammable,
explosive oil, gasoline or gas.
INSTALLATION INSTRUCTIONS:
During installation, the location of the appliance must be located in such a way that it does not come into contact with moisture or heat
pipes, gas pipes or electrical cables in its immediate vicinity. Install the appliance at least 30 cm high on the wall, so that the distance
between the ceiling and the appliance is at least 100 cm.We recommend placing the lower part of the appliance at a height of 60 cm
from the ground to ensure the best visual experience in the replace ag re.
RECCESSED INSTALLATION:
The included mounting accessories allow ush mounting on drywall and wood. Prior to installation, make sure that the wall
section has the correct load capacity and can provide the power supply for the device in the given location. When xing to a
wooden surface, it is not necessary to pre-drill the holes and use anchors for the screws!
W
85 cm
H
48 cm
1. Select the wall where you want to place the appliance, then cut a
hole of the right size for the appliance as shown! Use a spirit level
and a pencil to mark the hole. Saw with the right blade for cutting,
depending on the material.
2. Remove the glass front of the device. Remove
the screws onboth sidesof the device.You will nd
these screws in the middle of the housing, screw
number 4 down from the top of the housing.
Attention! The front of the device is made
of glass! Handle with care! Shattered
glass can cause cutting injuries! Place the
glass on a clean, soft surface.
3. Insert the device into the previously cut hole
and mark the location of the 4 xing points.
Remove the device. When xing to drywall,
drill the holes and insert the drywall anchors
into the holes.
4. Insert the replace into the prepared hole and secure it with the 4 screws. Be careful not to break the cord of the machine, do not
break the cord, or touch a sharp surface. Do not allow the cable to come in contact with the housing, as it may become hot during use.
5. Place the wood decoration or, if required, the supplied“crystals”in the combustion chamber and arrange them according to your taste.
6. Ask for help to replace the front panel. Use the xing screws on both sides of the appliance to x the front panel back to the replace
housing (at the plane of the wall, you can do this from the side).
7. Make sure the device is turned o. Connect the mains plug of the appliance to the mains socket. The device beeps to indicate that it
is ready for operation.

5
OUT OF WALL INSTALLATION NOT RECESSED:
1. Use a drill to drill the holes for mounting
the bracket. Use an 8 mm drill bit for drilling.
The depth of the holes must be at least 26 mm
deep. Do not use a smaller mounting size!
2. Insert the included anchors into the holes
until they line up with the plane of the wall.
3. Using a screwdriver, screw in the screws so that
theirheadsare3-4 mm fromtheplane of the wall.
4. Hook the replace on the screws and make
sure it ts snugly and accurately. If necessary,
adjust the position of the screws to secure the
replace to the wall.
5. Remove the front glass panel. Remove the
screws on both sides of the device. You will nd
these screws in the middle of the housing, screw
number 4 down from the top of the housing.
Attention! The front of the device is made
of glass! Handle with care! Shattered
glass can cause cutting injuries! Place the
glass on a clean, soft surface.
6. Be careful not to break the device cable, or
touch a sharp surface. Do not allow the cable to
come into contact with the housing, as it may
overheat during use.
7. Place the wood decoration or, if required, the supplied“crystals”in the combustion chamber and arrange them according to your taste.
8. Ask for help to replace the glass faceplate. Use the xing screws on each side of the device to reattach the front panel.
9. Make sure the device is turned o. Connect the mains plug of the appliance to the mains socket. The device beeps to indicate that it
is ready for operation.
HOW TO USE THE DEVICE:
There are two ways to control the replace:
1. By using the touch screen ont he panel
2. By using the remote
The icons on the replace touch screen and the remote serve the same functions.
When controlling the replace, please note that it takes a few seconds for the control unit to receive the given instruction and process it.
On/o switch: Press the button on the touch panel or remote control and you will hear a short signal, the electric replace will
turn on, the power icon will turn blue and the other buttons will light white, the display will show the room temperature.
Device shutdown: Press the POWER button on the touch panel or remote control and you will hear a short signal, the light will
go out and the replace, including the heating, will turn o. The POWER indicator will light up in red on both the unit and the remote
control,the fan inside the unit will operatefor another 10secondsafterthe poweris turned o,then the replacewill enterstandby mode.

6
High and low temperature adjustment:
Press and hold the„HEATER”button on the replace control panel for 3 seconds, then switch the device between 0C and 0F. (note:
This function is not available on the remote control.) Start temperature 22 0C (72 0F), if the room temperature is lower then the device
starts in high heating mode, if you want to switch to low heating mode, press the HEAT button to switch (after the rst press the
display shows the current mode, after pressing it again it switches to the desired mode, if you press the button again, it switches o
the heating mode. (H / L / O = high / low / o heating). You will hear a signal after each change, if you want to deactivate the heating
function, you can also reduce the temperature with the„DOWN”button.
Time adjustment:
You can set the timer from 0 to 12 hours. After switching on, the timer is set to 0 hours,You can set the timer using the touch panel on
the unit or theTIME button on the remote control, Once the replace is activated and you press theTIME button ,“00”will ash on
the display, then the number of times you press theTIME button it will change.
(00-30-1H-2H-3H-4H-5H-6H-7H-8H-9H-10H-11H-12H).
When you have reached the time you want to schedule, do not press the button again.
After the display ashes for 10 seconds and there is no status change, the display will show the room temperature again.
Temperature increasing buttons:
Temperature change range from 15 0C (60 0F) to 36 0C (97 0F), (default temperature 22 0C / 72 0F), press the up button and after each
press the temperature will rise by 1 0C / 1 0F. After a long press, the temperature will rise continuously.( Note This function does not work
with the remote control.)When in temperature setting mode, the temperature part will ash on the display. If no button is pressed for
10 seconds, the display will reset.
Temperature adjustment:
Temperature change range from 15 0C (60 0F) to 36 0C (97 0F), (default temperature 22 0C / 72 0F), press the up button and after each
press the temperature will decrease by 1 0C / 1 0F. After a long press, the temperature will decrease continuously. (NoteThis function does
not work with the remote control.) When in temperature setting mode, the temperature part will ash on the display. If no button is
pressed for 10 seconds, the display will reset.
DIMMER function:
The ame brightness is at maximum by default. Flame brightness has 5 levels. If you press the DIMMER button , the brightness will
decrease and after each press the brightness will decrease if the display shows -1, you have reached the darkest mode, if you press the
DIMMER button again, it will reset (brightest mode)
Flame color changing:
By default, the ame is orange when you press the COLOR MODE button on the remote control, the display temperature display
changes to a color display:
(C1, C2, C3, C4, C5 , C6 , C7, C8, C9)
Each time you press a button, it will change color:
(C1) orange, (C2) green, (C3) blue, (C4) white, (C5) green + orange, (C6) orange + blue, (C7) orange + white, (C8) green + blue,
(C9) green + white
Child safety function:
The electric replace has a locking function that you can both activate using the remote and the panel, after use, press the “up” and
“down”buttons simultaneously for 3 seconds or press and hold the child lock button on the remote control. You will then hear a
sound indicating that the replace is closed,The buttons do not work. If you want to control the appliance again, press and hold the„up”
and„down”buttons for 3 seconds or the child lock button on the remote control for 1 second, you will hear a signal and the child lock
will be released.
Time set hour: Press the button once to set the hour unit (setting range 00-23)
Time set minute: Press the button once to add one minute (setting range 00-59)

7
To set the days of the week: Press the button, each time you press the day icon, it jumps from left to right and ashes.
Weekly timer function: The electric replace has a weekly on / o timer function. button.
Weekly timer settings, on and o timer activation. button. (Please do not schedule the replace at a time when you
cannot monitor its operation!)
CONTROL BY REMOTE:
Remove the foil from the battery compartment of the remote control, and the remote control will be
ready for use.
RELEASE
PULL
OPEN
PUSH
CR2025
RELEASE
CR2025
Use the same buttons you found on the replace control.The control of the remote control works with infrared technology, so point the
remote towards the replace you want to use it properly. The infrared signal works from a maximum distance of 4-5 meters, make sure
that no objects or people get between you and the replace during the control.
Temperature correction:
If you nd that the temperature measurement of the device is inaccurate, you have the opportunity to ne-tune and calibrate it. To
do this, press the button marked for 3 seconds. The display is now ashing. The display will show 0, which you can change
by pressing the + and - buttons. This allows you to increase or decrease the measured temperature by the set °C value. Fine tuning is
possible in the range of -9 to +9 degrees.
Overheating protection:
If the device overheats for some reason, it will turn o automatically. Remove any objects that caused overheating. To safely restart the
replace, turn o the power for 15 minutes. Once the appliance has cooled down, it will switch on again.
Cleaning:
Always switch o, unplug and let the appliance cool down before cleaning. Use a dry cloth or vacuum cleaner to remove dust. The
housing should only be wiped with a slightly damp cloth, making sure that no moisture enters the device! Do not use chemicals or
alcohol during cleaning!
Storage:
Store in a cool, dry place. Do not throw away the product box. You can use it to store the device when not in use. Caution Only put the
appliance back in its box if it has cooled down properly.

8
MALFUNCTIONS:
Problem Reason Solution
The replace switches o and won’t
turn on
The replace is overheated and the safety unit
is turned o or the circuit breaker is open. Loose
cables, wires, poor connection.
Unplug the power cord, wait 5
minutes, and then plug it in again.
Check the wiring connections
The ame isn’t moving The ame engine is broken Contact an expert who can replace the
replace motor
The ame won’t show up The ame unit is out of it’s place Flame rod is not in place, may have
moved during transport.This problem
can be solved by removing the glass
panel and then turning it upside down
to remove some screws that hold the
ame rod in place and then move it
into place.
If in doubt, seek expert advice.
The rewood isn’t glowing Embers are o Turn the ame button to the high
position
The remote doesn’t work Low battery Replace the battery
Remote isn’t pointed at the device Point the remote control at the
appliance, more precisely at the
center of the glass panel towards the
rewood.
The remote control and / or sensor are damaged Replace the remote control and / or
sensor
Proper disposal of the appliance (Electrical appliance):
(Valid in the European Union and all other European countries participating in selective collection) According to Directive 2012/19 / EU,
electrical waste and appliances must not be disposed of with household waste. Old appliances should be placed in a bin to maximize the
recyclingofrawmaterials,thus reducingtheir impact on human health and theenvironment.Thecrossed-out wheeled-binsymbol must
appear on all products for which separate collection is required. Consumers should contact their local authorities for more information.
DE
Elektrischer eingebauter Kamin - Heizlüfter
Sehr geehrter Kunde, vielenDank, dassSie unserProdukt ausgewählthaben, wirhoen, unserProdukt kommt Ihnenlange zugute.
Es gibt nichts Schöneres, als an einem kalten Wintertag vor dem Kamin zu sitzen. Der multifunktionelle, eingebaute Kamin ist eine perfekte
NachbildungdesursprünglichenKamins:EsgibtwirklichkeitsgetreueFlammeneekteundglühendeHolzstücke;es kannjedochauchalsHeizung
verwendet werden. Eine romantische Atmosphäre ist garantiert. In kalten Winternächten können Sie die Intensität des Heizkörpers (950 W,
2000W) bei Bedarf auf zwei Leistungsstufen einstellen, die für die gelegentliche, periodische Beheizung eines Raums von bis zu 30 m² geeignet
sind. Auf dieseWeise wird nicht nur der Flameneekt, sondern auch das Wärmegefühl wirklichkeitsgetreu. Die genaueTemperaturregelung wird
durch einen eingebauten Thermostat gewährleistet, der über der mitgelieferten Fernbedienung eingestellt werden kann. Der Flammeneekt
kann unabhängig von der Heizfunktion verwendet werden, sodass Sie zu jeder Zeit im Jahr die magische Atmosphäre eines„brennenden Feuers”
im Kamin bewundern können. Die Zubehörkristalle verleihen dem Brennraum des Kamins ein exklusiveres Design.

9
MALFUNCTIONS:
Problem Reason Solution
The replace switches o and won’t
turn on
The replace is overheated and the safety unit
is turned o or the circuit breaker is open. Loose
cables, wires, poor connection.
Unplug the power cord, wait 5
minutes, and then plug it in again.
Check the wiring connections
The ame isn’t moving The ame engine is broken Contact an expert who can replace the
replace motor
The ame won’t show up The ame unit is out of it’s place Flame rod is not in place, may have
moved during transport.This problem
can be solved by removing the glass
panel and then turning it upside down
to remove some screws that hold the
ame rod in place and then move it
into place.
If in doubt, seek expert advice.
The rewood isn’t glowing Embers are o Turn the ame button to the high
position
The remote doesn’t work Low battery Replace the battery
Remote isn’t pointed at the device Point the remote control at the
appliance, more precisely at the
center of the glass panel towards the
rewood.
The remote control and / or sensor are damaged Replace the remote control and / or
sensor
Proper disposal of the appliance (Electrical appliance):
(Valid in the European Union and all other European countries participating in selective collection) According to Directive 2012/19 / EU,
electrical waste and appliances must not be disposed of with household waste. Old appliances should be placed in a bin to maximize the
recyclingofrawmaterials,thus reducingtheir impact on human health and theenvironment.Thecrossed-out wheeled-binsymbol must
appear on all products for which separate collection is required. Consumers should contact their local authorities for more information.
DE
Elektrischer eingebauter Kamin - Heizlüfter
Sehr geehrter Kunde, vielenDank, dassSie unserProdukt ausgewählthaben, wirhoen, unserProdukt kommt Ihnenlange zugute.
Es gibt nichts Schöneres, als an einem kalten Wintertag vor dem Kamin zu sitzen. Der multifunktionelle, eingebaute Kamin ist eine perfekte
NachbildungdesursprünglichenKamins:EsgibtwirklichkeitsgetreueFlammeneekteundglühendeHolzstücke;es kannjedochauchalsHeizung
verwendet werden. Eine romantische Atmosphäre ist garantiert. In kalten Winternächten können Sie die Intensität des Heizkörpers (950 W,
2000W) bei Bedarf auf zwei Leistungsstufen einstellen, die für die gelegentliche, periodische Beheizung eines Raums von bis zu 30 m² geeignet
sind. Auf dieseWeise wird nicht nur der Flameneekt, sondern auch das Wärmegefühl wirklichkeitsgetreu. Die genaueTemperaturregelung wird
durch einen eingebauten Thermostat gewährleistet, der über der mitgelieferten Fernbedienung eingestellt werden kann. Der Flammeneekt
kann unabhängig von der Heizfunktion verwendet werden, sodass Sie zu jeder Zeit im Jahr die magische Atmosphäre eines„brennenden Feuers”
im Kamin bewundern können. Die Zubehörkristalle verleihen dem Brennraum des Kamins ein exklusiveres Design.
• Sicherer Betrieb • Massives Gehäuse
• Kein Feuer, Funken oder Ruß •Versenkbar
• Zwei Leistungsstufen, hohe Heizleistung • Der Lichteekt kann auch separat eingeschaltet werden,
verstellbare Lichtstärke
•Wöchentliche Zeiteinstellung • Romantische Atmosphäre ab der ersten Minute
• Überhitzungsschutz • Es ist den Kaminen täuschend ähnlich
Achtung! Einige Stellen auf dem Gehäuse können durchWärmestrahlung überhitzen.
Design: Wandmontage, versenkbar EingebauterThermostat: Ja, manuell
Spannungsversorgung: AC 220 - 240V, ~ 50/60 Hz Schutzart: IP20
LED-Leistung: 1.6W Überhitzungsschutz: Ja
Heizleistung: 950 - 2000W Geräuschpegel: 50 dB
Empfohlener
Anwendungsbereich:
In einem Raum von max. 30 m² Länge des Stromkabels: 140 cm
Betriebstemperatur: 15 °C - 30 °C Material: Metall + Glas
Lagerungstemperatur: 15 °C - 30 °C Größe: 88 x 56 x 15 cm
DirekteWärmeleistung: 950 - 2000 W Farbe: Schwarz
Energieezienzklasse (EU2021): Klasse„G”
BEDIENUNGSANWEISUNG
GEFAHR
Allgemeine Hinweise: Erstickungsgefahr. Bitte bewahren Sie dieVerpackung des Geräts außerhalb der Reichweite von Kindern auf, da
dies zum Ersticken führen kann. Das Gerät darf nur von Erwachsenen benutzt werden. Der Aufbewahrungsort muss so gewählt werden,
dass Kinder versehentlich darauf nicht zugreifen können. Kinder dürfen mit dem Gerät nicht spielen.
Stromschlaggefahr:BetreibenSie dasGerätniemalsmitnassen, feuchtenHänden. Esist strengstensverboten,das Geräteinschließlich
Netzstecker, Kabel und Berührungsbildschirm mit nassen Händen zu berühren. Das Gerät darf an Wechselstrom nur mit der richtigen
Spannung angeschlossen werden. Richten Sie das Gerät nicht direkt auf Elektrogeräte, da heiße Luft in die Geräte eindringen und diese
beschädigen kann.Verwenden Sie das Gerät nicht in der Nähe einer Badewanne, Dusche, eines Schwimmbades oder einer Spüle. Ziehen
Sie das Gerät am Stecker aus der Steckdose.Verlegen Sie das Gerätekabel niemals an derVorderseite des Geräts.
Betrieb:MachenSiesichvordemGebrauchmitdenUmweltvorschriftenbekannt.VerwendenSiedasGerätnichtinexplosionsgefährdeten
Bereichen. Bei Verwendung an besonderen Orten (z. B. Tankstellen, Bäder) sind die örtlichen Sicherheitsbestimmungen zu beachten.
PlanenSie den Ort des Geräts,führen Sie Messungen durch,verwendenSie vorder Montage ein Maßband. DeckenSie das Gerätnichtmit
beliebigem Material (Betttuch, Decke ...) ab. Stellen Sie keine Möbel oder Gegenstände im Umkreis von 2 Metern vor das Gerät, um Feuer
zu vermeiden. Das Gerät darf nicht über eine Steckdose mit Zeitschalter betrieben werden. Das Gerät ist nicht als primäre Heizquelle für
Räume geeignet. Das Gerät ist für gelegentliche, periodische (kurzfristige) Heizung vorgesehen.
WARNUNG!
Allgemeine Hinweise: Das Gerät darf nur bestimmungsgemäß verwendet werden. Achten Sie beim Gebrauch auf die körperliche
Unversehrtheit und Sicherheit der Personen in Ihrer Umgebung (insbesondere von Kindern). Das Gerät darf nur von Personen benutzt
werden, die diese Gebrauchsanweisung gelesen und verstanden haben, und die es dementsprechend bedienen können. Personen
mit eingeschränkten geistigen, physischen oder sensorischen Fähigkeiten dürfen das Gerät nicht benutzen. Kinder dürfen das Gerät
nicht benutzen. Stellen Sie sicher, dass das heiße Gerät nach dem Gebrauch an einem gut belüfteten Ort abkühlen kann und keine
Verletzungen verursacht. Informieren Sie die Personen in Ihrer Umgebung über den betriebswarmen Zustand des Geräts.

10
Stromschlaggefahr: Schließen Sie das Gerät nur an eine Netzsteckdose an, die betriebssicher ist oder von einem Spezialisten gemäß
IEC 60364- 1 installiert wurde. Stellen Sie vor jedem Gebrauch sicher, dass das Gerät und der Netzstecker intakt sind. Verwenden
Sie nur unbeschädigte Geräte. Wenn Sie Schäden feststellen, dürfen Sie das Gerät nicht benutzen. Bitte wenden Sie sich an Ihren
Fachhändler. Achten Sie während des Gebrauchs auf die Integrität des Netzkabels und vermeiden Sie Kanten oder Gegenstände, die
die Kabeloberäche beschädigen können. Vermeiden Sie die Verwendung von Verlängerungskabeln oder Steckdosenleisten, da diese
während des Betriebs ein Risikofaktor darstellen.Trennen Sie das Gerät vom Stromkreis, wenn Sie es nicht benutzen.Wartungsarbeiten
dürfen nur bei gezogenem Netzstecker durchgeführt werden.
Betrieb: Verbrennungsgefahr. Berühren Sie niemals den Teil (Unterteil) des Heizlüfters. Lassen Sie das Gerät immer abkühlen, bevor
Sie das Gehäuse berühren, um Verbrennungen zu vermeiden. Das Gerät darf nur betrieben werden, wenn es mit den Werkszubehören
vollständig installiert ist. Wenn ein Zubehör beschädigt ist, muss es vor dem Gebrauch ausgetauscht werden. Lassen Sie das Gerät an
einem gut belüfteten Ort vollständig abkühlen, bevor Sie es aufbewahren. Überprüfen Sie während des Gebrauchs regelmäßig, ob das
Gerät nicht überhitzt ist und die Lüftungsönungen nicht verstopft sind.
VORSICHT!
Allgemeine Hinweise: Verwenden Sie das Gerät nicht, wenn Sie es zuvor fallen gelassen oder aus Versehen getroen haben und es
sichtbar beschädigt ist . Es ist verbindlich, Sicherheitsvorrichtungen bestimmungsgemäß zu verwenden. Es ist streng verboten, diese zu
modizieren oder zu deaktivieren.
Betrieb: Betreiben und lagern Sie das Gerät immer entsprechend den Angaben. Überprüfen Sie immer die Integrität von Gerät, Kabel,
Stecker und Zubehör.Verwenden Sie das Gerät im Schadensfall nicht.
ACHTUNG!
Betrieb: Verwenden Sie das Gerät nur über dem Gefrierpunkt 0 °C, um Kondensation und Stromschlag zu vermeiden. Lassen Sie das
Gerät niemals unbeaufsichtigt, wenn es an die Stromquelle angeschlossen ist. Schützen Sie das Gerät vor Feuchtigkeit und Wasser.
Lagern Sie das Gerät nicht bei hohenTemperaturschwankungen,Wetterbedingungen oder im Freien.
ACHTUNG!
BestimmteTeile des Produkts können sich aufwärmen undVerbrennungen verursachen.Vorsicht ist geboten bei Kindern.
ACHTUNG!
Das Gerät darf in eine Gipskartonwand oder in eine spezielle Holzwand oder -kiste nur versenkt eingebaut werden. Stellen Sie sicher,
dass das Gerät während der Installation ordnungsgemäß belüftet ist. Die internen Stromkreise und Komponenten werden durch
die Lüftungsönungen oben und unten am Kamin gekühlt. Zur Belüftung muss ein Luftraum geeigneter Größe vorhanden sein, die
Önungen dürfen nicht isoliert oder abgedeckt sein.
ACHTUNG!
Davon kann nur abgewichen werden, wenn Sie das Gerät an einer Wand (Aufputz) platzieren. In diesem Fall ist es auch möglich, das
Gerät an Ziegeln, Beton, Silikat und anderenWänden zu befestigen.
ACHTUNG!
Installationsarbeiten dürfen nur von einer Fachkraft durchgeführt werden. Eine sichere Installation erfordert zwei Personen.
ACHTUNG!
Der Heizkörper enthält keineVorrichtung zur Regelung der Raumtemperatur.Verwenden Sie es nicht unbeaufsichtigt in einem Raum mit
Personen, die den Raum nicht verlassen können.
ACHTUNG!
Lassen Sie mindestens 100 cm Freiraum über dem Heizlüfter und 200 cm vor dem Heizlüfter. Verwenden Sie den Heizlüfter niemals in
einem Raum mit brennbarem, explosivem Öl, Benzin oder Gas.

11
INSTALLATIONSANLEITUNG:
WährendderInstallationmuss derOrtdesGerätssogewähltwerden,dass dasGerätnichtmitFeuchtigkeitinBerührungkommt.Verlegen
Sie keine Heizungsrohre, Gasleitungen oder Stromleitungen in unmittelbarer Nähe des Geräts. Installieren Sie das Gerät mindestens
30 cm hoch, so dass der Abstand zwischen Decke und Gerät mindestens 100 cm ist. Es wird empfohlen, den unteren Teil des Geräts in
einer Höhe von 60 cm über dem Boden zu platzieren, damit der Kamin mit loderndem Feuer das beste visuelle Erlebnis ermöglicht.
EINBAUMONTAGE:
Die mitgelieferten Zubehöre ermöglichen die Einbaumontage auf Gipskartonwänden und Holzoberächen. Stellen Sie vor
der Installation sicher, dass der Wandabschnitt eine ausreichende Tragkraft hat und die Stromversorgung für das Gerät an
der angegebenen Stelle sichergestellt ist. Bei der Befestigung an einer Holzoberäche ist es nicht erforderlich, die Löcher
vorzubohren und Dübel für die Schrauben zu verwenden.
W
85 cm
H
48 cm
1. Wählen Sie die Wand aus, an der Sie das Gerät platzieren wollen,
und sägen Sie ein Loch in der richtigen Größe für das Gerät.
Verwenden Sie eineWasserwaage und einen Bleistift, um das Loch
zu markieren. Sägen Sie je nach Material mit richtigen Zähnen.
2. Führen Sie die Gipskartondübel in die Löcher
bei der Befestigung an einer Gipskartonwand.
Achtung! Die Frontplatte des Geräts
besteht aus Glas. Gehen Sie damit
vorsichtig um. Zerbrochenes Glas kann
zu Schnittverletzungen führen. Stellen
Sie das Glas auf eine saubere, weiche
Oberäche.
3.EntfernenSie das Glas von derVorderseitedes
Geräts. Entfernen Sie die Schrauben an beiden
Seiten des Geräts. Sie nden diese Schrauben
in der Mitte des Gehäuses, diese ist die vierte
Schraube von der Oberseite des Gehäuses.
4. Stellen Sie den Kamin auf das vorbereitete
Loch und befestigen Sie es mit den 4 Schrauben. Achten Sie darauf, das Gerätekabel nicht zu brechen oder mit einer scharfen Oberäche zu
berühren. Berühren Sie das Kabel nicht mit dem Gehäuse, da es während des Gebrauchs überhitzen kann.
5. Legen Sie die Holzdekoration, bzw. die mitgelieferten„Kristalle“ in den Brennraum und ordnen Sie sie nach Ihrem Geschmack an.
6. Bitten Sie um Hilfe beim Zurücklegen der Glasfrontplatte. Befestigen Sie die Frontplatte mit den Befestigungsschrauben, die an beiden
Seiten des Geräts zu nden sind, wieder am Kamingehäuse (in der Ebene derWand können Sie dies seitlich durchführen).
7. Stellen Sie sicher, dass das Gerät ausgeschaltet ist. Schließen Sie den Netzstecker des Geräts an die Netzsteckdose an. Das Gerät gibt einen
Signalton aus, wenn es betriebsbereit ist.

12
AUFPUTZMONTAGE NICHT VERSENKT:
1. Verwenden Sie einen Bohrer, um die
Befestigungslöcher der Halterung zu bohren.
Verwenden Sie zum Bohren einen 8 mm
langen Bohrer. Die Tiefe der Löcher muss
mindestens 26 mm betragen. Verwenden Sie
keine kleinere Befestigungsgröße.
2. SetzenSie diemitgelieferten Dübelin dieLöcher
ein, bis sie in einer Linie mit derWand sind.
3. Schrauben Sie die Schrauben mit einem
Schraubendreher so ein, dass ihre Köpfe 3-4
mm von derWandebene entfernt sind.
4. Stellen Sie den Kamin auf die Schrauben und stellen Sie sicher, dass es stabil und genau sitzt. Passen Sie bei Bedarf die Position
der Schrauben an, um den Kamin an der Wand zu befestigen.
5. Entfernen Sie das Glas von der Vorderseite des
Geräts. Entfernen Sie die Schrauben an beiden Seiten
des Geräts. Sie nden diese Schrauben in der Mitte des
Gehäuses, diese ist die vierte Schraube von der
Oberseite des Gehäuses.
Achtung. Die Frontplatte des Geräts besteht
aus Glas. Gehen Sie damit vorsichtig um.
Zerbrochenes Glas kann zu Schnittverletzungen
führen. Stellen Sie das Glas auf eine saubere,
weiche Oberäche.t
6. Achten Sie darauf, das Gerätekabel nicht zu brechen
oder mit einer scharfen Oberäche zu berühren.
Berühren Sie das Kabel nicht mit dem Gehäuse, da es während des Gebrauchs überhitzen kann.
7. Legen Sie die Holzdekoration, bzw. die mitgelieferten„Kristalle“ in den Brennraum und ordnen Sie sie nach Ihrem Geschmack an.
8.BittenSie um Hilfe beim ZurücklegenderGlasfrontplatte.Befestigen Sie die Frontplatte mit den Befestigungsschrauben, die an beiden
Seiten des Geräts zu nden sind.
9. Stellen Sie sicher, dass das Gerät ausgeschaltet ist. Schließen Sie den Netzstecker des Geräts an die Netzsteckdose an. Das Gerät gibt
einen Signalton aus, wenn es betriebsbereit ist.
SO VERWENDEN SIE DAS GERÄT
Es gibt zwei Möglichkeiten, den Kamin zu steuern:
1. mit dem Berührungsbildschirm am Kamin
2. mit der mitgelieferten Fernbedienung
Die Symbole auf dem Berührungsbildschirm des Kamins und auf der Fernbedienung erfüllen dieselben Funktionen.
Beachten Sie bei der Steuerung des Kamins, dass es einige Sekunden dauert, bis die Steuereinheit das Signal
empfängt und verarbeitet.
Ein/Aus-Schalter: Drücken Sie dieTaste auf dem Berührungsbildschirm oder der Fernbedienung, dann ertönt ein kurzer Piepton,
der elektrische Kamin schaltet sich ein, das Einschalten-Symbol leuchtet blau und die anderen Tasten leuchten weiß, das Display zeigt
die Raumtemperatur an.
Gerät stoppen: Drücken Sie die POWER-Taste auf dem Berührungsbildschirm oder der Fernbedienung, dann ertönt ein kurzer Piepton.
Das Licht erlischt, der Kamin und die Heizung schalten sich aus. Das POWER-Symbol leuchtet sowohl am Gerät als auch auf der Fernbedienung
rot auf. DerVentilator im Gerät läuft nach dem Ausschalten weitere 10 Sekunden lang. Anschließend wechselt der Kamin in den Standby-Modus.

13
Einstellung von hohen und niedrigenTemperaturen:
Halten Sie die „HEATER”-Taste auf dem Berührungsbildschirm des Kamins 3 Sekunden lang gedrückt, dann wechselt das Gerät
zwischen 0C und 0F. (Hinweis: Diese Funktion ist auf der Fernbedienung nicht verfügbar.) Standardtemperatur liegt bei 22 0C (72 0F),
wenn die Raumtemperatur niedriger als die Standardtemperatur ist, startet das Gerät mit einem hohen Heizmodus.Wenn Sie in einen
niedrigeren Heizmodus wechseln wollen, drücken Sie die HEATER-Taste, um zu wechseln (nach dem ersten Drücken zeigt das Display den
aktuellen Modus an, durch erneutes Drücken wird in den gewünschten Modus gewechselt.Wenn Sie dieTaste erneut drücken, wird der
Heizmodus ausgeschaltet. (H / L / O = hoher / niedriger / ausgeschalteter Heizmodus). Nach jedem Wechsel ertönt ein Piepton.Wenn
Sie die Heizfunktion deaktivieren wollen, können Sie dieTemperatur auch mit derTaste„DOWN”senken.
Zeitschaltuhr einstellen:
Sie können die Zeitschaltuhr zwischen 0 und 12 Uhr einstellen. Nach dem Einschalten ist die Zeitschaltuhr automatisch auf 0 Uhr
eingestellt. Sie können die Zeitschaltuhr mit dem Berührungsbildschirm am Gerät oder der Fernbedienung durch Drücken der TIME-
Taste einstellen. Drücken Sie nach dem Einschalten des Kamins die TIME-Taste auf dem Display oder auf der Fernbedienung. Am
Display wird„00”blinken. Jedes Mal, wenn SieTIME-Taste drücken, wird die Uhrzeit geändert.
(00-30-1H-2H-3H-4H-5H-6H-7H-8H-9H-10H-11H-12H).
Wenn Sie die gewünschte Uhrzeit eingestellt haben, drücken Sie dieTaste nicht erneut.
Nachdem das Display 10 Sekunden lang blinkt, und wenn es keine weitere Statusänderung erfolgt, zeigt die Anzeige erneut die
Raumtemperatur an.
Tasten zum Erhöhen der Temperatur:
Der Temperatureinstellbereich reicht von 15 0C (60 0F) bis 36 0C (97 0F) (Standardtemperatur ist 22 0C / 72 0F). Drücken Sie die Aufwärts-
Taste und nach jedem Drücken steigt die Temperatur um 1 0C / 1 0F. Nach langem Drücken steigt die Temperatur kontinuierlich an.
(Hinweis: Diese Funktion ist auf der Fernbedienung nicht verfügbar.) ImTemperatureinstellungsmodus blinkt dieTemperaturanzeige auf
dem Display.Wenn 10 Sekunden lang keineTaste gedrückt wird, wird das Display zurückgesetzt.
Tasten zum Verringern der Temperatur:
Der Temperatureinstellbereich reicht von 15 0C (60 0F) bis 36 0C (97 0F) (Standardtemperatur ist 22 0C / 72 0F). Drücken Sie die Abwärts-
Taste und nach jedem Drücken sinkt die Temperatur um 1 0C / 1 0F. Nach langem Drücken sinkt die Temperatur kontinuierlich.
(Hinweis: Diese Funktion ist auf der Fernbedienung nicht verfügbar.) ImTemperatureinstellungsmodus blinkt dieTemperaturanzeige auf
dem Display.Wenn 10 Sekunden lang keineTaste gedrückt wird, wird das Display zurückgesetzt.
Helligkeitsregelung:
Die Flammenhelligkeit ist standardmäßig maximal. Die Flammenhelligkeit hat 5 Stufen. Wenn Sie die DIMMER-Taste drücken,
wird die Helligkeit reduziert, und nach jedem Drücken weiter reduziert, wenn auf dem Display -1 angezeigt wird, dann haben Sie den
dunkelsten Modus erreicht. Wenn Sie die DIMMER-Taste erneut drücken, kehrt die Flammenhelligkeit zur Standardposition (zum
hellsten Modus) zurück.)
Veränderung der Flammenfarbe:
Die Flammenfarbe ist standardmäßig orange, wenn Sie die Taste COLOR MODE auf der Fernbedienung drücken, ändert sich die
Temperaturanzeige in eine Farbanzeige:
(C1, C2, C3, C4, C5, C6, C7, C8, C9)
Jedes Mal, wenn Sie dieTaste drücken, ändert sich die Farbe:
(C1) orange, (C2) grün, (C3) blau, (C4) weiß, (C5) grün + orange, (C6) orange + blau, (C7) orange + weiß, (C8) grün + blau, (C9) grün +Weiß
Kindersicherungsfunktion:
Der elektrische Kamin verfügt über eine Kindersicherungsfunktion, die sowohl mit der Fernbedienung als auch mit dem
Berührungsbildschirm aktiviert werden kann. Wenn Sie den Kamin nicht mehr benutzen, drücken Sie gleichzeitig 3 Sekunden lang
die Aufwärts- und Abwärts-Tasten oder halten Sie die Kindersicherungstaste auf der Fernbedienung gedrückt. Ein Piepton ertönt
und signalisiert, dass der Kamin geschlossen ist. Die Tasten funktionieren nicht. Wenn Sie das Gerät erneut steuern wollen, halten Sie
die Aufwärts- und Abwärts-Tasten 3 Sekunden lang gedrückt oder die Kindersicherungstaste auf der Fernbedienung 1 Sekunde lang
gedrückt. Ein Piepton ertönt und die Kindersicherung wird aufgehoben.

14
Stunde einstellen: Drücken Sie dieTaste einmal, um die Stundeneinheit einzustellen (Einstellbereich 00-23).
Minute einstellen: Drücken Sie dieTaste einmal, um die Minute zu ändern (Einstellbereich 00-59).
Wochentag einstellen: Drücken Sie dieTaste . Jedes Mal, wenn Sie dieTaste drücken, springt das SymbolWochentag von links
nach rechts und blinkt.
Wochenschaltuhr-Funktion: Der elektrische Kamin verfügt über eineWochenschaltuhr-Funktion. Taste.
Einstellung der Wochenschaltuhr, Ein- und Ausschalten, Aktivierung der Wochenschaltuhr. Taste (Bitte aktivieren Sie
den Kamin nicht zu einem Zeitpunkt, an dem Sie den Betrieb nicht überwachen können.)
STEUERUNG MIT FERNBEDIENUNG
DAY
SET UP
HOUR
MIN
WEEK/TIME
Entfernen Sie die Folie vom Batteriefach der Fernbedienung. Die Fernbedienung ist nun betriebsbereit.
RELEASE
PULL
OPEN
PUSH
CR2025
RELEASE
CR2025
Verwenden Sie die gleichen Tasten, die Sie für die Steuerung am Kamin verwendet haben. Die Fernbedienung funktioniert mit
Infrarottechnologie. Richten Sie die Fernbedienung auf den Kamin. Das Infrarotsignal funktioniert aus einer maximalen Entfernung von
4 bis 5 Metern. Achten Sie darauf, dass während der Steuerung keine Gegenstände oder Personen zwischen Ihnen und dem Kamin sind.
Temperatur anpassen:
WennSie feststellen,dass dieTemperaturmessungdesGerätsungenauist,habenSie dieMöglichkeit,eszu optimierenundzukalibrieren.
Drücken Sie dazu 3 Sekunden lang die „TIME“-Taste. Das Display fängt an zu blinken. Das Display zeigt 0 an, denWert können Sie
durch Drücken derTasten + und - ändern. Auf dieseWeise können Sie die gemesseneTemperatur um den eingestellten °C-Wert erhöhen
bzw. verringern. EineTemperaturoptimierung ist im Bereich von -9 bis +9 Grad möglich.
Überhitzungsschutz: Wenn sich das Gerät aus irgendeinem Grund erwärmt, schaltet es sich automatisch aus. Entfernen Sie alle
Gegenstände, die zu Überhitzung geführt haben. Um den Kamin sicher neu zu starten, trennen Sie sofort die Stromversorgung für 15
Minuten. Sobald das Gerät abgekühlt ist, schaltet es sich wieder ein.
Reinigung: Bevor Sie das Produkt reinigen, schalten Sie es aus, trennen Sie den Netzstecker von der Steckdose und lassen Sie es
ausreichend abkühlen. Verwenden Sie ein trockenes Tuch oder einen Staubsauger, um Staub zu entfernen. Das Gehäuse darf nur mit
einem leicht feuchtenTuch abgewischt werden. Achten Sie dabei darauf, dass keine Feuchtigkeit in das Gerät eindringt.Verwenden Sie
keine Chemikalien oder Alkohol zur Reinigung.
Lagerung: An einem trockenen, kühlen Ort lagern. Werfen Sie die Verpackung des Produktes nicht weg. Sie können die Verpackung
verwenden, um das Gerät zu lagern, wenn es nicht verwendet wird. Vorsicht. Legen Sie das Gerät nur dann wieder in die Verpackung,
wenn es ausreichend abgekühlt ist.

15
FEHLFUNKTIONEN
Problem Reason Solution
Kamin schaltet sich aus und schaltet
sich nicht wieder ein
Der Kamin ist überhitzt und die Schutzvorrichtung
hat ihn ausgeschaltet oder der Leistungsschalter
ist oen.
Lose Kabel, Drähte, schlechter Anschluss
Ziehen Sie das Netzkabel aus der
Steckdose, warten Sie 5 Minuten und
schließen Sie es dann wieder an.
Überprüfen Sie den Anschluss der
Kabel
Flamme bewegt sich nicht Flammenmotor ist defekt Wenden Sie sich an einen
Sachverständigen, der den
Kaminmotor austauschen kann
Flamme ist nicht sichtbar Flammeneinheit fehlt Flammenstange fehlt, bzw. ist
möglicherweise während des
Transports verrutscht. Dieses Problem
kann gelöst werden, indem die
Glasfrontplatte entfernt und dann
auf den Kopf gestellt wird. Entfernen
Sie einige Schrauben, die die
Flammenstange halten, und bringen
Sie sie in die richtige Position. Wenn
Sie unsicher sind, wenden Sie sich an
einen Sachverständigen.
Brennholz glüht nicht Glut ist ausgeschaltet Schalten Sie die Flammentaste auf
eine hohe Position
Fernbedienung funktioniert nicht Niedriger Akku-Ladezustand Wechseln Sie die Batterie
Fernbedienung wird nicht auf das Gerät gerichtet Richten Sie die Fernbedienung auf das
Gerät, genauer gesagt auf die Mitte
der Glasfrontplatte, auf das Brennholz.
Fernbedienung und/oder Sensor ist defekt Ersetzen Sie die Fernbedienung und /
oder den Sensor
Sachgemäße Entsorgung des Geräts (Elektrisches Gerät): (Gültig in der Europäischen Union und allen anderen europäischen
Ländern, die an einer getrennten Sammlung teilnehmen.) Gemäß der Richtlinie 2012/19/EU dürfen elektrische Abfälle und
Haushaltsgeräte nicht mit dem Hausmüll entsorgt werden. Alte Geräte sollen zur Sammelstelle gebracht werden, um das Recycling
von Rohstoen zu maximieren und deren Auswirkungen auf die menschliche Gesundheit und die Umwelt zu verringern. Das Symbol
des durchgestrichenen Mülleimers auf dem Gerät bedeutet, dass das Gerät einer getrennten Sammlung zugeführt werden muss.
Verbraucher sollen sich mit Ihren örtlichen Behörden inVerbindung setzen, um weitere Informationen zu erhalten.
HU
Elektromos fali kandalló - Hősugárzó + LED
Kedves Vásárló! Köszönjük, hogy termékünket választotta, reméljük sokáig örömét leli használatában.
Nincs is jobb, mint egy hideg, téli napon a kandalló előtt szerettünkkel összebújni. Ez a többfunkciós beépíthető kandalló
tökéletes mása az eredeti kandallóknak: valósághű, lángoló effektet és izzó, parázsló fadarabokat tartalmaz, ugyanakkor
fűtőtestként is kiválóan használható. A romantikus hangulat garantált. Hideg téli éjszakákon, igény szerint két teljesítmény

16
szinten tudja állítani a hősugárzó intenzitását (950 W, 2000 W), amely akár egy 30 m²-es helyiség alkalmankénti, időszakos
fűtésére is alkalmas. Így nem csak a látvány, de a hőérzet is valósághű lesz. A hőmérséklet precíz szabályzásáról beépített
termosztát gondoskodik, melyet a tartozék távirányító segítésével tud beállítani. A láng effekt a fűtés funkciótól függetlenül
használható, így az év bármely napjában gyönyörködhet a kandallóban„égő tűz”varázslatos hangulatában. A tartozék kristályok
még exkluzívabb megjelenést kölcsönöznek a kandalló„égésterének”.
• Biztonságosan üzemeltethető • Masszív váz
• Nincs tűz, szikra és korom • Falba süllyeszthető
• Két fűtési teljesítmény, nagy fűtőerő jellemzi • A fényeekt külön is kapcsolható, állítható fényerő
• Heti időzíthetőség • Romantikus hangulat a bekapcsolás első percétől
•Túlmelegedés védelem • Megtévesztően hasonlít a valódi kandallókra
Figyelem! A burkolat egyes pontjai a hősugárzás hatására átmelegedhetnek!
Kivitel: Falba építhető, süllyeszthető Beépített termosztát: Igen, manuális
Energiaforrás: AC 220 - 240V, ~ 50/60 Hz Védelem: IP20
LED teljesítmény: 1.6W Túlmelegedés elleni védelem: Yes
Fűtési teljesítmény: 950 - 2000W Zajszint: 50 dB
Ajánlott felhasználás: max. 30 m² helyiségben Tápkábel hossza: 140 cm
Üzemi hőmérséklet: 15 °C - 30 °C Anyag: Fém + üveg
Tárolási hőmérséklet: 15 °C - 30 °C Méret: 88 x 56 x 15 cm
Közvetlen hőteljesítmény: 950 - 2000W Szín: Fekete
Energiabesorolás (EU2021): ,,G”osztály
HASZNÁLATI ÚTMUTATÓ
Biztonsági előírások, gyelmeztetések
VESZÉLY!
Általános tanácsok: Fulladásveszély! Kérjük a készülék csomagolását tartsa távol gyermekektől, mert fulladáshoz vezethet. A
készüléket kizárólag felnőttek használhatják, a tárolás helyét úgy kell megválasztani, hogy gyermekek véletlenül sem férhetnek hozzá.
A készülékkel gyermekek nem játszhatnak.
Áramütésveszély: Soha ne üzemeltesse a készüléket nedves, vizes kézzel! A készülék megérintése, beleértve a hálózati dugóját,
kábelét és érintőpaneljét is nedves kézzel szigorúan tilos! A készüléket csak a megfelelő feszültséggel rendelkező váltóáramhoz szabad
csatlakoztatni.Ne irányítsaa készüléketközvetlenülelektromosberendezésekre,mert azokbelsejébejuthat a forrólevegőés károsíthatja
azt. Ne használja a készüléket vizet tartalmazó kád, zuhanyzó, medence, mosogató közelében. A készüléket csak a hálózati dugójánál
fogva csatlakoztassa le az aljzatról. A készülék kábelét soha ne vezesse a készülék előlapján!
Üzemeltetés: Használat előtt bizonyosodjon meg a környezeti előírásokról! Tilos a készüléket robbanásveszélyes helyen használni!
Speciális helyeken történő használat esetén (pl.: töltőállomások, fürdők) a helyi biztonsági szabályozást követve kell eljárni! A
készülék helyét tervezze meg, mérje ki, a telepítés előtt használjon mérőszalagot! A készüléket tilos bármivel letakarni (lepedővel,
takaróval)! A tűzesetek elkerülése érdekében a készülék elé ne rakjon 2 méteres körzetébe semmilyen bútort, tárgyat! A készüléket nem
szabad időzítővel ellátott konnektorról üzemeltetni! A készülék nem alkalmas helyiségek elsődleges fűtési forrásaként. A készüléket
alkalmankénti, időszakos (rövid ideig történő) fűtésre tervezték.

17
FIGYELMEZTETÉS!
Általános tanácsok:A készüléket csak rendeltetésszerűen szabad használni! A használat során ügyeljen a környezetében tartózkodók
(különösen gyermekek) testi épségére és biztonságára. A készüléket csak olyan személyek használhatják, akik ezt a használati útmutatót
elolvasták, megértették és ennek megfelelően tudják üzemeltetni a készüléket! Csökkent szellemi, zikai vagy érzékelő képességgel
rendelkező személyek nem használhatják a készüléket! Gyermekek nem használhatják a készüléket! Ügyeljen arra, hogy a készülék
használatát követően a forró készülék jól szellőző helyen tudjon hűlni, mégse okozzon személyi sérülést senkinek! Tájékoztassa a
környezetében lévő személyeket a készülék üzemmeleg állapotáról!
Áramütésveszély: Csak olyan hálózati aljzathoz csatlakoztassa a készüléket, amelynek biztonságos működéséről meg van győződve,
illetve szakember telepítette IEC 60364-1 szabvány alapján. Minden használat előtt győződjön meg a készülék és a hálózati kábel, csatlakozó
sértetlenségéről! Csak sértetlen készüléket szabad üzemeltetni! Ha bármilyen sérülést tapasztal, a készüléket tilos használni, forduljon
szakszervizhez! A használat során ügyeljen a hálózati kábel épségére, kerülje az olyan éleket, tárgyakat, amelyek sérülést okozhatnak a kábel
felületén. Kerülje a hosszabbító kábelek, elosztók használatát, mert veszélyforrásnak minősülnek az üzemeltetés során. A készüléket mindig
csatlakoztassa le a villamos hálózatról ha nem használja! Karbantartási munkákat csak kihúzott hálózati csatlakozódugó mellett szabad végezni!
Üzemeltetés: Égési sérülés veszély! Soha ne érintse meg a készülék hősugárzó részét (alsó rész)! Az égési sérülések elkerülése végett
a készülékház megérintése előtt mindig hagyja lehűlni a készüléket! A készüléket csak gyári tartozékkal teljesen összeszerelve szabad
üzemeltetni!Habármelyikalkatrészsérült,használat előtt pótolnikell aztújjal.A készülékettároláselőtt hagyja teljesen lehűlni jólszellőző
helyen. A készüléket használat közben időközönként ellenőrizze, hogy nem melegedett-e túl, a szellőzőnyílások nincsenek-e eltömődve.
VIGYÁZAT!
Általános tanácsok: Ne használja a készüléket ha korábban elejtette vagy odaütötte valamihez és szemmel láthatóan károsodott az! A
biztonsági berendezéseket kötelező rendeltetésszerűen használni, azokat módosítani vagy kiiktatni szigorúan tilos!
Üzemeltetés: A készüléket mindig a leírásnak megfelelően üzemeltesse és tárolja! Minden esetben ellenőrizze a készülék, a kábel, a
csatlakozó és a tartozékok sértetlenségét! Károsodás esetén ne használja a készüléket!
FIGYELEM!
Üzemeltetés: Csak fagypont, 0 °C felett használja a készüléket a páralecsapódás és áramütés elkerülése érdekében. Soha ne hagyja
felügyelet nélkül a készüléket, ha az csatlakoztatva van a hálózati áramforráshoz! Óvja a készüléket nedvességtől, víztől! Ne tárolja a
készüléket nagy hőmérsékletingadozásnak, időjárási viszonyoknak kitéve, külső térben.
FIGYELEM!
A termék bizonyos alkatrészei felforrósodhatnak, és égési sérülést okozhatnak. Fokozott gyelmet igényel gyermekek közelében.
FIGYELEM!
A hősugárzó nem tartalmaz készüléket a szobák hőmérsékletének szabályozásához. Ne használja felügyelet nélkül olyan szobában,
melyben olyan ember van, aki azt nem képes elhagyni.
FIGYELEM!
Maradjon legalább 100 cm hely szabadon a hősugárzó felett és 200 cm a hősugárzó előtt. Sose használja a hősugárzó olyan szobában,
amelyben gyúlékony, robbanékony olaj, benzin vagy gáz van.
TELEPÍTÉSI UTASÍTÁSOK:
A telepítés során úgy kell megtalálni a készülék helyét, hogy az nedvességgel ne érintkezzen, közvetlen környezetében ne menjenek
fűtéscsövek, gázcsövek vagy villamos hálózat vezetékei. A készüléket legalább 30 cm magasra telepítse úgy, hogy a mennyezet és a
készülék közötti távolság legalább 100 cm legyen. Javasoljuk a készülék alsó része a talajtól mért 60 cm-es magasságba helyezze, így
biztosítja a legjobb vizuális élményt a kandallóban lobogó tűz.

18
FIGYELEM!
A készüléket süllyesztett formában kizárólag gipszkarton falba, vagy külön erre a célra, fából épített falba, dobozba
szabad telepíteni. A telepítés során gondoskodjon a készülék megfelelő szellőzéséről. A kandalló tetején és alján
találhatószellőzőnyílásokonkeresztülkerülnekhűtésrea belsőáramkörök,alkatrészek.Ezekszellőzésérebiztosítani
kell megfelelő méretű légteret, leszigetelni, eltakarni ezt a részt nem szabad.
FIGYELEM!
Ettől eltérni csak akkor szabad, ha a készülék falon kívül történő elhelyezése mellett dönt. Ilyen esetben tégla,
beton, szilikát és egyéb falakra történő rögzítése is lehetséges.
FIGYELEM!
A készülék telepítését csak szakember végezheti! A biztonságos telepítéshez két ember szükséges!
SÜLLYESZTETT TELEPÍTÉS:
A tartozékbantalálhatórögzítésikellékekgipszkarton ésfa felületre történősüllyesztettrögzítést tesznek lehetővé! Installálás
előtt ellenőrizze, hogy megfelelő teherbírással rendelkezik a falrész és megfelelő tápellátást tud biztosítani az adott helyen a
készülék számára. Fa felületre történő rögzítéskor nem szükséges előfúrni a lyukakat és tiplit használni a csavarokhoz!
W
85 cm
H
48 cm
1. Válasza ki a falat ahová fel szeretné tenni a készüléket, majd
vágjon az ábra szerint egy megfelelő méretű lyukat a készüléknek!
A lyuk kijelöléséhez használjon vízmértéket, ceruzát. A kivágáshoz
anyagtól függően megfelelő fogazású fűrészt.
2. Vegye le a készülék üveg elejét. Távolítsa el a
készülék oldalán található csavarokat mindkét
oldalon. A készülékház közepén találja ezeket a
csavarokat, a készülék tetejétől számolva a 4.
csavar lefelé.
Figyelem! A készülék előlapja üvegből
készült! Óvatosan kezelje! Az összetört
üvegvágásisérüléseketokozhat!Helyezze
az üveglapot egy tiszta, puha felületre!
3. Helyezze a készüléket a korábban kivágott
lyukba és jelölje át a 4 rögzítési pont helyét.
Vegye ki a készüléket. Gipszkartonba történő
rögzítés esetén fúrja ki a lyukakat és helyezze a
gipszkarton tipliket a lyukakba.
5. Helyezze az égéstérbe a fa dekorációt, vagy igény esetén a tartozékként kapott„kristályokat”és rendezze el ízlésének megfelelően őket.
6. Kérjen segítséget az üveg előlap visszahelyezéséhez. A készülék két oldalán található rögzítő csavar segítségével rögzítse vissza az
előlapot a kandallóházra (a fal síkjánál, oldalról tudja ezt végrehajtani).
7. Ellenőrizze, hogy a készülék kikapcsolt állapotban van. Csatlakoztassa a készülék hálózati dugóját a hálózati aljzathoz. A készülék
sípolással jelzi, hogy üzemkész állapotba került.

19
FALON KÍVÜLI TELEPÍTÉS NEM SÜLLYESZTETT:
1. Fúró segítségével fúrja ki a konzolt rögzítő
lyukakat. A fúráshoz használjon 8 mm-es
fúrószárat. A lyukak mélysége legalább 26
mm mély legyen. Ettől kisebb rögzítési
méretet ne használjon!
2. A tartozékként kapott tipliket üsse
bele a lyukakba, amíg azok a fal síkjával
egyvonalba nem kerülnek.
3. Egy csavarhúzó vagy behajtó segítségével
csavarja be a csavarokat, úgy, hogy azok a feje a
fal síkjától 3-4 mm-re legyenek!
4.Akassza a kandallótacsavarokraésbizonyosodjonmegannakstabil,pontosilleszkedéséről.Igényeseténállítson acsavarokpozícióján,
hogy biztonságosan rögzítve legyen a kandalló a falon.
5. Vegye le a készülék üveg elejét. Távolítsa el a
készülék oldalán található csavarokat mindkét
oldalon. A készülékház közepén találja ezeket a
csavarokat, a készülék tetejétől számolva a 4.
csavar lefelé.
Figyelem! A készülék előlapja üvegből
készült! Óvatosan kezelje! Az összetört
üvegvágásisérüléseketokozhat!Helyezze
az üveglapot egy tiszta, puha felületre!
6. A készülék kábelének elvezetésére ügyeljen, ne
törjönmeg a kábelés netalálkozzonéles felülettel.
A kábel ne érintkezzen a készülékházzal, mert az a
használat során átforrósodhat.
7. Helyezze az égéstérbe a fa dekorációt, vagy igény esetén a tartozékként kapott„kristályokat”és rendezze el ízlésének megfelelően őket.
8.Kérjen segítséget azüvegelőlap visszahelyezéséhez.Akészülékkétoldalán találhatórögzítőcsavarsegítségévelrögzítsevissza az előlapot.
9. Ellenőrizze, hogy a készülék kikapcsolt állapotban van. Csatlakoztassa a készülék hálózati dugóját a hálózati aljzathoz. A készülék
sípolással jelzi, hogy üzemkész állapotba került.
HOGYAN HASZNÁLJUK A KÉSZÜLÉKET
A kandallót kétféleképpen irányíthatjuk:
1. A kandallón lévő érintőfelület segítségével
2. A tartozék távirányítóval
Az ikonok a kandalló érintőfelületén és a távirányítón ugyanazokat a funkciókat szolgálják.
A kandalló vezérlése során kérjük vegye gyelembe, hogy egy pár másodpercre szükség van, míg a vezérlőegység megkapja az adott
utasítást és feldolgozza azt.
Kandalló Be/Ki kapcsolás gomb: Nyomja meg a gombot az érintőpanelen vagy a távirányítón majd egy rövid hangot hallhat,
az elektromos kandalló bekapcsol, a bekapcsoló ikon kéken, a többi gomb pedig fehéren fog világítani, a kijelzőn megjelenik a
szobahőmérséklet.
Készülék leállítása: Nyomjameg a gombot az érintőpanelenvagy a távirányítón ekkor egy rövid jelzésthallhatunk, a fény kialszik és
kikapcsola kandalló,beleértvea fűtéstis.APOWERjelzéspirosanfog világítani,minda készülékenminda távirányítón,akészülékbelsejében
lévő ventilátor kikapcsolás után még 10 másodpercig működni fog majd leáll, ezután a kandalló készenléti állapotba kerül.

20
Magas és alacsony hőmérséklet beállítás:
Tartsa nyomva 3 másodpercig a gombot a kandalló kezelőfelületén, ekkor átvált az eszköz 0C és 0F között. (Megjegyzés: Ez a
funkció nem elérhető a távirányítón.) Indulási hőmérséklet 22 0C (72 0F), ha a szobahőmérséklet ettől alacsonyabb akkor az eszköz
magas fűtési üzemmóddal indul, ha váltani szeretne alacsony fűtési üzemmódra, akkor nyomja meg a gombot, hogy átváltson
(első megnyomás után a kijelzőn megjelenik a jelenlegi üzemmód, ismételt megnyomás után átvált a kívánt módba, ha mégegyszer
megnyomja a gombot akkor kikapcsolja a fűtési módot. (H / L / O = magas / alacsony / kikapcsolt fűtés)). Minden váltás után egy
hangjelzést hallhat, ha szeretné kikapcsolni a fűtés funkciót, akkor a hőmérsékletet is csökkentheti„DOWN”gombbal.
Időzítő beállítás:
Az időzítőt 0 - 12 óráig állíthatja, Bekapcsolás után az időzítő 0 órára van állítva, Az időzítőt állíthatja a készüléken lévő érintő panellel
vagy a távirányítóval a gomb megnyomásával, Miután működésbe lépett a kandalló és megnyomta aTIME gombot a kijelzőn“00”fog
villogni, ezután ahányszor megnyomja aTIME gombot az óra változni fog.
(00-30-1H-2H-3H-4H-5H-6H-7H-8H-9H-10H-11H-12H).
Ha elérte az időzíteni kívánt időt, ne nyomja tovább a gombot.
Miután a kijelző 10 másodpercig villog és nincs állapotváltozás a kijelzőn újra a szobahőmérséklet lesz látható.
Hőmérséklet növelő gombok:
Hőmérséklet változtatási sáv 15 0C (60 0F)-tól 36 0C (97 0F)-ig, (alapértelmezett hőmérséklet 22 0C / 72 0F), nyomja meg a felfelé
gombot és minden megnyomás után a hőmérséklet 1 0C / 1 0F fog emelkedni. Hosszabb nyomvatartás után a hőmérséklet folyamatoson
emelkedni fog.(Megjegyzés ez a funkció távirányítón keresztül nem működik.) Mikor hőmérséklet beállítás módban van, a kijelzőn
villogni fog a hőmérséklet rész. Ha 10 másodperc nem nyom meg semmilyen gombot a kijelző visszaáll alaphelyzetbe.
Hőmérséklet beállítás:
Hőmérséklet változtatási sáv 15 0C (60 0F)-tól 36 0C (97 0F)-ig, (alapértelmezett hőmérséklet 22 0C / 72 0F), nyomja meg a lefelé
gombot és minden megnyomás után a hőmérséklet 1 0C / 1 0F fog csökkenni. Hosszabb nyomvatartás után a hőmérséklet folyamatoson
csökkenni fog. (Megjegyzés ez a funkció távirányítón keresztül nem működik.) Mikor hőmérséklet beállítás módban van, a kijelzőn
villogni fog a hőmérséklet rész. Ha 10 másodperc nem nyom meg semmilyen gombot a kijelző visszaáll alaphelyzetbe.
Fényerő állítási (DIMMER) funkció :
A láng fényerő alaphelyzetben maximumon van. Láng fényerőnek 5 fokozata van. Ha megnyomja a DIMMER gombot akkor a
fényerő csökkenni fog és minden egyes megnyomás után csökkenni fog a fényerő ha a kijelző -1et mutat, akkor elérte a legsötétebb
módot, ha ismét megnyomja a DIMMER gombot akkor visszaáll alaphelyzetbe (legvilágosabb mód)
Láng színének változtatása:
Alaphelyzetben a láng narancssárga ha megnyomja a COLOR MODE gombot a távirányítón, a kijelző hőmérséklet kijelzése átvált szín
kijelzésre:(C1, C2, C3, C4, C5 , C6 , C7, C8, C9)
Minden egyes gomb nyomásnál színt fog váltani:
(C1) narancs, (C2) zöld, (C3) kék, (C4) fehér, (C5) zöld + narancs, (C6) narancs + kék, (C7) narancs + fehér,
(C8) zöld + kék, (C9) zöld + fehér
Gyerekzár funkció:
Az elektromos kandallónak van zárfunkciója, amit a távirányító és a panel segítségével is aktiválhat, használat befejeztével nyomja
meg a ,,fel” és ,,le”gombot egyszerre 3 másodpercig, vagy a gyerekzár gombot tartsa nyomva a távirányítón. Ezután egy hangot
fog hallani, ami jelzi hogy lezárt a kandalló, A gombok nem üzemelnek. Ha ismét vezérelni akarja a készüléket tartsa nyomva a„fel”és
„le”gombot 3 másodpercig vagy a távirányítón a gyerekzár gombot 1 másodpercig, ekkor egy hang jelzést hallhat és felold a gyerekzár.
Óra beállítás: Nyomja meg a hour gombot egyszer az óra egység beállításhoz (beállítási tartomány 00 - 23)
Perc beállítás: Nyomja meg a gombot egyszer, így hozzáad egy percet (beállítási tartomány 00 - 59)
Hét napjainak beállítása: Nyomja meg a gombot , minden megnyomással a napot jelző ikon balról jobbra ugrik, és felvillan.
Table of contents
Languages:
Other bewello Indoor Fireplace manuals
Popular Indoor Fireplace manuals by other brands
EdilKamin
EdilKamin FORMA Installation, use and maintenance
Jydepejsen
Jydepejsen ORO user manual

Superior
Superior VRT4032ZMN Installation and operation instructions
Harman
Harman P35I owner's manual
Quadra-Fire
Quadra-Fire CASTILEI-MBK manual
Duluth Forge
Duluth Forge DF300L OWNER'S OPERATION AND INSTALLATION MANUAL
Otto
Otto EF361A instruction manual

VonHaus
VonHaus 14/087 instruction manual
Desa
Desa Vanguard VVSR18 OWNER'S OPERATION AND INSTALLATION MANUAL
Spartherm
Spartherm NOVA E H2O Installation and operating manual
ORTAL
ORTAL Wilderness 25 Series Installation and operation manual
Spark modern fires
Spark modern fires RETRO-2' OWNER'S OPERATION AND INSTALLATION MANUAL
