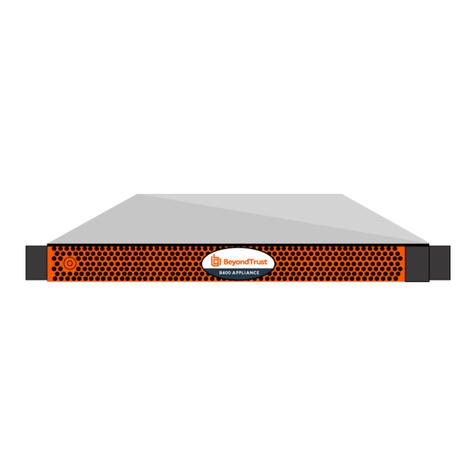
BeyondTrust U Series User manual

U-Series Appliance 4.1
Getting Started Guide
©2003-2023 BeyondTrust Corporation. All Rights Reserved. Other trademarks identified on this page are owned by their respective owners. BeyondTrust is not a chartered bank or trust company, or
depository institution. It is not authorized to accept deposits or trust accounts and is not licensed or regulated by any state or federal banking authority.
TC:10/11/2023

Table of Contents
Get Started with Your U-Series Appliance 3
Overview 3
U-Series Appliance Warranty, Specifications, and Requirements 4
Perform Initial Setup of Physical U-Series Appliance 10
Perform Initial Setup of Virtual U-Series Appliance 13
Perform Initial Setup of U-Series Appliance Cloud Instance 16
Run the U-Series Appliance Deployment & Configuration Wizard 26
Update Running Instances for the Amazon U-Series Appliance Deployment 33
Connect to a Cloud Database 36
SALES: www.beyondtrust.com/contact SUPPORT: www.beyondtrust.com/support DOCUMENTATION: www.beyondtrust.com/docs 2
©2003-2023 BeyondTrust Corporation. All Rights Reserved. Other trademarks identified on this page are owned by their respective owners. BeyondTrust is not a chartered bank or trust company, or
depository institution. It is not authorized to accept deposits or trust accounts and is not licensed or regulated by any state or federal banking authority.
TC: 10/11/2023
U-SERIES APPLIANCE 4.1
GETTING STARTED GUIDE
This page needed for table of
contents. Do not delete.

Get Started with Your U-Series Appliance
Overview
This guide is intended for experienced network security administrators who want to start using a U-Series Appliance in their network to
assist with protecting their organization's computing assets. U-Series is a self-contained physical or virtual appliance that contains the
operating system, the database, the BeyondTrust BeyondInsight platform, and the BeyondTrust Password Safe solution. This guide
provides the necessary details to assist you in getting familiar with your appliance and getting it deployed and set up for use in your
network or cloud environment.
The U-Series v20 is the virtual version of the U-Series 20 appliance and is available for VM Ware and Microsoft Hyper V hypervisors for
local hosting, and also for AWS and Azure cloud marketplaces.
Both physical and virtual appliances can be deployed in your network as standalone systems or configured for high availability with or
without redundancy.
High Level Deployment and Configuration Steps For U-Series Appliances
Getting started with your appliance involves an initial setup to prepare your appliance for access from a web browser in your network.
Once you have completed the initial setup of your U-Series Appliance, you must run the U-Series Appliance Deployment & Configuration
Wizard to complete the deployment of the appliance in your environment. High level deployment and configuration steps are outlined
below.
Initial Setup to Prepare your appliance for First Time Access
lPower on the physical appliance, or download and import the virtual appliance, or launch a cloud instance
lObtain the pre-assigned IP Address or configure a new IP address for the appliance so you can access it from a web browser
Run the U-Series Appliance Deployment & Configuration Wizard
lLicense Windows
lCreate an Admin account
lName the appliance
lConfigure networking settings such as, IP settings, internet connection, time zone, and SMTP
lConfigure your appliance for its intended use by licensing your BeyondTrust solutions, selecting a solution, selecting features for
the system, setting up how to receive updates from BeyondTrust
Detailed instructions for each of the above steps are covered in subsequent sections of this guide.
SALES: www.beyondtrust.com/contact SUPPORT: www.beyondtrust.com/support DOCUMENTATION: www.beyondtrust.com/docs 3
©2003-2023 BeyondTrust Corporation. All Rights Reserved. Other trademarks identified on this page are owned by their respective owners. BeyondTrust is not a chartered bank or trust company, or
depository institution. It is not authorized to accept deposits or trust accounts and is not licensed or regulated by any state or federal banking authority.
TC: 10/11/2023
U-SERIES APPLIANCE 4.1
GETTING STARTED GUIDE

U-Series Appliance Warranty, Specifications, and Requirements
Certification and Warranty Information for Physical Appliances
FCC Certification
This equipment has been tested and found to comply with the limits for a Class A digital device pursuant to Part 15 of the FCC Rules.
These limits are designed to provide reasonable protection against harmful interference when the equipment is operated in a commercial
environment. This equipment generates, uses, and can radiate radio frequency energy and, if not installed and used in accordance with
the manufacturer’s instruction manual, may cause harmful interference with radio communications.
Operation of this equipment in a residential area is likely to cause harmful interference, in which case you will be required to correct the
interference at your own expense.
Limited Hardware U-Series Appliance Warranty
This hardware U-Series Appliance is accompanied by a three-year manufacturer’s warranty based on the invoice date. (Extended
warranties available on request.) The warranty covers all hardware, including internal components supplied in this shipment. The warranty
does not cover additional items, such as keyboards, monitors, and mice, not included in this shipment. During the warranty period, the U-
Series Appliance will be repaired or replaced at no cost under the warranty terms.
Due to continuing changes in the computer industry, if a replacement is necessary, the U-Series Appliance manufacturer reserves the
right to make product substitutions of equal or greater value.
Do not ship any U-Series Appliance without first contacting BeyondTrust Technical Support to coordinate any repairs or replacements. Do
not try to repair the U-Series Appliance yourself.
Please back up all data before having the U-Series Appliance serviced or repaired. Neither BeyondTrust nor the U-Series Appliance
manufacturer warrants that operation of the U-Series Appliance will be uninterrupted or error-free. In no event will BeyondTrust or the U-
Series Appliance manufacturer be responsible or liable for loss or integrity of any data on the U-Series Appliance or any storage media.
Warranty Invalidation
This warranty is void in the event that:
lThe U-Series Appliance is damaged due to accident, abuse, misuse, problems with electrical power, modifications or servicing not
authorized by BeyondTrust or the U-Series Appliance manufacturer, or failure to operate in accordance with the U-Series
Appliance instructions.
lSerial tags, receiving numbers, product stickers, or manufacturer seals have been removed, altered, or tampered with.
lThe U-Series Appliance is opened for any reason.
lThe U-Series Appliance is damaged due to improper or inadequate packaging when returned for repair or replacement.
lThe U-Series Appliance has been tampered with, such as overclocking.
Labor and services performed on items or systems that are found not to be defective may be subject to a separate charge. In addition, the
U-Series Appliance manufacturer reserves the right to charge a ten percent restocking fee for items returned which are found not to be
defective.
SALES: www.beyondtrust.com/contact SUPPORT: www.beyondtrust.com/support DOCUMENTATION: www.beyondtrust.com/docs 4
©2003-2023 BeyondTrust Corporation. All Rights Reserved. Other trademarks identified on this page are owned by their respective owners. BeyondTrust is not a chartered bank or trust company, or
depository institution. It is not authorized to accept deposits or trust accounts and is not licensed or regulated by any state or federal banking authority.
TC: 10/11/2023
U-SERIES APPLIANCE 4.1
GETTING STARTED GUIDE

IMPORTANT!
Do not log on to the Console or Remote Desktop to the Virtual U-Series Appliance unless directed to do so by BeyondTrust Technical
Support. Installing any software or changing any additional settings may void your warranty.
Physical U-Series Appliance Specifications
U-Series 20 Specifications
Specification Description
AC Input Voltage 110 to 240 VAC
Rated Input Frequency 50 to 60Hz
Cooling 5 Standard Fans; 1 Standard 1U Heatsink.
Chassis Chassis with up to 8, 3.5in. Hard Drives
Dimensions 1U rack-mountable server
H: 1.68in. (4.28cm) (10.75in. shipping)
W: 18.97in. (48.18cm) (24in. shipping)
D: 26.89in. (68.30cm) (35.75in. shipping)
Weight: approx 45lbs. (48lbs. shipping)
Microprocessor Intel Xeon Silver 4112, 2.6GHz, 4-Core, 8-Thread, 8.25M Cache, Turbo, HT
Hard Drive 2 × 2TB 7.2 RPM NLAS 12Gbps 512n 2.5in Hot-plug
RAM 128GB
RAID Configuration RAID 1
RAID Controller PERC H730P, 2GB NV Cache
NIC Broadcom 57416 2 Port 10Gb Base-T + 5720 2 Port 1Gb Base-T, rNDC
Power Supply Dual, hot-plug, Redundant Power Supply (1+1), 495W
Power Cords 2 × NEMA 5-15P to C13 Wall Plug, 125 Volt, 15 AMP, 10 Feet (3m)
Rack Rails ReadyRails™ Sliding Rails with Cable Management Arm
PCIe Riser Risers with up to 4, x8 PCIe Slots + 2, x16 PCIe Slots
Operating System Embedded Windows Server 2016 Standard
Database Microsoft SQL Server 2016 Standard
U-Series 20 SQL Free
Specification Description
AC Input Voltage 110 to 240 VAC
Rated Input Frequency 50 to 60Hz
Cooling 5 Standard Fans; 1 Standard 1U Heatsink.
SALES: www.beyondtrust.com/contact SUPPORT: www.beyondtrust.com/support DOCUMENTATION: www.beyondtrust.com/docs 5
©2003-2023 BeyondTrust Corporation. All Rights Reserved. Other trademarks identified on this page are owned by their respective owners. BeyondTrust is not a chartered bank or trust company, or
depository institution. It is not authorized to accept deposits or trust accounts and is not licensed or regulated by any state or federal banking authority.
TC: 10/11/2023
U-SERIES APPLIANCE 4.1
GETTING STARTED GUIDE

Specification Description
Chassis Chassis with up to 8, 3.5in. Hard Drives
Dimensions 1U rack-mountable server
H: 1.68in. (4.28cm) (10.75in. shipping)
W: 18.97in. (48.18cm) (24in. shipping)
D: 26.89in. (68.30cm) (35.75in. shipping)
Weight: approx 45lbs. (48lbs. shipping)
Microprocessor Intel Xeon Silver 4112, 2.6GHz, 4-Core, 8-Thread, 8.25M Cache, Turbo, HT
Hard Drive 2 × 2TB 7.2 RPM NLAS 12Gbps 512n 2.5in Hot-plug
RAM 128GB
RAID Configuration RAID 1
RAID Controller PERC H730P, 2GB NV Cache
NIC Broadcom 57416 2 Port 10Gb Base-T + 5720 2 Port 1Gb Base-T, rNDC
Power Supply Dual, hot-plug, Redundant Power Supply (1+1), 495W
Power Cords 2 × NEMA 5-15P to C13 Wall Plug, 125 Volt, 15 AMP, 10 Feet (3m)
Rack Rails ReadyRails™ Sliding Rails with Cable Management Arm
PCIe Riser Risers with up to 4, x8 PCIe Slots + 2, x16 PCIe Slots
Operating System Embedded Windows Server 2016 Standard
Virtual U-Series Appliance Specifications
U-Series v20 and U-Series v20 SQL Free
Requirement Description
Hard Disk 300GB
RAM 32GB
Note: For a BeyondInsight deployment with a local SQL Server instance, the minimum
requirement is 32GB. As the appliance and BeyondInsight Software versions increase,
we provide more features and options which consume more RAM. 32GB of RAM is
required at the minimum to support all features of the product. If you have below 32GB of
RAM, you may experience slowness.
OS Microsoft Windows Server 2022 Standard
Database Microsoft SQL Server 2019 Standard
Note: The database information does not apply to the U-Series v20 SQL Free. The U-
Series v20 SQL Free does not include a database.
Form Factor VMware OVA for vSphere ESX 6.5 or Microsoft VHDX for Hyper-V (Gen 2 2012 R2 or later)
SALES: www.beyondtrust.com/contact SUPPORT: www.beyondtrust.com/support DOCUMENTATION: www.beyondtrust.com/docs 6
©2003-2023 BeyondTrust Corporation. All Rights Reserved. Other trademarks identified on this page are owned by their respective owners. BeyondTrust is not a chartered bank or trust company, or
depository institution. It is not authorized to accept deposits or trust accounts and is not licensed or regulated by any state or federal banking authority.
TC: 10/11/2023
U-SERIES APPLIANCE 4.1
GETTING STARTED GUIDE

Note: The license included with the U-Series v20 and U-Series v20 SQL Free for Microsoft Windows Server 2022 covers up to
16 cores on the physical virtualization (host) server.
U-Series Appliance Cloud Instance Specifications
Azure
The below table lists the two recommended U-Series Appliance instances available through the Azure marketplace, along with their
specifications.
Instance Type vCPU Memory SSD Storage Dedicated EBS Bandwidth (Mpbs)
DS4_V2 8 28 GB 56 GB 1000
DS5_V2 16 56 GB 112 GB 2000
Note: If you use an Azure SQL Database instance instead of an appliance, you must install the following database services to
support BeyondTrust Analytics & Reporting:
lMicrosoft SQL Server Reporting Services
lMicrosoft SQL Server Analysis Services
lMicrosoft SQL Server Integration Services
Amazon
The below table lists the recommended U-Series Appliance instances available through the Amazon marketplace, along with their
specifications.
Instance Size vCPU Memory (GiB) Instance Storage (GiB) EBS Bandwidth (Mbps)
m4.2xlarge 8 32GB EBS-Only 1,000
m4.4xlarge 16 64GB EBS-Only 2,000
m5.2xlarge 8 32GB EBS-Only Up to 4,750
m5.4xlarge 16 64GB EBS-Only 4,750
m5a.2xlarge 8 32GB EBS-Only Up to 2,880
m5a.4xlarge 16 64GB EBS-Only 2,880
r5.xlarge 4 32GB EBS-Only Up to 4,750
r5.2xlarge 8 64GB EBS-Only Up to 4,750
r5.4xlarge 16 128GB EBS-Only 4,750
For more information, please see Amazon EC2 Instance Types at https://aws.amazon.com/ec2/instance-types/.
SALES: www.beyondtrust.com/contact SUPPORT: www.beyondtrust.com/support DOCUMENTATION: www.beyondtrust.com/docs 7
©2003-2023 BeyondTrust Corporation. All Rights Reserved. Other trademarks identified on this page are owned by their respective owners. BeyondTrust is not a chartered bank or trust company, or
depository institution. It is not authorized to accept deposits or trust accounts and is not licensed or regulated by any state or federal banking authority.
TC: 10/11/2023
U-SERIES APPLIANCE 4.1
GETTING STARTED GUIDE

U-Series Appliance Networking and Port Requirements
The U-Series Appliance is designed to be configured and used with a web browser. The browsers that are supported for accessing the
appliance, as well as the network connections, firewall settings, and ports required for accessing the appliance are detailed below.
Client Requirements
Supported browsers:
lMicrosoft Edge
lFirefox
lGoogle Chrome
lSafari
U-Series Appliance Requirements
l10/100/1000MB Ethernet Connection
lTCP/IP v4
lRack Mount
Firewall Settings
lAll outgoing ports are allowed.
lIncoming ports are limited to the default Windows rules (includes allowing DCOM), plus the following:
TCP Ports
Port Purpose Target Program/System Resource Initial
Status
80 HTTP System Enabled
443 HTTPS System Enabled
445 SMB System Disabled
1433 SQL Server sqlservr.exe Enabled
2000 App Bus C:\Program Files(x86)\Common Files\eEye Digital
Security\Application Bus\eeyeevnt.exe
Disabled
2383 SQL Analysis Services msmdsrv.exe Enabled
3389 RDP C:\Windows\System32\svchost.exe Enabled
4422 Session Monitoring SSH C:\Program Files(x86)\eEye Digital Security\Retina CS\pbsmd.exe Enabled
4489 Session Monitoring RDP C:\Program Files(x86)\eEye Digital Security\Retina CS\pbsmd.exe Enabled
5022 SQL Server Mirroring Binn\sqlservr.exe Enabled
5985 WinRM (AWS Images Only) System; Restricted to 10.0.0.0-16 Enabled
SALES: www.beyondtrust.com/contact SUPPORT: www.beyondtrust.com/support DOCUMENTATION: www.beyondtrust.com/docs 8
©2003-2023 BeyondTrust Corporation. All Rights Reserved. Other trademarks identified on this page are owned by their respective owners. BeyondTrust is not a chartered bank or trust company, or
depository institution. It is not authorized to accept deposits or trust accounts and is not licensed or regulated by any state or federal banking authority.
TC: 10/11/2023
U-SERIES APPLIANCE 4.1
GETTING STARTED GUIDE

Port Purpose Target Program/System Resource Initial
Status
8530 WSUS HTTP System Disabled
8531 WSUS HTTPS System Disabled
10001 Central Policy v1 C:\Program Files(x86)\eEye Digital Security\Retina
CS\REMCentralPolicyService.exe
Enabled
21690 App Bus (C:\Program Files(x86)\Common Files\eEye Digital
Security\Application Bus\eeyeevnt.exe
Enabled
21690 Event Server C:\Program Files(x86)\Common Files\eEye Digital Security\Event
Server\REMEventsSvc.exe
Enabled
UDP Port
Port Purpose Target Program/System Resource Initial
Status
4609 Appliance Discovery C:\Program Files(x86)\Common Files\eEye Digital
Security\Scheduler\eeyeschedulersvc.exe
Enabled
ICMPv4 Protocol
Port Purpose Target Program/System Resource Protocol Initial
Status
Any ICMP Type 3, Code 4- Destination Unreachable
Fragmentation Needed
Any ICMPv4 Enabled
Any ICMP Type 8- Echo Any ICMPv4 Enabled
SALES: www.beyondtrust.com/contact SUPPORT: www.beyondtrust.com/support DOCUMENTATION: www.beyondtrust.com/docs 9
©2003-2023 BeyondTrust Corporation. All Rights Reserved. Other trademarks identified on this page are owned by their respective owners. BeyondTrust is not a chartered bank or trust company, or
depository institution. It is not authorized to accept deposits or trust accounts and is not licensed or regulated by any state or federal banking authority.
TC: 10/11/2023
U-SERIES APPLIANCE 4.1
GETTING STARTED GUIDE

Perform Initial Setup of Physical U-Series Appliance
The below sections walk you through powering on your appliance for the first time and using the LCD display panel to access and change
settings.
The physical U-Series Appliance package consists of the items listed below. Please verify all materials listed are present and free from
visible damage or defects before proceeding. If any item appears to be missing or damaged, please contact BeyondTrust Technical
Support.
lU-Series Appliance hardware
lTwo Power Cords
lGetting Started Guide
lRack Mount Kit
Once you have completed the initial setup of your U-Series Appliance, you must run the U-Series Appliance Deployment & Configuration
Wizard to complete the deployment of the appliance in your environment.
lFor physical appliance specifications, please see "Physical U-Series Appliance Specifications" on page 5.
lFor steps to run the U-Series Appliance Deployment & Configuration Wizard, please see
"Run the U-Series Appliance Deployment & Configuration Wizard" on page 26.
Power on the U-Series Appliance
1. Plug the power cables for the U-Series Appliance into a safe power source. The U-Series Appliance’s power supplies
automatically switch between 120V and 240V, as needed.
2. Plug a network cable into the network interface port.
3. Press and release the power button on the front of the U-Series Appliance. The power LED immediately to the right of the reset
button illuminates, and the HDD activity LED (immediately to the right of the power LED) begins to flash. Initialization of the U-
Series Appliance completes in about 60 seconds.
Note: The NIC1 and NIC2 LEDs may illuminate and show activity even when the U-Series Appliance is not powered on;
therefore, it is important to check the power and HDD LEDs to confirm that the U-Series Appliance is on.
4. The LCD panel displays Please wait. Once the U-Series Appliance completes the powering procedures, the U-Series Appliance
LCD panel displays the actions you can press to view and change settings, as detailed below. To access the settings:
LCD Panel Description
Press the check to enter or accept the setting.
Press the up or down arrow to navigate through the menus.
LCD Panel Functionality
SALES: www.beyondtrust.com/contact SUPPORT: www.beyondtrust.com/support DOCUMENTATION: www.beyondtrust.com/docs 10
©2003-2023 BeyondTrust Corporation. All Rights Reserved. Other trademarks identified on this page are owned by their respective owners. BeyondTrust is not a chartered bank or trust company, or
depository institution. It is not authorized to accept deposits or trust accounts and is not licensed or regulated by any state or federal banking authority.
TC: 10/11/2023
U-SERIES APPLIANCE 4.1
GETTING STARTED GUIDE

Press the right or left arrow to access settings in the menu.
Press the X to cancel the setting.
Perform Initial Network Configuration
The U-Series Appliance is configured to use DHCP and receives an assigned IP address. You'll need the appliance's IP address to
access the appliance from a client or device within your network. You can find the IP Address using the appliance's LED display panel.
From the LED panel, you can also configure the appliance to automatically update the IP address or manually configure the IP settings.
Obtain or configure your appliance's IP address as follows:
Display IP Address
To display the IP address:
1. Press the check to enter Settings / Show IP.
2. Press check . The IP address of the U-Series Appliance displays.
Automatically Enter IP Address
On the LCD panel, select Config IP with the check , then select Auto DHCP. The U-Series Appliance automatically updates the IP
address to the DHCP protocol.
Manually Enter IP Address
On the LCD panel, select Config IP with the check , then select Manual. Enter the IP Address, Subnet Mask, Gateway, DNS 1 and
DNS 2.
To access your U-Series Appliance for the first time:
1. Open a browser on a device on the same network subnet as the U-Series Appliance.
2. Enter the U-Series Appliance's IP address, preceded by https://, for example, https://10.10.123.456.
Other Actions Available from the LCD Display Panel
Enable RDP
From the LCD panel, start where U-Series 20 Ready is displayed.
1. Press the check to enter Settings / Show IP.
2. Press check . The IP address of the U-Series Appliance displays.
SALES: www.beyondtrust.com/contact SUPPORT: www.beyondtrust.com/support DOCUMENTATION: www.beyondtrust.com/docs 11
©2003-2023 BeyondTrust Corporation. All Rights Reserved. Other trademarks identified on this page are owned by their respective owners. BeyondTrust is not a chartered bank or trust company, or
depository institution. It is not authorized to accept deposits or trust accounts and is not licensed or regulated by any state or federal banking authority.
TC: 10/11/2023
U-SERIES APPLIANCE 4.1
GETTING STARTED GUIDE

3. Hold both the up and down buttons for four seconds. Do not do anything else between the previous step and this one.
Reset Administrator Password
1. Check the Allow LCD Panel to Reset Administrator Password box.
2. If needed, go to the U-Series Appliance to reset the administrator password.
3. Select Show IP to view the IP address.
4. Hold the up and down buttons simultaneously on the U-Series Appliance LCD panel. A random password is generated.
5. Press the check to accept the changed password.
On a U-Series Appliance with Windows Server 2016, you cannot reset an administrator account from the LCD panel. A locked
administrator account is unlocked after 20 minutes. Try logging on again after the 20-minute timeout period. If the account remains locked,
contact BeyondTrust Technical Support.
View the U-Series Appliance Version
1. On the LCD panel, select Versions with the check .
2. Scroll through with the left or right arrows to see the version for the U-Series Appliance, BeyondInsight, Discovery
Scanner, and audits.
Power Off The U-Series Appliance
You can power off the U-Series Appliance using the LCD panel. To power off, on the LCD panel, select Power Off. The U-Series
Appliance powers off.
Hardware Notes
The integrated Dell Remote Access Controller (iDRAC) is configured to use the primary interface (LAN1). The iDRAC shares the interface
with Windows. By default, iDRAC is not configured.
The U-Series Appliance has more than one adapter. If all adapters are used, the adapter chosen during scan time is determined by the
route associated with it.
SALES: www.beyondtrust.com/contact SUPPORT: www.beyondtrust.com/support DOCUMENTATION: www.beyondtrust.com/docs 12
©2003-2023 BeyondTrust Corporation. All Rights Reserved. Other trademarks identified on this page are owned by their respective owners. BeyondTrust is not a chartered bank or trust company, or
depository institution. It is not authorized to accept deposits or trust accounts and is not licensed or regulated by any state or federal banking authority.
TC: 10/11/2023
U-SERIES APPLIANCE 4.1
GETTING STARTED GUIDE

Perform Initial Setup of Virtual U-Series Appliance
U-Series v20 is BeyondTrust's virtual U-Series Appliance. You can download U-Series v20 VMware or Hyper-V images from the
BeyondTrust Customer Support Portal and import them as virtual machines in your network. Virtual U-Series Appliances are based on
Windows Server 2022.
Note: Image download speed and time may vary due to the large file sizes of these images and your internet connectivity.
The below sections walk you through importing the U-Series v20 appliance as a virtual machine in your environment and configuring it
with an IP address so that you can access the appliance from a client web browser within the same network subnet.
Once you have completed the initial setup of your U-Series Appliance, you must run the U-Series Appliance Deployment & Configuration
Wizard to complete the deployment of the appliance in your environment.
lFor virtual machine requirements, please see "Virtual U-Series Appliance Specifications" on page 6.
lFor steps to run the U-Series Appliance Deployment & Configuration Wizard, please see
"Run the U-Series Appliance Deployment & Configuration Wizard" on page 26.
Deploy / Import the Virtual Machine
IMPORTANT!
We recommend that you do NOT join the Virtual U-Series Appliance to a domain. Local policy is set on the appliance and if the
appliance belongs to a domain, it is possible that domain policy is pushed to the appliance overwriting the local policy. This has the
potential to negatively impact appliance hardening and usage. If joining the appliance to a domain is a requirement, please contact
BeyondTrust Services for assistance.
Before you can configure the Virtual U-Series Appliance, you must deploy / import the virtual image package as a virtual machine into your
environment using the following steps.
Deploy the Virtual Machine into VMware using vSphere Client
1. In vSphere Client, select File > Deploy OVF Template.
2. In the Deploy OVF Template window, click Browse.
3. Browse to the folder containing the .ova package you had downloaded, select it and click Open.
4. Click Next and complete the wizard to deploy the virtual machine image.
Import the Virtual Machine into Microsoft Hyper-V using Hyper-V Manager
Note: The following procedure is a guide only. For more detailed information about Hyper-V features, please refer to Hyper-V
product documentation.
SALES: www.beyondtrust.com/contact SUPPORT: www.beyondtrust.com/support DOCUMENTATION: www.beyondtrust.com/docs 13
©2003-2023 BeyondTrust Corporation. All Rights Reserved. Other trademarks identified on this page are owned by their respective owners. BeyondTrust is not a chartered bank or trust company, or
depository institution. It is not authorized to accept deposits or trust accounts and is not licensed or regulated by any state or federal banking authority.
TC: 10/11/2023
U-SERIES APPLIANCE 4.1
GETTING STARTED GUIDE

1. In Hyper-V Manager, select the host machine, then select Action > Import Virtual Machine. If the Before You Begin page
appears, click Next. Otherwise, go to step 4.
2. On the Locate Folder page, browse to the folder containing the image, and select the name.
3. Click the Select Folder button at the bottom.
Note: The folder you want to select contains three other folders (Virtual Machine, Virtual Hard Drive, Snapshots). Do not
import the VHD directly.
4. On the Select Virtual Machine page, verify that the machine appears in the list and click Next.
5. On the Choose Import Type page, make sure you retain the existing unique ID.
6. On the Choose Import Type page, select Copy the virtual machine and click Next.
7. On the Choose Destination page, select where you want to store your virtual machine files.
8. The default behavior is to import the files to the default Hyper-V folders set by your server configuration. If you want to override
this, check the Store the Virtual Machine in a different location box and browse to your locations.
9. Select where you want to store the imported VHD and click Next. If
there are any issues with the import, additional steps will appear.
For example, a Virtual U-Series Appliance is configured to use a
minimum of 32GB of RAM. If your server does not support this much
RAM or have enough RAM available, the message Memory virtual
quantity above maximum appears.
10. Review the import settings.
11. Click Finish to import the U-Series Appliance.
Configure the U-Series v20's IP Address
Note: If you already know the IP for the appliance and it is accessible, the below steps are not required. The IP is configured
when deploying the appliance using the U-Series Appliance Deployment & Configuration Wizard. Please see "Run Part 1:
New Appliance Deployment Using the Deployment Wizard" on page 27.
You can use the following account to set your IP address.
Account Name: btadmin
Password: ch@ngeM3now#!#!
Note: If you completed the Deployment & Configuration Wizard, you have already changed the password. If the image has
just been deployed, please allow for at least 10 minutes to pass before logging in, to allow post deployment scripts to
complete.
1. Log on to the virtual machine using the btadmin account.
2. Double-click the Local Area Connection on the desktop.
3. Click the Properties button.
SALES: www.beyondtrust.com/contact SUPPORT: www.beyondtrust.com/support DOCUMENTATION: www.beyondtrust.com/docs 14
©2003-2023 BeyondTrust Corporation. All Rights Reserved. Other trademarks identified on this page are owned by their respective owners. BeyondTrust is not a chartered bank or trust company, or
depository institution. It is not authorized to accept deposits or trust accounts and is not licensed or regulated by any state or federal banking authority.
TC: 10/11/2023
U-SERIES APPLIANCE 4.1
GETTING STARTED GUIDE

4. From the list, select Internet Protocol Version 4.
5. Click the Properties button.
6. Enter the IP address and DNS server fields, as needed.
SALES: www.beyondtrust.com/contact SUPPORT: www.beyondtrust.com/support DOCUMENTATION: www.beyondtrust.com/docs 15
©2003-2023 BeyondTrust Corporation. All Rights Reserved. Other trademarks identified on this page are owned by their respective owners. BeyondTrust is not a chartered bank or trust company, or
depository institution. It is not authorized to accept deposits or trust accounts and is not licensed or regulated by any state or federal banking authority.
TC: 10/11/2023
U-SERIES APPLIANCE 4.1
GETTING STARTED GUIDE

Perform Initial Setup of U-Series Appliance Cloud Instance
The below sections provide steps to get you started with running a U-Series Appliance cloud instance, available from the AWS and Azure
MarketPlaces.
Once you have completed the initial setup of your U-Series Appliance, you must run the U-Series Appliance Deployment & Configuration
Wizard to complete the deployment of the appliance in your environment.
lFor cloud instance requirements, please see "Virtual U-Series Appliance Specifications" on page 6.
lFor steps to run the U-Series Appliance Deployment & Configuration Wizard, please see
"Run the U-Series Appliance Deployment & Configuration Wizard" on page 26.
Launch an Instance from AWS MarketPlace
Log in to AWS MarketPlace, and search for BeyondTrust or BeyondInsight. From the BeyondTrust marketplace website, click Continue
and follow the below steps for using the 1-Click Launch or the Manual Launch options to launch an Amazon Machine Image (AMI)
instance in the EC2 Console.
Use the 1-Click Launch Option
1. Click the 1-Click Launch tab.
2. Configure the following settings:
lVersion: Select the desired UVM version from the list.
lRegion: Select the applicable region from the list.
lEC2 Instance Type: Select m4.2xlarge or m4.4xlarge from the list.
lVPC Settings: Select a Virtual Private Cloud (VPC) and Subnet from the lists.
lSecurity Group: Select the default BeyondTrust security group from the list.
lSelect the Key Pair.
Note: The key pair is required to retrieve Windows passwords for your instance. Please see How do I retrieve my Windows
administrator password after launching an instance? at https://aws.amazon.com/premiumsupport/knowledge-center/retrieve-
windows-admin-password/.
3. Click Launch 1-Click Launch.
Note: Initially, port 3389 is open to all IP addresses. We recommend changing firewall settings to reflect your IP address only.
Additionally, you can create an AWS security group that provides similar security protection as the firewall settings.
For more information on AWS security groups, please see Security Groups for Your VPC at
https://docs.aws.amazon.com/vpc/latest/userguide/VPC_SecurityGroups.html#DeleteSecurityGroup.
SALES: www.beyondtrust.com/contact SUPPORT: www.beyondtrust.com/support DOCUMENTATION: www.beyondtrust.com/docs 16
©2003-2023 BeyondTrust Corporation. All Rights Reserved. Other trademarks identified on this page are owned by their respective owners. BeyondTrust is not a chartered bank or trust company, or
depository institution. It is not authorized to accept deposits or trust accounts and is not licensed or regulated by any state or federal banking authority.
TC: 10/11/2023
U-SERIES APPLIANCE 4.1
GETTING STARTED GUIDE

Use the Manual Launch Option
1. Click Manual Launch.
2. The U-Series Appliance version is selected by default.
3. Select the region and then click Launch with EC2 Console.
lFor more information on how to run an AMI instance, please see Launching an Instance Using the Launch Instance
Wizard at https://docs.aws.amazon.com/AWSEC2/latest/UserGuide/launching-instance.html.
lWe recommend you use an AWS VPN connection when you use your instance or access your assets. For more
information, please see What Is Amazon VPC? at https://docs.aws.amazon.com/vpc/latest/userguide/what-is-
amazon-vpc.html.
Run an Azure Virtual Machine for the U-Series Appliance Deployment
To run an azure virtual machine, log in to Azure MarketPlace, and follow the below steps:
1. Select Virtual Machines > Add from the menu on the left.
2. Enter BeyondInsight in the search box.
3. Select a deployment model and click Create.
The five steps to complete your purchase are detailed below.
Step 1: Basics
1. Enter a virtual machine name and VM disc type.
The VM name must be the name you want to use as the machine name for the U-Series Appliance. The name must be 15
characters or less, or it will violate the requirement below. The U-Series Appliance name is entered when you run the U-Series
Appliance Deployment & Configuration Wizard.
2. Add btadmin as the username and enter a password. Minimum password length is 14 characters.
IMPORTANT!
The username must be btadmin during install.
3. You can create a new resource group or choose an existing one.
4. Select a location and click OK.
Step 2: Size
Choose a size. We recommend that you select a U-Series Appliance size from the recommended systems.
SALES: www.beyondtrust.com/contact SUPPORT: www.beyondtrust.com/support DOCUMENTATION: www.beyondtrust.com/docs 17
©2003-2023 BeyondTrust Corporation. All Rights Reserved. Other trademarks identified on this page are owned by their respective owners. BeyondTrust is not a chartered bank or trust company, or
depository institution. It is not authorized to accept deposits or trust accounts and is not licensed or regulated by any state or federal banking authority.
TC: 10/11/2023
U-SERIES APPLIANCE 4.1
GETTING STARTED GUIDE

Step 3: Configure Optional Features
lManaged Disks: Click Yes to automatically manage the availability of disks to provide data redundancy and fault tolerance
without creating and managing storage accounts on your own. Managed disks might not be available in all regions.
lVirtual Network: Virtual networks are logically isolated from each other in Azure. You can configure their IP address ranges,
subnets, route tables, gateways and security settings, much like a traditional network in your data center. Virtual machines on the
same virtual network can access each other by default.
lSubnet: A subnet is a range of IP addresses in your virtual network, which can be used to isolate virtual machines from each other
or from the Internet.
lPublic IP Address: Use a public IP address to communicate with the virtual machine from outside the virtual network. Choose
Dynamic or Static and give it a name.
lExtensions: Extensions are not currently supported.
lHigh Availability: Select None.
lMonitoring: Enable this feature to capture serial console output and screenshots of the virtual machine running on a host to help
diagnose startup issues.
lClick OK.
Step 4: Summary
A summary of the configuration settings is displayed. Click OK to confirm.
Step 5: Buy
lClick Purchase to complete your order.
lIt takes several minutes for the machine to deploy. After the machine deploys, select Informational from the options under the
Notifications tab.
Note: Initially, port 3389 is open to all IP addresses. We recommend changing firewall settings to reflect your IP address
only.For security purposes, limit your Internet exposure to only your IP address.
For more information on how to run an Azure virtual machine, please see Windows Virtual Machine Pricing at
https://azure.microsoft.com/en-us/pricing/details/virtual-machines/windows/.
lFor more information on how to run an Azure virtual machine, please see Windows Virtual Machine Pricing at
https://azure.microsoft.com/en-us/pricing/details/virtual-machines/windows/.
lWe recommend you use a VPN connection when you use your instance or access your assets. For more information
on configuring the VPN Tunnel in Azure, please see Create a Site-to-Site connection in the Azure portal at
https://docs.microsoft.com/en-us/azure/vpn-gateway/tutorial-site-to-site-portal.
SALES: www.beyondtrust.com/contact SUPPORT: www.beyondtrust.com/support DOCUMENTATION: www.beyondtrust.com/docs 18
©2003-2023 BeyondTrust Corporation. All Rights Reserved. Other trademarks identified on this page are owned by their respective owners. BeyondTrust is not a chartered bank or trust company, or
depository institution. It is not authorized to accept deposits or trust accounts and is not licensed or regulated by any state or federal banking authority.
TC: 10/11/2023
U-SERIES APPLIANCE 4.1
GETTING STARTED GUIDE

Deploy the Azure U-Series Appliance Using ARM Template
You can use the Azure Resource Manager (ARM) template to help automate creating your U-Series Appliance. You can use the template
in the following ways:
lUse the template and JSON parameters provided in the code block below to create two separate JSON files and use PowerShell
or Azure CLI scripting to execute them.
lYou can use the template in the Azure portal with the Create with Template option and upload the JSON file to the portal. This
gives the user minimal parameters, assuming defaults to some of the Azure Resource properties.
You can add your new U-Series Appliance to an existing virtual network (V-Net) or create a V-Net.
Key points to consider:
lLicensing is applied after the U-Series Appliance is created and is not part of the ARM template.
lWhen using this ARM template using Azure Portal with the Create with custom Template option, use the same resource group
for both the virtual machine and virtual network.
This section assumes you have knowledge about Azure ARM templates and Microsoft Azure Cloud.
For more information on Azure templates, please see Tutorial: Deploy a local ARM template at https://docs.microsoft.com/en-
us/azure/azure-resource-manager/templates/deployment-tutorial-local-template?tabs=azure-powershell.
Arm Template Parameters
The following parameters are part of the ARM template. There are different areas to can enter the parameters depending on how you
launch the ARM template.
lvmName: This is the name for the VM and is usually the same as the U-Series Appliance name configured during setup.
lvmSize: Azure sizing for the virtual machine. The default is Standard_D2s_v3.
lAdmin Username: The credential for the administrator account.
lAdmin Password: The password for the administrator account.
lvNet New or Existing: Specify whether to create a new or existing virtual network for the VM.
lVirtual Network Name: The name of the new or existing virtual network.
lVirtual Network Resource Group: The name of the new or existing resource group for the virtual network.
lSubnet name: Name of the subnet in the virtual network you want to use.
lDNS Name: Unique DNS Name for the Public IP used to access the virtual machine.
lNetwork Security Group Name ('nsgName'): Name of the new or existing NSG.
Deploy SQL Free Image
To deploy the SQL Free image, you must change a couple of lines in the JSON file.
SALES: www.beyondtrust.com/contact SUPPORT: www.beyondtrust.com/support DOCUMENTATION: www.beyondtrust.com/docs 19
©2003-2023 BeyondTrust Corporation. All Rights Reserved. Other trademarks identified on this page are owned by their respective owners. BeyondTrust is not a chartered bank or trust company, or
depository institution. It is not authorized to accept deposits or trust accounts and is not licensed or regulated by any state or federal banking authority.
TC: 10/11/2023
U-SERIES APPLIANCE 4.1
GETTING STARTED GUIDE

From:
"imageReference": {
"publisher": "beyondtrust",
"offer": "beyondinsight",
"sku": "u-series",
"version": "latest"
To:
"imageReference": {
"publisher": "beyondtrust",
"offer": "uvm-sf",
"sku": "u-series_sf",
"version": "latest"
JSON Template Code Block
Template JSON
"$schema": "https://schema.management.azure.com/schemas/2019-04-01/deploymentTemplate.json#",
"contentVersion": "1.0.0.0",
"parameters": {
"vmName": {
"type": "string",
"defaultValue": "btuseries",
"metadata": {
"description": "Name of the VM"
}
},
"vmSize": {
"type": "string",
"defaultValue": "Standard_DS4_v2",
"metadata": {
"description": "Size of the VM"
}
},
"adminUsername": {
"type": "string",
"metadata": {
"description": "VM Admin User Name"
}
},
"adminPassword": {
"type": "string",
"metadata": {
"description": "VM Admin Password"
}
},
"vNetNewOrExisting": {
SALES: www.beyondtrust.com/contact SUPPORT: www.beyondtrust.com/support DOCUMENTATION: www.beyondtrust.com/docs 20
©2003-2023 BeyondTrust Corporation. All Rights Reserved. Other trademarks identified on this page are owned by their respective owners. BeyondTrust is not a chartered bank or trust company, or
depository institution. It is not authorized to accept deposits or trust accounts and is not licensed or regulated by any state or federal banking authority.
TC: 10/11/2023
U-SERIES APPLIANCE 4.1
GETTING STARTED GUIDE
This manual suits for next models
2
Table of contents
Other BeyondTrust Network Hardware manuals
Popular Network Hardware manuals by other brands
Amcrest
Amcrest NV2104 user manual

Lenovo
Lenovo Iomega ix2 quick start guide
Matrix Switch Corporation
Matrix Switch Corporation MSC-HDX4000 product manual
Cabletron Systems
Cabletron Systems STS-5SU install guide

Engage Black
Engage Black BlackDoor Duo user guide
ADTRAN
ADTRAN NIU3 Installation and maintenance practice
