Big Chill RETRO BUNGALOW Use and care manual

RETRO BUNGALOW HOOD
USER AND INSTALLER MANUAL (ENG)
MANUALE D'USO E INSTALLATORE (IT)
MANUAL USUARIO E INSTALADOR (ESP)
MANUEL DE L'UTILISATEUR ET DE L'INSTALLATEUR (FR)

2
1. GENERAL PRECAUTIONS
▪Check that the cooker hood has not been damaged during transport.
▪Do not leave the packaging materials (bags, corner brackets, etc...) within the reach of children.
▪This appliance must only be used by adults.
▪The hood is not for use by people with reduced phsiquical, sensory or mental capacities unless they are specifically instructed
by the person responsible for their safety.
▪Children must be controlled to make sure they do not play with the hood.
▪Do not cook “flambéed” products (i.e, generate flames beneath the hood).
▪Do not ignite burners that give off intense, uncontrolled flames beneath the hood.
▪Make sure that no flames emerge from the sides of pans.
▪When frying foods, do not allow the oil to escape from the pan or reheat it, as it could match fire.
▪Before performing any cleaning or maintenance operation, disconnect the hood from the power supply using the respective
mains or sector switch, a double-pole switch or by unplugging it.
▪If using other appliances that require gas or appliances that consume oxygen from the atmosphere, ensure there is sufficient
ventilation. For safe ventilation, the maximum depression level in the premises must not exceed 4 Pa (0.04 mbar) and a hole
leading outside the premises must be made in the wall (with the correct diameter and location).
▪Do not use the cooker hood without the provided filters.
▪Keep the grease filters clean and respect the recommended cleaning frequencies (see MAINTENANCE section).
▪If your hood is being used in recirculation mode, you have to repace your charcoal filters every 50hours use.
▪Turn the hood motor on before starting to cook.
▪Turn the hood motor off about 10 minutes after you finish cooking.
▪It is forbidden to use the hood as an aspirator.
▪Never cook foodstuffs directly over the flame or have the gas burners on under the hood without cooking recipients over them
2. ELECTRICAL INSTALATION
▪This appliance must be connected to an electricity supply with a ground connection.
▪Check that the installation and electrical connections are made by qualified technicians and that the indicated instructions and
local regulations in force are met, using materials that are compliant with the applicable legislation.
▪The company will not be responsible for installations executed by non-qualified staff and installations that fail to heed the
applicable legislation on electrical safety (with regard to both modes and materials).
▪The electrical technical data can be found inside the hood, after removing the grease filters.
▪The flexible power cable supplied is already connected internally and emerges from the hood near the air outlet tube.
Before installing the electrical connections, you should:
▪Verify that the indicated electrical data coincide with the voltage values and frequency of the electrical circuit in the
house where the hood is to be installed;
▪Check that the premises have electrical protection against short circuits and electrocution, pursuant to the applicable
legislation;
▪Always switch off the power supply using the double-pole switch before the connection operations and turn the power on
again for normal use only when the operation has been completed.
3. GENERAL INFORMATIONS
3.1 Cooker hood Typology: Classification
Filtering Version: One active charcoal filter or plasma filter is needed for this and can be obtained from your usual retailer. The
filter removes the grease and smells from the extracted air before sending it back into the room through the upper outlet grid.
Ducting Version: Fumes are conveyed outside of the building by means of a special pipe connected with the connection ring
located on top of the hood.
3
3.2 Tips for the user:
1. To obtain a better performance, it is advisable to connect the hood a few minutes before starting to cook and leave it running
after it has been completed, for at least 10 minutes.
2. Never lose sight of the frying pan or fryer, the oil may overheat and catch fire.
3. Never flame under the hood. Free flame may cause a fire.
4. Before carrying out any operation inside the hood, disconnect the appliance from the mains.
5. Respect cleaning and filter replacement times, as omitting this aspect, deposited grease can cause a fire or deteriorate the
product.
6. Any modification in the steel, voids the warranty.
3.3 Condensation in Cooker Hoods
Condensation is the change in state of matter (vapor) that is in gaseous form and passes into liquid form. This happens by abrupt change
of temperature, the steam in contact with a cold surface.
Condensation is, unfortunately, a physical phenomenon that does not depend entirely on the suction capacity of the hood but rather on
the difference in temperature between the hot cooking fumes and the cold surfaces of the hood. No matter how powerful the hood is, it
can not expel all the condensation. A hood is prepared to expel fumes, but it does not have the capacity to expel water to the outside.
If you have a condensation problem on your hood; a drip on the bottom of the hood ... it is reported that this problem may be due to
several reasons separately or as a whole.
▪The ambient temperature is cooler or lower than the cooking steam temperature. (Physical phenomena unavoidable) Producing
heat shock upon contact with the cold surface of the hood.
▪The use of the cooking hob at maximum power without environmental preheating of the surface of the hood. (This effect is
especially aggravated by the induction plates which heat very quickly and which does not generally heat residual).
▪Improper use or maintenance of the hood such as cleaning filters and replacing carbon filters.
▪An installation of unfavorable smoke evacuation ducts, with diameters lower than those required by the engine, excessive duct
length, reductions, elbows, etc.
▪In certain bell designs such as inclined wall bells and integrated hoods in the cabinet when installed closer to the cooking zone
generate more condensation.
Tips for use to prevent condensation on the hood:
▪Switch on the hood 10 minutes before cooking and once it is finished, activate the delayed stop function to evacuate the smoke
stored in the duct. With this we will get the total evacuation.
▪Do not cook at maximum power from the beginning, start with a low or medium power, to give time for the bell to be tempered.
▪Keep the filters clean, cleaning them at least every 10 days, and in case of deterioration, replace them with new ones.
▪Have a continuous air intake in the room, so that it does not generate a depression and affect the aspiration rate. Such as a
ventilation grille, semi-open window.
▪Dry the steam that is generated, as well as after cooking.
▪Follow the instructions in the instructions on the hob for the effects of condensation. Use adequate power for controlled boiling.
▪Use the speeds of the hood in proportion to the amount of fumes and steam that is being generated. Speed 1: When heating
water. Speed 2 and 3 for normal, non-intensive cooking. Speed 4 (Booster) For aggressive cooking such as griddle, frying,
under no circumstances with cooking of steam.
The proportionate use of the extractor hood operating speeds will reduce any condensation problems that may occur. Keep in mind that
the steam generated in the cooking will be collected together to the fumes that are produced. Water is a heavy liquid that is not easy to
drive through the hood engine. For this reason, we recommend using a suction speed that allows you to collect the fumes produced and a
reasonable part of the steam, reserving additional methods to eliminate the steam not collected by the hood as to leave as much
ventilation as possible in the kitchen and if it is possible an open window, such as when condesia is generated in the bathroom after a hot
shower.
4
4. INSTRUCTIONS FOR THE INSTALLER:
4.1 Select the appropriate dimension of the hood: (Fig.1)
4.2 At what height should we place the cooker hood - recommendations: (Fig.2)
According to regulations: European 60335-2-31, International IEC 60335-2-31: 2012 and Spanish UNE-EN 60335-2-31-
The minimum distance between the support surface of the cooking vessels on the worktop and the bottom of the extractor hood must be
at least 650 mm if the hood is installed on a gas cooking element.
4.3 Installation of conduits for proper extraction: (Fig.3)
1. Avoid making a reduction of diameter in the exit of the pipe of the hood or near elbows, always try to make them in straight
sections and away from the hood.
2. Avoid abrupt tube reductions.
3. Avoid to the maximum number of elbows. In case of having to install elbows, make sure they have the least possible degrees.
4. Ensure that the smoke outlet is as direct as possible to avoid incorrect air circulation.
5. The diameter of the flue pipe must not be less than that of the hood motor itself.
6. The hood shall be located at an optimum distance from the working plane of not less than: 65 cm. in case of gas or mixed
cookers.
7. If the instructions for the installation of the device for cooking with gas specify a greater distance, it must be taken into account.
8. The maximum depression allowed by the combustion decree, for this type of environment, should not exceed 0.04 mbar. so
check that there is adequate ventilation.
9. The air sucked by the hood does not have to be removed by the heater flue or by a device powered by non-electric energy.
10. Like the size, the height of the hood is very important to get its maximum performance.
4.4 Ventilation - create primary air inlets: (Fig.4)
It is a basic requirement that the kitchen is provided with an air intake to ensure a good air circulation and therefore a correct operation of
the hood because without this entrance and with the kitchen closed creates a depression that reduces the suctioning efficiency of the bell.
In case there is an air inlet for the gas installation, this would be useful and if not, one must be created.
5. CONTROL PANELS & REMOTE CONTROLS
5.1 Control Panel: (Fig.5)
A.- ON / OFF button:This button turns the hood on and off. The hood is always activated at the same speed as the one with which it
was last turned off.
B.- High-speed button: This button increases the aspiration speed. When it is operating the light is blue. When at maximum speed,
the blue light will flash.
C.- Low-speed button: This button decreases the motor speeds. When it is operating, the light is blue.
D.- Timer: When it is operating, the blue light will be lit. When this function is activated, the hood continues to operate for a few
minutes at the required speed and then automatically switches off. Only works on 1-2-3 speed, in 4th speed the BOOST function
cancels the timer.
E.- Light switch: Press this switch to turn the lights on and off. When it is operating, the light is blue.
This control panel is provided with a feature that is programed to inform about when the grease filters must be changed.
When light on button “E” appears, this means the filters must be washed (usually every 40 hours of operation).
When the filters have been mounted again, keep button “E” pressed for 10 second to reset it and for the counter to return to zero.
5
6. LIGHTING
6.1. Led Characteristics
✓LED 3000K (Not Dimmable)
✓On / Off
✓Beam Angle 60º
✓Lens Material PC
✓12V
✓Lumen 255
✓PW Consumption: 2,2W
6.2 Replacing the LED lights:
LED are removable from outside the hood. Access the LED commands by unscrewing and pulling out the housing support of the LED and
control panel. Remove LEDs by pushing the tabs.
7. GRESE FILTERS
BAFFLE FILTER SHOULD BE EXAMINED PERIODICALLY TO ASSURE THAT ALL SURFACES AND PARTS ARE CLEAN.
The function of the grease filter is the absorption of fat particles that are formed during cooking.
To remove the grease filter, pull from the handle.
✓The filters are dishwasher safe or in a sink with hot, soapy water
✓Easy periodic cleaning will assure optimum filter performance
✓Do not use caustic detergent to clean the filters. abrasive cleaners may harm or damage the finish
✓Do not disassemble the baffle filter. Disassembly will void the warranty.
Features of Baffle filters:
✓Thicker baffle filters 0.79 inch - 20mm - which improve airflow
✓Springs system for easy removal.
✓Dishwasher safe
✓All metal design makes them more durable and require low maintenance
✓Safer and more effective grease collection tha standard inox filters-.
✓Its blades act as fire barrier and prevents flames traveling past the hood
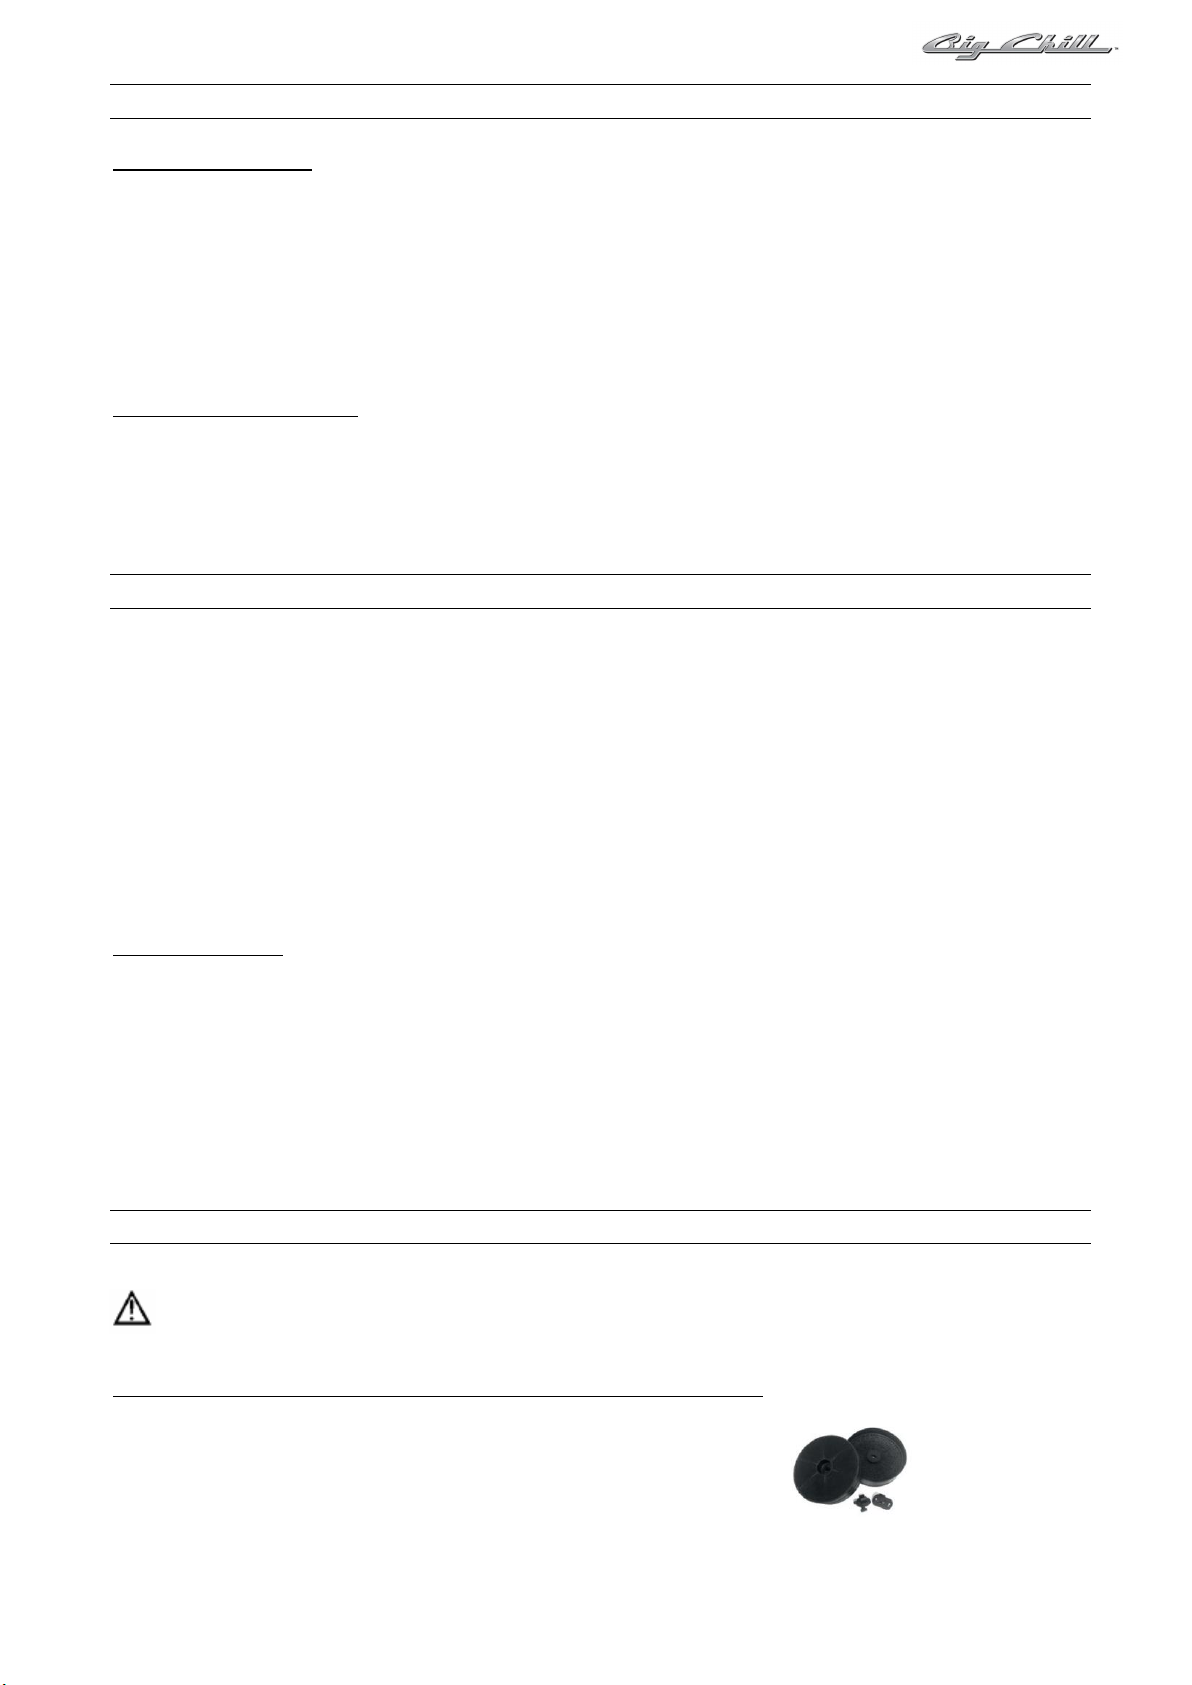
8. CHARCOAL / CARBON FILTERS
Before performing this procedure, make sure that the hood is switched off and that the motor is not running. For further safety, disconnect the
hood from the power supply. Some hoods have a switch power button inside, apart from their remote control.
8.1. Carbon filters integrated into the motor (indicated models only). (Fig.7)
1. Lay the filter on the side of the engine, matching the notches A with B.
2. Once faced, turn a quarter of a turn in any direction.
3. Repeat the operation on each side of the engine. (Install 2 filters)
Table of contents
Languages:
Other Big Chill Ventilation Hood manuals

Popular Ventilation Hood manuals by other brands

Gorenje
Gorenje S3 IHGC963S4X manual

KOBE
KOBE ISX2136SQB-1 Installation instructions and operation manual

U.S. Products
U.S. Products ADVANTAGE-100H Information & operating instructions

Kuppersberg
Kuppersberg DUDL 4 LX Technical Passport

Framtid
Framtid HW280 manual

Thermador
Thermador HGEW 36 FS installation manual


