Birth Alarm Mobile Multiple User manual

the original product
Birth Alarm Mobile Multiple
Manual
EN

2
EN
Thank you for purchasing the Birth Alarm Mobile Multiple. This is a highly
dependable foal birth notification system. We recommend that you read this
manual carefully prior to use. It is essential that the alarm is fitted and
operated properly to ensure that it works correctly.

3
EN
Table of Contents
1. Introduction 5
2. Contents of packaging 6
3. Preparation for use 8
3.1 First time 8
3.2 Switching on/off 8
4. The different lights on the Birth Alarm Mobile Multiple 10
4.1 The status light 10
4.2 The status light on the Master 10
4.3 The status light on the Slave 11
4.4 The GSM light 11
5. The inside of the Birth Alarm Mobile Multiple 12
5.1 Inserting/replacing batteries 12
6. Inserting the SIM card 14
7. Installing a new SIM card 15
8. Programming telephone numbers 17
8.1 Programming mode 17
8.2 Programming telephone numbers 17
8.2.1 Programming by calling 17
8.2.2 Programming by sending a text 19
8.2.3 Programming directly 20
9. Programming the other settings 22
9.1 Sleeping mode on the Master 22
9.2 Sleeping mode on the Slave 24
9.3 Angle setting on the Master 24
9.4 Angle setting on the Slave 26

4
EN
9.5 Number of calls and moment of sending a text 27
9.5.1 Changing the number of call rounds 27
9.5.2 Setting the moment when a text is sent 27
10. Status text messages 30
11. The automatic system check 31
12. Pairing 32
13. Testing 33
14. Fitting the device onto the mare 36
14.1 Fitting the holder under the halter 37
14.2 Fitting the holder into an anti-roll girth 38
15. Summary and method of use 39
16. Technical specifications 41

5
EN
1. Introduction
When your mare is about to give birth, you want to be present so that you
can intervene or warn a vet if there are any complications. Horses and ponies
have a tendency to lie completely stretched out on their left or right side
during the delivery. That gives them more room during the contractions. The
Birth Alarm Mobile Multiple system makes very clever use of this tendency.
The Birth Alarm Mobile Multiple is a system which consists of a "Master
Module" (M) and one (or more) "Slave Module(s)" (.S.). The system aims to
make it easy for you to watch over several mares that are foaling. It is ideal
for breeders, riding schools and large stables.
The Master Module (M) is a complete GSM birth alert, but it can also forward
any signals (alerts) sent by Slave Modules (.S.) to your mobile phone.
In other words, a Slave Module is a birth alert without the GSM functionality.
The Slave Module will only send out a radio signal when the delivery starts.
The system is interactive. Once a Slave Module has been linked to the Master
Module, the Master Module will check whether the Slave remains within the
area of reception. If any problems are identified within the system, the
Master Module will inform you about this by means of a brief text message.
You are thus completely in control of the operation and condition of the
entire system.

6
EN
2. Contents of packaging
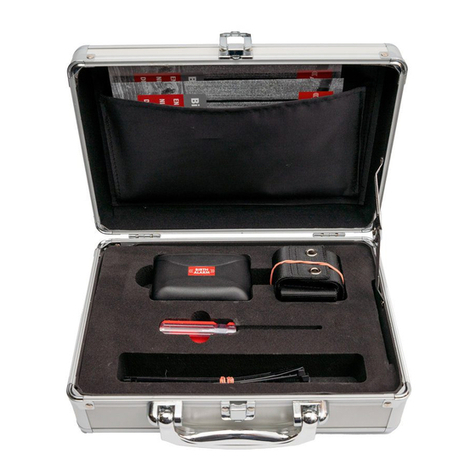
1. The Birth Alarm Mobile Multiple Master. You can recognize the Master
by the M – symbol on the label.
2. The Birth Alarm Mobile Multiple Slave. You can recognize the Slave by
the .S. – symbol on the label.
3. 2x Special holder (For inserting the Master and Slave Modules). This
holder can be attached either to your mare's halter or in the ring of the
anti-roll girth.
4. Tie wraps. We have supplied a number of tie-wraps to enable you to get
started. These tie-wraps should be used once only, but they are available
at any DIY store.
5. The special screwdriver. This enables you to unscrew your Birth Alarm
Mobile Multiple (for instance when the batteries need to be replaced or
when you have to insert/remove your SIM card), but it also has a strong
magnet on the back. With this magnet you can operate your Birth Alarm
Mobile Multiple.
6. SIM card package. This package contains the necessary contact numbers,
as well as the SIM card's PIN code and PUK code. (It may be the case that
your Birth Alarm Mobile Multiple set has been supplied without a SIM
card / SIM package. This depends on the country where you live)
7. Documentation. Your Birth Alarm Mobile Multiple set also contains the
following two documents:
a. QuickStart Guide (brief, concise user guide)
b. TroubleShooter (You can refer to this checklist if you are
experiencing any problems when using the Birth Alarm Mobile
Multiple)

7
EN
2
1
3
4
5
7

8
EN
3. Preparation for use
3.1 First time
Before using the Birth Alarm Mobile Multiple for the first time you have to
complete the following steps; this needs to be done once only:
• Unscrew both the Master and the Slave and remove the red label,
which is located against the pole of one of the batteries. The batteries
will now make contact.
• The SIM card may or may not have been supplied; this depends on
the country where you live.
- If it has been supplied, it is located in the SIM holder under the
battery compartment of the MASTER. (see 5.3)
- If this is not the case, you have to purchase your own SIM card
and configure it; once this is done it has to be activated and
inserted into the SIM holder. (see 5.3)
• The Chapter "Installing a new SIM card" (see 6) explains how you can
configure and install a newly bought SIM card.
Once you have carried out these steps for the Master and the Slave , you can
tighten the screws again and continue the configuration process.
3.2 Switching on/off
You can switch on/off your Birth Alarm Mobile Multiple and operate it by
using the back of the supplied special screwdriver.
Complete the following steps to switch the Birth Alarm Mobile Multiple ON:
If you have a good signal with your mobile phone in the stable
or field where your mare is, we recommend that you buy a SIM
card from the same provider.

9
EN
• Hold the back of the screwdriver against the red
square ( ) beside the symbol on the side of the
Birth Alarm Mobile Multiple.
• The status light will turn to green. Remove the
screwdriver.
• The Birth Alarm Mobile Multiple is now active and
ready to be attached to your mare.
Complete the following steps to switch the Birth Alarm Mobile Multiple OFF:
• Hold the back of the screwdriver against the red
square ( ) beside the symbol on the side of the
Birth Alarm Mobile Multiple once again.
• The status light will now turn to red. Remove the
screwdriver.
• The Birth Alarm Mobile Multiple is now switched
off.

10
EN
4. The different lights on the Birth Alarm Mobile Multiple
4.1 The status light
The status light is the outermost light on the side of the
Birth Alarm Mobile Multiple. The status light is a special
light that can show 3 different colours: blue, green and
red. The flashing order of the light shows the status of
the Birth Alarm Mobile Multiple. For example: if it flashes green the device is
working OK, but if it flashes red the battery needs to be replaced.
4.2 The status light on the Master
When the Birth Alarm Mobile Master is ringing, the status light will give you
some further information. If the light flashes blue and red alternately, this
means that the signal is bad. If the light flashes yellow/blue or green/blue
alternately, the signal is moderate or good. The table below shows what the
standard light patterns signify.
Fig1. : Standard light patterns of the status light
LED light pattern
Signifies
Standby, battery OK
Standby, battery OK, sleeping mode on
Standby, battery weak
GSM active, connecting
GSM active, bad network signal
GSM active, moderate network signal
GSM active, good network signal
Alert received

11
EN
4.3 The status light on the Slave
The status light on the Slave will also give you some further information. The
table below shows what the standard light patterns signify.
Fig2. : Standard light patterns of the status light
4.4 The GSM light
Next to the status light on the side of the Master you
will also find a light marked "GSM". This light only
shows an amber light. It is linked directly to the
Master's internal GSM, and it will only light up when the
GSM becomes active.
In brief, three different situations are possible:
1. GSM is searching network (light flashes rapidly)
2. GSM is connected to network (light flashes slowly)
3. GSM is making a call (light is on continuously during the call)
The GSM light only gives extra information; you will normally mainly use the
status light.
LED light pattern
Signifies
Standby, battery OK
Standby, battery OK, sleeping
mode on
Standby, battery weak
Alert sent
As only the Master has a GSM, the GSM light is only present on
the Master. The Slave does not have this light.

12
EN
5. The inside of the Birth Alarm Mobile Multiple
When you unscrew the Birth Alarm Mobile Multiple, you will see the
following important parts:
1. Batteries
2. SIM card / SIM card holder (present only in Master)
3. Status light
4. GSM light
5. Communication unit
5.1 Inserting/replacing batteries
When replacing the batteries of your Birth Alarm Mobile Multiple, you should
always use alkaline batteries (preferably "Duracell" or "Panasonic"). The use
of rechargeable batteries is inadvisable. Also make sure that you replace the
entire set of 3 batteries! If you are unable to remove the batteries with your
fingers, you can also carefully use a small screwdriver.

13
EN
The batteries should always be inserted with the minus pole against the
spring.
The design of the casing of the Birth Alarm Mobile Multiple is
such that the screws can be tightened only in one way. This is to
ensure that the status light of the GSM light is visible.
When you foresee that you are not going to use the Birth
Alarm Mobile Multiple for some time, for instance after the foaling
season, it is advisable to remove the batteries to prevent any
leakage or damage in the device.
You should always use new batteries at the start of the foaling
season!

14
EN
6. Inserting the SIM card
The SIM card should be inserted into the Master with the chip facing down.
Also make sure that the diagonal side of the card is facing towards the front
when you insert it.
Keep pushing the SIM card into the holder until you hear a "click". The SIM
card is now firmly fixed in the holder and the Master is ready for use. To
remove the SIM card from the holder, carefully push against the SIM card
until you hear another "click". The SIM card will now partly stick out of the
holder, so that you can easily remove it.

15
EN
7. Installing a new SIM card
The SIM card may or may not have been supplied with the Birth Alarm Mobile
Multiple package; this depends on the country where you live. If it has been
supplied, it has already been inserted into the SIM card holder of the Master.
If this is not the case, you need to purchase your own SIM card.
Buy a prepaid SIM card (or a SIM card with a cheap SIM-Only subscription)
from your mobile phone shop. We recommend that you choose a provider of
which you know that it offers good coverage at the location where you want
to use your Birth Alarm Mobile Multiple set.
When you have bought your SIM card, you need to activate it. You can do this
as follows:
• Insert the newly purchased SIM card into your own device.
• Enter the PIN code if the device asks for this after it has been switched
on. You can find the PIN code in the instructions or letter supplied with
your SIM card. The PIN code is usually "0000".
• Now try to use the device by making a call. It may happen that you hear
some kind of welcome message from your provider before the telephone
starts ringing, because this is the first time you are using the card. Listen
to the entire message first.
• You should now check whether the voicemail of the SIM card has been
switched off. You can do this by calling the number of the SIM card with a
different phone. If after some time you are put through to a voicemail
service, this obviously means that the voicemail is on. In that case you will
have to switch off the voicemail by calling the provider's customer service
or by keying in a specific switch-off code. How the voicemail is switched
off depends on the specific provider; it will be explained in the SIM card's
user guide.

16
EN
• If your were asked to enter a PIN code when you switched on the device,
the PIN code security should be switched off. For more information about
this, consult the user guide of your device.
• Check the phone credit on the SIM card. You can do this by calling your
provider's phone credit/ top-up number. Make sure that there is at least
€ 10 on the card. If you have insufficient phone credit, you should top up
your credit by means of a top-up card (available from post office or
supermarket).
Once you have completed all the steps, the new SIM card will be ready for
use and can be installed in the Master . (see 6)

17
EN
8. Programming telephone numbers
Occasionally, you will wish to change the settings on your Birth Alarm Mobile
Master or add numbers. In order to change the settings on your Birth Alarm
Mobile Master you will have to set the device to programming mode.
8.1 Programming mode
The following steps will enable you to program the Master directly:
• Hold the back of the screwdriver a few seconds against the red square
( ) beside the symbol on the side of the casing.
• While you do this, the status led will flash 3x in green, after which it will
show a blue light.
• When it is blue, you can remove the screwdriver.
• The Birth Alarm Mobile Multiple is now in programming mode.
8.2 Programming telephone numbers
Telephone numbers can be programmed in 3 different ways: by calling, by
sending a text or through the "direct programming" option. The three
different options are described in detail below. You only have to choose one
method. People often choose the "call" method. The 4 numbers which the
Master can call are indicated as "M1","M2","M3" and "M4".
8.2.1 Programming by calling
• Put the Master into "programming mode" (see 7.1) . Wait until the status
light flashes 1x blue and 1x green alternately.
• Use your (preferably mobile) phone to call the Master.
When you have finished programming just wait for 2-3
minutes; the Master will automatically exit the programming mode
and return to the normal status. The Birth Alarm Mobile Multiple
will be switched on and ready for use.

18
EN
• The Master will receive your call and program your telephone number in
its memory.
• The Master will confirm this by calling you back. Just let your phone ring
(so don't answer and don't press the decline button).
If you want to preprogram more numbers you can follow the steps below.
• Wait until the Master flashes 1x blue and 2x green.
• Now call the Master with the phone you want to be the 2nd one that is
called (this can also be a landline connection).
• The Master will receive this call too and program your telephone number
in its memory.
• The Master will confirm this by calling you back on this phone too. Just let
your phone ring and do not respond.
• After a few seconds the Master will flash 1x blue and 3x green to indicate
that you can now also program the 3rd number (and after that the 4rd
number) following the same method.
Fig2. : light patterns of the status light during programming
LED light
pattern
Signifies
The
Master
is ready for the first call
The
Master
is ready for the second call
The
Master
is ready for the third call
The
Master
is ready for the fourth call
You have now programmed your number. The Master now has
your number and will call you during the delivery. Wait for 2-3
minutes. The Master will automatically exit the programming
mode, after which it will be ready for use.

19
EN
8.2.2 Programming by sending a text
You can also program the Master by sending a text. Follow the steps below:
• On your own mobile phone, text "M1:" (NB: use capital M), followed
immediately by the required first number. In the table below you can see
an example of a text message in your country
• Put the Master into "programming mode" (see 8.1) . Wait until the status
light flashes 1x blue and 1x green alternately.
• Now send the text message you have just prepared to the Master's
mobile number.
Country
Nati
onal
code
Example of a
mobile number :
Example of the text
message to be sent:
(NB: Use capital "M" and type
without leaving any spaces)
Netherlands (NL)
+31
0 6 12345678
M1:+31612345678
Belgium (BE)
+32
0 491 123456
M1:+32491123456
France (FR)
+33
0 6 12345678
M1:+33612345678
Switzerland (CH)
+41
0 176 12345678
M1:+4117612345678
Austria (AT)
+43
0 664 1234567
M1:+436641234567
United Kingdom
(UK)
+44
0 7788 123456
M1:+447788123456
Sweden (SE)
+46
0 707 123456
M1:+46707123456
Germany (DE)
+49
0 171 1234567
M1:+491711234567
As you can see in the table, you have to enter the national code
instead of the first "0" which you would normally dial when you
call a mobile number.
The number of green flashes on the Master will show you which
number you can program. For instance, 1x blue and 4x green
means that you can program the 4th number.

20
EN
(TEXT MESSAGE)
M1:+……
M2:+……
M3:+……
M4:+……
• The Master will confirm receipt of the message shortly by sending a
status text. It contains the number that you have programmed after M1:
The numbers of M2, M3 and M4 can be programmed
following the same procedure. You can also program
more than one number in one text
message, as long as you start a new line
in your message for each number.
8.2.3 Programming directly
It is always possible to program the Master by temporarily inserting the
Master's SIM card into your own or another mobile phone, and to program
the numbers on the SIM card using that telephone. However, this tends to be
the most complex method. The following steps will enable you to program
the SIM card directly:
• Remove the SIM card from the Master's SIM card holder. (see 6)
• Insert the SIM card into another mobile phone.
• Switch the phone on.
• Program the names M1, M2, M3 and M4 on the SIM card, on memory
locations 11, 12, 13 and 14. The mobile phone's user guide will explain
You can also program the numbers via text messages while you
are testing the birth alert. (see 13) As long as the GSM light on the
Master flashes slowly, you can send a text with telephone
number(s) or new settings, and the Master will be able to process
these.
We recommend that you program a mobile number as the first
number (M1), as that means that the Master can send you texts
and can receive texts from you.
Table of contents
Other Birth Alarm Security System manuals
