BJ Live BJOY Ring Wireless User manual

c.Mare de Déu del Coll, 70, |08023|Barcelona|Spain|t.+34 93 285 04 37|fax + 34 93 553 56 34| export@bjliveat.com | www.bjliveat.com
BJ-889 BJOY Ring Wireless
Quick Start Guide
BJ-889 BJOY Ring Wireless
Page 2
Quick Start Guide
BJ-889 BJOY Ring Wireless
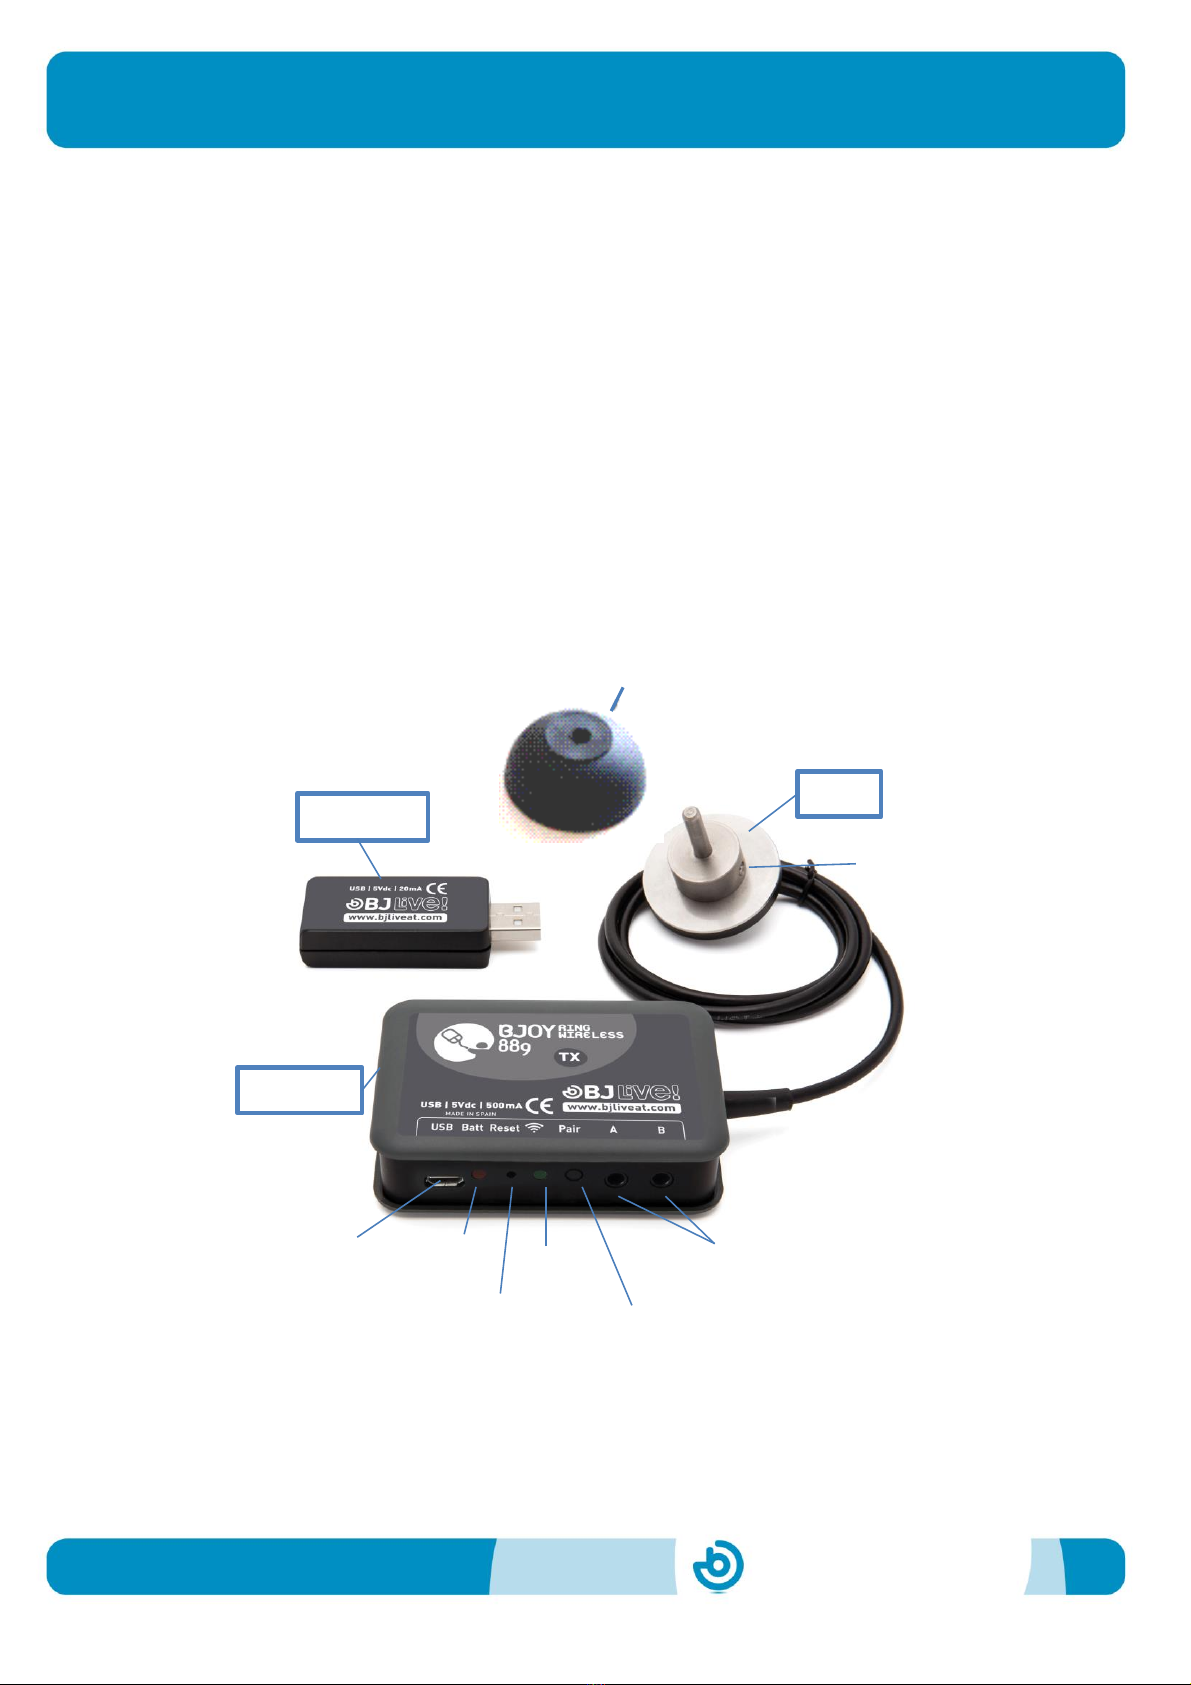
1_ Description of the equipment
The BJOY Ring wireless mouse is comprised by following parts:
Ring
Protection cover
Emitter
Receiver
Assembly spanner
Extension USB cable (1.5m long) with cradle
Micro USB cable for charging
USB type power supply
Fig. 1: Parts of the BJOY Ring wireless
Switch inputs
Battery
LED
Reset button
Micro
USB input
RING
EMITTER
RECEIVER
Fixing screw
Connection
status
Protection cover
Pair button

BJ-889 BJOY Ring Wireless
Page 3
Quick Start Guide
BJ-889 BJOY Ring Wireless
2_ Assembly of the equipment
2.1 Assembly of the Ring
In order to assemble the Ring you must follow these steps:
1.
Take the handle off the
wheelchair joystick and the
protective hood if any.
2.
Insert the ring.
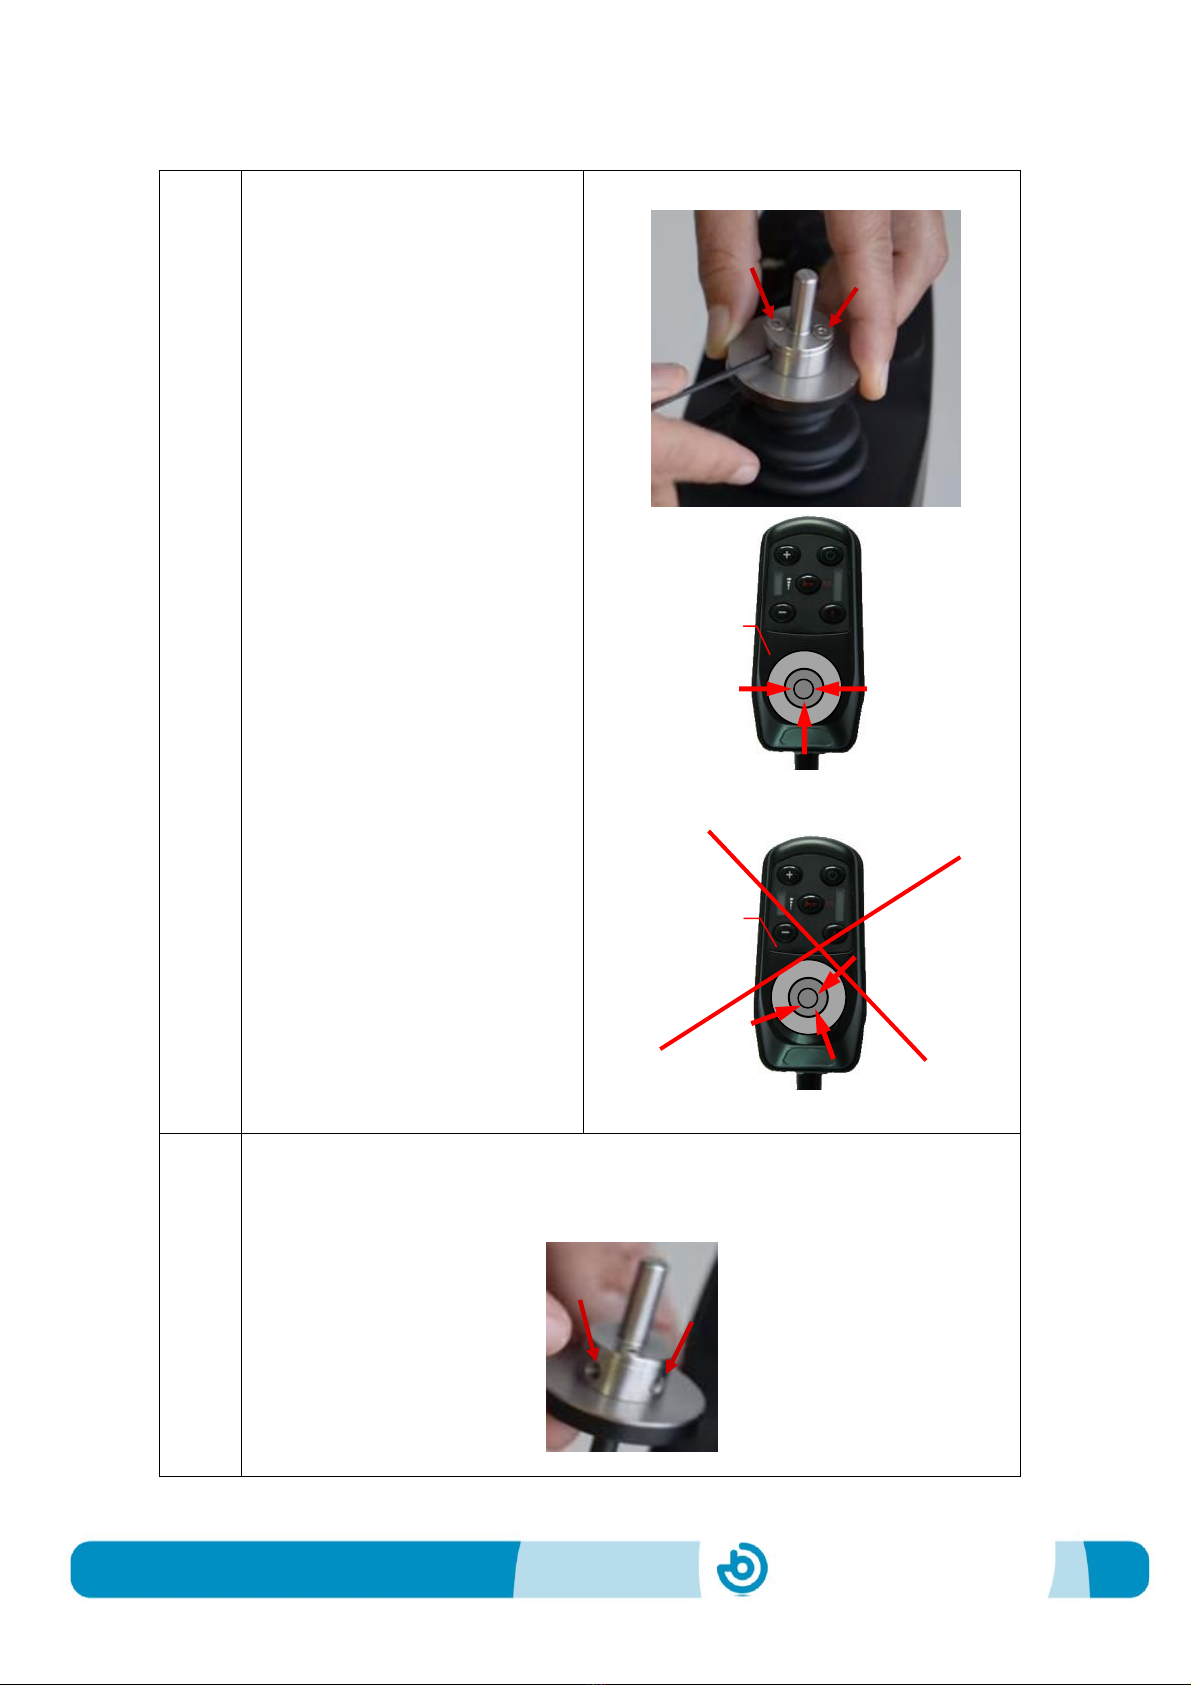
BJ-889 BJOY Ring Wireless
Page 4
Quick Start Guide
BJ-889 BJOY Ring Wireless
The optimum position for
assembling the ring is with
the two visible screws in
the chair’s forward
direction and the cable
sideways (left or right
side).
It is important to check
that the cable does not
disturb or it is forced by
the movement of the
joystick.
In the case that it cannot
be set up in the optimum
position, the ring can be
assembled in positions with
90º turns in relation to the
chair’s forward position.
If it is set up in different
positions the mouse will
not respond properly.
3. 3
.
Tighten the mounting screws using the spanner provided with the
device. It is important not to force the tightening screws.
Bear in mind that device has two tightening screws.
Other
assembly
positions
Examples of
assembly
positions to
avoid
BJ-889 BJOY Ring Wireless
Page 5
Quick Start Guide
BJ-889 BJOY Ring Wireless
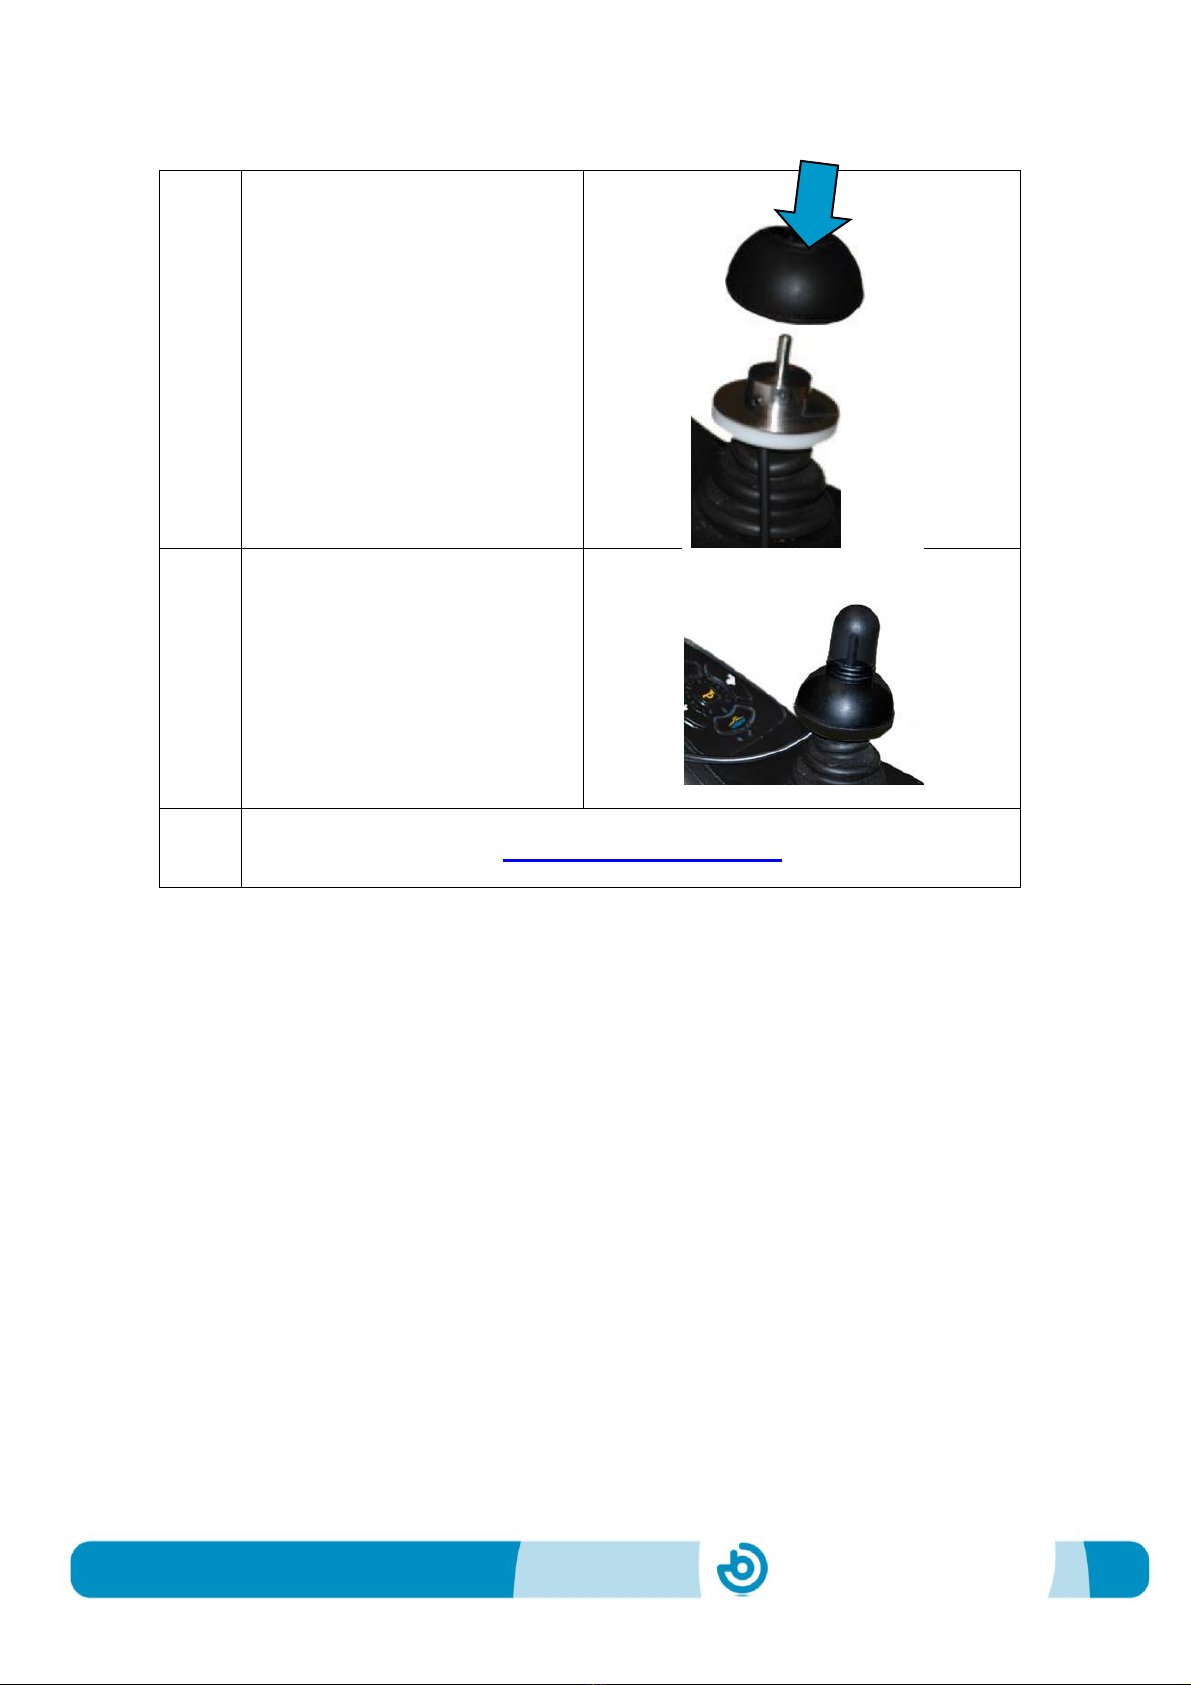
4. 4
.
Put on the protective hood.
It is important to always
put on the protective
hood.
5. 5
Reassemble the joystick
handle onto the wheelchair.
It is recommended to use
assembly inclinations of
under 45º.
6.
If you any doubt about how to assemble the device properly, check
out the video tutorial: https://goo.gl/CinfHB
2.2 Assembly of the Emitter
Emitter and receiver are communicated via Radio Frequency. Metal
areas and interferences from other devices installed in the wheelchair
or nearby may affect this communication, causing the bad operation
of the device.
Follow these recommendations to ensure the correct operation
of the device:
oPlace the emitter far away from interferences from other devices
installed in the wheelchair
oDo not place it close to metal areas to avoid the screening effect.
oPlace it accesible enough to be able to connect the charger cable
and switches.
oProtect the emitter box from liquids and avoid water entering.
oTie the cable surplus between emitter and ring to avoid pulls.

BJ-889 BJOY Ring Wireless
Page 6
Quick Start Guide
BJ-889 BJOY Ring Wireless
2.3 Assembly of the Receiver
The receiver is an USB device that must be plugged to the USB port
of a computer or to a compatible mobile device using an USB-OTG
cable.
Follow these recommendations to ensure the correct operation
of the device:
oUse the provided extension cable with cradle to place the receiver
in a visible place. Avoid to plug it at the back of the computer.
oPlace the receiver far away from interferences from other devices.
oDo not place it close to metal areas to avoid the screening effect.
oProtect the receiver from liquids and avoid water entering
Each device is provided with one receiver paired to the emitter.
One emitter can be paired up to four receivers. If the user wants
to access more than one device or devices in different places, it is
possible to order more receivers.
IMPORTANT: To learn about the use of the BJOY Ring wireless with
compatible smartphones and tablets see section “Use with compatible
smartphones and tablets” in the user guide.
2_ Getting started
1.
Charge up the emitter’s
battery using the micro USB
cable connected to the USB
port or to the mains with the
USB type power supply.
While the battery is charging
the battery LED (red) flashes.
When the battery is fully
charged the battery LED stops
flashing.
The LED turns off when the
cable is disconnected.

BJ-889 BJOY Ring Wireless
Page 7
Quick Start Guide
BJ-889 BJOY Ring Wireless
2.
Assembly all the parts of the device following the instructions
and recommendations given in this document.
Connect the switches to the switch entries if needed.
3.
Emitter and receiver provided by default are paired.
If the user wants to add more receivers, they should be paired to
the emitter. Follow instructions in the user guide to learn how to do
it.
4.
Once the emitter has been
fixed to the wheelchair reset
the device pressing the reset
button to ensure that the
device finds the resting
position.
Do not move the joystick while
beeping.
5.
Calibrate the device using the
BJOY software provided in
order to improve the device’s
response.
(It is possible to connect the
emitter directly to the
computer for calibration using
the micro USB cable provided)
6.
Customise the device’s operation to meet the user needs using the
BJOY software provided.

Quick Start Guide
BJ-889 BJOY Ring Wireless
This manual suits for next models
1
Table of contents
Other BJ Live Mouse manuals


