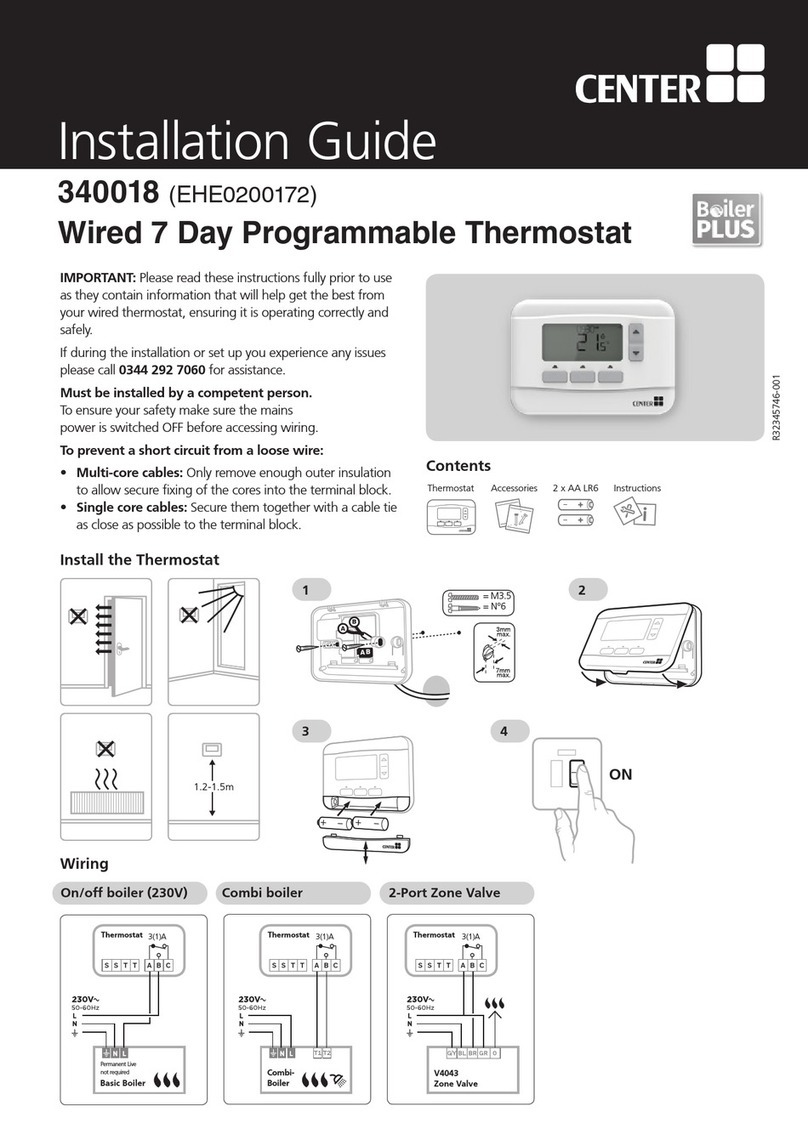
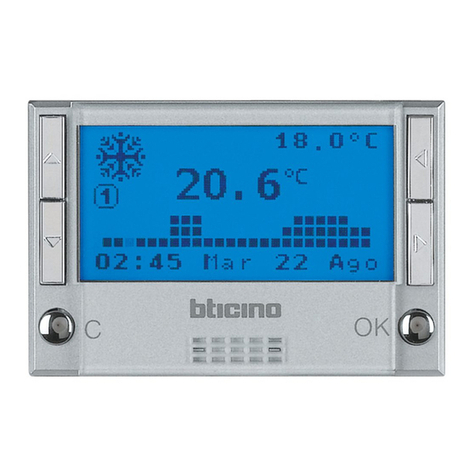
BJC 2381 User manual

CRONOTERMOSTATO
CLOCK THERMOSTAT
FÁBRICA ELECTROTECNICA JOSA, S.A.
Av. de la Llana, 95-105
08191 RUBI (BARCELONA) ESPAÑA/SPAIN
TEL. (34) 93 561 05 00
BJC-97722
2381
SPAGNOLO/INGLESE 7/7/05 5-09-2005 17:48 Pagina 1

1ESPAÑOL
1 Utilización conforme a las
especificaciones
El 2381 es un Cronotermostato para el control de la temperatura
ambiente.
Este cronotermostato está previsto a conectar y desconectar, en
función de la hora y de la temperatura ambiente, un aparato eléctri-
co con un consumo máximo de 6A, como por ejemplo una bomba
de circulación, un quemador o una válvula mezcladora motorizada.
Únicamente debe utilizarse en locales secos y con grado de polu-
ción normal en ambientes domésticos.
Para una utilización correcta deben respetarse estas instrucciones.
Cualquier otra utilización se considera un mal uso y el fabricante no
se hace responsable de los daños que puedan ocasionarse
2 Advertencias de seguridad
Deben observarse los reglamentos de instalación y las
reglas de seguridad en vigor.
Cualquier manipulación o modificación del cronoter-
mostato comporta la pérdida de la garantía.
Contenido
1 Utilización conforme a las especificaciones . . . . . . . . . . 1
2 Advertencias de seguridad . . . . . . . . . . . . . . . . . . . . . . . 1
3 Descripción y montaje . . . . . . . . . . . . . . . . . . . . . . . . . . . 2
3.1 Vista general del aparato . . . . . . . . . . . . . . . . . . . . . . . . . . 2
3.2 Montaje y conexión eléctrica . . . . . . . . . . . . . . . . . . . . . . . .3
4 Puesta en funcionamiento y operación . . . . . . . . . . . . . 4
4.1 Reinicializar . . . . . . . . . . . . . . . . . . . . . . . . . . . . . . . . . . . . 4
4.2 Poner o cambiar pilas . . . . . . . . . . . . . . . . . . . . . . . . . . . . . 4
4.3 Seleccionar idioma . . . . . . . . . . . . . . . . . . . . . . . . . . . . . . . 4
4.4 Ajustar hora / fecha . . . . . . . . . . . . . . . . . . . . . . . . . . . . . . 4
4.5 Seleccionar perfil de temperaturas . . . . . . . . . . . . . . . . . . . 5
4.6 Consultar temperatura ambiente y ajustes actuales:
botón de información . . . . . . . . . . . . . . . . . . . . . . . . . . . . . 5
4.7 Modificar temperatura ambiente transitoriamente . . . . . . . . 6
4.8 Abandonar, consultar o borrar el programa de
vacaciones . . . . . . . . . . . . . . . . . . . . . . . . . . . . . . . . . . . . . 6
4.9 Programa Party / Eco . . . . . . . . . . . . . . . . . . . . . . . . . . . . 7
5 Programación . . . . . . . . . . . . . . . . . . . . . . . . . . . . . . . . . . 7
5.1 Ajustar el programa de vacaciones . . . . . . . . . . . . . . . . . . 7
5.2 Cambiar los valores de consigna para temperaturas
nominales . . . . . . . . . . . . . . . . . . . . . . . . . . . . . . . . . . . . . . 8
5.3 Programa P3 . . . . . . . . . . . . . . . . . . . . . . . . . . . . . . . . . . . 8
5.4 Ajustes de servicio . . . . . . . . . . . . . . . . . . . . . . . . . . . . . . 11
5.5 Hora/fecha y horario de verano/invierno . . . . . . . . . . . . . . 13
6 Conservación y mantenimiento . . . . . . . . . . . . . . . . . . . 14
7 Desechar . . . . . . . . . . . . . . . . . . . . . . . . . . . . . . . . . . . . 14
7.1 Desechar las pilas . . . . . . . . . . . . . . . . . . . . . . . . . . . . . . . 14
7.2 Desechar el aparato . . . . . . . . . . . . . . . . . . . . . . . . . . . . . 14
8 Datos técnicos . . . . . . . . . . . . . . . . . . . . . . . . . . . . . . . . 14
SPAGNOLO/INGLESE 7/7/05 5-09-2005 17:48 Pagina 3

ESPAÑOL
2
ESPAÑOL
3 Descripción y montaje
3.1 Vista general del aparato
Indicación del día de la semana
(1 = lunes, 2 = martes, etc.)
línea de símbolos para la visualiza-
ción del nivel de programación
(selecionador manual MENU)
Botones de cambio +
Botones de cambio --
Seleccionador manual
de programas
Línea de texto multifuncional, Ej.:
“Temperatura ambiente 20.0° C”
botón i
para la consulta de ajustes
Indicación equipo activo
Botón OK (confirmar ajuste/elección
o programación)
Indicación programa
PARTY o ECO activo
Botón RESET
Indicación de cambio de pilas
necesario
Botón ESC (cancelación de entra-
das de programación)
Visualización de las fases de
conmutación
Antes de la colocación del
cronotermostato, figura ❹,
seleccione la función
W= Invierno /S= Verano con el
interruptor, figura ❷
W= Invierno / Calefacción
S = Verano / Aire Acondicionado
3.2 Montaje y conexión eléctrica
3.2.1 Ejemplos de montaje
Control mediante la
bomba de circulación
o la calefacción por
acumulación térmica/
aire caliente
3.2.2 Ejemplos de conexión
1
2
3
4
bornes de conexión
carga
Control de un
quemador
S W
3
SPAGNOLO/INGLESE 7/7/05 5-09-2005 17:48 Pagina 2

5ESPAÑOL
4
ESPAÑOL
4. a visualización cambia automáticamente al modo automático
ajustado, por ej. visualización de la temperatura nominal.
Note: La hora y la fecha también pueden cambiarse en el menú
„Servicio“(véase la página 11), Ahítambién se pueden efectuar los
ajustes referentes al cambio de horario de verano a horario de
invierno.
3. El display cambia automáticamente al
ajuste de la fecha.
Ajustar consecutivamente el año, el
mes y la fecha del día. Confirmar cada
ajuste con el botón OK. La visualización
cambia automáticamente al ajuste
siguiente.
4.5 Seleccionar perfil
de temperaturas
4.5.1 Programa P1 (programa almacenado)
Températura confort de lu a vi de 6.00 a 22.00 horas al igual que sá
y do de 7.00 a 23.00 horas.
Entre estos tiempos: temperatura reducida.
4.5.2 Programa P2 (programa almacenado)
Temperatura confort de lu a vi de 6.00 a 8.00 horas y de 16.00 a
22.00 horas, al igual que sáy do de 7.00 a 23.00 horas. Entre estos
tiempos: temperatura reducida.
4.5.3 Programa P3 (de programación libre)
El programa P3 es un perfil de temperaturas que puede programar-
se libremente. En el estado de entrega, el programa P3 no se encu-
entra programado. Para la programación véase la página 8.
4.5.4 Confort permanente
La temperatura ambiente se regula permanentemente en la temper-
artura confort programada. No se realiza una reducción.
4.5.5 Reducción permanente
La temperatura ambiente se regula permanentemente en la temper-
artura reducida programada.
4.5.6 Anticongelante
El termostato del local sólo se conecta si la temperatura ambiente
desciende debajo de la temperatura anticongelante programada.
4.6 Consultar temperatura ambiente y ajustes
actuales: botón de información
Con el botón ise pueden visualizar la temperatura ambiente actual
al igual que todos los ajustes importantes del programa ajustado en
el selector de funciones.
1. Presionar el botón i. En el display se visualiza la temperatura
ambiente actual por aprox. 3 segundos. Para continuar con la
consulta, volver a presionar el botón lnfo.
2. De esta manera se pueden consultar las siguientes informacio-
nes consecutivamente:
- temperatura ambiente
- temperatura nominal activa de momento
- fecha y hora
4 Puesta en funcionamiento y operación
Para la puesta en funcionamiento tener en cuenta los párrafos 4.1 a 4.5
4.1 Reinicializar
Después de haber colocado por
primera vez las pilas o al sobrepa-
sar la reserva de marcha de 10
min. del cambio de pilas se deberáreinicializar.
Para esto, con un objeto puntiagudo presionar el
botón RES.
Después de sustituir las baterías
y colocar al dispositivo en su
base, presione la tecla "reset".
Siga el mismo procedimiento cada vez que
retire el cronotermostato de su base.
4.2 Poner o cambiar pilas
Sólo utilizar pilas de 1.5 V del tipo AAA, Alkaline, Cambiar las pilas
cada 1 año. Siempre cambiar ambas pilas.
Al ponerlas, observar la polaridad correcta de las pilas (véase la
ilustración). Cuando las pilas insertadas se han gastado, esto se
visualizarámediante el parpadeo del símbolo de pila en el display.
Véase la ilustración en la página 2.
4.3 Seleccionar idioma
1. Después de restablecer, el display automáticamente visualiza la
selección de idiomas.
2. Con los botones ▲o ▼seleccionar el
idioma deseado. Los idiomas disponi-
bles se visualizan uno tras otro.
Confirmar con el botón OK.
3. La visualización cambia automáticamente al ajuste de la hora.
Nota: El idioma también puede cambiarse en el menú„Servicio“
(véase la página 11).
4.4 Ajustar hora / fecha
Con el botón ESC en cualquier momento se puede regresar al paso
de programación precedente para corregir una entrada.
1. El display visualiza el ajuste de la hora.
2. Con los botones ▲y ▼
ajustar la hora actual:
Ajustar la hora y confirmar con el
botón OK.
Ajustar el minuto y confirmar con el
botón OK.
Botón para
restablecer
SPAGNOLO/INGLESE 7/7/05 5-09-2005 17:48 Pagina 4

7ESPAÑOL
6
ESPAÑOL
4.9 Programa Party / Eco
Con la función „Party / Eco“se puede suspender el perfil de tempe-
raturas del programa ajustado para las horas siguientes (hasta un
máximo de 23 horas y 50 minutos).
4.9.1 Ajustar el programa Party/Eco
1. Presionar ambas teclas ▲y ▼al mismo tiempo, por aprox.
2 segundos
2. El display cambia y visualiza el texto PERIODO y un reloj parpa-
deante. En el plazo de 3 segundos, presionar uno de los botones
▲o ▼y ajustar el periodo deseado en pasos de 10 minutos.
3. Después de 3 segundos, el display cambia y visualiza el texto
CONFORT o REDUCIDO. En el plazo de 3 segundos, seleccionar la
temperatura confort o reducida con las teclas ▲o ▼.
4. Después de 3 segundos, la visualización cambia automática-
mente. El display visualiza la temperatura nominal seleccionada
con la adición „PARTY“(para temperatura confort) o „ECO«(para
temperatura reducida). El programa Party resp. Eco se encon-
traráactivo durante el tiempo ajustado.
4.9.2 Abandonar el programa Party / Eco
Para terminar el programa „Party/ Eco“, presionar ambos botones ▲
y ▼al mismo tiempo, por aprox. 2 segundos. Esperar otros 3 seg-
undos más, hasta que el display vuelva a cambiar.
El programa Party / Eco ha terminado, y la adición „PARTY“resp.
„ECO«desaparece del display.
5 Programación
Nota: Los programas P1 y P2 se encuentran almacenados en
fábrica y no se pueden modificar.
5.1 Ajustar el programa de vacaciones
Ajustando un programa de vacaciones, se puede suspender el
perfil de temperaturas de un programa automático ajustado por
cualquier período deseado.
Nota: Con el botón ESC se puede cancelar la programación en
cualquier momento.
1. Posicione el cursor sobre el programa MENU.
2. Con los botones ▲o ▼, seleccionar la inscripción VACACION.
Confirmar con el botón OK.
Nota: En caso de que ya exista un programa de vacaciones
almacenado, se puede elegir si éste se desea consultar o borrar.
Antes de poder almacenar un programa de vacaciones nuevo, se
deberáborrar el programa de vacaciones ya almacenado. Véase
el párrafo 4.8 en la página 6.
3. Si aún no hay un programa de vacaciones almacenado, ahora
ajustar la fecha de inicio y de fin con los botones ▲y ▼.
Ajustar consecutivamente el año, el mes, la fecha del día y la
hora. Confirmar cada ajuste con el botón OK. La visualización
cambia automáticamente al ajuste siguiente.
Nota: El tiempo de fin no deberáser igual o anterior al tiempo de
inicio. De otra manera apareceráun mensaje de error: ERROR.
El programa de vacaciones deberáprogramarse de nuevo.
- tiempos de respuesta del programa ajustado. Los perfiles de
temperaturas y tiempos de respuesta almacenados se descri-
ben en el párrafo 4.5.
- Variante del display ajustada (es decir quéinformaciones se
visualizan en el display; véase también la página 11).
3. La consulta ha terminado. La visualización automáticamente
retorna al estado original.
4.7 Modificar temperatura ambiente
transitoriamente
Con esta función se puede modificar transitoriamente la temperatu-
ra nominal predeterminada por el programa. La temperatura nomi-
nal modificada no se almacena de manera perdurable. Sólo per-
manece ajustada hasta el siguiente cambio de temperatura del pro-
grama (por ej. de temperatura confort a temperatura reducida).
Nota: En caso de que se encuentre ajustado uno de los programas
„confort permanente“, „reducción permanente“o „anticongelante“,
la modificación de la temperatura quedaráajustada hasta un cam-
bio de programa.
1. Presionar uno de los botones ▲o ▼. El display visualiza la tem-
peratura nominal ajustada.
2. Modificar la temperatura nominal con los botones ▲o ▼.
3. Después de aprox. 3 segundos, la visualización retorna a su
estado original y el termostato del local ajusta la temperatura
nominal modificada.
4.8 Abandonar, consultar o borrar el
programa de vacaciones
En caso de que se quiera abandonar un programa de vacaciones
activado, se deberáborrar el programa de vacaciones.
Nota: El ajuste del programa de vacaciones se describe en el pasaje
5.1 en la página 7.
1. Posicione el cursor sobre el programa MENU.
2. Con los botones ▲o ▼seleccionar la inscripción VACACION.
Confirmar con el botón OK.
3. Con los botones ▲o ▼seleccionar la inscripción deseada y con-
firmar con el botón OK:
-CONSULTA: Presionando repetidas veces el botón OK se
pueden consultar uno tras otro los ajustes de¡programa de
vacaciones almacenado (tiempo de inicio y de fin, temperatura)
-BORRAR: Presionando el botón OK se borra el programa de
vacaciones almacenado.
Ahora se puede programar el programa de vacaciones (véase
el pasaje 5.1 en la página 7) o ajustar el perfil de temperatu
ras deseado (programa automático véase el párrafo 4.5 en la
página 5).
SPAGNOLO/INGLESE 7/7/05 5-09-2005 17:48 Pagina 6

9ESPAÑOL
8
ESPAÑOL
5.3.2 Elaborar un nuevo perfil de temperaturas P3
visualización de los
espacios de memoria
5.3.3 Consultar perfil de temperaturas P3
no hay programa en memoria
véase
5.3.5
véase
5.3.6
retornar a
retornar a
retornar a
retornar a
véase 5.3.1
véase 5.3.1
Presionando los botones OK o ▲
se enumeran consecutivamente
los tiempos de respuesta del día.
Al haberse alcanzado el último
tiempo de respuesta del día, se
visualizarán los tiempos de respu-
esta del día siguiente, etc.
5.3.4 Borrar perfil de temperaturas
3. El display primero visualiza la temperatura confort.
Con los botones ▲o ▼, modificar consecutivamente la tempera-
tura confort, la temperatura reducida y la temperatura anticonge-
lante. Confirmar cada ajuste con el botón OK. La visualización
cambia automáticamente al ajuste siguiente.
4. Después de la temperatura anticongelante se ha terminado c el
ajuste de las temperaturas nominales. El display visualiza FIN.
y después de 3 segundos retorna automáticamente.
5. Poner el selecionador manual en la posición del programa deseado.
5.3 Programa P3
5.3.1 Vista general del menú “Programa”
4. Elegir si se prefiere la temperatura confort, la temperatura redu-
cida o la temperatura anticongelante durante el tiempo ajustado.
Confirmar con el botón OK.
5. Ahora, el programa de vacaciones se encuentra programado y se
activa en el tiempo de inicio ajustado.
6. Retornar el selector de programas al programa deseado y cerrar
la tapa abatible.
7. Mientras que se encuentre activo el programa de vacaciones, el
display visualizarála temperatura nominal y la línea de texto
VACACION.
Nota: Cómo se consulta, borra o termina un programa de vacaci-
ones se describe en el párrafo 4.8 en la página 6.
5.2 Cambiar los valores de consigna para
temperaturas nominales
Para los perfiles de temperatura de los programas individuales se
puede elegir entre tres valores de temperatura: temperatura confort,
temperatura reducida y temperatura anticongelante.
Estos valores de temperatura se encuentran preprogramados en
fábrica. Usted los puede modificar conforme a sus deseos.
1. Posicione el cursor sobre el programa MENU.
2. Con los botones ▲o ▼, seleccionar la inscripción TEMP NOMINAL.
Confirmar con el botón OK.
SPAGNOLO/INGLESE 7/7/05 5-09-2005 17:48 Pagina 8

11 ESPAÑOL
10
ESPAÑOL
5.4 Ajustes de servicio
5.4.1 Vista general del menú „Servicio“
5.4.2 Seleccionar variante del display
Seleccionar variante del display con los botones ▲o ▼.
Confirmar con el botón OK. Cancelar con ESC.
Nota:
En la tabla, el
ajuste en fábri-
ca se encuentra
marcado con
fondo gris.
T= línea de texto
N= visualización numérica
Tabla: Vista general de las informaciones visualizadas en el display
para diferentes variantes del display.
Ejemplos de las informaciones que salen en el indicador visual.
Variación del indicador visual n°3
. Posicione el cursor de los programas sobre:
Los tiempos de respuesta
se visualizan uno tras otro.
Visualizar el siguiente tiem-
po de respuesta con ▲
5.3.5 Visualizar y borrar tiempos de respuesta individuales
no hay programa en memoria retornar a
véase 5.3.1
retornar a
véase 5.3.1
2. Borrar el tiempo de
respuesta deseado Para borrar el tiempo
de respuesta visua-
lizado, presionar el
botónOK.
El tiempo de respuesta
se borra, se visualiza el
siguiente tiempo de
respuesta.
5.3.6 Borrar todos los tiempos de respuesta
no hay programa en memoria
Para cancelar la operación
de borrar, presionar el
botón ESC.
retornar a
véase 5.3.1
retornar a
véase 5.3.1
1. Visualizar tiempos
de respuesta visualización del tiempo
de respuesta
SPAGNOLO/INGLESE 7/7/05 5-09-2005 17:48 Pagina 10

13 ESPAÑOL
12
ESPAÑOL
5.5 Hora/fecha y horario de verano/invierno
Ajustar hora y fecha: hora, minuto,
año, mes, día. Para la descripción
véase página 46.
Nota: La hora para cambiar al horario de in-
vierno se toma del horario de verano, por ej.
regresar de las 3.00 horas a las 2.00 horas.
Comienzo
del horario
de verano: mes
Comienzo
del horario
de invierno: mes
fin de semana
dentro del mes
fin de semana
dentro del mes
hora para el
cambio:
por ej. de las
2.00 horas a las
3.00 horas retornar a
5.4.3 Seleccionar idioma
Seleccionar el idioma con los botones ▲ o▼.
Confirmar con el botón OK. Cancelar con ESC.
retornara
véase 5.4.1
5.4.4 Ajustar compensación de pared
Con condiciones desfavorables en el lugar de montaje (montaje en
pared exterior, chimenea o similares), eventualmente podrán pre-
sentarse divergencias de temperatura entre la temperatura detecta-
da por el termostato del local y la temperaura ambiente efectiva.
Esta diferencia en la temperatura puede compensarse en la com-
pensación de pared ajustando un valor de corrección.
Ejemplo: La diferencia entre la temperatura medida y la temperatu-
ra controlada es de 2°C, es decir que la temperatura ambiente está
regulada por 2°C demasiado elevada. Valor de corrección: -2°C.
Valor de corrección se puede ajustar de -3°C a +3°C.
Ajustarlo con los botones ▲ o▼. Confirmar con el
botón OK. Cancelar con ESC.retornara
véase 5.4.1
Ajustar con los
botones ▲ o▼:
0.2°C ... 5.0°C.
5 …30
0.1°C ... 0.5°C
5.4.5 Adaptar comportamiento del regulador
Ajustar con
botones ▲ o▼:
0.2°C ... 1.0°C.
o automát.
después de 6 s
Con sistemas de calefacción adecuados, los reguladores PD se
caracterizan por un corto tiempo de ajuste y los pocos escesos por
encima del máximo, por todo ello se consigue un control mas exacto.
Con sistemas de calefacción bajo o sobredimensionado los regula-
dores por histéresis se caracterizan por la baja frecuencia de cam-
bios y las pequeñas variaciones de temperaturas.
Características de los reguladores PD
Características de los reguladores por histéresis
SPAGNOLO/INGLESE 7/7/05 5-09-2005 17:48 Pagina 12

14
ESPAÑOL
6 Conservación y mantenimiento
A excepción del necesario cambio de pilas este termostato no nece-
sita mantenimiento.
Limpiar el aparato exclusivamente con un trapo seco o apenas
húmedo, suave y que no deje pelusa. No deberápenetrar agua al
interior del aparato.
Cambiar las dos pilas regularmente aprox. cada 1 años.
Sólo utilizar pilas de 1.5 V nuevas, del tipo AAA, Alkaline. Nunca
mezclar pilas viejas con pilas nuevas.
7 Desechar
7.1 Desechar las pilas
Las pilas agotadas deberán desecharse conforme a las reglamenta-
ciones nacionales, de manera respetuosa con el ambiente (por ej. en
puntos de recolección especiales de pilas). No tirar pilas a la basura
7.2 Desechar el aparato
Al finalizar su vida útil, el termostato deberádesmontarse profesio-
nalmente y desecharse conforme a las reglamentarias nacionales,
de manera respetuosa con el ambiente.
En caso de duda, le rogamos consultar al fabricante o distribuidor.
8 Datos técnicos
Tipo de regulador: RS tipo 1B conforme a EN 60730-1: 2001
Contacto: Contacto inversor, sin potencial, baja ten-
sión de protección.
Máx. 6 A / 250 V~, mín. 1mA/5 V
Précisión: ± 1 s al día con 20°C
Precisión de regulación: ± 0.2 K
Alcance de medición de
temperatura: de 0°C a 50°C, resolución 0.1°C
Margen de ajuste para
temperatura: de 6°C a 30°C en pasos de 0.2°C
Período de regulación de 5 a 30 min. (regulador PD)
Gama de captura de la
regulación: de ± 0.2 K a ± 5 K (regulador PD)
Histéresis de conmutación: de ± 0.2 K a ± 1.0 K (regulador histéresis)
Espacios de memoria: 22 cambios de temperatura, programables
para lu a vier, sa/do, cada día o para días
individuales.
Función Invierno/Verano: seleccionable con el interruptor
(09/2006) W= Invierno / Calefacción
S= Verano / Aire Acondicionado
Clase de protección: II conforme a EN 60730-1
Tipo de protección: IP 20 conforme a EN 60529-1
Pilas: 2 pilas alcalinas de 1.5 V, tipo AAA
Reserva de cuerda durante
el cambio de pilas: 10 minutos
15 ENGLISH
Table of Contents
1 Designated Use …………………………...…….……………..15
2 Safety Instructions …………………………………………....15
3 Description and Mounting…………………………………… 16
3.1 Device Overview . . . . . . . . . . . . . . . . . . . . . . . . . . . . . . . . 16
3.2 Mounting and Electrical Connection . . . . . . . . . . . . . . . . . 17
4 Installation and Operation . . . . . . . . . . . . . . . . . . . . . . . . 18
4.1 Carrying out a Reset . . . . . . . . . . . . . . . . . . . . . . . . . . . . . 18
4.2 Inserting or Exchanging Batteries . . . . . . . . . . . . . . . . . . . 18
4.3 Selecting the Language . . . . . . . . . . . . . . . . . . . . . . . . . . . 18
4.4 Setting the Time / Date . . . . . . . . . . . . . . . . . . . . . . . . . . . 18
4.5 Selecting the Temperature Profile . . . . . . . . . . . . . . . . . . . 19
4.6 Checking Current Room Temperature and Settings -
Info Button . . . . . . . . . . . . . . . . . . . . . . . . . . . . . . . . . . . . 19
4.7 Temporarily Changing the Target Temperature . . . . . . . . . 20
4.8 Early Cancellation, Check or Clearance of the
Holiday Program . . . . . . . . . . . . . . . . . . . . . . . . . . . . . . . . 20
4.9 Party / Eco Program . . . . . . . . . . . . . . . . . . . . . . . . . . . . . 21
5 Programming . . . . . . . . . . . . . . . . . . . . . . . . . . . . . . . . . 21
5.1 Setting the Holiday Program . . . . . . . . . . . . . . . . . . . . . . . 21
5.2 Changing the Settings for Target Temperatures . . . . . . . . . 22
5.3 Program P3 . . . . . . . . . . . . . . . . . . . . . . . . . . . . . . . . . . . 22
5.4 Service Settings . . . . . . . . . . . . . . . . . . . . . . . . . . . . . . . . 25
5.5 Time / Date and Summer / Winter Time . . . . . . . . . . . . . . 27
6 Maintenance and Repair . . . . . . . . . . . . . . . . . . . . . . . . . 28
7 Disposal . . . . . . . . . . . . . . . . . . . . . . . . . . . . . . . . . . . . . 28
7.1 Disposal of Batteries . . . . . . . . . . . . . . . . . . . . . . . . . . . . 28
7.2 Disposal of the Device. . . . . . . . . . . . . . . . . . . . . . . . . . . . 28
8 Technical Data . . . . . . . . . . . . . . . . . . . . . . . . . . . . . . . . 28
1 Designated Use
The 2381 is a digital clock thermostat for controlling the room tem-
perature.
The room thermostat 2381 is intended for time and room tempera-
ture - dependent on and off switching of an electrical load with a
maximum current consumption of 6 A, such as a circulation pump,
a burner or a motor mixing valve. It must only be used in dry rooms
with impurities that are usual for flats or houses.
Designated use also includes adherence to the operating and moun-
ting instructions. Any other usage is not allowed. The manufacturer
cannot be held liable for damages resulting from this.
2 Safety Instructions
The connection and installation of electrical devices
must only be carried out by a qualified technician.
The national regulations and respective safety instruc-
tions are to be observed.
Interferences and changes to the device will lead to
cancellation of the warranty.
SPAGNOLO/INGLESE 7/7/05 5-09-2005 17:48 Pagina 14

17
16
ENGLISH
3 Description and Mounting
3.1 Device Overview
Display of the day of week
(1 = Monday, 2 = Tuesday etc.)
Icon bar for display of the
programming level (manual switch
position MENU)
Change buttons +
Change buttons --
Switch for program selection
Multifunctional display, e.g.
“Room temperature 20.O˚C”
Info button for checking
the settings
Heating On
Button OK (confirmation of set-
tings/ selection or programming )
Display PARTY or ECO
program active
RESET button
Display for batteries to be replaced
Button ESC (cancellation of
programming entries)
Display of the switch phases
ENGLISH
3.2. 2 Connection examples
Control of a burner
Control via the
circulation pump or
storage-/hot-air
heating
3.2 Mounting and Electrical Connection
3.2.1 Installing
1
2
3
4
Load connection
terminals
Before locating the chrono-
thermostat, figure ❹, select
the function Winter/Summer
by means of the switch
figure ❷
W= Winter/Heating
S= Summer/Cooling
S W
SPAGNOLO/INGLESE 7/7/05 5-09-2005 17:48 Pagina 16

19 ENGLISH
18
ENGLISH
3. The display changes automatically
to the date setting.
Set the year, month and date one
after the other. Confirm each setting
with the OK button. The display
changes automatically.
4. The display automatically changes to the set automatic mode,
e.g. display of the target temperature.
Note: The time and date can also be changed in the “Service”menu
(see page 25). There you can also set the changeover from winter to
summer time.
4.5 Selecting the
Temperature Profile
4.5.1 Program P1 (fixed program)
Comfort temperature Mo-Fr from 6 a.m. - 10 p.m. as well as Sa-Su
from 7 a.m. - 11 p.m. In between lower temperature.
4.5.2 Program P2 (fixed program)
Comfort temperature Mo-Fr from 6 - 8 a.m. and from 4 to 10 p.m. as
well as Sa-Su from 7 a.m. - 11 p.m. In between lower temperature.
4.5.3 Program P3 (freely programmable)
The program P3 is an individually programmable temperature profile.
Program P3 is not programmed when delivered. For programming
see page 22.
4.5.4 Permanent comfort
The room temperature is permanently regulated to the programmed
comfort temperature. There is no reduction.
4.5.5 Permanent reduction
The room temperature is permanently regulated to the programmed
lower temperature.
4.5.6 Antifreezing
The room thermostat only comes on when the room temperature
falls below the programmed antifreeze temperature.
4.6 Checking Current Room Temperature and
Settings - lnfo Button
With the lnfo button you can display the current room temperature as
well as all important settings of the switch for program selection.
1. Press the Info button. The current room temperature is shown in
the display for approx. 3 seconds. In order to continue with the
check, press the lnfo button again.
2. This way you can check the following information one after the other:
- Room temperature
- Currently active target temperature
- Date and time
- Switch times of the set program and the fixed programmed tem-
perature profiles and switch times are described in section 4.5.
4 Installation and Operation
For installation of the 2381, follow the sections 4.1 to 4.5.
4.1 Carrying out a Reset
After having connected the power supply or having
inserted the batteries (when exceeding the battery
change power reserve of 10 min), you must carry
out a Reset. For this purpose, press with a pointed
object on the Reset button which
is recessed in the case.
After batteries replacement and
device locked on its
basement, push “reset” button.
Follow this procedure every time
device is removed from its basament.
4.2 Inserting or Exchanging Batteries
Only use 1.5 V batteries of the type AAA, Alkaline. Replace the bat-
teries every year. Always replace both batteries.
When inserting, make sure the batteries are correctly polarised (see figure).
When the inserted batteries are discharged, this is indicated in the
display by the flashing battery icon. See figure on page 16.
4.3 Selecting the Language
1. The display automatically shows the selected language after Reset.
2. Select your language with the buttons
▲or ▼. The available languages are
displayed one after the other. Confirm
with the OK button.
3. The display automatically switches to the time setting.
Note: The language can also be changed in the “Service”menu
(see page 25).
4.4 Setting the Time / Date
With the ESC button you can always return to the previous programm-
ming step in order to adjust a setting.
1. The display shows the time setting.
2. Set the current time with the buttons
▲and ▼:
Set the hour and confirm with the OK
button.
Set the minutes and confirm with the
OK button.
SPAGNOLO/INGLESE 7/7/05 5-09-2005 17:48 Pagina 18

21 ENGLISH
20
ENGLISH
4.9 Party / Eco Program
With the “Party / Eco”function, you can cancel the temperature
profile of the set program for the next few hours (up to 23 hours and
50 minutes).
4.9.1 Setting the Party / Eco Program
1. Press both buttons ▲and ▼at the same time for approx. 2
seconds.
2. The display changes and shows the text PERIOD and a flashing
clock. Within 3 seconds, press one of the buttons ▲or ▼, and
set the desired period in increments of 10 minutes.
3. After 3 seconds, the display changes and shows the text COMFORT
or LOWER. Within 3 seconds, select the comfort or lower tempera-
ture with the buttons ▲or ▼.
4. The display changes automatically after 3 seconds. The display
shows the desired target temperature with the addition “PARTY”
(for comfort temperature) or “ECO”(for lower temperature). The
Party or Eco program is active for the set period.
4.9.2 Early Cancellation of the Party / Eco Program
In order to cancel the “Party / Eco”program, press both buttons ▲
and ▼for approx. 2 seconds, until the display changes. Wait ano-
ther 3 seconds until the display changes back again. The Party / Eco
program is cancelled, and the addition “PARTY”or “ECO”disap-
pears from the display.
5 Programming
Note: The P1 and P2 programs are fixed programs ex works, and
cannot be changed.
5.1 Setting the Holiday Program
By setting a holiday program, the temperature profile of the set auto-
matic program can be cancelled for any period of time.
Note: With the ESC button, you can cancel the programming at
any time.
1. Push the slideswitch switch to the MENU setting.
2. With the buttons ▲or ▼, select the entry HOLIDAY.
Confirm with the OK button.
Note: If a holiday program is already saved, you can choose if
you want to check or clear it. In order to save a new holiday pro-
gram, the already saved holiday program must be cleared. See
section 4.8 on page 20.
3. If no holiday program has been saved yet, set the start and end
date now with the buttons ▲ and ▼.
Set the year, month, date and hour one after the other. Confirm
each setting with the OK button.
The display changes automatically.
Note: The end time must not be the same as or earlier than the
start time. Otherwise an error message is displayed: ERROR. The
holiday program must then be programmed again.
4. Select whether you want the comfort, the lower or the antifreeze
temperature for thd set period. Confirm with the OK button.
- Set display type, (i.e. which information is shown in the display,
also see page 25).
3. The check is completed. The display automatically switches back
to the original state.
4.7 Temporarily Changing the Target
Temperature
With this function, you can temporarily change the target tempera-
ture given by the program. The changed target temperature is not
saved long-term. It only remains set until the next temperature chan-
ge of the program (e.g. from comfort to lower temperature).
Note: If one of the programs “Perm. comfort”, “Perm. lower”or
“Frost”is set, the temperature change remains until the program
changes.
1. Press one of the buttons ▲or ▼.The display shows the set target
temperature.
2. Change the target temperature with the buttons ▲or ▼.
3. After approx. 3 seconds, the display automatically switches back
to its original state, and the room thermostat regulates to the
changed target temperature.
4.8 Early Cancellation, Check or Clearance of
the Holiday Program
If you want to cancel an activated holiday program early, you must
clear the holiday program.
Note: The setting of the holiday program is described in section 5.1
on page 21.
1. Push the slideswitch switch to the MENU setting.
2. With the buttons ▲or ▼, select the option HOLIDAY.
Confirm with the OK button.
3. With the buttons ▲or ▼, select the desired option and confirm
with the OK button:
-CHECK: By repeated pressing of the OK button, you can check
all settings of the saved holiday program one after the other
(start or end time, temperature).
-CLEAR: By pressing the OK button, the saved holiday program
is cleared.
You can now program a new holiday program (see section 5.1
on page 21) or set the desired temperature profile (automatic
program) a the selection switch (see section 4.5 on page 19).
SPAGNOLO/INGLESE 7/7/05 5-09-2005 17:48 Pagina 20

23 ENGLISH
22
ENGLISH
5.3.2 Creating a new temperature profile P3
Display of the free
memory areas
5.3.3 Checking the temperature profile P3
5.3.4 Clearing the temperature profile
no program stored in memory
By pressing the OK or ▲button,
all switch times of the day are dis-
played one after the other. Once
the last switch time is reached, the
switch times of the next day are
displayed etc.
back to
back to
back to
back to
see 5.3.2
see 5.3.1
see
5.3.5
see
5.3.6
5. The holiday program is now programmed and is activated at the
set start time.
6. Reset the switch for program selection.
7. While the holiday program is active, the display shows the target
temperature and the text line HOLIDAY.
Note: Checking, clearing or cancelling a holiday program is
described in section 4.8 on page 20.
5.2 Changing the Settings for Target
Temperatures
For the temperature profiles of the individual programs, you can
choose between three temperature values: Comfort, lower and
antifreeze temperature.
These temperature values are programmed ex works. You can change
these according to your wishes.
1. Push the slideswitch switch to the MENU setting.
2. With the buttons ▲or ▼, select the entry TARGET TEMP.
Confirm with the OK button.
3. The display first shows the comfort temperature.
With the buttons ▲or ▼, change the comfort, lower and anti-
freeze temperature one after the other. Confirm each setting with
the OK button. The display changes automatically.
4. After having set the antifreeze temperature, the setting of the tar-
get temperatures is completed. The display shows END and auto-
matically changes back after 3 seconds.
5. Select by program switch the desired program.
5.3 Program P3
5.3.1 Overview “Program” menu
SPAGNOLO/INGLESE 7/7/05 5-09-2005 17:48 Pagina 22

25 ENGLISH
24
ENGLISH
DISPLAY
LANGUAGE
WALL COMP
CONTROL
END
5.4 Service Settings
5.4.1 Overview “Service” menu
T = text line
N = numerical display
Select the display type with the button ▲or ▼.
Confirm with the OK button. Cancel with ESC.
Note:
The factory
stetting is
highlighted grey
in the table
5.4.2 Selecting the display type
Table: Overview of the information shown in the display for different
displays types.
Examples of informations in the display.
Display n°3. and slideswitch in position:
5.3.5 Displaying individual switch times and clearing them
1. Displaying the switch
times
2. Clearing the desired
switch times
5.3.6 Clearing all switch times
no program stored in memory
In order to clear the
displayed switch time,
press the OK button.
The switch time is
cleared and the next
switch time is displayed.
The switch times are dis-
played one after the other.
Display next switch time
with ▲.
no program stored in memory
back to
see 5.3.1
back to
see 5.3.1
back to
see 5.3.1
back to
see 5.3.1
In order to cancel the
clearing process, press
the ESC button.
SPAGNOLO/INGLESE 7/7/05 5-09-2005 17:48 Pagina 24

27 ENGLISH
26
ENGLISH
5.5 Time/Date and Summer/Winter Time
Setting the time and date:
hour, minute, year, month, day.
Description see page 18.
Start of
summer time:
Month
Weekend
within
month
Weekend
within
month
Hour for
changeover:
e.g. from 2 a.m.
to 3 a. m.
Start of
winter time:
Month
Note: Time for changeover to winter time is taken
from summer time, e.g. back from 3 a.m. to 2 a.m.
back to
back to
see 5.4.1
5 …30
0.1°C ...0.5°C
Set with buttons
▲or ▼:
0.2°C ...5.0°C
back to
or autom.
after 6 sec.
see 5.4.1
5.4.3 Selecting the language
Select the language with the buttons ▲or ▼.
Confirm with the OK button. Cancel with ESC.
5.4.4 Setting the wall compensation
In case of unfavourable conditions at the installation site (installation
at the exterior wall, chimney, etc.), there may be deviations in temper-
ature between the temperature measured by the thermostat and the
actual room temperature. This difference in temperature can be com-
pensated with the wall compensation by setting an offset value.
Example: The difference between the measured and the controlled
temperature is 2°C, i.e. the room temperature is regulated 2°C too
high: Offset value -2°C.
Offset value adjustable from -3°C ... +3°C.
Setting with ▲or ▼. Confirm the value with OK.
Cancel with ESC.
5.4.5 Adjusting the controller behaviour
With suitable heating systems the PD controller is characterized by
a short setting time, scarce maximum overshooting and therefore a
high control accuracy.
With over or under engineered heating systems a hysteresis con-
troller is characterized by scarce shift frequency and small tempera-
ture deviations.
Characteristics of the PD controller
Characteristics of a hysteresis controller
Set with buttons
▲or ▼:
0.2°C ...1.0°C
SPAGNOLO/INGLESE 7/7/05 5-09-2005 17:48 Pagina 26

28
ENGLISH
6 Maintenance and Repair
With the exception of a regular replacement of the batteries for the
room thermostats are maintenance-free.
Only clean the device with a dry or slightly damp, soft and lint-free
cloth. The interior of the device must remain free from water.
Replace the two batteries at regular intervals every 1 years. Only
use new 1.5 V batteries of the type AAA, Alkaline. Never mix old and
new batteries, as old batteries can leak.
7 Disposal
7.1 Disposal of Batteries
Used batteries must be disposed of according to the national regu-
lations with regard to the environment (e.g. at special battery collec-
tion outlets). Never throw used batteries out with your usual rubbish.
7.2 Disposal of the Device
At the end of its life, the room thermostat must be dismounted pro-
fessionally and disposed of according to the national regulations
with regard to the environment.
In case of doubts, please contact the manufacturer’s representative
in your country. Contact details can be found at the back of this
manual.
8 Technical Data
Control type: RS type 1B acc. to EN 60730-1: 2001
Contact: Change-over contact, potential-free,
protective low voltage.
Max. 6A / 250 V~, min. 1 mA / 5V
Accuracy: ± 1 sec. per day at 20°C
Control accuracy: ± 0.2 K
Temperature meas. range: O°C to 50°C, resolution 0.1°C
Temperature setting range: 6°C to 30°C in increments of 0.2°C
Control period: 5 to 30 min. (PD control)
Control lock-in range: ± 0.2 K to ± 5 K (PD control)
Switching hysteresis: ± 0.2 K to ± 1 0 K (hysteresis control)
Memory spaces: 22 temperature changes, programmable
for Mo-Fr, Sa-Su, each day or for individ-
ual days.
Winter/Summer function: by means of switch
(09/2006) W= Winter/Heating
S= Summer/Cooling
Class of protection: II according to EN 60730-1
Type of enclosure: IP 20 according to EN 60529-1
Batteries: 2 x Alkaline batteries 1.5 V, type AAA
Power reserve during
battery replacement: 10 minutes
SPAGNOLO/INGLESE 7/7/05 5-09-2005 17:48 Pagina 28
Table of contents
Languages:
