DE DEUTSCH
Lüftung
Plötzlichen Temperaturabfall z.B. beim Lüften, lässt der Regler die
nächste halbe Stunde unberücksichtigt. Dezimalpunkt und Tem-
peratureinheit blinken.
Fernsteuerung
Durch Anschluss eines GSM-Modems kann die Raumeinheit von Ihrem
Handy ferngesteuert werden.
Klemmenblock auf der Rückseite der Raumeinheit.
Drücken Sie (+) oder (-) oder wählen Sie eine neue Betriebsart um
die Fernbedienung zu beenden.
Bitte beachten Sie, dass nur spannungs- und potentialfreie Kontakte
angeschlossen werden dürfen.
Fehlersuche
Beachten Sie, dass es bei einer Änderung der Temperatureinstellung des
Systems einige Zeit (bis zu 24 H) dauern kann, bis die Raumtemperatur
den neuen Einstellungen entspricht. Diese Zeit hängt unter anderem
von der Funktion und der Dimensionierung des Heizsystems sowie von
der Wärmedämmung des Gebäudes ab.
Sollte die Raumtemperatur nicht mit dem Programm übereinstim-
men, kontrollieren Sie, dass:
• Die Uhrzeit recht ist
• Der Programmschritt nicht zu kurz ist
• Der Unterschied zwischen Komforttemperatur und Ab
senktemperatur nicht zu hoch ist.
Andernfalls machen Sie die Fehlersuche laut der
LK 110/LK 120/LK 130 SmartComfort Bedienungsanleitung.
Fehlercode: Erscheint im Display
10 Interner Fehler
11 Vorlauffühler
12 Aussenfühler
13 Reserve
14 Raumeinheit, Kommunikationsfehler
15 Reserve
50 Raumeinheit, Raumtemperaturfühler
15
March
: : °C 1 2 3 4 5 6 7
°F
: : °C 1 2 3 4 5 6 7
°F
: : °C 1 2 3 4 5 6 7
°F
: : °C 1 2 3 4 5 6 7
°F
: : °C 1 2 3 4 5 6 7
°F
: : °C 1 2 3 4 5 6 7
°F
: : °C 1 2 3 4 5 6 7
°F
: : °C 1 2 3 4 5 6 7
°F
: : °C 1 2 3 4 5 6 7
°F
Plan für individuelles Programm
Anpassung der Programme U1 und U2
Mit U1 und U2 können Sie das Programm individuell anpassen. Die
Zeiten können in Schritten von 30 Minuten programmiert werden.
Immer, wenn ein Wert oder Symbol blinkt, können Sie mit den Tas-
ten (+) oder (-) eine Einstellung oder Auswahl vornehmen und
dann mit der Taste OK zum nächsten Schritt wechseln. Mit der Es-
cape-Taste können Sie jederzeit einen Schritt zurückgehen .
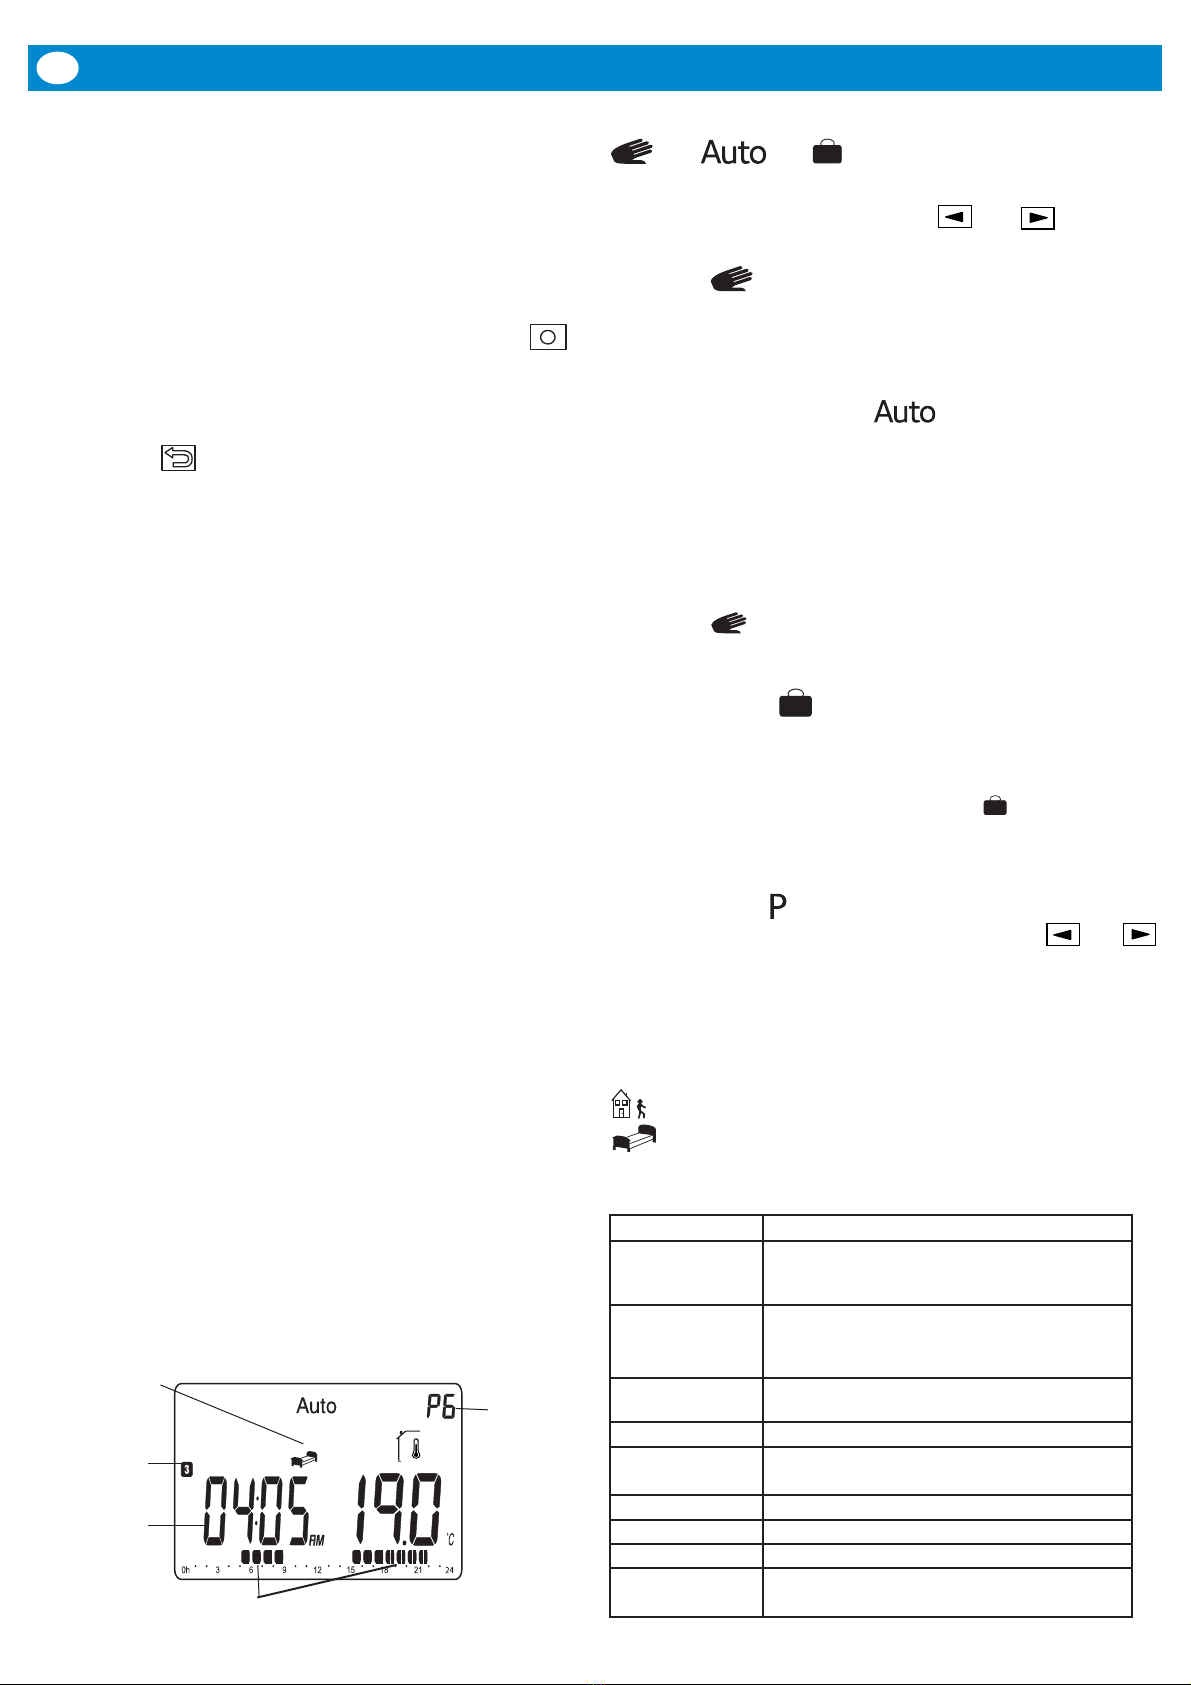
Im folgenden Programmbeispiel wählen Sie bitte die Programmart P.
Danach wählen Sie mit den Tasten (+) oder (-) Programm U1. Wenn
U1 blinkt, drücken Sie die Bearbeitungstaste . Jetzt können Sie
ein benutzerdefiniertes Programm anpassen. Die Programmierung
beginnt 00:00 und endet 24:00.
blinkt jetzt und die Anzeige zeigt 01. Wählen Sie den gewünschten
Modus oder mit (+) oder (-) und drücken Sie OK. In diesem
Beispiel, wählen Sie . Die Uhrzeit blinkt 00:00 und die Anzeige zeigt
01A. Mit den Tasten (+) oder (-) stellen Sie die Uhrzeit, wenn die Absenk-
temperatur diesen Tag starten soll, 00:00 und bestätigen Sie mit OK.
Die Uhrzeit 00:30 blinkt und die Anzeige zeigt 01b. Mit den Tasten (+)
oder (-) stellen Sie die Uhrzeit, wenn die Absenktemperatur stoppten
soll, 06:00 und bestätig Sie mit OK.
Die Temperatur blinkt. Wählen Sie die gewünschte Absenktem-
peratur, 20°C und bestätigen Sie mit OK.
blinkt und die Anzeige zeigt 02. Wählen Sie mit der
Taste OK. Die Uhrzeit 06:00 blinkt und die Anzeige zeigt 02A. Mit den
Tasten (+) oder (-) stellen Sie die Uhrzeit, wenn die Absenktemperatur
starten soll, 09:00. Bestätigen Sie mit OK.
Die Uhrzeit 09:30 blinkt und die Anzeige zeigt 02b. Mit den Tasten (+)
oder (-) stellen Sie die Uhrzeit, wenn die Absenktemperatur stoppen
soll, 16:00. Bestätigen Sie mit OK.
Die Temperatur blinkt. Wählen Sie die gewünschte Absenktem-peratur,
18°C und bestätigen Sie mit OK.
Auf diese Weise können Sie max. 5 Absenkperioden pro Tag ein-
stellen. Schliessen Sie die Bearbeitung des ersten Tages ab. Drücken Sie
die Bearbeitungstaste . Die Anzeige zeigt jetzt Copy YES.
Wenn Sie möchten, können Sie das soeben für diesen Tag erstellte
Programm nun für die darauffolgenden Tage kopieren. Das Programm
startet immer mit Tag 1 = Erster Tag der Woche.
Drücken Sie OK, um das Programm auf den nächsten Tag zu kopieren.
Mit (+) oder (-) können Sie Copy no wählen und ein anderes Pro-
gramm für die Folgetage erstellen.
Nachdem Sie für den letzten Tag 7 OK gedrückt haben, erscheint die
Meldung Save und die OK-LED blinkt grün. Drücken Sie OK um das
Wochenprogramm zu speichern. Betriebsart Auto und Programm U1 er-
scheinen im Display.
Das angepasste Programm U1 hat nun Komforttemperatur 06:00
-09:00 und 16:00 – 24:00.
Absenktemperatur , 20°C, 00:00 – 06:00
Absenktemperatur , 18°C, 09:00 – 16:00
Parametermenü
Die Raumeinheit verfügt über ein Parametermenü, das Sie auf-rufen
können, indem Sie die Bearbeitungstaste 10 Sekunden lang ge-
drückt halten.
Beachten Sie, dass die Uhrzeitart zuerst erscheint. Halten Sie die Taste
gedrückt bis das Parametermenü geöffnet wird.
Sie können nun mit den Navigationstasten und zum einzus-
tellenden Parameter wechseln. Rufen Sie den Parameter mit OK auf.
Ändern Sie ihn mit (+) oder (-), und bestätigen Sie mit OK.
Um das Parametermenü zu schliessen, wählen Sie den Parameter 99
End aus und drücken Sie OK.
Tastensperre-Funktion
Verwenden Sie diese Funktion, um jegliche Änderungen an Ihren Ein-
stellungen zu verhindern.
• Zum Einschalten der Tastensperre halten Sie die Escape-Taste
gedrückt, und drücken Sie gleichzeitig die Bearbeitungstaste
. Auf der Anzeige erscheint das Symbol .
• Zum Entsperren der tastatur gehen Sie genauso vor.
9