manuals.online logo
Brands
  1. Home
  2. •
  3. Brands
  4. •
  5. Black & Decker
  6. •
  7. Lawn Mower
  8. •
  9. Black & Decker EMax34i-XE User manual

Black & Decker EMax34i-XE User manual

Australia
New Zealand
www.blackanddecker.com.au
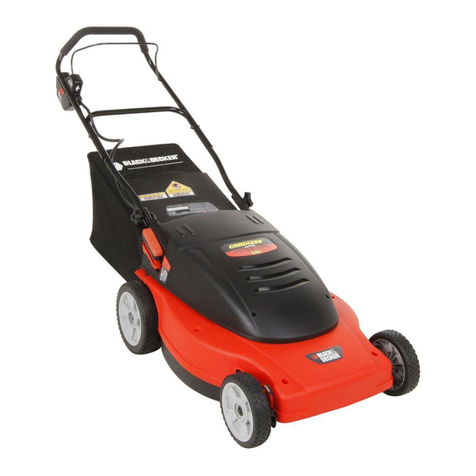
EMax34i-XE
EMax34s-XE
EMax38i-XE
EMax42i-XE
2
ENGLISH (Original instructions)
Intended use
Your Black & Decker mower has been designed for mowing
grass. This tool is intended for consumer use only.
Warning! Read all of the 'Safety, Maintenance,
Service' manual carefully before operating
this appliance.
Read all of this manual carefully before operating
the appliance.
Features
This appliance includes some or all of the following features.
1. Switch box
2. On/off switch
3. Upper handle
4. Intelligent cable management
5. Lower handle
6. Cable storage holders
7. Height adjustment
8. Height of cut gauge
9. EdgeMax
10. Grass collection box
11. Cleargrassap
12. Carry handles
Assembly
Warning! Before assembly, make sure that the appliance is
switched off and unplugged.
Assembling the grass collection box (g. A - D)
The grass box requires assembly before use and comes in 5
pieces.
u Clipthehandle(13)intothelid(14)ofthegrassbox(g.
A).Thehandlewillonlytonewayround.
uClip the 2 sides (15) of the grass collection box together.
Makesurethatallclipsandguidesarealigned(g.B).
uAlign the assembled sides onto the bottom (16) of the
grass collection box. Ensure that the 4 guides (17) are
aligned(g.C)
uPush the 2 parts together. Apply even force around all
edges of the grass collection box securing the clips
into position uniformly. Check that each clip is fastened
together securely.
uAlign the lid (14) onto the assembled grass collection box.
Ensurethatthe10guides(18)arealigned(g.D)
Note: Take extra care when aligning the 2 clips at the rear of
the grass collection box.
uPush down on the lid to secure all clips. Begin at the back
and ensure that all clips are securely located.
Fitting the lower handle (g. E)
uInsert the ends of the lower handle (5) into the corre-
sponding holes in the mower.
uPress the handle down as far as it will go.
uSecure the handle using the screws (19.
Assembling the upper handle (g. F)
uFit the upper handle part (3) to the lower handle (5) using
the knobs (20), washers (21) and screws (22) as shown.
Note:Theupperhandlecanbexedin2differentheight
positions.
Securing the motor cable (g. G)
Themotorcablehastobexedusingthecablerestraints.
uClip the cable to the upper and lower handle using the
restraint clips (23) as shown.
Fitting the grass collection box (g. N)
u Liftthecleargrassap(11)andplacethegrasscollection
box (10) over the lugs (24).
Replacing the blade (g. L)
Warning! Ensure the blade has completely stopped and
disconnect the appliance from the mains.
Warning!Onlyusethespeciedreplacementblade.
Warning! Use heavy-duty gloves to grip the blade.
To remove the blade:
uTurn the appliance onto its side.
uUsing heavy-duty gloves, grip the blade.
uUse a 13mm spanner to loosen and remove the blade bolt
(25) by turning the spanner anti-clockwise (ac).
uRemove the blade (26) and blade bolt (25).
To replace the blade:
uOffer the blade up to bolt shaft and locate the blade bolt
(25) into the bolt shaft.
Note:Whenttingablade,thetextontheblademustbe
facing the user.
u Tightenthebladebolt(25)asrmlyaspossiblebyhand.
uUsing heavy-duty gloves, grip the blade.
uUse a 13mm spanner to securely tighten the blade bolt
(25) by turning the spanner clockwise (c).
Use
Warning! Let the appliance work at its own pace. Do not
overload.
Adjusting the height of cut (g. M1 & M2)
The height of cut is adjusted by the central height adjust
mechanism, there are 6 positions to choose from.
To set the height of cut
uPull the height adjustment lever (7) away from the body of
the unit.
3
ENGLISH
(Original instructions)
uMove the lever towards the rear of the appliance to lower
the height of cut.
uMove the lever towards the front of the appliance to raise
the height of cut.
uPush the height adjustment lever (7) into one of the 6
height locations.
Note: The height of cut can be viewed on the height of cut
gauge (8) on the side of the unit.
Switching on and off (g. I)
Switching on
uPush in and hold the lock-off button (27).
uPull the on/off switch (2) towards the handle.
uRelease the lock-off button.
Switching off
uRelease the on/off switch (2).
Warning: Never attempt to lock a switch in the on position.
Mowing (g. P1 & P2) (EMax38i & EMax42i only)
We recommend to use your mower as outlined in this section
in order to achieve optimum results and to reduce the risk of
cutting the mains cable.
uLoop the mains cable through the intelligent cable
managementsystem(4)asshown(g.H)ensuethatyou
leave approximately 100 cm of cable between the switch-
box (1) and the intelligent cable management restraint (4).
uEnsure that the cable restraint can slide freely from one
handle to the other.
uPlace the bulk of the mains cable on the lawn, close to the
startingpoint(position1ing.P1).
uSwitch the appliance on as described above.
u Proceedasshowning.P1
uMove from position 1 to position 2.
uTurn right, stepping over the cable and proceed towards
position 3. The cable restraint will slide from one side of
the handle to the other ensuring that the cable is laid out
away from the cutting blade.
uTurn left, stepping over the cable and move towards posi-
tion 4. The cable restraint will slide from one side of the
handle to the other ensuring that the cable is laid out away
from the cutting blade.
uRepeat the above procedure as required.
Warning:Donotworktowardsthecableasshowning.P2.
Mowing (g. P1 & P2) (EMax34s & EMax34i only)
We recommend to use your mower as outlined in this section
in order to achieve optimum results and to reduce the risk of
cutting the mains cable.
uPlace the bulk of the mains cable on the lawn, close to the
startingpoint(position1ing.P1).
uSwitch the appliance on as described above.
u Proceedasshowning.P1
uMove from position 1 to position 2.
uTurn right and proceed towards position 3.
uTurn left and move towards position 4.
uRepeat the above procedure as required.
Warning:Donotworktowardsthecableasshowning.P2.
EdgeMax (g. K1 & K2)
EdgeMax allows you to cut grass right up to the edge of a wall
orfence(gK1).
EdgeMax allows you to accurately cut grass right up to the
edgeofyourlawn(gK2).
uWith the lawnmower parallel with the edge of your lawn.
uPush the lawnmower along the edge of the lawn. Ensure
that the EdgeMax (9) is slightly over the edge of your lawn
(g.K2)
Note: The roller underneath the appliance provides stability
when mowing over the edge of your lawn.
Compact&Go (g. J) (EMax34i, EMax38i & EMax42i
only)
When the grass collection box is full you can compact the
grass in the collection box. You can determine how full the
grasscollectionboxisbylookingthroughthecleargrassap
(11).
uRelease the on/off switch (2).
uUsing your right foot, press the grass compaction lever
(29) all the way down until it locks into place.
Note: The grass in the collection box is now compressed into
the rear of the box. You may continue mowing until the grass
collection box becomes full.
Emptying the grass collection box (g. J) (EMax34i,
EMax38i & EMax42i only)
uRelease the on/off switch (2).
uRemove the grass collection box (10).
uEmpty the contents from the front of the box.
uPlace the grass collection box on the ground and pull in
and hold the grass compaction lever release button (30).
uLift the grass compaction lever (29) into the vertical
position and release the grass compaction lever release
button (30).
uEmpty the contents from the rear of the box.
Emptying the grass collection box (EMax34s only)
When the grass collection box is full you should empty the
grass in the collection box.
uRelease the on/off switch (2).
uRemove the grass collection box (10).
uEmpty the contents from the box.
4
ENGLISH (Original instructions)
Cable storage (g. O)
The cable holders (6) provide a safe and convenient way to
store the cable (31) when not in use.
u Wrapthecablearoundthecableholders(6)inagureof
eight pattern.
Carrying the mower
Warning! Ensure the blade has completely stopped and
disconnect the appliance from the mains.
uThe mower can be carried using the convenient carry
handles (12).
Hints for optimum use
uIf the grass is longer than approximately 10 cm, make two
cutstoobtainabetternish.Firstmowatmaximumheight
of cut, then use a low or medium height of cut.
uIn order to achieve optimum results, only mow dry grass.
Troubleshooting
If your appliance seems not to operate properly, follow the
instructions below. If this does not solve the problem, please
contact your local Black & Decker repair agent.
Warning! Before proceeding, remove the plug from the
socket.
Problem Possible Cause Possible solution
Machine fails to
operate
Power turned off Turn power on
Fuse faulty/blown Replace fuse
Grass too long Increase the height of
cut and move machine
to shorter grass to start
Thermal cut out
activated
Allow motor to cool and
increase height of cut
Machine functions
intermittently
Thermal cut out
activated
Allow motor to cool and
increase height of cut
Machine leaves
ragged nish or
motor labours
Height of cut too low Increase height of cut
Cutting blade blunt Replace the blade
Underside of machine
clogged
Check underneath the
machine and clear out
as necessary (always
wear heavy duty
gloves)
Bladettedupside
down Retbladecorrectly
Technical data
EMax34s-XE
EMax34i-XE
Type 3
EMax38i-XE
Type 3
EMax42i-XE
Type 3
Voltage
VAC 230 230 230
Power Input
W
1400 1600 1800
No-Load Speed
min-1
3500 3500 3500
Height adjustment
mm
20-70 20-70 20-70
Blade length
mm
340 380 420
Weight
kg
12.1 13.3 13.9
Hand/arm weighted vibration value according to EN 60335:
= 3.2 m/s2,uncertainty(K)=1.5m/s2.
Australia & New Zealand
Stanley Black & Decker
82 Taryn Drive, Epping, VIC 3076 Australia
Tel.1800 444 224 (Aust) or Tel. 0800 339 258 (NZ)
90590486 12/2012

This manual suits for next models

3

Other Black & Decker Lawn Mower manuals

Black & Decker MM1800 User manual

Black & Decker

Black & Decker MM1800 User manual

Black & Decker MM2000R User manual

Black & Decker

Black & Decker MM2000R User manual

Black & Decker GR230 User manual

Black & Decker

Black & Decker GR230 User manual

Black & Decker GX530 User manual

Black & Decker

Black & Decker GX530 User manual

Black & Decker MM2000 User manual

Black & Decker

Black & Decker MM2000 User manual

Black & Decker CMM1000 User manual

Black & Decker

Black & Decker CMM1000 User manual

Black & Decker CM2040 User manual

Black & Decker

Black & Decker CM2040 User manual

Black & Decker emax 34i User manual

Black & Decker

Black & Decker emax 34i User manual

Black & Decker GR1000 User manual

Black & Decker

Black & Decker GR1000 User manual

Black & Decker CM1936Z User manual

Black & Decker

Black & Decker CM1936Z User manual

Black & Decker CM1936 User manual

Black & Decker

Black & Decker CM1936 User manual

Black & Decker M200 User manual

Black & Decker

Black & Decker M200 User manual

Black & Decker 661817-00 User manual

Black & Decker

Black & Decker 661817-00 User manual

Black & Decker LAWN HOG MM675 User manual

Black & Decker

Black & Decker LAWN HOG MM675 User manual

Black & Decker GR342C User manual

Black & Decker

Black & Decker GR342C User manual

Black & Decker GR389 User manual

Black & Decker

Black & Decker GR389 User manual

Black & Decker CLM3820 User manual

Black & Decker

Black & Decker CLM3820 User manual

Black & Decker GX302 User manual

Black & Decker

Black & Decker GX302 User manual

Black & Decker EMax32s Manual

Black & Decker

Black & Decker EMax32s Manual

Black & Decker MTD100 User manual

Black & Decker

Black & Decker MTD100 User manual

Black & Decker GFC1234 User manual

Black & Decker

Black & Decker GFC1234 User manual

Black & Decker CM1936ZF2 User manual

Black & Decker

Black & Decker CM1936ZF2 User manual

Black & Decker MM2000 User manual

Black & Decker

Black & Decker MM2000 User manual

Black & Decker gr292 User manual

Black & Decker

Black & Decker gr292 User manual

Popular Lawn Mower manuals by other brands

Toro 30853 Operator's manual

Toro

Toro 30853 Operator's manual

Snapper 281318BE Safety instructions & operator's manual

Snapper

Snapper 281318BE Safety instructions & operator's manual

Flymo MOW N VAC Original instructions

Flymo

Flymo MOW N VAC Original instructions

DR DR SCOUT DR SCOUT FIELD and BRUSH MOWER Safety & Operating Instructions

DR

DR DR SCOUT DR SCOUT FIELD and BRUSH MOWER Safety & Operating Instructions

Ariens LM18S Owner's/operator's manual

Ariens

Ariens LM18S Owner's/operator's manual

Craftsman 917.388192 owner's manual

Craftsman

Craftsman 917.388192 owner's manual

Dolmar PV-3936 instruction manual

Dolmar

Dolmar PV-3936 instruction manual

Neuton CE 5.3 Safety & Operating Instructions

Neuton

Neuton CE 5.3 Safety & Operating Instructions

Krone EasyCut B 970 Original operating instructions

Krone

Krone EasyCut B 970 Original operating instructions

Poulan Pro 411188 Operator's manual

Poulan Pro

Poulan Pro 411188 Operator's manual

Snapper Z-RIDER ZM2200K Safety instructions & operator's manual

Snapper

Snapper Z-RIDER ZM2200K Safety instructions & operator's manual

Craftsman 536.270211 owner's manual

Craftsman

Craftsman 536.270211 owner's manual

Snapper SPE1250K, SPE140KW, SPE150KH, Safety instructions & operator's manual

Snapper

Snapper SPE1250K, SPE140KW, SPE150KH, Safety instructions & operator's manual

KUHN GMD33 N Operator's manual

KUHN

KUHN GMD33 N Operator's manual

Yard force MowBest 805 Original Installation Guide

Yard force

Yard force MowBest 805 Original Installation Guide

Craftsman 917.28812 Operator's manual

Craftsman

Craftsman 917.28812 Operator's manual

Simplicity 4211H Operator's manual

Simplicity

Simplicity 4211H Operator's manual

Yazoo/Kees KKW32121 Operator's manual

Yazoo/Kees

Yazoo/Kees KKW32121 Operator's manual

manuals.online logo
manuals.online logoBrands
  • About & Mission
  • Contact us
  • Privacy Policy
  • Terms and Conditions

Copyright 2025 Manuals.Online. All Rights Reserved.