Help
17
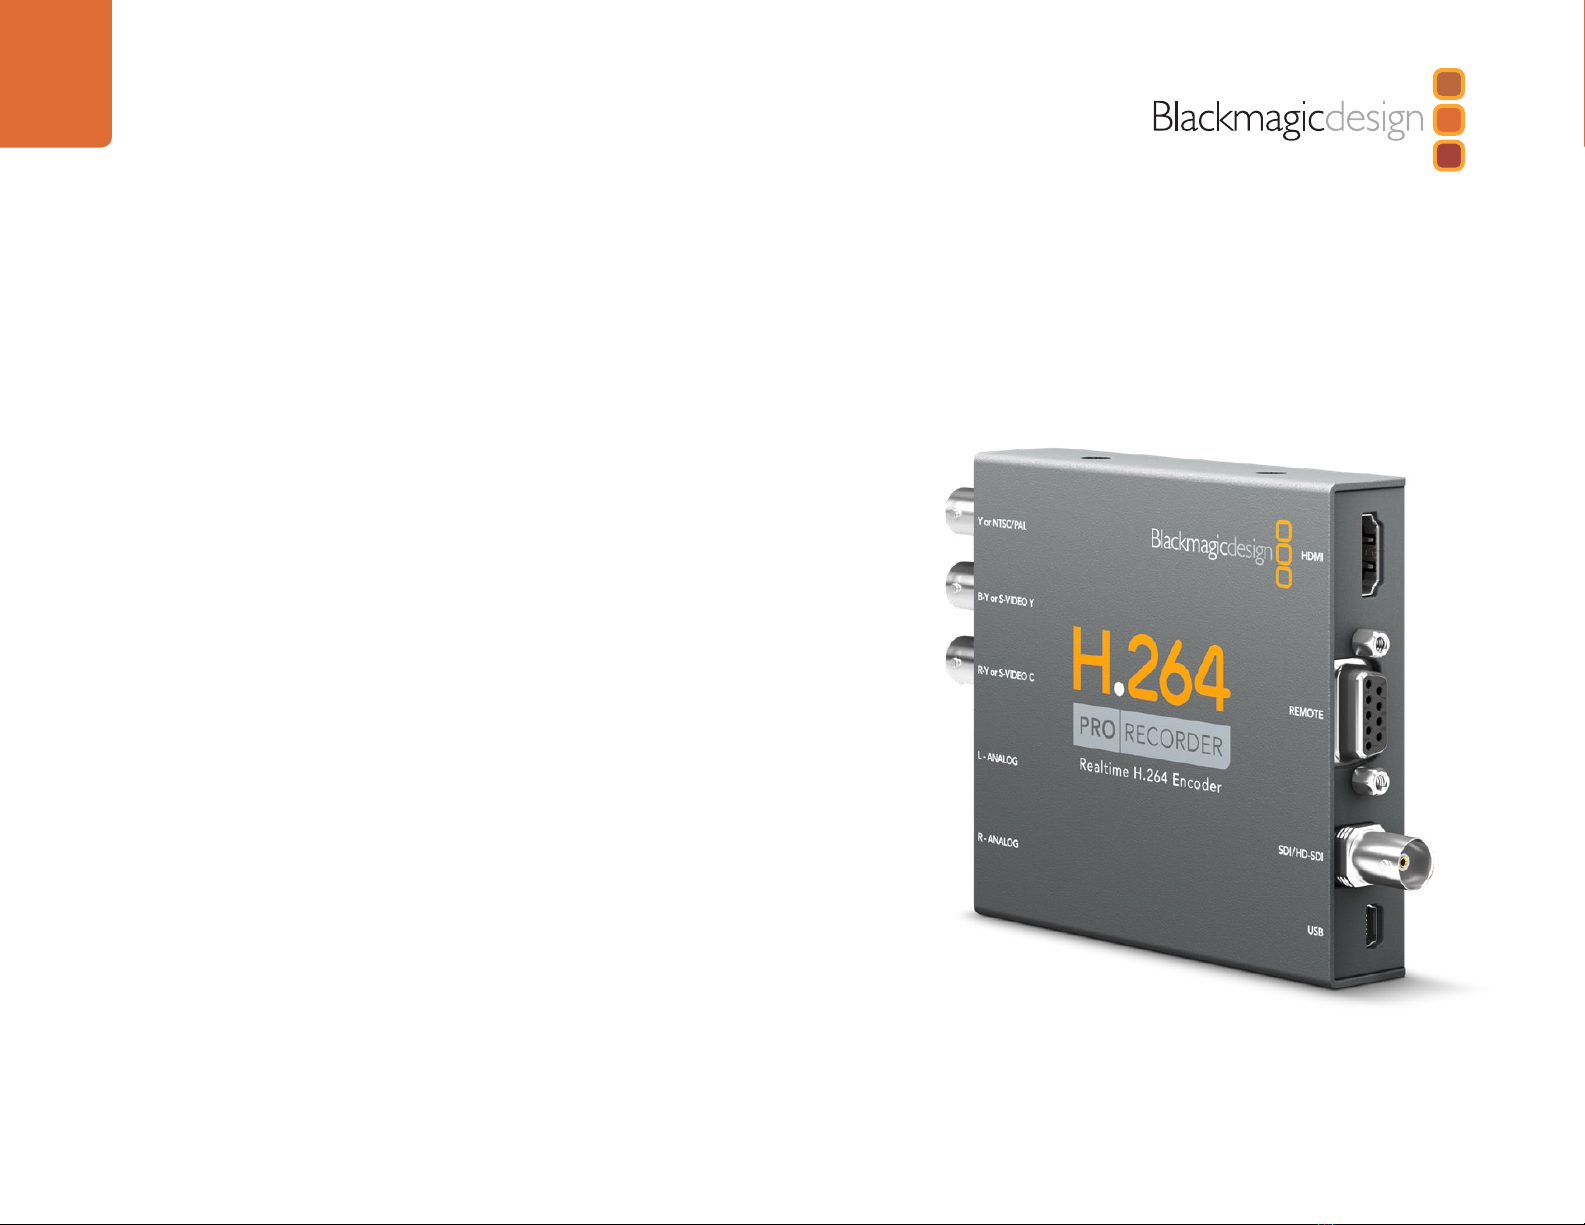
Which Connections Should I Use for Best Quality Video?
Choosing the best video connections to use with cameras, decks, capture cards and other video equipment
can be confusing but it’s easy with H.264 Pro Recorder. Simply choose the best quality uncompressed output
connection provided by each piece of video hardware. For example, H.264 Pro Recorder can capture
composite analog video, from an old field deck, but can also capture HDMI from the latest DSLR cameras
and even HD-SDI digital video and audio from an ARRI ALEXA camera or HDCAM SR deck.
If you are capturing from analog video equipment, you will also need to connect the left and right analog
audio cables in addition to any video cables. By contrast, HDMI and SDI digital connections only need a
single cable to carry both digital video and digital audio.
Composite — Good Analog Video
Composite is the oldest and most common analog video format and is often regarded as “regular video”.
You are likely to find it on almost any video device. Broadcast and professional video equipment will usually
have a single BNC connector for composite video whereas consumer equipment will usually use a single,
yellow RCA connector. An inexpensive BNC-RCA adapter can be used to connect composite video from
consumer equipment to the BNC connector on H.264 Pro Recorder.
S-Video — Better Analog Video
S-Video is higher quality than composite video and became a mainstream consumer standard in the
late 1990s. It can also be found on some professional video hardware. Professional video equipment will
sometimes have dual BNC connectors for S-Video labelled “Y” and “C”, whereas consumer equipment will
use a single, multi-pin S-Video connector.
“Y” and “C” ports connect directly to the S-Video Y and S-Video C ports on H.264 Pro Recorder
using BNC cables.
When connecting a multi-pin S-Video port to H.264 Pro Recorder, an inexpensive third party,
breakout cable (not included) is required. The breakout cable adapts a single, S-Video connector
to two BNC connectors on the H.264 Pro Recorder.
Component — Best Analog Video
Component is the highest quality analog video connection. It appeared on broadcast and professional
video equipment during the 1990s and finally became popular on consumer equipment during the 2000s. It
uses three cables to transmit all of the color information. On broadcast and professional video equipment,
BNC connections are usually used. On consumer equipment, RCA connectors are used on three cables
which are usually colored red, green and blue. Inexpensive BNC-RCA adapters can be used to connect
component video from consumer equipment to the three BNC connectors on H.264 Pro Recorder.