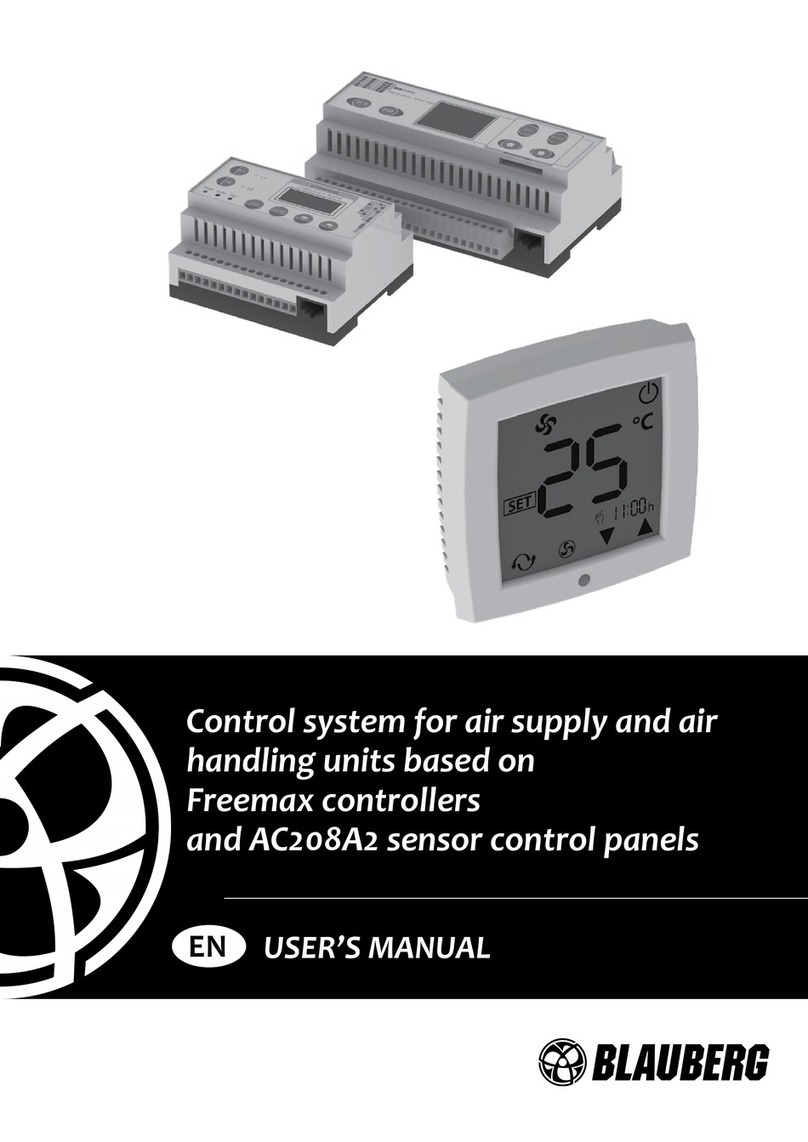
BLAUBERG S30 User manual

BLAUAIR AUTOMATIC CONTROL SYSTEM
S30 (KVENT, TH-TUNE)
S31 (KVENT)
S32 (KVENT, PGDE)
USER’S MANUAL
EN

S30, S31, S32
2
www.blaubergventilatoren.de
CONTENTS
Safety requirements..................................................................................................................................................................... 3
Purpose ............................................................................................................................................................................................... 4
Technical data ................................................................................................................................................................................. 5
Installation and set-up................................................................................................................................................................ 6
Control ................................................................................................................................................................................................ 10
This user’s manual is a main operating document intended for technical, maintenance, and operating staff.
The manual contains information about purpose, technical details, operating principle, design, and installation of the S30, S31, S32 unit
and all its modifications.
Technical and maintenance staff must have theoretical and practical training in the field of ventilation systems and should be able to
perform works in accordance with workplace safety rules as well as construction norms and standards applicable in the territory of the
country.
The information in this user’s manual is correct at the time of the document’s preparation.
The Company reserves the right to modify the technical characteristics, design, or configuration of its products at any time in order to
incorporate the latest technological developments.
No part of this publication may be reproduced, stored in a retrieval system, or transmitted, in any form or by any means in any information
search system or translated into any language in any form without the prior written permission of the Company.

www.blaubergventilatoren.de
S30, S31, S32
3
UNIT INSTALLATION AND OPERATION SAFETY PRECAUTIONS
• Disconnect the unit from power mains prior
to any installation operations. • Unpack the unit with care.
• The unit must be grounded!
• While installing the unit, follow the safety
regulations specific to the use of electric
tools.
• Do not change the power cable length
at your own discretion. Do not bend the
power cable. Avoid damaging the power
cable. Do not put any foreign objects on the
power cable.
• Do not lay the power cable of the unit in
close proximity to heating equipment.
• Do not use damaged equipment or cables
when connecting the unit to power mains.
• Do not operate the unit outside the
temperature range stated in the user’s
manual. Do not operate the unit in
aggressive or explosive environments.
• Do not touch the unit controls with wet
hands. Do not carry out the installation and
maintenance operations with wet hands.
• Do not wash the unit with water. Protect
the electric parts of the unit against ingress
of water.
• Do not allow children to operate the unit. • Disconnect the unit from power mains prior
to any technical maintenance.
SAFETY REQUIREMENTS
• Please read the user’s manual carefully prior to installing and operating the unit.
• All user’s manual requirements as well as the provisions of all the applicable local and national construction, electrical, and technical
norms and standards must be observed when installing and operating the unit.
• The warnings contained in the user’s manual must be considered most seriously since they contain vital personal safety information.
• Failure to follow the rules and safety precautions noted in this user’s manual may result in an injury or unit damage.
• After a careful reading of the manual, keep it for the entire service life of the unit.
• While transferring the unit control, the user’s manual must be turned over to the receiving operator.
THE PRODUCT MUST BE DISPOSED SEPARATELY AT THE END OF ITS SERVICE LIFE.
DO NOT DISPOSE THE UNIT AS UNSORTED MUNICIPAL WASTE.

S30, S31, S32
4
www.blaubergventilatoren.de
The automatic control system is designed for controlling ventilation systems of various configurations.
The control system controls basic ventilation system components, such as supply and extract fans, heat exchanger, air heater, air cooler,
air humidifier, air mixing chamber, air dampers. The automation unit has a configurable controller with installed software. The controller
can be individually configured for each ventilation system. The control panels are rated for non-stop operation.
THE UNIT SHOULD NOT BE OPERATED BY CHILDREN OR PERSONS WITH REDUCED
PHYSICAL, MENTAL, OR SENSORY CAPACITIES, OR THOSE WITHOUT
THE APPROPRIATE TRAINING.
THE UNIT MUST BE INSTALLED AND CONNECTED ONLY BY PROPERLY QUALIFIED
PERSONNEL AFTER THE APPROPRIATE BRIEFING.
THE CHOICE OF UNIT INSTALLATION LOCATION MUST PREVENT UNAUTHORIZED
ACCESS BY UNATTENDED CHILDREN.
PURPOSE
For detailed description of the automatic control system functions please refer to the controller’s manual.
Please ask the ventilation unit seller to provide the manual.

www.blaubergventilatoren.de
S30, S31, S32
5
TECHNICAL DATA
Parameter Value
th-Tune pGDE
Storage temperature [°C] -20...+70 -20...+70
Storage humidity [%] 10...90 (no condensation) 10...90 (no condensation)
Operation temperature [°C] -10...+60 -20...+60
Operation humidity [%] 10...90 (no condensation) 10...90 (no condensation)
Cable AWG 20 or AWG 22 up to 500 m Telephone cable max. 50 m; twisted pair
AWG 22 max. 500 m
Ingress Protection IP20 IP40
Overall dimensions for thTune control panel
Overall dimensions for pGDE control panel
86 8 22,5 28
86 48
82
31 11
64
156
135

S30, S31, S32
6
www.blaubergventilatoren.de
INSTALLATION OF THTUNE CONTROL PANEL
For installation of the back side of the control panel use a mounting box with a minimum diameter 65 mm and installation depth 31 mm.
1. Detach the front side of the control panel from the back side using
a screwdriver.
2. Disconnect the 4-pin connector from the front side of the control
panel.
3. Complete the electric connection in compliance with wiring diagram.
4. Fix the back side of the control panel in the mounting box using the supplied screws.
5. Re-connect the 4-pin connector.
6. Lay all the wires inside of the control panel and install the control panel from the bottom. Press the control panel front side to click to
complete installation.
4
5
64
5
6
Overall dimensions of the control panel back side, mm
74
60
74
60
Outline drawing of the control panel back side is shown on the left.
INSTALLATION AND SETUP

www.blaubergventilatoren.de
S30, S31, S32
7
INSTALLATION OF PGDE CONTROL PANEL
Connect the pGDE control panel to the connector on the controller using the 6P6C phone connector (PLUG-6P6C-P-C2).
The maximum telephone cable length is 50 m.
Lay the telephone cable to the installation place of the control panel.
1. Fix the back side of the control panel inside of the mounting box using the supplied round-head screws.
2. Connect the telephone cable to the front side of the control panel. Attach the front side of the control panel to its back side using the
supplied countersunk head screws as shown below. Press the control panel front side to click to complete installation.

S30, S31, S32
8
www.blaubergventilatoren.de
CONNECTION TO POWER MAINS
DISCONNECT THE UNIT FROM POWER MAINS PRIOR TO ANY OPERATIONS.
THE UNIT MUST BE CONNECTED TO POWER SUPPLY BY A QUALIFIED ELECTRICIAN.
THE RATED ELECTRICAL PARAMETERS OF THE UNIT ARE GIVEN ON THE
MANUFACTURER’S LABEL.
• The unit is rated for connection to single-phase 230 V/50 Hz or three-phase 400 V/50 Hz power mains (refer to Technical data) in
compliance with wiring diagrams.
• The unit must be connected to power mains using durable, insulated and heat-resistant conductors (cables and wires). The actual wire
cross section selection must be based on the maximum load current, maximum conductor temperature depending in the wire type,
insulation, length and installation method.
• The external power input must be equipped with an automatic circuit breaker QF built into the stationary wiring to open the circuit in
the event of overload or short-circuit. The position of the external automatic circuit breaker must ensure free access for quick power-
off of the unit. The trip current of the automatic circuit breaker must exceed the maximum current consumption of the unit (refer to
the “Technical data”section). The recommended trip current of the circuit breaker is the next current in the standard trip current row
following the maximum current of the connected unit. The automatic circuit breaker is not included in the delivery set and can be
ordered separately.
DO NOT LAY THE VENTILATION UNIT POWER CABLE IN CLOSE
PROXIMITY TO THE CONTROL PANEL CABLE!
DO NOT COIL THE CABLE FROM THE CONTROL PANEL IN LOOPS WHILE
LAYING IT.
Route the cables to the control unit via the cable glands on the air handling unit.
Complete the electric connections in compliance with external wiring diagram via the terminal blocks in the control unit.
L3 N1L L1 L2 N
X1 X2
PE
Power input
400VAC
1 2 3 4 5 6 7
L3 N1L L1 L2 N
X1
PE
Power input
230VAC
1 2 3 4 5 6 7 1 2 3 4 5 6 7 8 9 10 11 12 13 14 15 16 17 18 19 20
NOGND
GND GND
GND GNDNC NC NC NC
0-10V 24VAC
24VAC 24VAC
24VAC
R-/T- Am 02-4R+/T+
NO NO NO NO
2
SW1*
1
P1** ThTune
2
PK1*
12
PD1*
1 3
GND
GND
R-/T-
GND
R+/T+
24VAC
DPT*
CO2*
GND
am 02-4
Heater
GND
Heating/cooling
control
Cooler
Alarm signal
White
Brown
Yellow
Green
Grey
ANY TAMPERING WITH THE INTERNAL CONNECTIONS IS PROHIBITED
AND WILL VOID THE WARRANTY.

www.blaubergventilatoren.de
S30, S31, S32
9
Designation Description Type Cable***
SW1* Remote turning on/off NO 2x0.75mm2
DPT*/CO2* Pressure sensor/CO2sensor 3x0.75mm2
PK1* NC contact of fire alarm panel 2x0.75 mm2NC 2x0.75mm2
P1** External control panel thTUNE thTUNE 5x0.25mm2
PD1* Filter clogging sensor NC 2x0.75mm2
* Not supplied with the unit. Available as specially ordered accessories.
** The unit may be supplied with the thTUNE control panel.
*** The wire cross section is valid for the max. cable length 100 m.
Alarm signal is a digital output that changes its status in case of alarm.

S30, S31, S32
10
www.blaubergventilatoren.de
CONTROL
Display
port/BMS
Fieldbus2/
BMS
Field bus
Fieldbus2/BMS
conguration
BMS
Fieldbus1/
BMS
Display
port
Ethernet
USB
BMS card
1
12
5
13
14
6
710 118 9
2
3
4
S31 controller (KVENT) inputs/outputs

www.blaubergventilatoren.de
S30, S31, S32
11
Position Description
1 Digital inputs
2 Analogue inputs
3 Analogue outputs
4 Digital outputs
5 Micro USB for updating applications, import and export of
settings, alarm log
6 Power source for external sensors
7 Ethernet port
8 Connection port for PGDe control panel
9 Display port
10 BMS/Fieldbus2 port
11 BMS/Fieldbus1 port. Used for connection of th-Tune as well
12 Slot for connection of BMS card (not included in the delivery
set, available as a specially ordered accessory)
13 Jumpers for configuration of BMS/Fieldbus2 port
14 Power input
Ventilation unit control with a mobile device
Display
port/BMS
Control
stand-by
Fieldbus2/
BMS
Fieldbus1/
BMS
Display
port
Ethernet
USB
Ethernet Internet LAN WAN
The ventilation unit is controllable via a mobile device or tablet. Connect the router through the Ethernet (LAN) connector using the
twisted pair (4 x 2 x 0.51) not below Cat5 with 8P8C connectors. Go to router menu and find IP address of the ventilation unit. Enter IP
address in the URL bar in a mobile device.
After that the unit is ready for operation via mobile device. The control interface is identical to the PGDe control panel interface.

S30, S31, S32
12
www.blaubergventilatoren.de
THTUNE CONTROL PANEL
BUTTON FUNCTIONS
(MODE) Standby/auto mode. Boost function deactivation.
(FAN)
Editing operation settings: ECO, PRECOMFORT, COMFORT, STOP.
(CLOCK)
Schedule mode on/off: press once shortly.
To get access to the schedule menu press and hold for 2 seconds.
Use the rotation knob to select variants.
MODE+CLOCK To turn off the Boost function press and hold for 3 seconds.
(ON-OFF)
On/Off switch and Exit settings.
PUSH
ENCODER
Setting of the required value using the rotation knob. Setup
menu of the set indoor temperature - press once. Supply air
temperature - press twice. External temperature - press thrice.
1 3
2
15
14
13 12 11 10
5
4
6
7
8
9
DISPLAY SYMBOLS
1. System on/off indication
2. Main field (current indoor temperature, field for temperature setup,
schedule setup, etc.)
3.
Operation modes:
ECO
PECOMFORT
COMFORT
AUTO
4. Temperature measurement unit
5. Schedule blocking function (the pictogram appears in case of
attempt to activate schedule on unconfigured unit)
6. Set value
7. Humidity measurement unit
8. Current time band
9. Day week
10. Cooling on
11. Heating on
12. Ventilation mode
13. Alarm signal. The error code is displayed in the line 14
14. Time
15. Activated scheduled mode
Description of the operation modes:
STOP: the fans are off, the protection functions are on (no indication in the field 3).
ECO: low fan speed, low temperature and power consumption.
PRECOMFORT: medium fan speed, medium temperature and power consumption.
COMFORT: maximum fan speed, increased temperature and power consumption.
AUTO: scheduled operation mode.

www.blaubergventilatoren.de
S30, S31, S32
13
TO reset the alarms synchronously press and hold the FAN and ON/OFF buttons for 3 seconds
Schedule setup
Th-Tune enables setup of scheduled operation and temperature settings. To enter the menu turn off the schedule mode and press
the CLOCK button for 2 seconds. The data are saved in the thTune control panel, for that reason during transition from one time band
(hh:mm) to the other the display offers the initial time band following the previous time band (hh:mm+1).
Th-Tune checks coordination of the time bands.
After entering the setup menu of schedule mode the following points are displayed:
Clock: enables setting for current time
Sel days: enables schedule and temperature setting. Press the ENCODER buttons to get access to the settings. Then rotate ENCODER to
select several days or one day to set an operation mode as follows:
7 days (mon, tue, wed, thu, fri, sat, sun). For Monday, Tuesday, Wednesday, Thursday, Friday, Saturday and Sunday the time band settings
are common.
5 days (mon, tue, wed, thu, fri). For Monday, Tuesday, Wednesday, Thursday and Friday the time band settings are common.
2 days (sat, sun). For Saturday and Sunday the time band settings are common.
Day by day. The time band settings for each day are individually settable.
Each time period can have up to 6 time bands. The time bands are marked with following pictures:
Rotate the ENCODER button to switch between the time band settings.
Each selected time band has the set temperature (1) and activation time (2) parameters.
1
2
The time band «-:-» can be deactivated on the display:
To set the OFF band on the th-Tune rotate the minimum setting down to OFF point as shown in the figure below.

S30, S31, S32
14
www.blaubergventilatoren.de
PGDE CONTROL PANEL
The control panel has 6 buttons:
(ALARM): manual reset of alarm signals.
Prg (PRG): operation mode editing.
Esc (ESC): return to previous display.
, (UP, DOWN): moving between displays screens
or increasing/decreasing values
(ENTER): data validation and reset to parameter list
UNIT START
After connection of the unit to power mains the controller is loaded and the home page opens.
5
6
7
2
1
8 9 10
3
4
1. Day and time.
2. Supply fan is on.
3. Operation mode.
STOP
ECONOMY
PRECOMFORT
COMFORT
AUTO
4. Current unit condition.
— damper opening/closing
— fan run
— heating
— cooling
FC
FH
— free heating/cooling
— humidification
— dehumidification
— active heat recovery
— standard shutdown
— alarm shutdown
— scheduler is active
— heat exchanger freeze protection
— active Boost function

www.blaubergventilatoren.de
S30, S31, S32
15
5. Main temperature control (air temperature in the supply air duct).
6. Set indoor air or supply duct temperature point (depending on settings).
7. Indicates access to the user menu with UP, DOWN and ENTER buttons.
INFO: indicates general condition of devices, operation status of outputs and inputs of devices and sensors.
SET: indicates current set point and operation mode according to schedule. It is possible to set the set points
for devices and schedule.
MODE: indicates changing of operation mode (stop, economy, precomfort, comfort, auto, in mask X00a).
8. Supply fan speed.
9. Extract fan is on.
10. Extract fan speed.
Set-up of scheduled mode.
Press ENTER to switch to menu in the SET mode.
The menu has three set points:
1) Setup of operation mode for each week day. It is possible to set maximum four time bands for one day (from Monday till Sunday)
and start time for set mode.
1
4
2
3
1: Selection of week day for setup.
2: Copying of set parameters to enter for the other week day. Select Yes to copy parameters on the next day (parameter Copy to).
3: Setting number of time bands for the day. Current mode exits as the next mode starts.
4: Saving set parameters.
2) Setting operation mode for 3 time bands (from one day till one year).
Current operation mode exits as the next mode starts.
3) It is possible to set a day for switching to set mode.
It is possible to set maximum 6 days. Current operation mode exits as the next mode starts.
To activate the schedule mode set the value I007 for the BOARD parameter in the section Unit cfq.

S30, S31, S32
16
www.blaubergventilatoren.de
ALARMS
In case of alarm the alarms are displayed on the display.
5
2
1
3
4
Position Description
1 Alarm number / total alarms
2 Alarm date and time
3 Alarm code
4 Alarm description
5 Alarmed sensor value
The alarms can be reset manually, automatically or repeated automatically.
• Manual reset: after troubleshooting an alarm reset the audio signal using the ALARM button, then press and hold the button
for 3 seconds for final reset.
• Automatic reset: after automatic troubleshooting of the alarm the audio signal turns off and the signal is reset.
• Automatically repeated reset: the system checks number of repeated interventions per hour. If this number is below the set
maximum value, the alarm is automatically reset. As soon as the limit is crossed, the alarm must be reset manually.
Alarm list
Alarm
code Alarm description Reset Action
A000 Supply temperature sensor not working Automatic reset Unit shutdown
A001 Cooling device alarm Reset by user Cooler shutdown
A002 Antifreeze alarm by DIN Automatic reset to counter (filter
timer) value (3 times 3600 s)
Unit shutdown and forced 100%
power heating
A003 Prototype software Automatic reset Unit shutdown
A004 High number of retain memory writings Reset by user No
A005 Error in retain memory writings Reset by user No
A006 Return temperature sensor broken not working Automatic reset Changeover in the supply control
mode
A007 External temperature sensor broken not working Automatic reset Deactivation of outdoor air
temperature compensation mode
A008 CO2air quality sensor not working Automatic reset Deactivation of CO2control mode
A009 Exhaust temperature sensor not working Automatic reset Unit shutdown
A010 th-Tune offline Automatic reset Deactivation of indoor air
temperature compensation mode
A011 Supply temperature out of range Automatic reset No
A012 Supply air flow alarm Reset by user Unit shutdown
A013 Return air flow alarm Reset by user Unit shutdown
A014 Humidifier alarm Automatic reset Humidifier shutdown
A015 Humidifier maintenance required Automatic reset No
A016 Return fan maintenance required Automatic reset No
A017 Supply fan maintenance required Automatic reset No
A018 Reheating coil maintenance required Automatic reset No
A019 Heat recovery maintenance required Automatic reset No

www.blaubergventilatoren.de
S30, S31, S32
17
A020 Supply filters alarm Automatic reset No
A021 th-Tune clock not working Automatic reset No
A022 th-Tune temperature sensor not working Automatic reset Deactivation of indoor air
temperature regulation mode
A023 th-Tune humidity sensor not working Automatic reset Deactivation of indoor air
humidity regulation mode
A024 BMS offline Automatic reset No
A025 Supply differential pressure sensor not working Automatic reset No
A026 Return differential pressure sensor not working Automatic reset No
A027 Fire alarm by digital input Reset by user Unit shutdown, forced switching
of fans to fire speed
A028 Heating coil water temperature sensor not working Automatic reset Unit shutdown, forced switching
to 100% bypass damper opening
A029 Preheating coil water temperature sensor not working Automatic reset Unit shutdown, forced switching
to 100% bypass damper opening
A030 After preheating coil temp.sensor not working Automatic reset Preheater shutdown
A031 Heating device alarm Automatic reset to counter (filter
timer) value (3 times 3600 s)
Heater shutdown
A032 Fire alarm by temperature Reset by user Unit shutdown, forced switching
of fans to fire speed
A033 Antifreeze alarm by heat back water temperature Automatic reset to counter (filter
timer) value (3 times 3600 s)
Unit shutdown, forced switching
to 100% bypass damper opening
A034 Antifreeze alarm by preheat back water temperature Automatic reset to counter (filter
timer) value (3 times 3600 s)
Unit shutdown, forced switching
to 100% bypass damper opening
A035 Fans overload alarm Automatic reset Unit shutdown
A036 Supply humidity sensor not working Automatic reset Humidifier shutdown
A037 Unit configuration not allowed Automatic reset Unit shutdown
A038 Supply fan - Offline Automatic reset Unit shutdown
A039 Supply fan - Line Fault Automatic reset Unit shutdown
A040 Supply fan - Motor blocked Automatic reset Unit shutdown
A041 Supply fan - Fire alarm Automatic reset Unit shutdown
A042 Supply fan - Uin Low (FW 10) Automatic reset Unit shutdown
A043 Supply fan - Uin High (FW 10) Automatic reset Unit shutdown
A044 Supply fan - UZK low Automatic reset Unit shutdown
A045 Supply fan - UZK high Automatic reset Unit shutdown
A046 Supply fan - IGBT fault Automatic reset Unit shutdown
A047 Supply fan - Earth-GND fault Automatic reset Unit shutdown
A048 Supply fan - Peak current error Automatic reset Unit shutdown
A049 Supply fan - Hall sensor error Automatic reset Unit shutdown
A050 Supply fan - Offline Automatic reset Unit shutdown
A051 Supply fan - Phase Failure Reset by user Unit shutdown
A052 Supply fan - Motor blocked Reset by user Unit shutdown
A053 Supply fan - Mains undervoltage Reset by user Unit shutdown
A054 Supply fan - Mains overvoltage Reset by user Unit shutdown
A055 Supply fan - DC-link overvoltage Reset by user Unit shutdown
A056 Supply fan - DC-link undervoltage Reset by user Unit shutdown
A057 Supply fan - Motor overheating Reset by user Unit shutdown
A058 Supply fan - Internal circuit overheating Reset by user Unit shutdown
A059 Supply fan - Outer stage overheating Reset by user Unit shutdown
A060 Supply fan - Hall sensor error Reset by user Unit shutdown
A061 Supply fan - Communication error Reset by user Unit shutdown
A062 Supply fan - Generic error Reset by user Unit shutdown
A063 Supply fan - Outer stage high temperature Automatic reset Unit shutdown

S30, S31, S32
18
www.blaubergventilatoren.de
A064 Supply fan - Internal circuit high temperature Automatic reset Unit shutdown
A065 Supply fan - Motor high temperature Automatic reset Unit shutdown
A066 Supply fan - Low DC-link voltage Automatic reset Unit shutdown
A067 Supply fan - Limited mains power Automatic reset Unit shutdown
A068 Supply fan - Limited mains current Automatic reset Unit shutdown
A069 Supply fan - Brake mode Automatic reset Unit shutdown
A070 Supply fan - Cable break Automatic reset Unit shutdown
A071 Supply fan - Freeze protection Automatic reset Unit shutdown
A072 Supply fan - Heating: motor stop Automatic reset Unit shutdown
A073 Supply fan - Speed under limit Automatic reset Unit shutdown
A074 Supply fan - High DC-link voltage Automatic reset Unit shutdown
A075 Supply fan - High supply voltage Automatic reset Unit shutdown
A076 Supply fan - High line Impedance Automatic reset Unit shutdown
A077 Return fan - Offline Automatic reset Unit shutdown
A078 Return fan - Line fault Automatic reset Unit shutdown
A079 Return fan - Motor blocked Automatic reset Unit shutdown
A080 Return fan - Fire alarm Automatic reset Unit shutdown
A081 Return fan - Uin Low (FW 10) Reset by user Unit shutdown
A082 Return fan - Uin High (FW 10) Reset by user Unit shutdown
A083 Return fan - UZK low Reset by user Unit shutdown
A084 Return fan - UZK high Reset by user Unit shutdown
A085 Return fan - IGBT fault Reset by user Unit shutdown
A086 Return fan - Earth-GND fault Reset by user Unit shutdown
A087 Return fan - Peak current error Reset by user Unit shutdown
A088 Return fan - Hall sensor error Reset by user Unit shutdown
A089 Return fan - Offline Reset by user Unit shutdown
A090 Return fan - Phase failure Reset by user Unit shutdown
A091 Return fan - Motor blocked Reset by user Unit shutdown
A092 Return fan - Mains undervoltage Reset by user Unit shutdown
A093 Return fan - Mains overvoltage Reset by user Unit shutdown
A094 Return fan - DC-link overvoltage Reset by user Unit shutdown
A095 Return fan - DC-link undervoltage Reset by user Unit shutdown
A096 Return fan - Motor overheating Reset by user Unit shutdown
A097 Return fan - Internal circuit overheating Reset by user Unit shutdown
A098 Return fan - Outer stage overheating Reset by user Unit shutdown
A099 Return fan - Hall sensor error Reset by user Unit shutdown
A100 Return fan - Communication error Automatic reset Unit shutdown
A101 Return fan - Generic error Automatic reset Unit shutdown
A102 Return fan - Outer stage high temperature Automatic reset Unit shutdown
A103 Return fan - Internal circuit high temperature Automatic reset Unit shutdown
A104 Return fan - Motor high temperature Automatic reset Unit shutdown
A105 Return fan - DC-link low voltage Automatic reset Unit shutdown
A106 Return fan - Limited mains power Automatic reset Unit shutdown
A107 Return fan - Limited mains current Automatic reset Unit shutdown
A108 Return fan - Brake mode Automatic reset Unit shutdown
A109 Return fan - Cable break Automatic reset Unit shutdown
A110 Return fan - Freeze protection Automatic reset Unit shutdown
A111 Return fan - Heating: motor stop Automatic reset Unit shutdown
A112 Return fan - Speed under limit Automatic reset Unit shutdown
A113 Return fan - DC-voltage high Automatic reset Unit shutdown
A114 Return fan - High supply voltage Automatic reset Shutdown of VOC regulation

www.blaubergventilatoren.de
S30, S31, S32
19
A115 Return fan - High line impedance Automatic reset No
A404 VOC air quality sensor malfunction Automatic reset No
A405 Supply filter 2 alarm Automatic reset Shutdown. Check-up of air
humidity for natural cooling
A406 Return filter alarm Automatic reset No
A407 Fresh air humidity sensor not working Automatic reset No
A408 Preheating coil maintenance required Automatic reset No
A412 IEC humidifier maintenance required Automatic reset No
A413 Cooling device maintenance required Automatic reset No
A414 Cooling device 2 maintenance required Automatic reset No
A415 Heating device maintenance required Automatic reset No
A416 Heating device 2 maintenance required Automatic reset No
A417 Reverse device maintenance required Automatic reset No
A418 Reverse device 2 maintenance required Automatic reset No
A422 Out of design temperature limits alarm Automatic reset Opening air mixing unit or
ventilation shutdown if mixing
unit is not available
A429 Heat exchanger clogged Automatic reset Shutdown of heat recovery
A430 Door switch Automatic reset Unit shutdown
THE ENGINEERING SETTINGS ARE PASSWORD PROTECTED
FOR DETAILED DESCRIPTION OF ENGINEERING SETTINGS PLEASE REFER TO THE
MANUAL FOR THE CONTROLLER SOFTWARE.
PLEASE ASK THE UNIT SUPPLIER FOR THE MANUAL TO THE CONTROLLER SOFTWARE.
The engineering menu enables to set operation of the automation unit with the control panels S30 and S32 both individually and jointly.
The automation system is operable also without control panel.
The system can be operated also with an external on/off switch.
The automation unit has a built-in WEB interface and supports the Modbus and Bacnet protocols according to RS485 and Ethernet
interfaces.
Please refer to the controller operation manual for information about protocol setup.

www.blaubergventilatoren.de
B201EN-01
This manual suits for next models
2
Table of contents
Other BLAUBERG Control System manuals