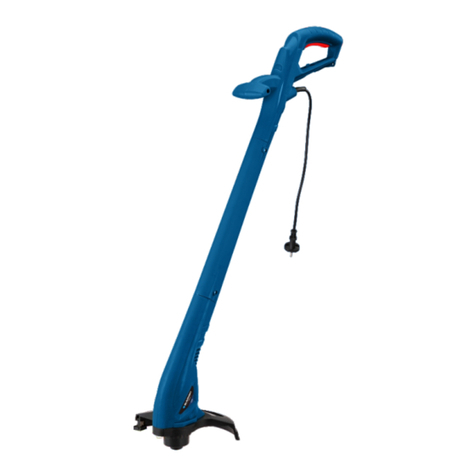
Blaupunkt GT1000 User manual

WARRANTY
This product has 3 years warranty for manufacturing defects. The warranty period
will be counted from the date of purchase of the product, according to purchase
invoice. Product warranty only covers manufacturing defects, defects resulting from
improper use, such as dropping, improper transportation, connection to the mains
power supply not in compliance with the voltage specied in this manual, insertion
of foreign objects and natural wear of parts and parts Such as plastic parts (caps,
buttons, handles, latch locks, power cables, etc.) and metal parts (wires, motors, etc.).
Also not covered are damages due to agents of nature, lightning, ood, sea,
oxidation, humidity etc.). The product will lose its warranty if it presents defects,
which after analysis by our technicians, are characterised as being improperly used,
used for professional use or for the purpose for which it is not intended (according to
the Owner's Manual). This warranty will be void if it is found that the device has been
tampered with, has been repaired by a person or service not authorised by
Blaupunkt. The guarantee is only valid with the receipt/invoice provided at purchase.
Blaupunkt undertakes to provide the above-mentioned services in the warranty
period only in places where it maintains an authorised service. Consumers who are
not located near an authorised service centre should be responsible for the costs and
risks of transport to the authorised service of their choice.
Natural wear is not covered under warranty.
This product is for domestic use only.
Grass Trimmer GT1000
INSTRUCTION MANUAL
To prevent injury or damage, read
and follow all instructions in this
manual before using the appliance.
0800 677 1923
www.bp-tools.co.uk
Imported and Distributed by SKN Innovations Ltd. for Blaupunkt
17 Northumberland Sq.
NE30 1PX
Registered in the UK - Company Number 10366861
SAVE THESE INSTRUCTIONS

1
GENERAL SAFETY WARNINGS
When used for its intended purpose, this device corresponds to the state of the
art, as well as to the current safety requirements at the time of its introduction.
This unit may only be used with the permitted original cutting tools to cut
grass and light weeds on trees, walls, posts, lawn edges and other
locations dicult to access with a lawn mower.
These symbols identify the required personal protection equipment:
To operate this device safely, the user must have read and understood
these instructions for use before using the device for the rst time.
Observe all safety instructions! Failure to do so may cause harm to you and
others. Retain all instructions for use, and safety instructions for future
reference. If you sell or pass the device on, you must also hand over these
operating instructions.
The device must only be used when it functions properly. If the device or
part of the device is defective, have it repaired by a specialist.
Never use the device in a room where there is a danger of explosion or in
the vicinity of ammable liquids or gases.
Always ensure that a device which has been switched o cannot be
restarted unintentionally.
Do not use devices with an on/o switch that does not function correctly.
Keep children away from the device! Keep the device out of the way of
children and other unauthorised persons.
Do not overload the device. Do not use the device for purposes for which
it is not intended.
Make sure to always wear the required personal protective equipment.
Exercise caution and only work when in good condition: If you are tired, ill,
if you have ingested alcohol, medication or illegal drugs, do not use the
device, as you are not in a condition to use it safely.
This product is not intended to be used by persons (including children)
who are limited in their physical, sensory or mental capacities or who lack
experience and/or knowledge of the product unless they are supervised,
or have been instructed on how to use the product, by a person
responsible for their safety.
Ensure that children are not able to play with the device.
Always comply with all applicable domestic and international safety,
health, and working regulations.
GENERAL SAFETY WARNINGS
Risks caused by vibrations
CAUTION!
Risk of injury due to vibrations!
Vibrations may, in particular for persons with circulation problems, cause
damage to blood vessels and/or nerves.
If you notice any of the following symptoms, stop working immediately
and consult a doctor. Numbness of body parts, loss of sense of feeling,
itching, pins and needles, pain, changes in skin colour.
The vibration values specied in the technical data represent the main
uses of the device. The actual existing vibrations during use may deviate
from these as a result of the following factors:
Incorrect use of the product;
Unsuitable tools inserted;
Unsuitable material;
Insucient maintenance.
You can reduce the risks considerably by following the tips below:
– Maintain the device in accordance with the instructions in the operating
instructions.
– Avoid working at low temperatures.
– When it is cold, make sure your body and your hands, in particular, are
kept warm.
– Take regular breaks and move your hands at the same time to promote
circulation.
Electrical safety
The device may only be connected to a socket that is correctly installed
and grounded.
The fuse must be a residual current circuit-breaker with a measured
residual current of no more than 30 mA.
Make sure that the power supply corresponds with the connection
specications of the device before it is connected.
2
GENERAL SAFETY WARNINGS
The tool may only be used within the specied limitations for voltage and
power (see type plate).
Do not touch the mains plug with wet hands! Always pull out the mains
plug at the plug and not by the cable.
Do not bend, crush, pull or drive over the power cable, protect from sharp
edges,oil and heat.
Do not lift the device using the cable or use the cable for purposes other
than intended.
Check the plug and cable before each use.
If the power cable is damaged immediately disconnect the plug. Never
use the device if the power cable is damaged.
If the device is not in use make sure the plug is pulled out.
Make sure that the device is switched o before plugging in the mains
cable.
Make sure that the device is switched o before unplugging it.
Disconnect the power supply before transporting the device.
DESCRIPTION FOR THE PRODUCT
1 - On/o switch
2 - Operating handle
3 - Strain relief mechanism for extension cable
4 - Protective hood
5 - Thread
6 - Cutting head
7 - Front handle
3 4

KNOW YOUR PRODUCT
5 6
KNOW YOUR PRODUCT
1
2a
2b
2c
2d
2e
2f
2
Nut
8 (Bolt)
Nut
8 (Bolt)

3
OPERATIONS
7 8
MAINTENANCE
Before conducting any maintenance on the device, disconnect the mains
plug.
Only those maintenance and fault elimination tasks described here may
be carried out. Any other tasks must be completed by a specialist.
Only use original replacement parts. Only these replacement parts are
designed and suitable for the device. Other replacement parts will not
only lead to an invalidation of the warranty, they may also endanger you
and your environment.
DEVICE-SPECIFIC SAFETY INSTRUCTIONS
Keep the handles dry and free of grease.
Make sure to always wear personal protective clothing when operating.
Make sure the connection cable is always kept out of the working range of
the device. Make sure that cables always lead away from the rear of the
device.
Make sure you are positioned rmly and with a natural stance when
working with the device.
Always hold the unit tightly with both hands.
Before starting work, check the area for animal and objects. Remove all
objects that may be blown away by the unit, or that the thread may
become caught on.
Before starting work check the area and remove all objects which may
damage the cutting mechanism.
Always ensure sucient distance to the cutting mechanism.
In the vicinity of 15 m around the cutting area there should be no people
or animal as they may be hurt by ying objects.
Only work with good light and visibility.
Do not work above hip height! Do not bend forwards or lean over
backwards!
The clothing of the operator should be close-tting. Avoid wearing loosely
tting clothing. Wear sturdy footwear and long work trousers.
2g
2h
3
4

DEVICE-SPECIFIC SAFETY INSTRUCTIONS
Pay attention when walking backwards. Danger of stumbling!
The cutting tool will continue to rotate even after the engine has been
switched o.
Risk of injury caused by the cutting blades! After pulling out a new
thread, always keep the machine in the normal working position before
switching on.
Ensure that the ventilation slots are kept free from dirt.
Never mount metal cutting elements.
Children should be supervised to ensure that they do not play with the
device.
If the power cable of this device is damaged, it may only be replaced by
the manufacturer, their customer service operation, or a similarly qualied
person,in order to prevent risks.
Remember that moving parts may also be located behind ventilation and
venting slots.
Symbols axed to your tools may not be removed or covered. Information
on the device that is no longer legible must be replaced immediately.
SYMBOLS
Read the operating manual before using the device
Be careful when handling the device! Observe all safety
instructions in the instructions for use!
Disconnect the mains plug before all cleaning and maintenance
work.
If the mains cable is damaged, pull out the plug.
Pull out the power plug before conducting any maintenance
work on the device.
Do not expose the machine to moisture.
SYMBOLS
Danger of injury from ying parts!
Always maintain a suciently safe distance.
Keep unauthorised persons away from the area you are
working in.
Ensure a 15 m gap to other people and animals
Wear safety goggles/ Wear ear defenders
Wear protective gloves/Wear safety shoes
SCOPE OF DELIVERY
- Operating manual
- Lawn strimmer
- Protective hood
Note: If any one of the parts is missing or damaged contact the retailer.
- P. 4, item 2a, 2b, 2c, 2d, 2e, 2f, 2g, 2h
Insert the individual parts of the appliance together and tighten them
with screws (8).
- P. 4, item 3
Use screws (9) to screw the protective (4) hood to the trimming head.
Remove the transportation protection mechanism from the cutting
blade (10).
9 10

OPERATION
Check before starting the device!
DANGER!
Risk of injury!
The device may only be put into operation if there are no defects. If a part
is defective it must be replaced before the device is used again.
WARNING!
Risk of injury!
Before starting work check the area and remove all objects which may be
kicked up by the unit.
Check to make sure the device is in safe operating condition:
- Check to make sure there are no visible defects.
- Check to make sure all device components are correctly mounted.
Proper Position
- Hold the unit
- With the left hand on the front handle, and the right hand at
approximately hip level on the operating handle.
- Balanced in a comfortable way.
Attaching the extension cable
- P. 4, item 4
Plug the unit plug into the connector of the extension cable.
Feed the extension cable through the strain relief mechanism (3) as shown.
Switching on and o
- Switching on: Press down the On/O switch (1).
- Switching o: Release the On/O switch (1) again.
11 12
CUTTING TIPS
Only cut with the left (shown here as light grey) area of the cutting unit
when the unit is being moved from right to left.
In the right (dark grey) area, the threads rotate in your direction. This
represents a high level of kickback risk and objects may be thrown in your
direction by the rotation of the thread. You may be hurt as a result.
When the unit is moved from left to right, ensure that the thread is kept
away from the grass to ensure that the grass is not thrown up.
Cut long grasses from top to bottom to ensure that the grasses do not get
tangled around the spool.
Only use the tip of the thread. This way you use less thread and avoid grass
getting caught up in the spool.
Only take the thread as close as absolutely necessary to posts, walls,
fences etc. Solid objects will wear the thread.
Tree trunks, young trees and bushes may be damaged by the thread.

CLEANING AND MAINTENANCE OVERVIEW
Note: Clean unit immediately after every use. Dried grass remains are very
hard, and are very dicult to remove.
CLEANING AND MAINTENANCE
Removing the thread spool
- P. 4, item 3
Press the locking mechanism (11) in.
Remove the spool housing.
Inserting the thread spool
Feed both threads in the openings of the spool housing.
Press the thread spool into the spool housing. Pull the threads out
through the openings.
Warning: Switch o and disconnect from mains supply before
replacing, adjusting or cleaning your trimmer. Be aware that the
trimmer continues to rotate for a few more seconds after it has
been switched o.
To Store: Store it out of the reach of children, in a stable and safe position
and in a dry place where the temperature is not too hot or too cold.
- Store the trimmer away from direct sunlight, if possible in a dark or barely
lit place.
- Do not store in a nylon bag as this could encourage the formation of
mould.
- Do not store the grass trimmer resting on the oor. Hang it by the upper
handgrip instead, so that the guard does not touch anything. The resting
of the guard on a surface could alter its shape and therefore its dimensions
and safety characteristics would be modied.
13 14
LENGTHENING THE THREAD
When the unit no longer cuts cleanly, the threads have become too short.
The best cutting results are obtained when the thread is lengthened far
enough to be cut by the blade to the correct length.
LENGTHENING THE THREAD IN CUTTING OPERATION
– Briey tap the underside of the thread spool on the ground when the
machine is running.
– If the thread is still not long enough, tap it on the ground again.
The threads will automatically be cut to the correct length by the blade.
LENGTHENING THREADS BY HAND
WARNING!
Risk of injury!
When performing work on the thread spool, always unplug from the
power source!
If the threads are too short then they can not be lengthened by tapping.
They must be pulled from the thread spool by hand.
– Place the unit on the oor.
– Using one hand, press the underside of the thread spool and pull both
threads out until they reach slightly further than the edge of the
protective hood.
The threads will be cut to the correct length by the blade next time the
unit is used.
CLEANING AND MAINTENANCE
DANGER!
Risk of injury!
Prior to conducting maintenance or cleaning: Unplug from the power
source.

15 16
CLEANING AND MAINTENANCE
To Clean
- Regular cleaning and maintenance of you grass trimmer will ensure
eciency and prolong the life of your machine.
- After each cutting operation, take apart and clean out the grass and soil
from; the spool and its slot, the whole trimmer and in particular the guard.
- During operation, keep the air slots clean and free of grass.
- Only use a cloth soaked with hot water and a soft brush to clean the
grass trimmer.
- Do not spray or wet the appliance with water.
- Do not use detergents or solvents as these could ruin the trimmer. The
parts in plastic can easily be damaged by chemical agents.
- If the wire cutting blade no longer cuts or breaks, have this replaced by
contacting an authorised service center.
- Take special care to clean around the inside of cutting head guard, the
cap and motor housing cooling vents.
- Refer to qualied service personnel if internal maintenance is required.
- CAUTION! The blade can give deep cuts.
TROUBLESHOOTING
PROBLEM POSSIBLE CAUSE SOLUTION
Line will not
advance when
you restart
the machine.
Cutting head is
hard to turn
Grass wraps
around
the attachment
shaft and the
trimmer head
assembly
Liner trimmer
stops and will
not start again
1. Line is welded to itself.
2. Not enough line on spool.
3. Line is worn too short.
4. Line is tangled on spool.
Grass wrapped or built
up around head.
Cutting tall grass at ground level.
1) Unit failed
2) Plug is damaged.
1. Lubricate with a silicone spray.
2. Install more line (Refer to
“Replacing the Cutting Line” earlier
in this manual).
3. Pull lines while alternately pressing
down on and releasing bump button.
4. Remove line from spool and
rewind (Refer to “Replacing the
Cutting Line” earlier in this manual).
Clean affected parts of the machine.
Cut tall grass from the top down.
1) Contact dealer to check damage
2) Check the plug

17 18
TROUBLESHOOTING
Waste electrical products should not be disposed of together
with household waste. Please recycle where facilities exist. Check
with your local authority or retailer for recycling advice.
Separate collection of used products and packaging allow
materials to be recycled and used again. Reuse of recycled
materials helps prevent environmental pollution and reduces
the demand for raw material.
TECHNICAL DATA
Type - GT1000
Voltage - 230-240V~50Hz
Rated power - 250W
No load speed - 12000rpm
Cutting line dia. - 1.2mm diameter line
Cutting diameter - 230mm
Net weight - 1.08Kg
Other manuals for GT1000
1
Table of contents
Other Blaupunkt Trimmer manuals

Blaupunkt
Blaupunkt GT7010 User manual

Blaupunkt
Blaupunkt GT4000 User manual

Blaupunkt
Blaupunkt GT3010 User guide

Blaupunkt
Blaupunkt HKSK 750201 User manual

Blaupunkt
Blaupunkt RATK 750104 User manual

Blaupunkt
Blaupunkt BlueRazor MST601 User manual

Blaupunkt
Blaupunkt HT6010 User manual

Blaupunkt
Blaupunkt GT1000 User manual

Blaupunkt
Blaupunkt BC3010 User manual