Blue Hawk SGY-NR-KITC User manual

ATTACH YOUR RECEIPT HERE
Serial Number Purchase Date
ITEM #0461681
MODEL SGY-NR-KITC
4-TOOL NAILER
COMBO KIT
1
service department at 1-877-888-8225, 8 a.m. - 8 p.m., EST, Monday - Friday.
Questions, problems, missing parts? Before returning to your retailer, call our customer
R
www.lowes.com
AB1318
Français p. 24
Español p. 47

TABLE OF CONTENTS
IMPORTANT
PRODUCT SPECIFICATIONS
.Safety Information ................................................................................................................... 8
Read and follow all safety rules and operating instructions before using product. Retain this manual
for future reference.
.Troubleshooting................................................. ....................................................................... 19
Package Contents .................................................................................................................. 4
Product Specifications ............................................................................................................... 2
..Operating Instructions...................................... ....................................................................... 10
..Care and Maintenance................................... ........................................................................ 18
.
Exploded views ............................................... ........................................................................ 20
.
Warranty ......................................................... ........................................................................ 19
2
Nail capacity
Nail length
Operating pressure
Air inlet
Dimensions
Weight
Fastener size
DESCRIPTION
100 pcs.
1-1/4 in. - 2-1/2 in. (32 - 64 mm)
70 - 110 PSI (4.8 - 7.5 bar)
1/4 in. N.P.T.
12.59 in. × 10.62 in. × 2.95 in.
(320 × 270 × 75 mm)
4.14 lbs.
16 gauge
SPECIFICATION
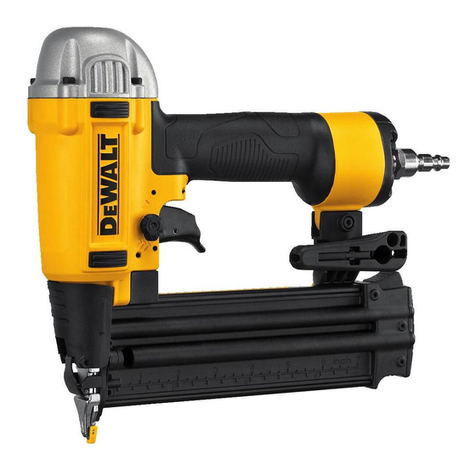
16 GA 2-1/2 INCH FINISH NAILER
R
www.lowes.com

PRODUCT SPECIFICATIONS
Nail capacity
Nail length
Operating pressure
Air inlet
Dimensions
Weight
Fastener size
DESCRIPTION
100 pcs.
5/8 in. - 1-5/8 in. (16 - 40 mm)
70 - 110 PSI (4.8 - 7.5 bar)
1/4 in. N.P.T.
9.76 in. × 9.52 in. × 2.12 in.
(248 × 242 × 54 mm)
3.1 lbs.
18 gauge
SPECIFICATION
Nail capacity
Nail length
Operating pressure
Air inlet
Dimensions
Weight
Fastener size
DESCRIPTION
100 pcs.
5/8 in. - 2 in. (15 - 50 mm)
70 - 110 PSI (4.8 - 7.5 bar)
1/4 in. N.P.T.
9.8 in. × 9.68 in. × 2.16 in.
(249 × 246 × 55 mm)
3.08 lbs.
18 gauge
SPECIFICATION
3
18 GA 1/4 INCH CROWN STAPLER
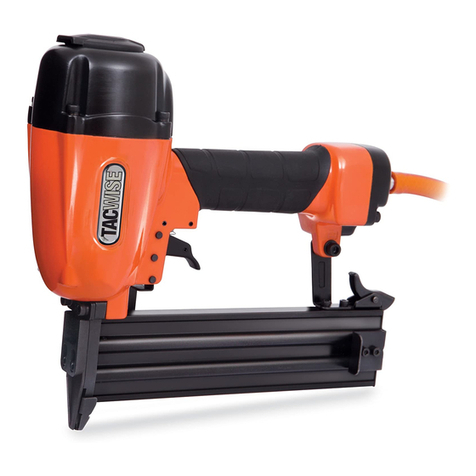
18 GA BRAD NAILER
Nail capacity
23 GA 1 INCH PIN NAILER
Nail length
Operating pressure
Air inlet
Dimensions
Weight
Fastener size
DESCRIPTION
140 pcs.
1/2 in. - 1 in. (12 - 25 mm)
70 - 100 PSI (4.8 - 6.9 bar)
1/4 in. N.P.T.
8.46 in. × 6.37 in. × 1.77 in.
(215 × 162 × 45 mm)
2.2 lbs.
23 gauge (1.25 × 1 mm)
SPECIFICATION
R
www.lowes.com

PACKAGE CONTENTS
QUANTITY
1
1
1
1
1
PART
A
B
C
D
E
DESCRIPTION
Air Deflector
Cylinder Cover
Gun Body
Quick Release
Magazine
QUANTITY
1
1
1
1
PART
F
G
H
I
DESCRIPTION
Trigger
Adjacent Nut
Air Plug
Handle
4
16 GA 2-1/2 INCH FINISH NAILER
A
B
C
DE
H
I
F
G
R
www.lowes.com

PACKAGE CONTENTS
QUANTITY
1
1
1
1
1
PART
A
B
C
D
E
DESCRIPTION
Air Deflector
Cylinder Cover
Gun Body
Quick Release
Safety Stand
QUANTITY
1
1
1
1
PART
F
G
H
I
DESCRIPTION
Magazine
Trigger
Latch
Air Inlet Plug 1
JHandle
5
18 GA 1/4 INCH CROWN STAPLER
A
B
C
D
E
H
I
J
F
G
R
www.lowes.com

PACKAGE CONTENTS
A
B
C
D
FE
I
G
H
QUANTITY
1
1
1
1
1
PART
A
B
C
D
E
DESCRIPTION
Air Deflector
Cylinder Cover
Body
Quick Release Handle
Movable Magazine
QUANTITY
1
1
1
1
PART
F
G
H
I
DESCRIPTION
Trigger
Air Inlet Plug
Handle
Release Latch
6
18 GA BRAD NAILER
R
www.lowes.com

PACKAGE CONTENTS
QUANTITY
1
1
1
1
1
PART
A
B
C
D
E
DESCRIPTION
Exhaust Cap
Cylinder Cover
Gun Body
Driver Guide
Magazine
QUANTITY
1
1
1
1
PART
F
G
H
I
DESCRIPTION
Trigger
Fixed Lever
Air Inlet Plug
Handle
7
23 GA 1 INCH BRAD NAILER
A
B
C
DE
G
H
I
F
R
www.lowes.com

SAFETY INFORMATION
8www.lowes.com ®
A
ra
Always be aware of air hose tripping hazard for anyone in the work area, especially if a long air
hose is used in work area.
Carry tool by the handle only.
Always keep the tool pointed away from yourself and others.
Do not keep the trigger depressed during loading of fasteners.
Always disconnect tool from air supply before loading fasteners to prevent any accidental firings
during connection.
Unintentional firing of fasteners may cause personal injury.
Disconnect tool from air supply hose and close the compressor before performing any
maintenance.
Never use a tool that is leaking air, has missing or damaged parts or requires repair.
Only use parts and accessories recommended by the manufacturer.
Read this manual and all operating instructions thoroughly before loading or unloading fasteners
or any other use of the tool. Failure to follow safety or operating instructions could result in
serious personal injury.
Do not drive fastener on scaffolding, ladders, and similar construction materials for which it’s not
intended.
Make sure all screws are securely tightened before use.
DO NOT CONNECT TOOL TO COMPRESSED AIR THAT EXCEEDS 120 PSI.
To avoid unintentional firing of tool, always be aware when safety part of trigger is depressed.
Keep hands and body away from rear area of gun to safely guard against possible injury.
NEVER USE OXYGEN, COMBUSTIBLES OR ANY OTHER BOTTLED GAS AS A POWER
SOURCE, as they can cause explosions and serious personal injury.
Keep chi ldren away. Children must never be allowed in the work area. Do not let them handle
brad nailer nails, fasteners, air hoses or any other equipment or tool.
Dress properly.Do not wear loose clothing or jewelry as they can be caught in moving parts.
Protective, electrically nonconductive clothes and nonskid footwear are recommended when
working. Wear restrictive hair covering to contain long hair.
Protect your eyes.Wear safety glasses or a face shield when using this product.
Protect your hearing. Noise can harm your hearing.
Always wear ear protection to safeguard your
Keep proper footing at all times. Do not overreach as slipping, tripping, and/or falling can be a
major cause of serious injury and/or death. Be aware of excess hose left in the working area or
work surface. Do not abuse hoses or connectors. Never carry the tool by the hose or yank it to
disconnect it from power supply. Keep hoses away from heat, oil, and sharp edges. Check hoses
for weak or worn connections before each use and make certain that all connections are secure.
hearing.

9
WARNING
SOME DUST CREATED BY PAINT SPRAYING, POWER SANDING, SAWING,
GRINDING, DRILLING, AND OTHER RELATED ACTIVITIES IS KNOWN TO THE
STATE OF CALIFORNIA TO CAUSE CANCER, BIRTH DEFECTS, AND OTHER
REPRODUCTIVE HARM. A LISTING OF CHEMICALS CAN BE OBTAINED FROM
www.oehha.ca.gov UNDER PROPOSITION 65. SOME EXAMPLES OF THESE
CHEMICALS ARE:
LEAD FROM LEAD BASED PAINTS
PRODUCTS
CRYSTALLINE SILICA FROM BRICKS, CEMENT AND OTHER MASONRY
ARSENIC AND CHROMIUM FROM CHEMICALLY TREATED LUMBER
YOUR RISK FROM THESE EXPOSURES VARIES, DEPENDING ON HOW OFTEN
YOU DO THIS TYPE OF WORK. TO REDUCE YOUR EXPOSURE TO THESE
CHEMICALS WORK IN A WELL VENTILATED AREA, AND WORK WITH APPROVED
SPECIALLY DESIGNED TO FILTER MICROSOPIC PARTICLES.
SAFETY EQUIPMENT, SUCH AS A RESPRIATOR OR DUST MASKS WHICH ARE
R
www.lowes.com

10
OPERATING INSTRUCTIONS
1
3
2
16 GA 2-1/2 INCH FINISH NAILER
BEFORE LOADING OR UNLOADING FASTENERS, MAKE
SURE THE TOOL IS DISCONNECTED FROM THE AIR
SUPPLY, THE TRIGGER IS NOT DEPRESSED, AND THE
TOOL IS NOT POINTING TOWARD ANYONE.
1. Pull back on nail switch release latch until you hear the latch
click and it’s locked in place.
2. Insert nails into magazine.
3. Press forward on the nail switch release latch so that it slides
forward until it makes contact with the inserted fasteners. It’s
recommended to test fire the fastener on a scrap piece of wood
to make sure the depth setting on the nailer is set
properly.
NOTE: Before inserting any nails into the gun, make sure you are
using the proper nail with the proper nail gun. If the incorrect
nail is used, bodily injury or property damage may occur. Make
sure that the nail is facing the proper direction with the tip facing
down toward the bottom of the magazine and the head of the
nail facing up toward the top of the magazine. Please consult
your retailer if you have any questions on which nail is the correct
one to be used with this tool or how to place the nails properly
into the magazine.
R
www.lowes.com

OPERATING INSTRUCTIONS
4. Air supply
5. Loading fasteners and operating
When connecting air supply always keep hands and body away from discharge area of tool.
A filter regulator-lubrication (not included) is required and should be located as close to the
Make sure the air pressure is set at the correct range of 70 - 110 PSI before using. Never
exceed 120 PSI.
tool as possible.
Not all components shown are included.
Release the latch and pusher Slide the pusher against the nails.
Insert a strip of fasteners into magazine, keeping it pointed down.
Connect the tool to the air supply. Make sure the air pressure is in the correct range.
Test the driving depth in a sample piece of wood before using. If the fasteners are being
driven too far or not far enough, adjust the regulator to provide less air pressure or more air
pressure.
Never operate tool unless safety nose is in contact with workpiece. Do not operate tool
without fasteners or damage to tool may result.
Never fire fasteners into air because fasteners may injure operator or others and damage to
tool may result.
The tool is equipped with a fixed block that can change the operating mode from sequential
fire to single fire. When the orientation block is rotated to the sequential fire position, the tool
will sequentially fire. If it is rotated to the single fire position, the tool will fire the fastener
singly only. To fire the next fastener, both the trigger and the safety nose must be released.
Tool
Quick
Quick
Coupler Quick
Coupler
Air Hose Regulator
Air
Compressor
Connector Quick Oiler Filter
Connector
4
11 www.lowes.com ®

12
OPERATING INSTRUCTIONS
Press
1
Push
18 GA 1/4 INCH CROWN STAPLER
3
BEFORE LOADING OR UNLOADING FASTENERS, MAKE
SURE THE TOOL IS DISCONNECTED FROM THE AIR
SUPPLY, THE TRIGGER IS NOT DEPRESSED, AND THE
TOOL IS NOT POINTING TOWARD ANYONE.
NOTE: Before inserting any staples into the gun, make sure you
are using the proper staple with the proper nail gun. If the
incorrect staple is used, bodily injury or property damage may
occur. Make sure that the staple is facing the proper direction
in the magazine before use. Please consult your retailer if you
have any questions on which staple is the correct one to be
used with this tool or how to place the staples properly into the
magazine.
2. Insert staples into magazine.
NOTE: It’s recommended to test fire the nailer on a scrap piece
of wood to make sure the depth setting on the nailer is set
properly.
1. Press the release switch on the movable magazine so the
movable magazine releases from the fixed magazine housing.
Once switch is released, slide the movable magazine to the
open position.
the fixed magazine, slide the movable magazine to the
closed position. The movable magazine must be securely
closed. Ensure the movable magazine is properly closed
and locked into place and that the movable magazine cannot
accidentally open unless the release switch is pressed.
Once the nailer has been properly reloaded and is secure,
reconnect air supply.
3. Once the staples/fasteners have been properly inserted into
2
www.lowes.com ®

OPERATING INSTRUCTIONS
4. Air supply
5. Loading fasteners and operating
When connecting air supply, always keephands and body away from discharge area of tool.
A filter regulator-lubrication (not included) is required and should be located as close to the
Make sure the air pressure is set at the correct range of 70 - 110 PSI before using. Never
exceed 120 PSI.
tool as possible.
Not all components shown are included.
Release the latch and pusher. Slide the pusher against the nails.
Insert a strip of fasteners into magazine, keeping it pointed down.
Connect the tool to the air supply. Make sure the air pressure is in the correct range.
Test the driving depth in a sample piece of wood before using. If the fasteners are being
driven too far or not far enough, adjust the regulator to provide less air pressure or more air
pressure.
Never operate tool unless safety nose is in contact with workpiece. Do not operate tool
without fasteners or damage to tool may result.
Tool
Quick
Quick
Coupler Quick
Coupler
Air Hose Regulator
Air
Compressor
Connector Quick Oiler Filter
Connector
4
13
R
www.lowes.com

14
OPERATING INSTRUCTIONS
Press
1
2
Push
3
MAKE SURE THE TOOL IS DISCONNECTED FROM THE AIR
SUPPLY, THE TRIGGER IS NOT DEPRESSED
TOOL IS NOT POINTED AT ANYONE. AND THE
1. Press the release switch on the movable magazine so the
movable magazine releases from the fixed magazine housing.
Once switch is released, slide the movable magazine to the
open position.
properly into the inlay slice of the fixed magazine. Make sure
the nails/fasteners being inserted are the desired type and
length and are compatible with the nailer.
All nails/fasteners being inserted must be facing the same
direction ensuring that, when fired, the nail tip should be
facing away from the gun so that it inserts correctly into the
material being nailed.
the fixed magazine, slide the movable magazine to the
closed position. The movable magazine must be securely
closed. Ensure the movable magazine is properly closed
and locked into place and that the movable magazine cannot
accidentally open unless the release switch is pressed.
Once the nailer has been properly reloaded and is secure,
reconnect air supply.
2. Adjust the movable magazine so the nails/fasteners fit
3. Once the nails/fasteners have been properly inserted into
BEFORE LOADING OR UNLOADING FASTENERS,NOTE:
When loading, it is very important to use theproper
sized nail for this tool:
Length: 5/8 in. - 2 in. (15 mm - 50 mm)
Width: 1.25 x 1.00 mm
The 18 GA brad nailer is designed to work withvarious lengths
of nails ranging from 5/8 in. to 2 in. (15 mm - 50 mm) with a fixed
width of 1.25 x 1.00 mm.
DO NOT ATTEMPT TO USE ANY OTHER SIZED NAIL NOT
NOTE:
1 mm
1.25 mm
F15
F20
F25
F30
F32
F35F38F40
F45
F50
15 20 25 30 32 35 38 40 45 50
Nails/
Fastners
NAIL SIZING DIAGRAM
SHOWN IN THE NAIL SIZING DIAGRAM, AS IT IS NOT SAFE.
18 GA BRAD NAILER
www.lowes.com ®

OPERATING INSTRUCTIONS
4. Air supply
5. Loading fasteners and operating
When connecting air supply, always keephands and body away from discharge area of tool.
A filter regulator-lubrication (not included) is required and should be located as close to the
Make sure the air pressure is set at the correct range of 70 - 110 PSI before using. Never
exceed 120 PSI.
tool as possible.
Not all components shown are included.
Connect the tool to the air supply.
Release the latch and pusher; slide the pusher against the nails.
Test the drive depth in a sample piece of wood before using. The nail may be driven in too
far, or not far enough. The air pressure regulator may require adjustment to ensure the nails
are driven to the correct depth. If the air pressure regulator is adjusted, make sure it does
not exceed 120 PSI.
Repeat the drive depth test on a sample piece of wood until the proper depth of the driven
nail is achieved.
Tool
Quick
Quick
Coupler Quick
Coupler
Air Hose Regulator
Air
Compressor
Connector Quick Oiler Filter
Connector
4
15 www.lowes.com ®

16
OPERATING INSTRUCTIONS
Press
1
Push
3
2
23 GA 1 INCH PIN NAILER
BEFORE LOADING OR UNLOADING FASTENERS, MAKE
SURE THE TOOL IS DISCONNECTED FROM THE AIR
SUPPLY, THE TRIGGER IS NOT DEPRESSED, AND THE
TOOL IS NOT POINTING TOWARD ANYONE.
1. Press the release switch on the movable magazine so the
movable magazine releases from the fixed magazine housing.
Once switch is released, slide the movable magazine to the
open position.
NOTE: Before inserting any staples into the gun make sure you
are using the proper staple with the proper nail gun. If the
incorrect staple is used, bodily injury or property damage may
occur. Make sure that the staple is facing the proper direction
in the magazine before use. Please consult your retailer if you
have any questions on which staple is the correct one to be
used with this tool or how to place the staples properly into the
magazine.
2. Insert the finishing nail into magazine
the fixed magazine, slide the movable magazine to the
closed position. The movable magazine must be securely
closed. Ensure the movable magazine is properly closed
and locked into place and that the movable magazine cannot
accidentally open unless the release switch is pressed.
Once the nailer has been properly reloaded and is secure,
reconnect air supply.
3. Once the nails/fasteners have been properly inserted into
NOTE: It’s recommended to test fire the nailer on a scrap piece
of wood to make sure the depth setting on the nailer is set
properly.
www.lowes.com ®

OPERATING INSTRUCTIONS
4. Air supply
5. Loading fasteners and operating
When connecting air supply,always keephands and body away from discharge area of tool.
A filter regulator-lubrication (not included) is required and should be located as close to the
Make sure the air pressure is set at the correct range of 60 - 100 PSI before using. Never
exceed 110 PSI.
tool as possible.
Not all components shown are included.
Release the latch and pusher. Slide the pusher against the nails.
Insert a strip of fasteners into magazine,keeping it pointed down.
Never operate tool unless safety nose is in contact with workpiece. Do not operate tool
without fasteners or damage to tool may result.
Never fire fasteners into air because fasteners may injure operator or others and damage to
tool may result.
The tool is equipped with a fixed block that can change the operating mode from sequent fire
to single fire. When the orientation block is rotated to the sequent fire position, the tool will
sequentially fire. If it is rotated to the single fire position, the tool will fire the fastener singly
only. To fire the next fastener, both the trigger and the safety nose must be released.
Tool
Quick
Quick
Coupler Quick
Coupler
Air Hose Regulator
Air
Compressor
Connector Quick Oiler Filter
Connector
4
17
www.lowes.com ®

CAREANDMAINTENANCE
18
Nail gun must be well-cleaned and lightly lubricated before storing
Place 2 to 6 drops of pneumatic tool oil (not included) into the air inlet before each work day or
after 2 hours of continuous use depending on the characteristic of workpiece or type of fasteners.
Inspect trigger and safety mechanism to ensure system is safe and functional. Make sure there
are no loose or missing parts, and no binding or sticking parts.
If your tool is used without the in-liner automatic oiler, regular lubrication is required.
Store nail gun in a dry and safe place, out of reach of children
Storing
Clearing a jammed nail gun:
Disconnect the tool from the air supply before performing any maintenance. All nail guns excluding
the 23 GA brad nailer have a quick release handle to loosen and/or remove any fastener(s)/nail(s).
Once air supply is disconnected, pull back on the nail switch release latch or press the release
switch and remove any fastener(s) or nail(s) which are in the magazine. Pull open the quick release
handle. After opening, the fastener(s)/nail(s) should come out. If the fastener(s)/nail(s) are not
released insert a flathead screwdriver (not included) into the driving mechanism of the nail gun
and push the driving mechanism back into the gun body. This should release the fastener(s)/nail(s)
and clear any jam. If you have any questions, please consult your retailer for additional assistance.
The 23 GA brad nailer does not have a quick release handle. To clear a nail jam, disconnect the
tool from the air supply before performing any maintenance. Once air supply is disconnected,
press the release switch on the movable magazine and pull back on the movable magazine.
Remove any fastener(s)/nail(s) which are in the magazine. Insert a flathead screwdriver (not
included) into the driving mechanism of the nail gun and push the driving mechanism back into the
gun body (the use of a hex wrench may be needed to adjust the front of the nail magazine for a
flathead screwdriver to fit). Remove any bent fastener(s)/nail(s) from the gun body or driver guide.
Once bent fastener(s)/nail(s) are removed, align and re-tighten the magazine housing (if loosened).
Once aligned and properly tightened, reinsert the fastener(s)/nail(s) into the magazine. Reconnect
the air supply to the nail gun.
www.lowes.com ®

TROUBLESHOOTING
19
WARNING: If any of the following problems occur during operation, stop using the tool
immediately or serious personal injury could result. Only a qualified person or an
authorized service center can perform repairs or replacement of tool.
Disconnect tool from air supply before attempting repair or adjustment. When replacing O-rings
or cylinder, lubricate with air tool oil (not included) before assembly.
Air leak near top of
tool or in trigger area. 1. O-rings in trigger valve are
damaged.
2. Trigger valve heads are damaged.
3. Trigger valve stem, seal or O-ring
are damaged.
1. Check and replace O-ring.
2. Check and replace trigger valve heads.
3. Check and replace trigger valve
stem, seal or O-ring.
Air leak near bottom of
tool. 1. Loose screws.
2. Worn or damaged O rings
-
or bumper.
1. Tighten screws.
2. Check and replace O-rings
or bumper.
Air leak between body
and cylinder cap. 1. Loose screws.
2. Worn or damaged O-rings or seals. 1. Tighten screws.
2. Check and replace O-rings or bumper.
Blade driving fastener
too deep. 1. Worn bumper.
2. Air pressure is too high. 1. Replace bumper.
2. Adjust the air pressure.
Tool: cannot drive
fastener or operates
sluggishly.
1. Inadequate air supply.
2. Inadequate lubrication.
3. Worn or damaged O
-
rings or seals.
4. Exhaust port in cylinder head is
blocked.
1. Verify adequate air supply.
2. Place 2 to 6 drops of oil into air inlet.
3. Check and replace O-rings or seal.
4. Replace damaged internal parts.
Tool skips fasteners. 1. Worn bumper or damaged spring.
2. Dirt in front plate.
3. Dirt or damage prevents fasteners
from moving freely in magazine.
4. Worn or dry O
-
ring on piston or
lack of lubrication.
5. Cylinder cover seal leaking.
1. Replace bumper or pusher spring.
2. Clean drive channel on front plate.
3. Magazine needs to be cleaned.
4. O-ring needs to be replaced.
5. Lubricate cylinder cover seal.
PROBLEM POSSIBLE CAUSE CORRECTIVE ACTIONS
Tool jams. 1. Incorrect or damaged fasteners.
2. Damaged or worn driver guide.
3. Magazine or nose screw loose.
4. Magazine is dirty.
2. Check and replace the driver.
3. Tighten the magazine.
4. Clean the magazine.
1. Change and use correct fastener.
www.lowes.com ®
WARRANTY
1-YEAR LIMITED WARRANTY
The manufacturer warrants this product against defects in materials and workmanship for
one year from date of purchase. If within this period a product is found to be defective in
material or workmanship, the product must be returned with a copy of the bill of sale as proof
of purchase to the place of purchase. The manufacturer will, at its option, repair, replace or
refund the purchase price to the consumer. This warranty does not cover the product becoming
defective due to misuse, accidental damage, improper handling and/or installation and specifically
excludes liability for direct, incidental or consequential damages. As some states do not allow
exclusions or limitations on how long an implied warranty lasts, the above exclusion and limitation
may not apply to you. This warranty gives you specific rights and you may also have other rights
which vary from state to state.

20
EXPLODED VIEWS
1 30 O-ring Release Latch
Bolt
Bolt
Snap Retainer
Drive Nail Plate
Spring
Bolt
Magazine
Pin
Rived
Fixed Seat
Spring
Pusher
Washer
Fixed Lever
Strengthen Slice
Support Seat
Bolt
Bolt
Washer
Nut
Rubber Handle Case
End Cap Washer
End Cap
Air Plug
Air Plug Case
Trigger Valve Guide
Switch Spring
O-ring
Switch Valve Stem
O-ring
Switch Valve Seat
Pin
Trigger
Safety Space
Trigger Pin
O-ring
Pin
Safety Seat
Nut
Adj. Nut
Spring
Steel Ball
Snap Retainer
Compressed Spring
Direction Stand
Safety Stand
Safety Nozzle Cap
Compressed Spring
Driver Guide
Space
Space Pin
Snap Retainer
Cover Plate
59
2 31
Bolt
Air Deflector
O-ring
Bumper
Bolt
Spring Washer
Cylinder Cover
O-ring
Compressed Spring
O-ring
O-ring
O-ring
Switch Valve
O-ring
Collar
O-ring
O-ring
Cylinder
O-ring
Main Piston
Bumper
60
3 32 61
4 33 62
5 34 63
6 35 64
7 36 65
8 37 66
9 38 67
10 39 68
11 40 69
12 41 70
13 42 71
14 43 72
15 44 73
16 45 74
17 46 75
18 47 76
19 48 77
20 49 78
79
80
81
82
83
84
21 50
51
52
53
54
55
56
57
58
No. Description Description DescriptionQty. Qty. Qty.No. No.
1
1
1
1
1
1
11
1
1
1
1
1
1
1
1
1
1
1
1
1
1
1
Washer
Cylinder Cover Wahser
Gun Body
O-ring
O-ring
Trigger Valve Seat
O-ring
O-ring
22
23
24
25
26
27
28
29
1
1
1
1
1
1
1
1
1
1
1
1
1
1
1
1
1
91
1
2
1
1
1
1
2
1
5
1
2
2
2
1
2
2
1
1
1
2
1
1
1
1
1
1
1
2
1
1
1
1
1
1
1
2
1
1
1
1
1
2
1
16 GA 2-1/2 INCH FINISH NAILER
www.lowes.com ®
Table of contents
Languages:
Other Blue Hawk Nail Gun manuals

