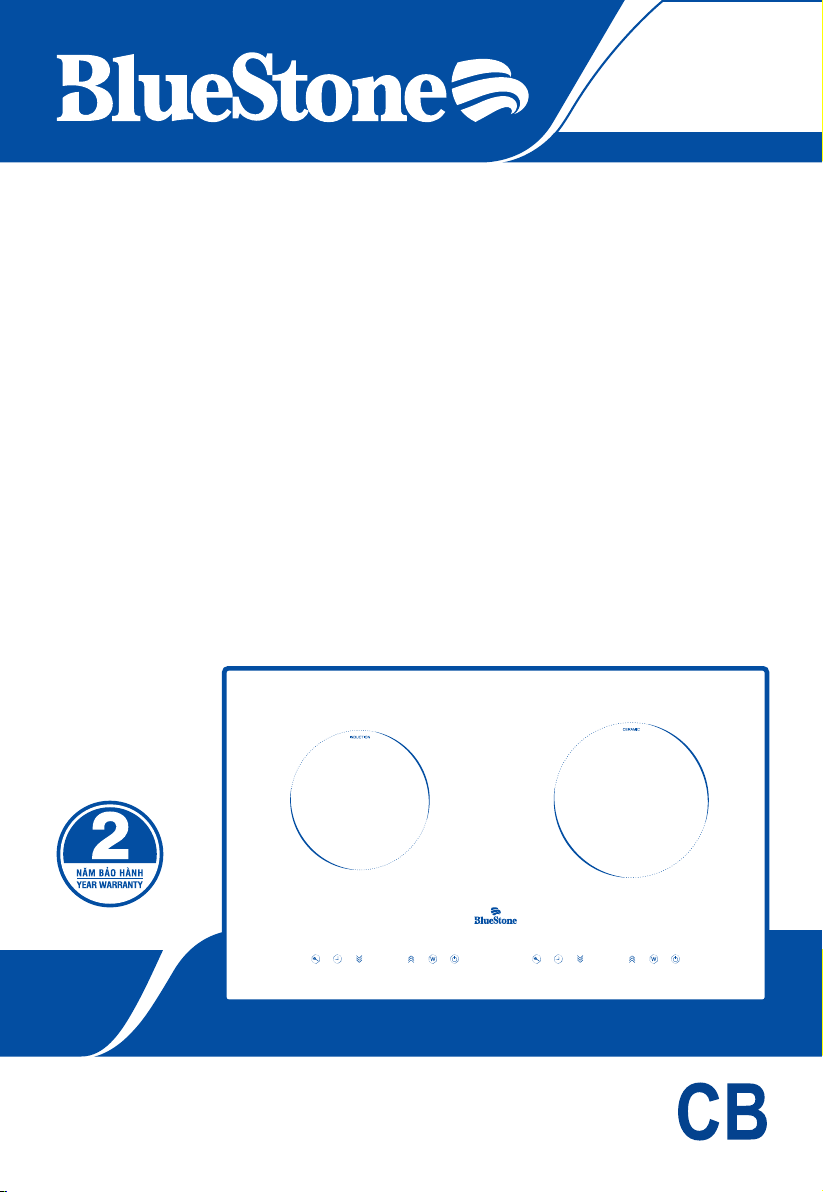
BLUE STONE ICB-6811 Instruction Manual
Model
ICB-6811
BẾP HỖN HỢP QUANG TỪ
Hãy giữ lại Hướng Dẫn Sử Dụng vì sự an toàn của bạn.
HƯỚNG DẪN SỬ DỤNG
MỤC LỤC
CẢNH BÁO AN TOÀN
ĐẶC TÍNH KỸ THUẬT
MÔ TẢ TỔNG QUÁT
BẢNG ĐIỀU KHIỂN
HƯỚNG DẪN SỬ DỤNG CÁC CHỨC NĂNG
HƯỚNG DẪN CHỌN NỒI PHÙ HỢP (đối với bếp từ)
CÁCH VỆ SINH VÀ BẢO TRÌ
SỰ CỐ VÀ CÁCH KHẮC PHỤC
HƯỚNG DẪN LẮP ĐẶT
BẢO VỆ MÔI TRƯỜNG
INDEX
SAFETY CAUTIONS
SPECIFICATION
GERNERAL DESCRIPTION
CONTROL PANEL
INSTRUCTION FOR USE
SUITABLE COOKWARE (for Induction cooker)
CLEANING AND MAINTENANCE
TROUBLE SHOOTING
INSTALLTION
ENVIRONMENT FRIENDLY DISPOSAL
04
05
05
05
06
08
09
10
11
13
16
17
17
17
18
20
21
22
23
25
Tiêu chuẩn kỹ thuật nhà sản xuất có thể thay đổi mà không cần báo trước.
Manufacturer has right to replace technical standard or specication without
any notice.
Các sản phẩm và các linh kiện sản phẩm BlueStone đều được sản
xuất dựa trên quy trình chuyên nghiệp theo tiêu chuẩn CB về chất
lượng và an toàn sản phẩm.
Bên cạnh đó, các sản phẩm BlueStone đều được kiểm tra chặt chẽ về
mẫu mã, dây chuyền sản xuất và kiểm định lô hàng.
Sản phẩm BlueStone được công ty đối tác Mỹ Great American Appliance
(GAA Corp) tư vấn về quản lý và quy trình. GAA là công ty được thành
lập và hoạt động theo luật pháp Mỹ theo Giấy chứng nhận thành lập
số 3089043 do văn phòng thư ký bang California cấp có trụ sở chính
tại 7809 Michigan Ave Oakland, CA 94605, Hoa Kỳ.
Sản phẩm BlueStone được thiết kế theo kiểu dáng công nghiệp với
màu sắc đa dạng. Dưới sự nghiên cứu và thiết kế của các chuyên viên
thiết kế và kỹ thuật viên chuyên nghiệp, các sản phẩm BlueStone
được thiết kế theo tiêu chuẩn quốc tế nghiêm ngặt nhằm đáp ứng
được nhu cầu ngày càng cao của người tiêu dùng.
BlueStone luôn coi trọng việc chăm sóc khách hàng. Các sản phẩm
BlueStone đều được bảo hành 2 năm
TIẾNG VIỆT TIẾNG VIỆT
2 3
CẢNH BÁO ANTOÀN
Hãy đọc kỹ hướng dẫn sử dụng trước khi lắp ráp, vận hành và lưu giữ hướng
dẫn này cho tham khảo về sau.
Khi sử dụng thiết bị điện, cần tuân thủ các chú ý an toàn trước khi sử dụng
nhằm tránh các rủi ro cháy nổ, điện giật hoặc bị thương như sau:
Đọc kỹ hướng dẫn sử dụng trước khi lắp đặt và sử dụng.
Không đặt các vật liệu dễ cháy, kim loại lên bề mặt sản phẩm.
Không để bếp trong môi trường nhiệt độ quá cao.
Đặt bếp trên bề mặt phẳng.
Nếu dây dẫn nguồn bị hỏng thì phải do nhà chế tạo hoặc đại lý dịch vụ, những
người có trình độ tương đương thay thế nhằm tránh xảy ra sự cố. Không tự sửa
chữa thiết bị để tránh nguy hiểm.
Nếu có thức ăn trong đồ hộp, hãy mở hộp ra trước và sau đó nấu để tránh bị nổ.
Không đun bếp với nồi rỗng để tránh cháy nồi gây nguy hiểm.
Không đun nóng tấm kim loại bằng sắt trên mặt thủy tinh của bếp nhằm tranh
nguy hiểm do nhiệt độ cao.
Không rửa bếp bằng nước hay chất lỏng khác để tránh nước thấm vào bên
trong bếp gây hỏng hóc.
Ngắt điện sau khi sử dụng bếp.
Trẻ em cần được giám sát bởi người lớn khi sử dụng.
Nếu mặt kính của bếp bị hỏng, ngắt bếp khỏi nguồn điện ngay lập tức và
mang đến trung tâm bảo hành gần nhất.
Không tự ý sửa chữa nếu không biết rõ vì điện áp cao trong thiết bị.
Nguồn điện cho bếp phải đảm bảo đủ công suất tránh gây quá tải, chạm chập,
cháy nổ.
Sau khi nấu, mặt bếp vẫn còn nóng vì nhiệt độ cao, không chạm vào bề mặt
bếp hay lau chùi ngay lúc đó vì có thể bị bỏng.
Không đặt những vật cản che đậy các khe thông gió vì có thể làm quá nhiệt
hư hỏng bếp.
Không để côn trùng chui vào bên trong bếp để tránh gây hư hỏng thiết bị.
1
2
3
4
5
6
7
8
9
10
11
12
13
14
15
16
17
18
19
20
Nếu người vận hành bếp mắc bệnh tim hoặc cần sự hỗ trợ của máy hỗ trợ nhịp
tim, vui lòng tham khảo và theo hướng dẫn của bác sĩ trước khi sử dụng.
Thiết bị này không thích hợp cho người tàn tật, thiểu năng trí tuệ, hoặc những
người không có kinh nghiệm và thiếu hiểu biết (kể cả trẻ em) trừ khi được
giám sát hoặc hướng dẫn sử dụng thiết bị bởi người có trách nhiệm về sự an
toàn của họ.
Nhiệt độ bếp khi sử dụng rất cao, cẩn trọng tránh bị bỏng.
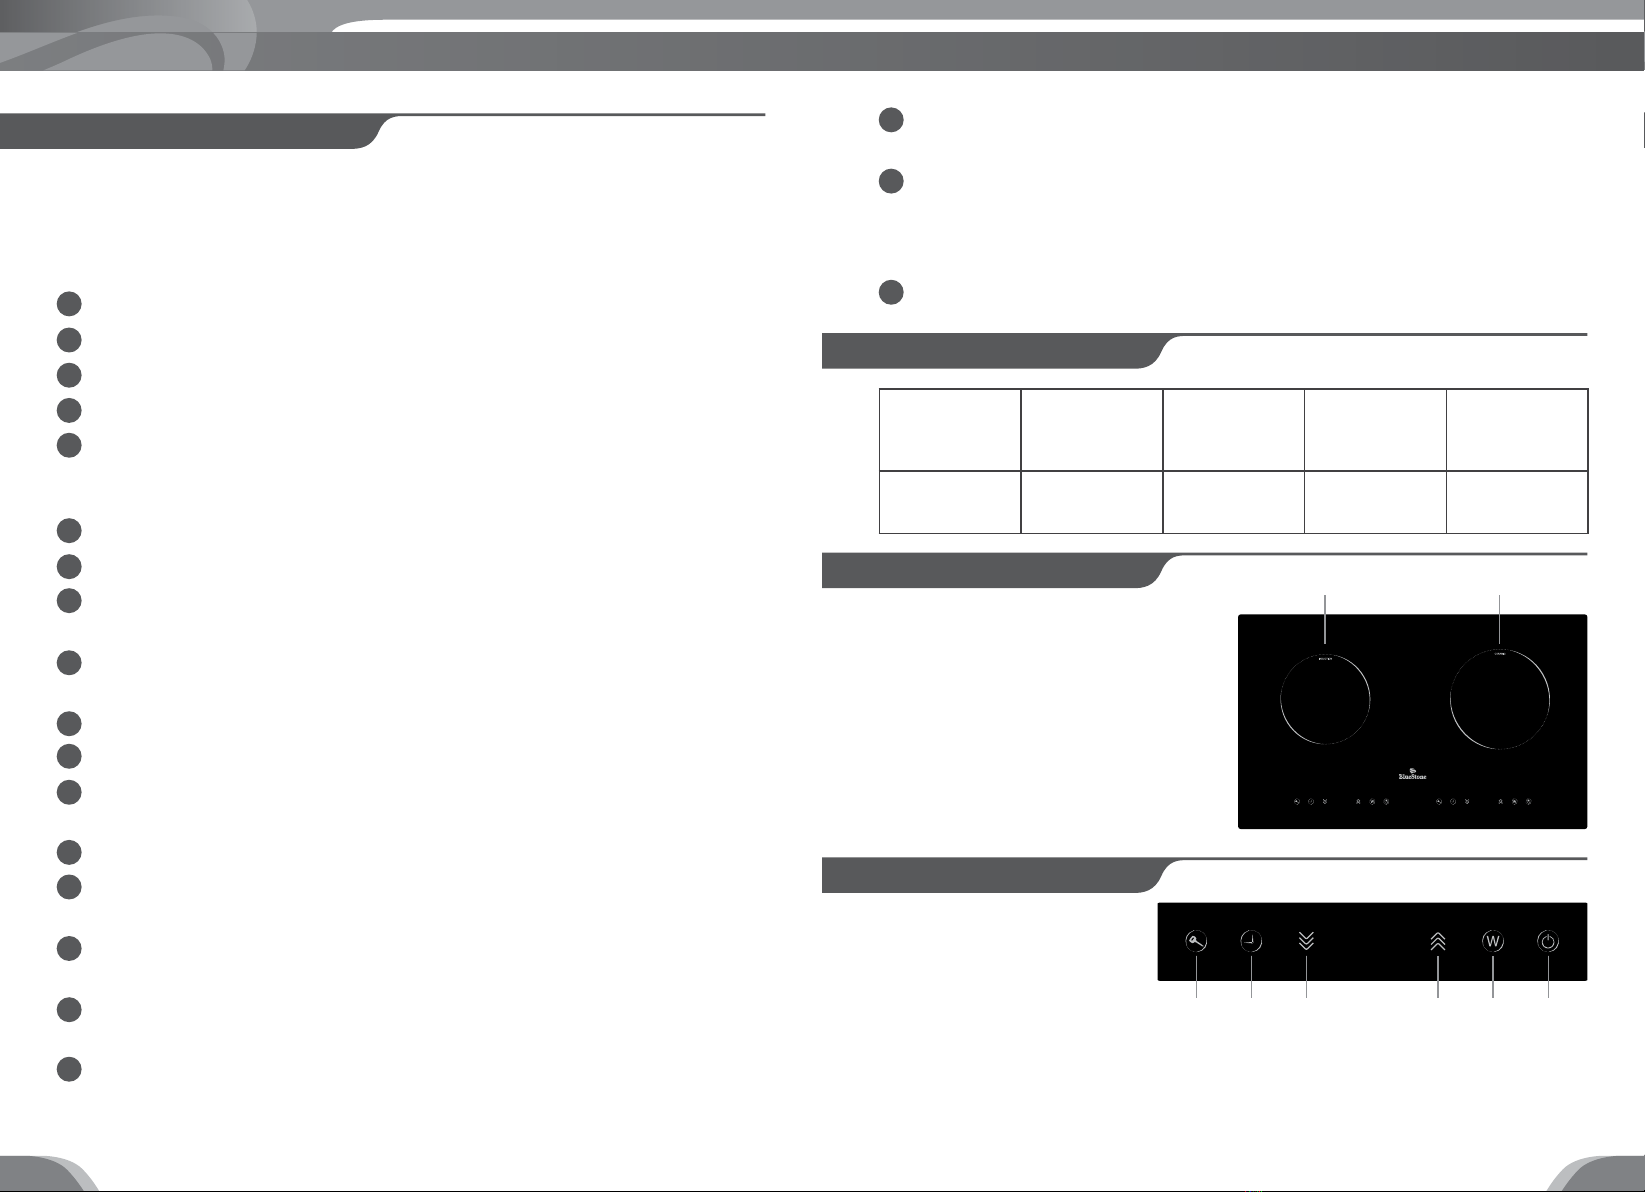
ĐẶC TÍNH KỸ THUẬT
MÔ TẢ TỔNG QUÁT
BẢNG ĐIỀU KHIỂN
Model Hiệu điện thế Công suất Kích thước
sản phẩm
(mm)
Trọng lượng
(kg)
ICB-6811 220-240V
~50/60Hz
3200W 700x430x82
(mm)
7.70kg
1
Bếp từ Bếp quang
2 3 4 5 6
1. Khóa bàn phím
2. Hẹn giờ
3. Giảm (thời gian cài đặt, công suất)
4. Tăng (thời gian cài đặt, công suất)
5. Điều chỉnh công suất
6. Tắt/Mở
TIẾNG VIỆT TIẾNG VIỆT
4 5
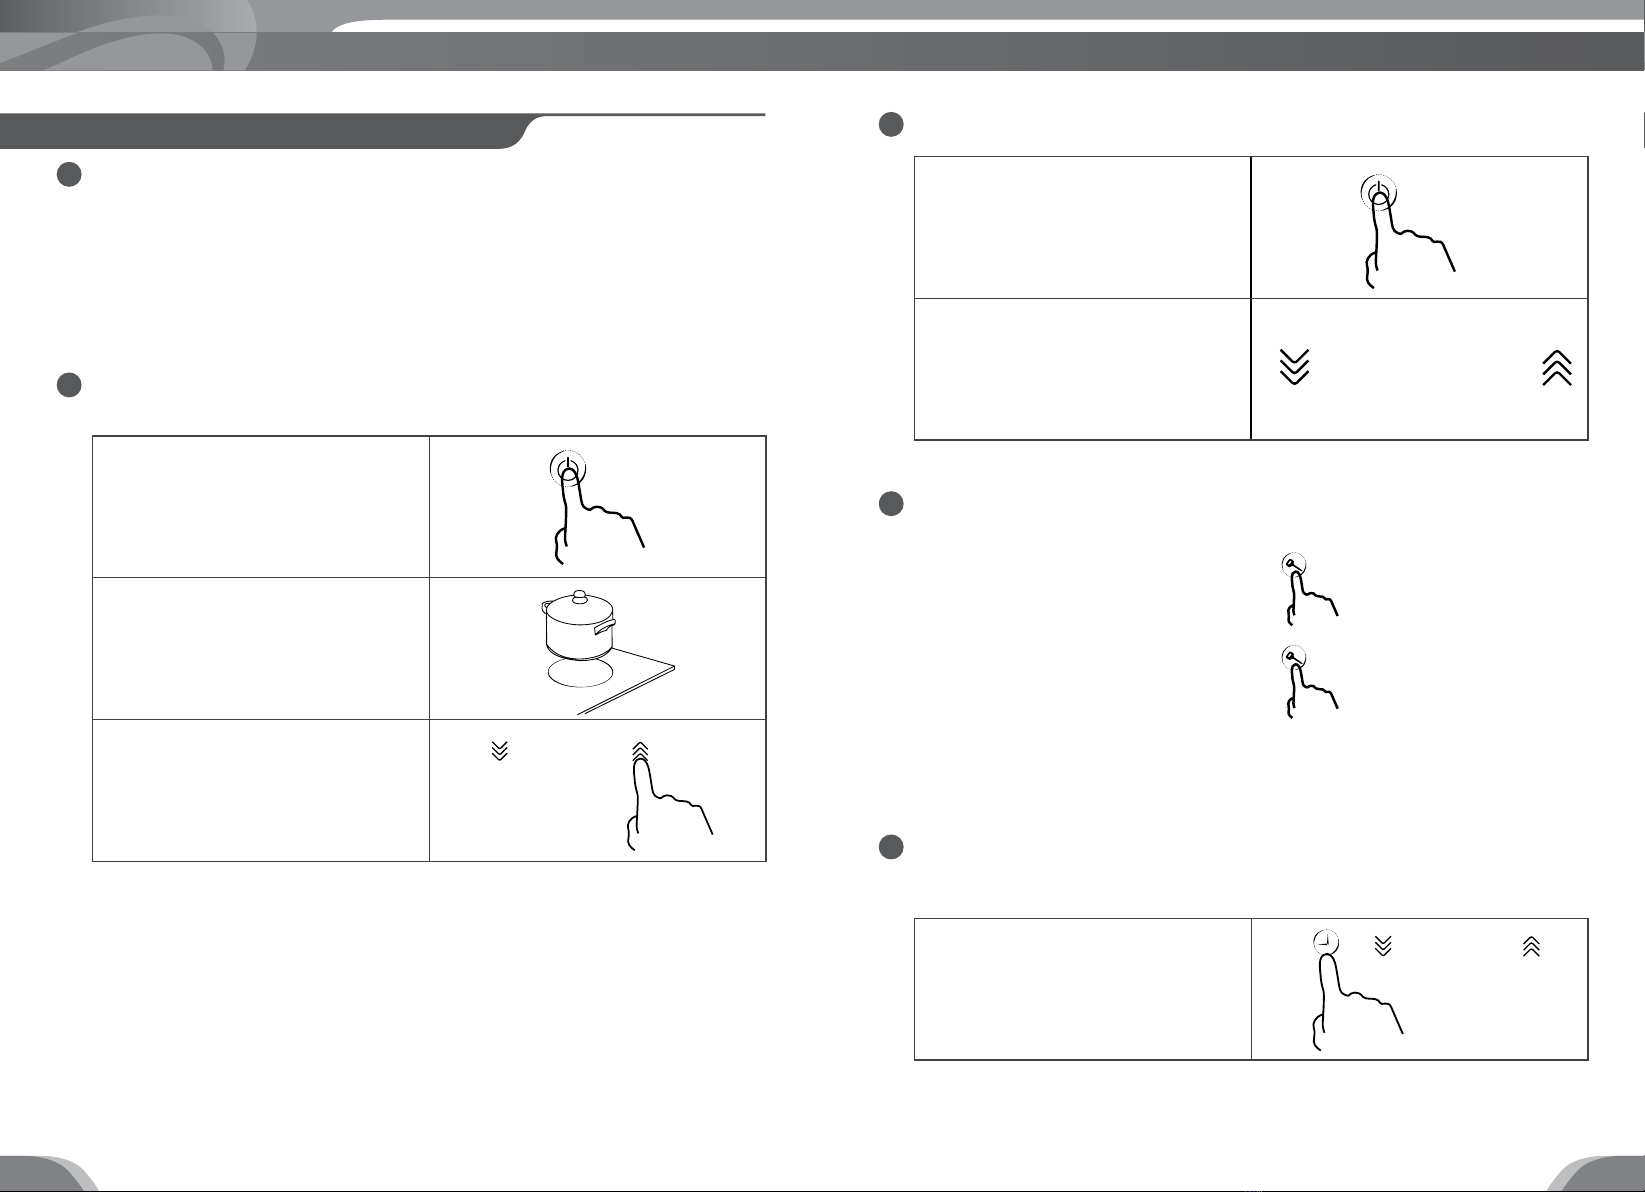
HƯỚNG DẪN SỬ DỤNG CÁC CHỨC NĂNG
Chú ý trước khi sử dụng:
Đối với bếp từ, trước khi sử dụng bếp bạn cần biết rằng bếp từ dùng từ trường
để truyền nhiệt, nhiệt sẽ được truyền trực tiếp khi có sự tiếp xúc với xoong
nồi, do đó xoong nồi nấu phải có bề mặt bằng phẳng tiếp xúc tạo từ tính (xem
Hướng dẫn chọn nồi phù hợp ở trang 8).
Đặt nồi với thức ăn giữa mặt kính bếp.
Chú ý: Lau bên ngoài nồi sạch, không dính nước trước khi đặt lên bếp.
Không đặt nồi rỗng lên bếp để tránh hư nồi hay nguy hiểm gây cháy.
Bắt đầu nấu:
Chú ý:
Khi bếp phát ra tiếng“bíp”cùng với màn hình hiển thị nhấp nháy (chỉ bếp từ),
có nghĩa là:
- Nồi không được đặt đúng vị trí.
- Nồi đang sử dụng không tương thích với bếp từ.
- Đường kính nồi quá nhỏ, không hoàn toàn nằm trong vùng bắt từ.
- Màn hình sẽ tự động tắt nếu sau 2 phút không đặt nồi thích hợp lên bếp.
Nếu bếp điện quang (bếp phải) đang hoạt động, thì công suất cao nhất mà
bếp điện từ (bếp trái) đạt được là 1400W.
1
2
Chạm nút Tắt/Mở khoảng 2 giây, sau
khi có điện, bếp sẽ phát ra tiếng“bíp”,
đèn sẽ sáng lên, bếp đã ở trạng thái
sẵn sàng.
Đặt nồi lên khu vực nấu theo nhu
cầu.
Chạm vào biểu tượng Tăng hoặc
Giảm để lựa chọn mức công suất phù
hợp.
1200
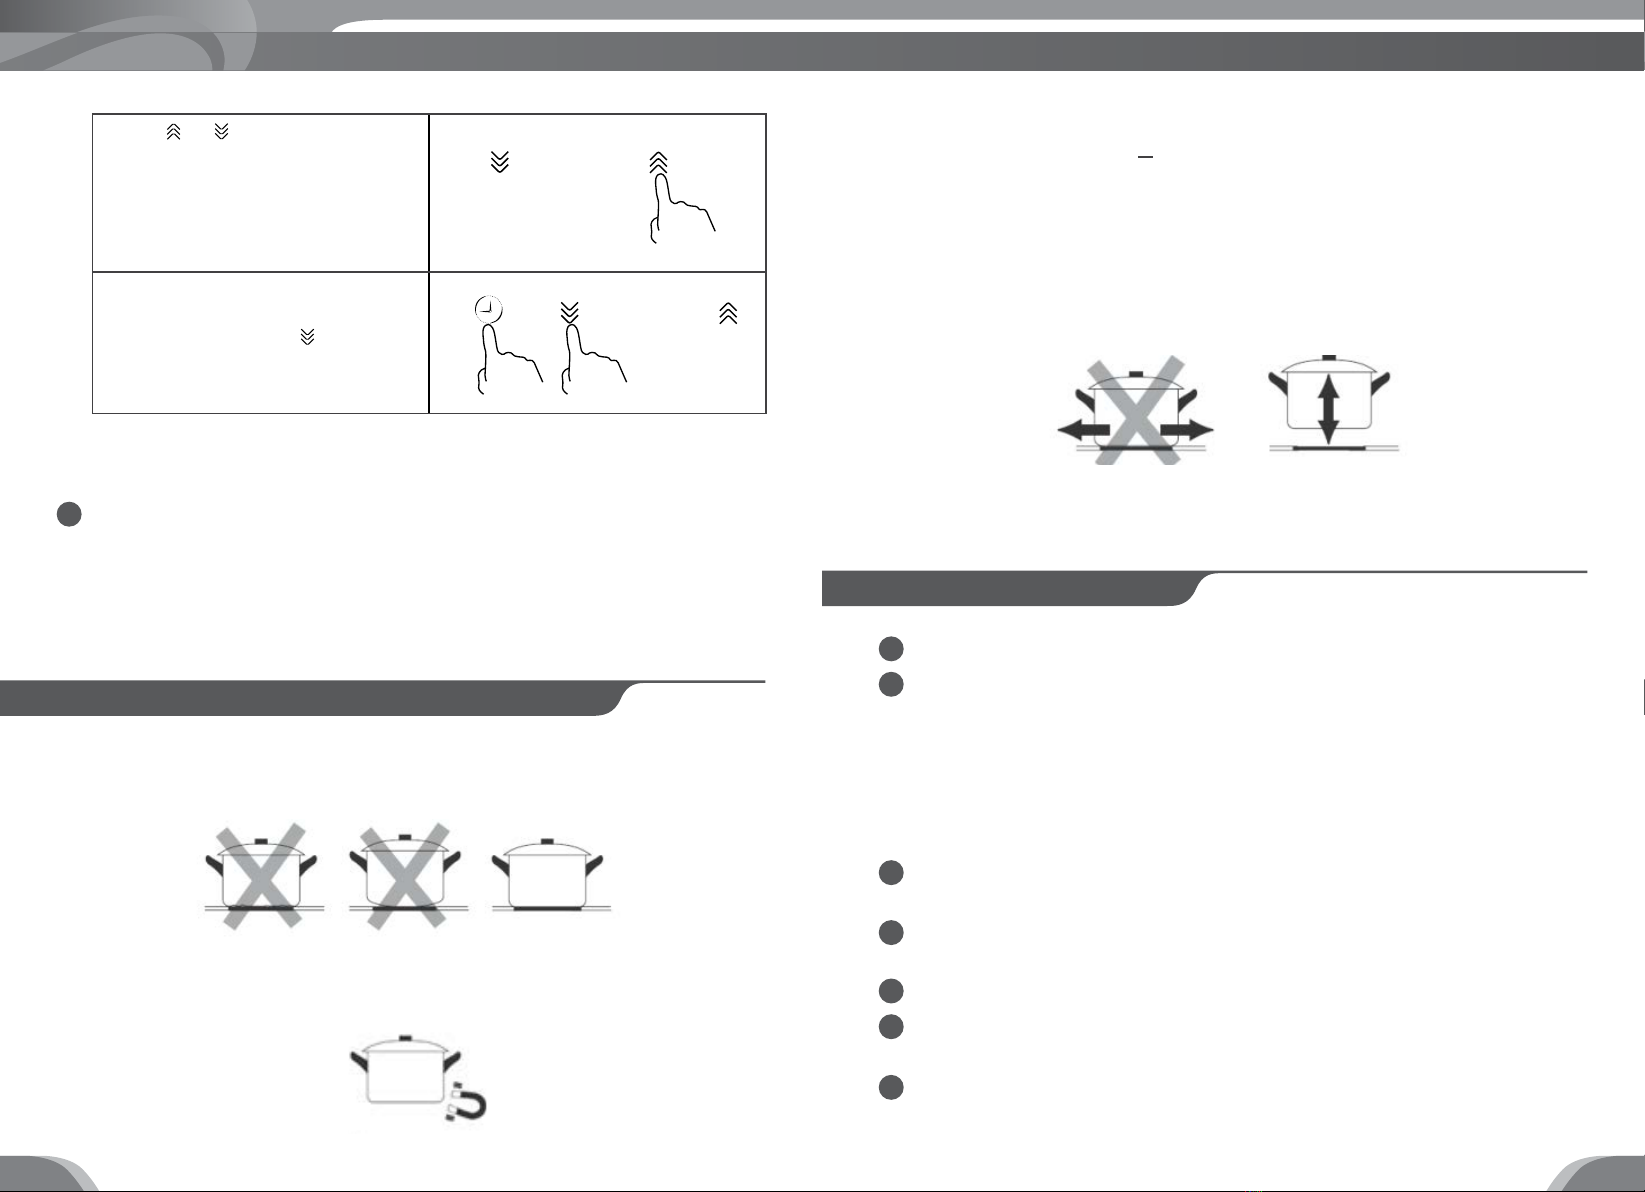
Chức năng Khóa an toàn:
Bạn có thể sử dụng chức năng khóa an toàn để ngăn ngừa các nguy hiểm
không lường trước.
Để kích hoạt chức năng Khóa an toàn:
- Chạm vào phím trên bảng điều khiển.
- Màn hình hiển thị“Loc”.
Để hủy chức năng Khóa an toàn:
- Chạm và giữ phím trong khoảng 2 giây.
Lưu ý: Khi bếp đang ở trong trạng thái khóa an toàn, tất cả các điều khiển hoạt
động ngoài phím TẮT/MỞ. Bạn có thể tắt bếp bằng cách chạm vào phím“Tăt/
Mở”trong các trường hợp khẩn cấp, tuy nhiên chúng tôi khuyến khích nên tắt
chức năng Khóa an toàn trước khi chuyển sang sử dụng các chức năng khác.
Chức năng Hẹn giờ:
Mỗi vùng nấu có thế được hẹn giờ riêng biệt.
Kết thúc nấu:
3
4
5
Tắt bếp bằng cách chạm vào biểu
tượng Tắt/ Mở.
Ký tự “H” sẽ thể hiện tại bếp đang có
nhiệt độ cao, ko nên chạm vào. Nếu
màn hình không thể hiện, nghĩa là
mặt bếp đã nguội dần với nhiệt độ
an toàn.
Chạm vào biểu tượng Hẹn giờ tại
bếp cần nấu.
H
0:00
TIẾNG VIỆT TIẾNG VIỆT
6 7
Chạm“ ”/“ ”để cài đặt thời gian.
- Mỗi lần chạm sẽ tăng hoặc giảm
thời gian nấu 1 phút.
- Mỗi lần chạm và giữ sẽ tăng hoặc
giảm thời gian nấu 10 phút.
Để hủy chức năng Hẹn giờ, chạm và
giữ biểu tượng Hẹn giờ trong 2 giây
hoặc chạm biểu tượng cho đến khi
màn hình thể hiện“0:00”.
0:10
0:00
Khi thời gian đã được cài đặt, màn hình hiển thị thời gian và bắt đầu đếm
ngược. Khi thời gian hẹn giờ đã hết, bếp sẽ tự động tắt.
Bảo vệ quá nhiệt và tự động tắt:
Bộ phận cảm biến nhiệt được trang bị ở bên trong bếp. Khi nhiệt độ trong bếp
quá cao, bếp sẽ tự động ngắt điện.
Chức năng tự động tắt là chức năng an toàn giúp bảo vệ và tăng tuổi thọ cho bếp.
Khi bếp đang hoạt động, nếu bạn để quên bếp, bếp sẽ tự động tắt. Thời gian
hoạt động mặc định là 2 tiếng.
Nồi/chảo bằng thép, sắt tráng men, thép không gỉ, các loại chảo/nồi đáy
phẳng, đường kính đáy từ 14cm.
Đề nghị sử dụng nồi/chảo có đáy phẳng nồi có thể sử dụng với bếp từ.
Bạn có thể sử dụng để kiểm tra xem nồi đang có hiện tại có thể sử dụng với
loại bếp này hay không. Để nam châm gần với đáy nồi, nếu có lực hút xảy ra,
nồi đó có thể sử dụng với bếp từ.
6
HƯỚNG DẪN CHỌN NỒI PHÙ HỢP (đối với bếp từ)
1
2
3
4
5
6
7
Trong trường hợp không có nam châm, cho 1 ít nước vào nồi mà bạn muốn
kiểm tra. Nếu biểu tượng U nhấp nháy, tức nồi đó không thể sử dụng để nấu
với bếp từ.
Trọng lượng nồi bao gồm thức ăn và nước bên trong phải nhỏ hơn 15kg.
Không đặt nồi rỗng lên bếp để tránh hư nồi hay nguy hiểm gây cháy.
Lưu ý: Tránh kéo lê xoong nồi trên mặt bếp vì có thể làm xước hoặc mờ màu
sắc bề mặt kính.
Đề nghị sử dụng nồi được giới thiệu thay vì sử dụng các loại khác.
Tất cả các loại nồi đáy phẳng đều sử dụng được đối với bếp điện quang.
Không đặt nồi rỗng lên bếp để tránh hư nồi hay nguy hiểm gây cháy.
Rút điện ra trước khi vệ sinh bếp. Không lau bếp cho đến khi mặt bếp nguội.
Vệ sinh mặt bếp:
Dùng vải mềm cho các vết bẩn nhẹ (dấu vân tay, vết đổ, rơi vãi của thức ăn
trên mặt bếp).
Với vết dầu mỡ, bụi, thì sử dụng vải ẩm với xà bông, nước rửa chén có chất tẩy nhẹ.
Không sử dụng hơi nước để làm sạch.
Không sử dụng các sản phẩm làm sạch có chứa chất tẩy ăn mòn hoặc sử dụng
miếng kim loại để lau chùi vì sẽ làm cho mặt kính trầy xước.
Không vệ sinh bếp bằng cách nhúng trực tiếp vào nước hay chất lỏng khác để
tránh nguy hiểm.
Bụi và chất dơ sẽ bám vào trong lỗ thông hơi, vệ sinh bằng bàn chải mềm hoặc
tăm bông cotton một cách thường xuyên.
Để đảm bảo an toàn cho bếp, phải đảm bảo phích cắm tiếp xúc tốt với ổ điện.
Không giật dây điện ra khi bếp đang hoạt động. Để tăng tuổi thọ của bếp, nên
tắt bếp bằng cách chạm phím Tắt/Mở trước, sau đó mới rút điện ra.
Để kéo dài tuổi thọ của bếp, không nên rút dây điện ra ngay sau khi quạt
ngưng chạy, vì sau khi tắt bếp, quạt vẫn hoạt động để làm nguội bếp.
CÁCH VỆ SINH VÀ BẢO TRÌ
TIẾNG VIỆT TIẾNG VIỆT
8 9

SỰ CỐ VÀ CÁCH KHẮC PHỤC
Các trường hợp như bên dưới không có nghĩa là sản phẩm bị hư, vui lòng tự kiểm
tra trước khi mang sản phẩm đi sửa chữa.
SỰ CỐ NGUYÊN NHÂN CÁCH KIỂMTRA / KHẮC
PHỤC
Không có tiếng “bíp”, tất
cả các đèn hiển thị và màn
hình số không sáng.
Không có nguồn điện Thiết bị đã được cắm điện
chưa? Có bị mất điện
không? Dây nguồn có bị
hư không?
Các biểu tượng chức năng
không thể điều khiển được
Chức năng khóa an toàn
đang được mở
Kiểm tra bếp có đang ở
chế độ khóa an toàn hay
không? Mở khóa theo
hướng dẫn.
Các biểu tượng chức năng
khó điều khiển.
Kiểm tra xem bảng điều
khiển có khô ráo không?
Điều khiển bằng cách
chạm nhẹ, không cần phải
nhấn.
Nghe thấy tiếng lách cách
khi đang nấu
Cấu tạo của đáy nồi (nhẹ
hoặc kết cấu bởi nhiều
thành phần)
Âm thanh này không phải
là lỗi.
Sử dụng nồi có đáy nặng
hơn hoặc được kết cấu bởi
một thành phần duy nhất
Mặt kính bị nứt Đun nấu với công suất
quá cao và rang các món
quá khô liên tục trong thời
gian dài
Tránh rang thức ăn quá
khô liên tục trong thời
gian dài.
Màn hình hiển thị E1 hoặc
E2
Thiết bị cảm biến nhiệt
bị hỏng-mạch hở hoặc
nghẽn mạch
Kiểm tra nguồn điện hoặc
thay cảm biến nhiệt.
Màn hình hiển thị E3. Nhiệt độ của cảm biến
nhiệt cao.
Chờ nhiệt độ nguội dần.
Chạm vào biểu tượng
“Tắt/Mở”để khởi động lại.
Màn hình hiển thị E4 hoặc
E5.
Nhiệt độ cảm biến nhiệt
của IGBT hỏng (mạch hở
hoặc nghẽn mạch).
Thay bảng điện.
Nếu bếp vẫn không hoạt động sau khi tự kiểm tra, phải lập tức liên hệ với trạm bảo
hành gần nhất. Không tự ý tháo lắp sản phẩm, nếu không chúng tôi không chịu
trách nhiệm bảo hành.
Bếp từ khi hoạt động, các linh kiện bên trong bếp sinh ra một lượng nhiệt khá lớn,
lượng nhiệt này sẽ thoát ra bên hông bếp và dưới đáy bếp. Yêu cầu quan trọng khi
lắp đặt là phần đáy bếp và bên hông phải được thông thoáng, giải nhiệt tốt.
Bề mặt để lắp đặt phải được làm bằng chất liệu chịu nhiệt. Mặt bếp (bằng đá, gỗ,
….) phải được khoét theo đúng kích thước mặt dưới của bếp. Không khoét lỗ đặt
bếp lớn hơn 1cm theo mỗi chiều của đáy bếp, nếu lớn hơn 1cm sẽ dẫn tới mặt kính
trở thành điểm chịu lực nén.
Sau khi đặt bếp vào vị trí, phải bắt đai giữ bếp với mặt bàn đá để chống xê dịch.
Màn hình hiển thị E6 IGBT quá nhiệt Chờ nguội dần. Chạm vào
biểu tượng “Tắt/Mở” để
khởi động lại.
Kiểm tra quạt có hoạt
động không để thay thế.
Màn hình hiện thị E7 hoặc
E8
Hiệu điện thế đầu vào quá
cao hoặc quá thấp.
Kiểm tra nguồn điện
Màn hình thể hiện Eb Thiết bị cảm biến nhiệt bị
hỏng - không có giá trị
Kiểm tra nguồn điện hoặc
thay cảm biến nhiệt.
HƯỚNG DẪN LẮP ĐẶT
TIẾNG VIỆT TIẾNG VIỆT
10 11

A B C D E F
400+4
-0 mm
670+4
-0 mm
50mm (Tối
thiểu)
50mm (Tối
thiểu)
50mm (Tối
thiểu)
50mm (Tối
thiểu)
A(mm) B(mm) C(mm) D E
760 50 (Tối thiểu) 30 (Tối thiểu) Đường dẫn
không khí vào
Đường dẫn
không khí ra
10 mm
Đảm bảo khoảng cách tối thiểu từ mặt bếp tới kệ tủ bếp hoặc máy hút mùi là 76cm.
Bếp có thể sử dụng trên mặt bàn với kích thước lắp đặt như sau:
Bếp phải được lắp đặt cố định, trên một mặt phẳng. Cố định bếp trên bề mặt lắp đặt
bằng ốc vít như hình vẽ sau khi lắp đặt.
Những lưu ý khi lắp đặt:
- Quá trình lắp đặt phải được thực hiện bởi nhân viên kỹ thuật đã qua đào tạo.
- Không lắp đặt bếp trực tiếp phía trên máy rửa chén, tủ lạnh, lò vi sóng, lò nướng.
- Bề mặt lắp đặt phải được làm bằng chất liệu chịu nhiệt
BẢO VỆ MÔI TRƯỜNG
Hãy bảo vệ môi trường của bạn! Tôn trọng quy định của địa phương:
hãy đem những thiết bị điện không sử dụng nữa đến những nơi thu
gom phù hợp để tái chế.
A B
50mm (Tối
thiểu)
50mm (Tối
thiểu)
TIẾNG VIỆT TIẾNG VIỆT
12 13

ENGLISH ENGLISH
14 15
ENGLISH ENGLISH
14 15
Model
ICB-6811
DOUBLE BURNER MIXED COOKER
USER MANUAL
Always keep manual for your safety
Standard Compliance
BlueStone products are manufactured under the Standards and the
technical rules for product safety design and testing.
BlueStone products and associated accessories intended for professional,
iindustrial-process under ), CB standards and have been successfully
tested on areas: sampling test, assembling test and lot test
Trademark
BlueStone manufactured products are based on the consultation by
Great American Appliance (GAA Corp) a company incorporated and
existing under the laws of United States of America under Certicate
of Incorporation No. 3089043 in the secretary oce located in the
state of California in Michigan, Ave Oakland, CA 94605, USA.
Industrial design
Bluestone provides products with industrial design and color variations
oering a broad range of possibilities for customers. Through the
experienced designers and technicians, Bluestone design has highly
reliable solutions so the customers are assured of quality designed
systems that meet stringent industry and international compliance
regulations.
After sales service
After sales service is considered by BlueStone as a major concern for
our customers. With such, we provide our BlueStone products with a
2 years guaranteed warranty that help our end user feel at ease.

19
20
SPECIFICATION
GERNERAL DESCRIPTION
CONTROL PANEL
Model Voltage Power Dimension
(mm)
Weight (kg)
ICB-6811 220-240V
~50/60Hz
3200W 700x430x82
(mm)
7.70kg
1
Induction cooker Ceramic cooker
2 3 4 5 6
1. Keylock control
2. Timer control
3. Time/Power regulating
4. Time/Power regulating
5. Power control
6. ON/OFF control
The appliance is not intended for use by person (including children)
with reduced physical, sensory or mental capabilities or lack of experience and
knowledge, unless they have been given supervision or instruction concerning
use of the appliance by a person responsible for their safety.
The temperature of the appliance during using is high, be careful to avoid
burned.
SAFETY CAUTIONS
Please read and understand this entire manual before attempting to assemble,
operate or install the product. And save these instructions for future reference.
When using electrical appliances, basic precaution should always be followed to
reduce the risk of re, electric shock, and injury to persons, including the following:
Read this instruction carefully before installing and using.
Do not put and operate the appliance on the metal surface, carpet, table cloth
and thin paper for avoiding overheat caused by inlet/outlet air logged.
Do not use the unit under the high temperature environment.
Put the appliance on the at surface.
If the supply cord is damaged, it must be replaced by the manufacturer, its
service agent or similarly qualied person in order to avoid a hazard. Do not
disassemble the appliance by yourself for avoiding dangers.
If the food is in the can, please open them rst and then heat for avoiding
expansion explosion.
Do not heat the appliances with empty pot for avoiding destroying the function
of the unit or cause danger.
Do not heat the iron slip on the glass plate for avoiding danger caused by high
temperature.
Do not wash the induction cooker with water or other liquid for avoiding danger
happen or breakdown by waterogged inside.
Please pull out the plug after using. Do not unplug by pulling on the cord.
Do not let the children use it by themselves, and put it out of the children.
If the glass plate is broken, please shut off the power immediately, and
exchange it in our company’s appointed Maintenance Department.
Do not repair this product by yourseft because high power is in cover of product.
The power supply to the unit must be sucient to avoid overloading and exploding.
After cooking, induction cooker is till hot. Please do not touch for avoiding burning.
Do not let the empuruties such as pin, metal wire,.. the air inlet; air outlet or gap.
Do not let the insects go into the appliance for avoiding damage.
If the operator is installed with cardiac pacemaker, please follow the doctor’s
advice before using.
1
2
3
4
5
6
7
8
9
10
11
12
13
14
15
16
17
18
ENGLISH ENGLISH
16 17

Locking the control:
You can lock the controls to prevent unintended use.
To lock the controls:
- Touch the lock control
- The timer indicator will show“Loc”
To lock the controls:
- Touch and hold the lock control for a while (about 2 second).
Note: When the hob is in the lock mode, all the controls are disable except the
ON/OFF , you can always turn the ceramic hob o with the ON/OFF
control in an emergency, but you shall unlock the hob rst in the next operation.
Timer control:
Finish cooking:
3
4
5
Turn the whole cooktop o by touch-
ing the ON/OFF control.
Beware of hot surfaces
H will show which cooking zone is
hot to touch. It will disappear when
the surface has cooled down to a
safe temperature. It can also be used
as an energy saving function if you
want to heat further pans, use the
hotplate that is still hot.
Touch the timer control of the
corresponding cooking zone you
want to set the timer for.
H
0:00
INSTRUCTION FOR USE
Attention before using:
Only use cookware with a base suitable for induction cooker (please refer as
the page 20)
Place the pan with food on the center of cooking zone.
Note:
Clean the water, oil or other dirt on the pan before placing it on the appliance.
Please do not place an empty pot on the appliance to avoid any demage or danger.
Start cooking:
Note:
If the buzzer beep alternately with the heat setting (Only induction zone).
This means that:
- You have not placed a pan on the correct cooking zone or,
- The pan you’re using is not suitable for induction cooking or,
- The pan is too small or not properly centered on the cooking zone.
No heating takes place unless there is a suitable pan on the cooking zone.
- The display will automatically turn o after 2 minutes if no suitable pan is
placed on it.
- If Right ceramic zone is activated, Left induction zone is limited up to 1400W.
1
2
Touch the ON/OFF control for
about two seconds. After power on,
the buzzer beeps once, the power
indicator light will icker, indicating
that the induction hob has entered
the state of standby mode.(If no any
operation for 60 seconds after that it
will enter into power o state.)
Place a suitable pan on the cooking
zone that you wish to use.
Make sure the bottom of the pan and
the surface of the cooking zone are
clean and dry.
Select a heat setting by touching the
“ ”or “ ” control.
You can modify the heat setting at
any time during cooking.
1200
ENGLISH ENGLISH
18 19

1
2
3
4
5
6
7
- If you do not have a magnet, put some water in the pan/pots you have. If the
display show“U”and ash, your pan/pots is unsuitable.
- Weight requirements: the pan/pots (including the food and water inside) is
less than 15kg.
Note: Do not slide the pan/pots on the glass plate; they may scratch the plass.
You can use any cookware for the Ceramic cooker.
Remove the power plug prior to clean the appliance. Do not clean it until the
surface cools down.
Glass plate, panel and shell:
Solf cloth for sligh stain (ngerprints, marks, stains left by food or non-sugary
spillover on the glass).
Use a clean damp cloth with neutral detergent to clean the grease, dirt, blot.
Use sponge or non-metal brush to clean the glass plate.
Do not clean this appliance by immerging into water or other liquid.
Dust and dirt would remain on the gas vent, please clean it by brush or cotton
stick regularly.
To protect this appliance, be sure to have a good contact between plug and
socket before using.
Do not pull the power cord directly during operation. To extend the appliance’s
using life, touch the“ON/OFF”icon rst, then pull out the power cord.
The fan would still working for cooling the plate. In order to make operating
time longer, it is better to plug out after the fan stops working.
CLEANING AND MAINTENANCE
Steel, enameled iron, stainless steel, at-bottom pan/pots. The diameter of
pan/pot shoud be more than 14cm.
- You can check whether your pan/pots is suitable by carrying out a magnet
test. Move the magnet towards the base of pan/pots. If it is attracted, the pan/
pots is suitable for induction.
Set the time by touching the or control
of the timer Hint:
Touch the “ ” or “ ” control of the
timer once will decrease or increase
by 1 minute.
Touch and hold the“ ”or“ ”control of
the timer once will decrease or increase
by 10 minutes.
Touch and hold the timer control
for about two seconds or touch the
“ ” button to”0:00”, the timer will
be cancelled.
0:10
0:00
When the time is set, it will begin to count down immediately. The display will
show the remaining time.
When cooking timer expires, the corresponding cooking zone will be switched
o automatically.
Over-Temperature Protection:
A temperature sensor equipped can monitor the temperature inside the ceramic
hob. When an excessive temperature is monitored, the ceramic hob will stop
operation automatically.
Another safety feature of the hob is automatic shutdown. This occurs whenever
you forget to switch o a cooking zone. The default shutdown time is 2 hours.
6
SUITABLE COOKWARE (for Induction cooker)
ENGLISH ENGLISH
20 21

If it is still not working after the inspection by yourseft, please immediately contact
our service points, do not apart the unit by yourseft or our company is out of
responsibility.
DO NOT TRY TO ADJUST OR REPAIR THIS APPLIANCE BY YOURSELF.
Cut out the work surface according to the sizes show in the drawing.
For the purpose of installation and use, a minium of 5 cm space shall be preserved
around the hole. Please select the heat-resistant and insulated work surface material
to avoid the electrical shock and larger defomation caused by the heat radiation
from the hot plate. The thickness of the work surface is at least 30mm.
The safety distance between the sides of the hob and the inner surfaces of the
worktop shout be at least 3mm and maximum 1cm.
Display shows E6 High temperature of IGBT. Touch “ON/OFF” button to
restart unit. Wait for the
temperature of IGBT return
to normal.
Check whether the fan
runs smoothly;
if not , replace the fan.
Display shows E7 or E8 Supply voltage is below/
above the rated voltage.
Please inspect whether
power supply is normal.
Power on after the power
supply is normal.
Display shows Eb Ceramic plate temperature
sensor failure-invalid .
Check the connection or
replace the ceramic plate
temperature sensor.
INSTALLTION
TROUBLE SHOOTING
The case below do not mean the appliance breaks down, please check by yourseft
before sending to repair.
MALFUNCTION REASON INSPECTION
No beep, all indicator
lights and nixie tube are
not bright.
No power. Plug in or not? Power
o or not? Power cord is
okay?
The touch controls are
unresponsive.
The controls are locked Unlock the controls. See
Section “Locking the
control”for instruction.
The touch controls are
dicult to operate.
There may be a slight lm
of water over the controls
or you may be using the
tip of your nger when
touching the controls.
Make sure the touch control
area is dry and use the ball
of you finger when touching
the controls.
Some pans make the
crackling or clicking noises.
This may be caused by
the construction of your
cookware. (layers of dierent
metals vibrating dierently).
This is normal for cookware
and does not indicate a
fault.
The glas is being sratched. Rough-edged cookware.
Unsuitable, abrasive scourer
or cleaning products being
used.
Use the cookware with at
and smooth base.
The glass is broken. Heating with higher power
and dry the food for a long
time.
Do not dry the food for a
long time.
Display shows E1 or E2 Ceramic plate temperature
sensor failure-open circuit/
short circuit.
Check the connection or
replace the ceramic plate
temperature sensor.
Display shows E3. High temperature of ceramic
plate sensor .
Touch “ON/OFF” button to
restart unit. Wait for the
temperature of ceramic
plate return to normal.
Display shows E4 or E5 Temperature sensor of the
IGBT failure (open circuit/
short circuit)
Replace the power board.
ENGLISH ENGLISH
22 23

The unit should be placed on a stable, smooth surface (use the packaging). Do not
apply force onto the controls protruding from the hob.
Fix the hob on the work surface by screw four brackets on the bottom of hob (see
picture) after installation. Adjust the bracket position to suit for dierent work surface’s
thickness.
Note:
- This appliance must be installed by the manufacturer, its service agent or similarly
qualied person in order to avoid a hazard.
- Do not install the appliance above the dish-washing machine, fridge, microwave,
oven…
- The work surface need to made from heat-resistant.
ENVIRONMENT FRIENDLY DISPOSAL
You can help protect the environment!
Please remember to respect the local regulations: hard in the
non-working electrical equipments to an appropriate waste disposal
center.
A B C D E F
400+4
-0 mm
670+4
-0 mm
50mm mini 50mm mini 50mm mini 50mm mini
A(mm) B(mm) C(mm) D E
760 50 mini 30 mini Air intake Air exit 10 mm
A B
50mm mini 50mm mini
The ceramic cooker hob can be used on the table top of cabinet. The ceramic hob
should be placed horizontally. As shown below:
Under any circumstances, make sure the ceramic cooker hob is well ventilated and
the air inlet and outlet are not blocked. Ensure the ceramic cooker hob is in good
work state. As shown below:
The safety distance between the hotplate and the cupboard above the hotplate
should be at least 760mm.
ENGLISH ENGLISH
24 25
Table of contents
Languages:


 Use & care manual")