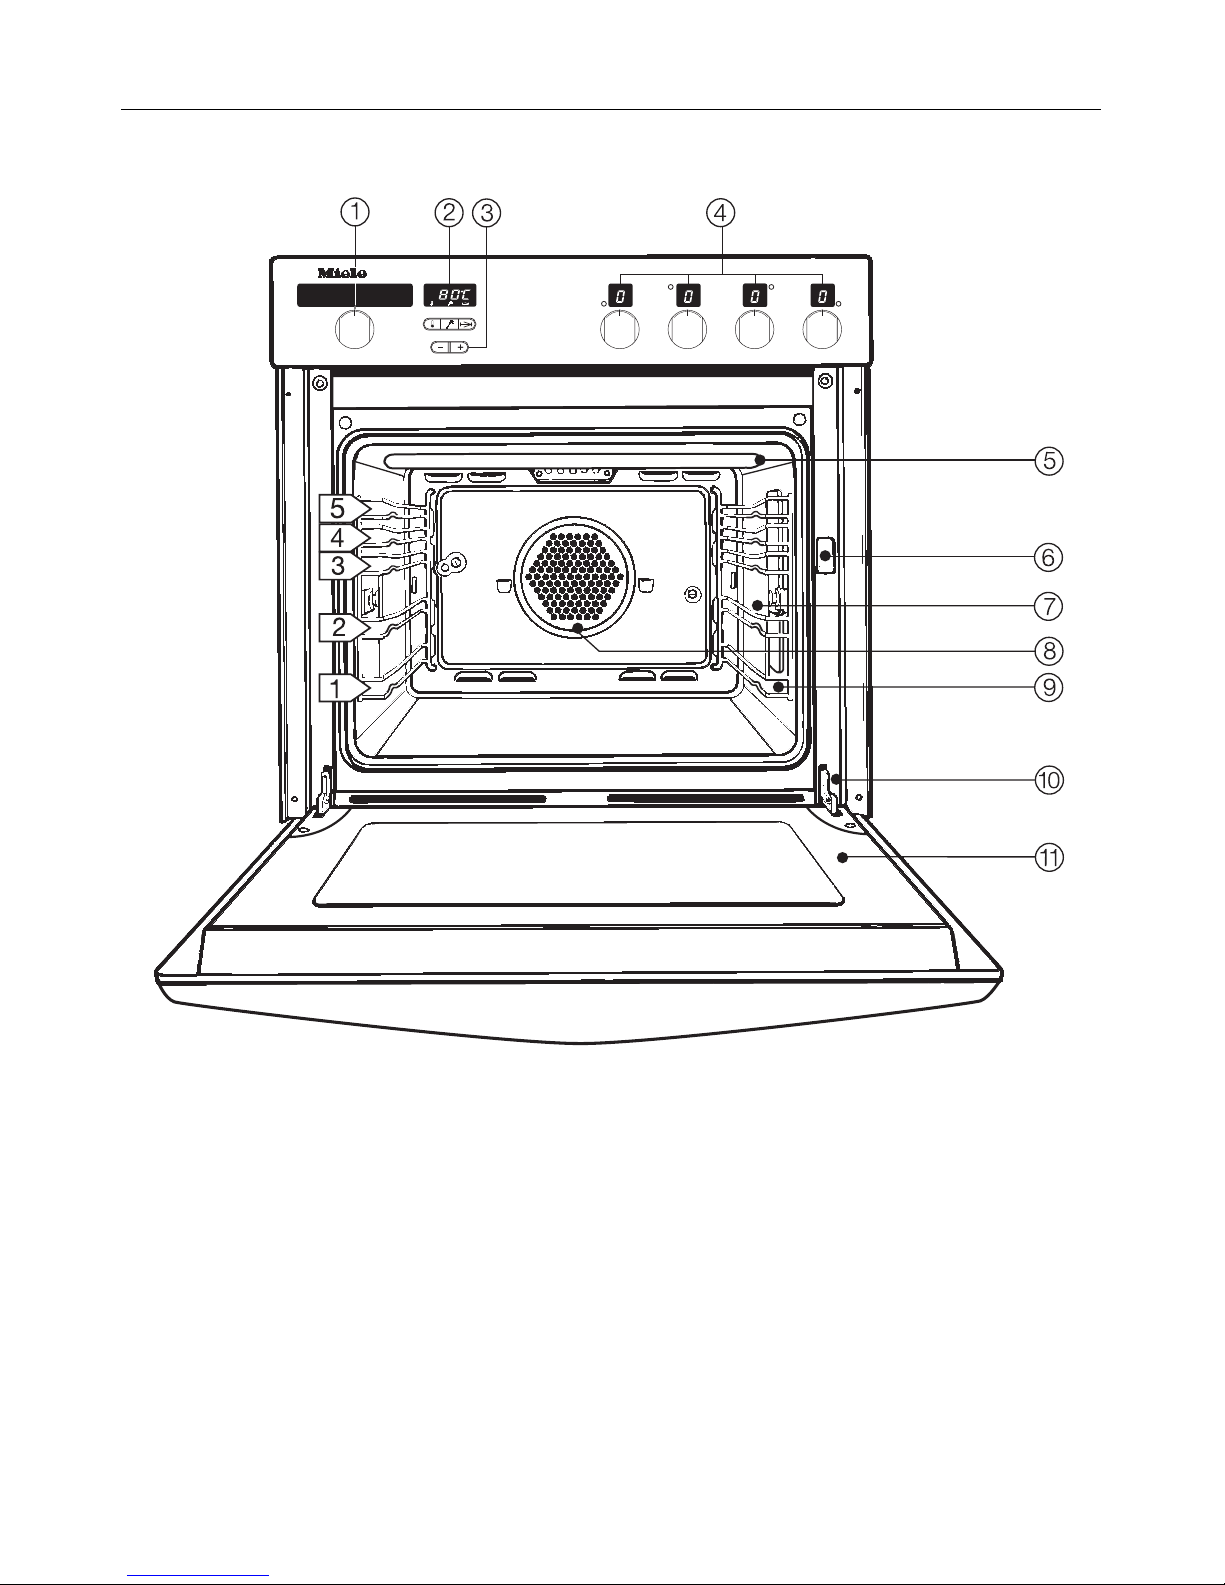
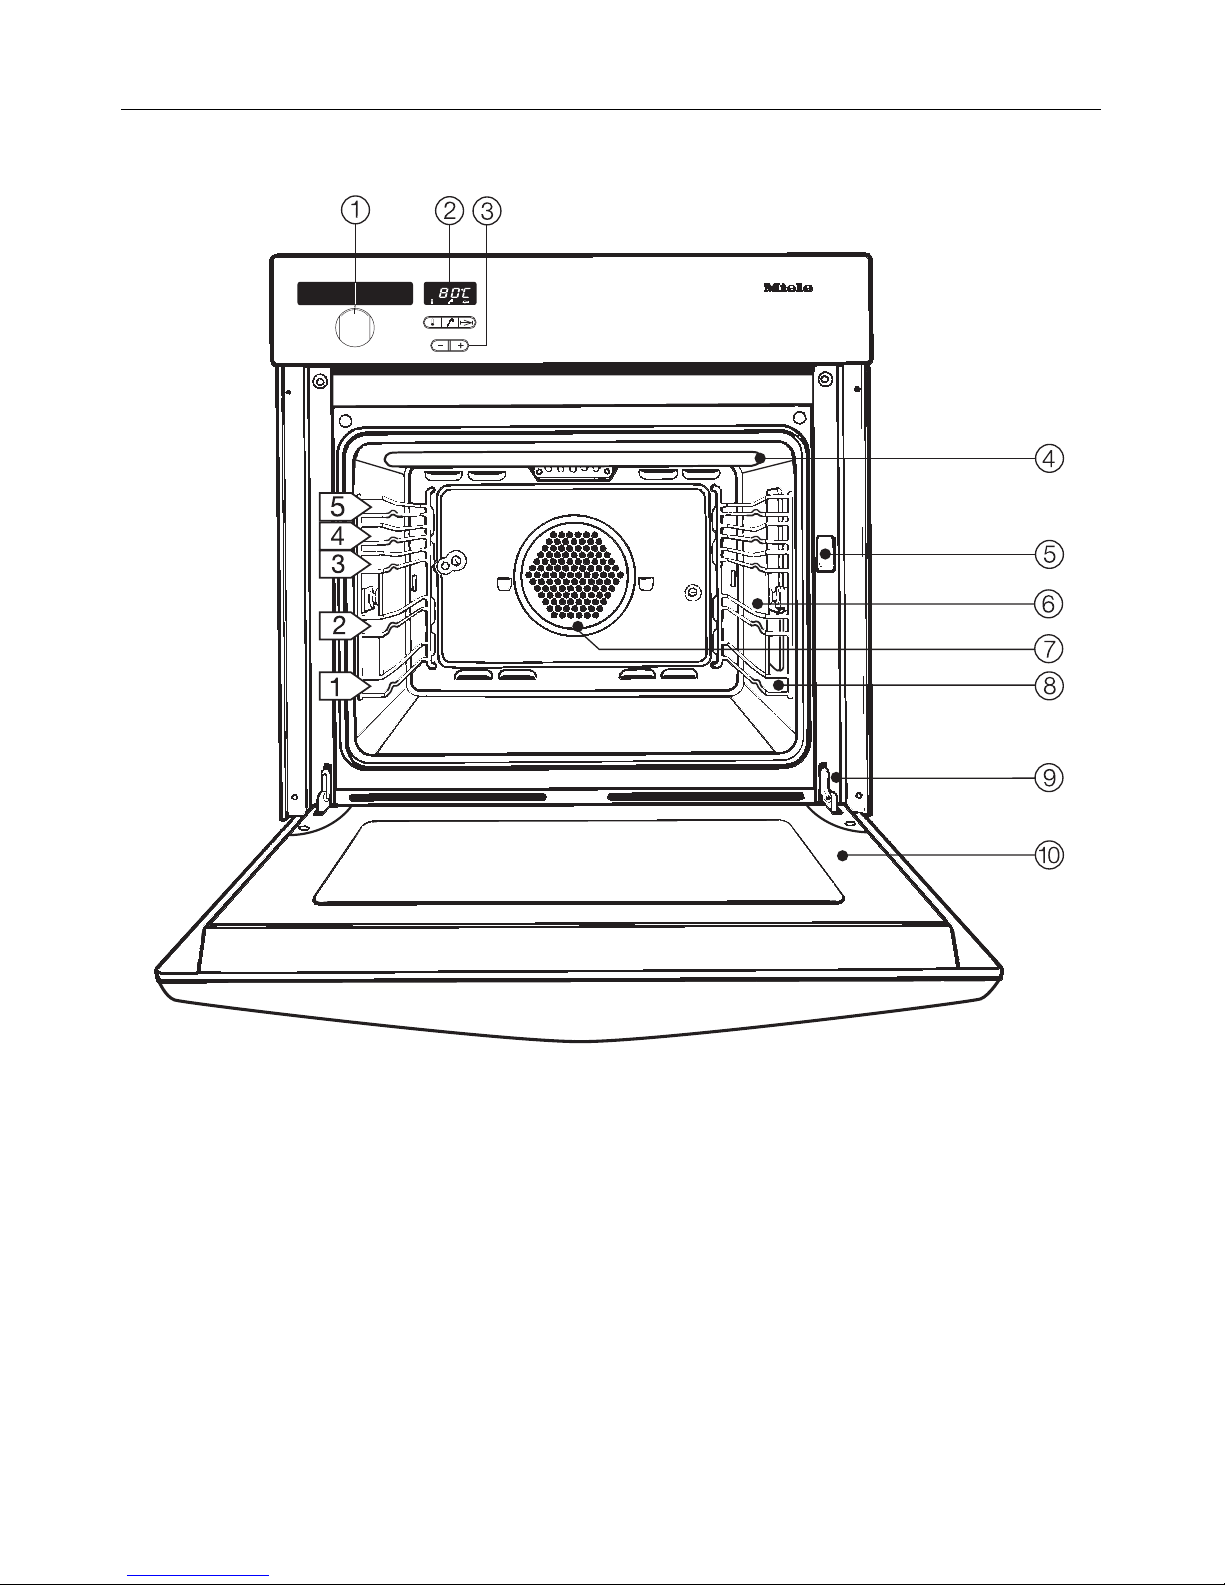
Warning and Safety instructions
This appliance complies with all rele-
vant legal safety requirements. Im-
proper use of the appliance can,
however, present a risk of both per-
sonal injury and material damage.
Before installation and before using
the appliance for the first time, read
the operating instructions carefully.
They contain important notes on
safety, on the installation, operation
and care of the appliance. This way
you will avoid the risk of accidents
and damage to the appliance.
Do not let children access the ap-
pliance or its controls. Supervise its
use by the elderly or infirm.
Keep these instructions in a safe
place and pass them on to any fu-
ture user.
Correct usage
The appliance is intended for do-
mestic use to cook food, and in
particular to bake, roast, defrost, cook,
dry fruit etc, and to grill.
Any other usage is at the owner’s risk
and could be dangerous. The manufac-
turer cannot be held responsible for
damage caused by improper use of the
appliance.
Technical safety
Before connecting the appliance to
the mains supply make sure that
the voltage and frequency correspond
to the rating on the data plate, other-
wise the appliance could be damaged.
Consult a competent person if in doubt.
The electrical safety of this ap-
pliance can only be guaranteed
when continuity is complete between
the appliance and an effective earthing
system, which complies with local and
national regulations. It is most import-
ant that this basic safety requirement is
tested by a qualified electrician. The
manufacturer cannot be held respon-
sible for the consequences of an inade-
quate earthing system.
This appliance must only be oper-
ated as a built-in appliance. This is
necessary to ensure that all electrical
components are shielded.
Never open the casing of the ap-
pliance.
Tampering with electrical connections or
components and mechanical parts is
highly dangerous to the user and can
cause operational faults.
Warning and Safety instructions
8