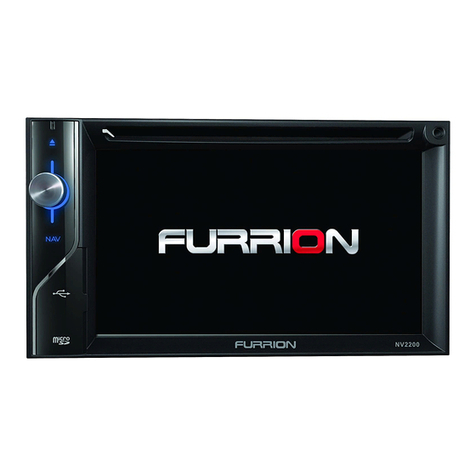
Bluepower BLP-890 User manual

INSTRUCTION MANUAL
BLP-890/ BLP-840 CUSTOM NAVIGATION SYSTEM

Content:
Precaution ....................................................................................................................................... 2-3
Features...............................................................................................................................................4
Location and function of controls.......................................................................................................5-7
Card remote control..............................................................................................................................8
Getting started......................................................................................................................................9
Tuner operation.........................................................................................................,....................10-11
Playback controls(CD/USB/SD).....................................................................................................12-13
Playing disc....................................................................................................................................14-15
USB/SD operation...............................................................................................................................16
iPod operation................................................................................................................................17-18
Bluetooth operation........................................................................................................................19-20
Other mode..........................................................................................................................................21
Navigation.......................................................................................................................................22-24
DVB-T..............................................................................................................................................25-26
Settings............................................................................................................................................27-32
Installation.......................................................................................................................................
Troubleshooting....................................................................................................................................35
Specifications...................................................................................................................................... 36
1
___________________________

MUTE
OK
Note
Safety Precautions
Thank you for purchasing this product. Please read through these operating instructions so you
will know how to operate your model properly. After you have finished reading the instructions,
keep this manual in a safe place for future reference.
1. Only connect the unit to a 12-volt power supply with negative grounding.
2. Never install this unit where the operation & condition for safety driving is restrained.
3. Never use the video display function in the front when driving to prevent the violation of laws &
regulations and also to reduce the risk of traffic accident except using for rearview video camera.
To ensure safe driving, please adjust the volume to a safe & comfort level in case of emergent
situations
4. Never expose this unit, amplifier and speakers to moisture or water for preventing electric
sparks or fires.
5. Please don't change the fuse on the power cord without professional guidance, using improper
fuse may cause damage to this unit or even cause fire.
2
Please power off this unit at once and send it back to the after-sales service center or the
dealer /distributor you purchased from if one of the following symptoms is found:
(a). No audio output;
(b). No image output;
(c). Water or other obstacle enters the unit;
(d). Smoking;
(e). Peculiar smell.
MUTE
OK
Warning
Operate the unit correctly according to the manual instruction to prevent unnecessary problem.
CAUTION
The use of optical instruments with this product will increase eye hazard. As the laser beam used
in this CD/DVD player is harmful to eyes, do not attempt to disassemble the cabinet. Refer to
qualified personnel only.
Two laser products
Wave length: CD: 780nm DVD: 650nm
Laser power: No hazardous radiation is emitted with safety protection.
To reduce the risk of fire electric shock, and annoying interference, use only the included
components.
Caution of disc using
1. DO NOT use irregular shaped disc.
2. Disc Cleaning. Use a dry, soft cloth to wipe the disc from center to edge, only neutral detergent
can be used
.
3. When playing a new disc. New disc may have some rough spots around the inner and outer
edges. If such a disc is used, remove these rough spots with a pencil or ball-point pen, etc.
3
___________________________
Safety Precautions
_____________________________

MUTE
OK
Note
Safety Precautions
Thank you for purchasing this product. Please read through these operating instructions so you
will know how to operate your model properly. After you have finished reading the instructions,
keep this manual in a safe place for future reference.
1. Only connect the unit to a 12-volt power supply with negative grounding.
2. Never install this unit where the operation & condition for safety driving is restrained.
3. Never use the video display function in the front when driving to prevent the violation of laws &
regulations and also to reduce the risk of traffic accident except using for rearview video camera.
To ensure safe driving, please adjust the volume to a safe & comfort level in case of emergent
situations
4. Never expose this unit, amplifier and speakers to moisture or water for preventing electric
sparks or fires.
5. Please don't change the fuse on the power cord without professional guidance, using improper
fuse may cause damage to this unit or even cause fire.
2
Please power off this unit at once and send it back to the after-sales service center or the
dealer /distributor you purchased from if one of the following symptoms is found:
(a). No audio output;
(b). No image output;
(c). Water or other obstacle enters the unit;
(d). Smoking;
(e). Peculiar smell.
MUTE
OK
Warning
Operate the unit correctly according to the manual instruction to prevent unnecessary problem.
CAUTION
The use of optical instruments with this product will increase eye hazard. As the laser beam used
in this CD/DVD player is harmful to eyes, do not attempt to disassemble the cabinet. Refer to
qualified personnel only.
Two laser products
Wave length: CD: 780nm DVD: 650nm
Laser power: No hazardous radiation is emitted with safety protection.
To reduce the risk of fire electric shock, and annoying interference, use only the included
components.
Caution of disc using
1. DO NOT use irregular shaped disc.
2. Disc Cleaning. Use a dry, soft cloth to wipe the disc from center to edge, only neutral detergent
can be used
.
3. When playing a new disc. New disc may have some rough spots around the inner and outer
edges. If such a disc is used, remove these rough spots with a pencil or ball-point pen, etc.
3
___________________________
Safety Precautions
_____________________________

DVD-R/RW compatibility
It is possible to playback DVD-R/RW discs recorded with the video format and Video Recording
format.
Video CDs featuring PBC compatibility
It is possible to playback Video CDs featuring PBC (playback control).
WMA and MP3 compatibility
It is possible to playback WMA and MP3 files.
About WMA
The Windows Media™ logo printed on the box indicates that this unit can playback WMA data.
!Windows Media and the Windows logo are trade marks or registered trademarks of Microsoft
Corporation in the United States and/or other countries.
!This unit maynot operate correctly depending on the application used to encode WMA files.
About MP3
Supply of this product only conveys a license for private, non-commercial use and does not
convey a license or imply any right to use this product in any commercial(i.e.revenuegenerating)
realtime broadcasting (terrestrial,satellite, cable and/or any other media), broadcasting/streaming
via internet, intranets and/or other networks or in other electronic content distribution systems,
such as pay-audio or audio-on-demand applications. An independent license for such use is
required.
Features
Note
To provide a clear demonstration and an alternative for easy understanding of the operation of
this unit, graphic illustration was used. However, this illustration is not necessary printed as the
actual image found on the unit.
4
Location and function of controls
BLP 890
1. Disc slot
2. SD card slo
3.
4. Eject button
5.
6. GPS button - Press to open navigation source
7.
8. Disc button -- Press to open disc source
9. Display button-- Press to turn off display
10.Prev/Next knob
11. IR eye
12. USB port
13. Aux input
14. Volume knob -
GPS card slot
SRC button -- Short press to change sources; Long press to return to main source list/homepage
Radio button - Press to open radio source
Power button -- Short press to mute; Long press to turn of the power
15. Display window/touch panel
PIC 1
Note
On any video/no signal mode, touch this zone to exit current interface and return to main
source list interface
On any audio/video playing mode, touch this zone to select previous section/song/movie,etc.
On any audio/video playing mode, touch this zone to select next section/song/movie,etc
5
_________________________________
_________________________
1
11
3
4
5
6
7
8
9
10
2
12
13
14
15
Zone A
Zone B Zone C

Location and function of controls
67
_________________________
______________________
Location and function of controls
1. Disc slot
2. SD card slo
3.
4. Eject button
5.
6. GPS button - Press to open navigation source
7.
8. Disc button -- Press to open disc source
9. Display button-- Press to turn off display
10.Prev/Next knob
11. IR eye
12. USB port
13. Aux input
14. Volume knob -
GPS card slot
SRC button -- Short press to change sources; Long press to return to main source list/homepage
Radio button - Press to open radio source
Power button -- Short press to mute; Long press to turn of the power
15. Display window/touch panel
PIC 2
Note
On any video/no signal mode, touch this zone to exit current interface and return to main
source list interface
On any audio/video playing mode, touch this zone to select previous section/song/movie,etc.
On any audio/video playing mode, touch this zone to select next section/song/movie,etc
1
2
3
12
4
13
14
15
11
5
6
7
8
9
10
Zone A
Zone B Zone C

Location and function of controls
67
_________________________
______________________
Location and function of controls
1. Disc slot
2. SD card slo
3.
4. Eject button
5.
6. GPS button - Press to open navigation source
7.
8. Disc button -- Press to open disc source
9. Display button-- Press to turn off display
10.Prev/Next knob
11. IR eye
12. USB port
13. Aux input
14. Volume knob -
GPS card slot
SRC button -- Short press to change sources; Long press to return to main source list/homepage
Radio button - Press to open radio source
Power button -- Short press to mute; Long press to turn of the power
15. Display window/touch panel
PIC 2
Note
On any video/no signal mode, touch this zone to exit current interface and return to main
source list interface
On any audio/video playing mode, touch this zone to select previous section/song/movie,etc.
On any audio/video playing mode, touch this zone to select next section/song/movie,etc
1
2
3
12
4
13
14
15
11
5
6
7
8
9
10
Zone A
Zone B Zone C

Card remote control
Card remote commander
The remote control can operate within a distance of 3~5 meters.
30˚ 30˚
Caution:
1. Service life of the battery is around 6 months under normal conditions. If the remote control
can not be operated normally, the battery should be replaced with new one in time.
2. If the remote control is not to be used for a long time, the battery should be taken out to
prevent liquid leakage from causing damage of the remote control.
3. Prevent the remote control from falling to ground which may damage it.
4. Do not dismantle or crush the battery, or put the battery into fire or place with other metal
materials.
5. Put the battery of remote control in a safe place to prevent the children from swallowing it.
If the children swallowed the battery by accident, please send them to see doctor promptly.
Preparing the card remote commander
Before using the card remote commander for the first time, remove the insulation film.
Remote control operation:
Power ON/OFF
In disc mode, repeat between
selected point A and B
Amplify images
In disc mode, show subtitle
Switch modes
Eject/Suck Disc
Switch to main interface
Switch to settings interface
Adjus lcd screen
Mute
Play/Pause
Stop
Next / Search
Previous/Search
Volume up
Volume down
Fast forward / Search
Fast backward / Search
In disc mode,PBC ON/OFF
Eject/Suck Disc
Selecting/Confirm keys
In disc mod, switch audio tracks
In disc mode, show disc information
In disc mode, show digital keyboard
for selection of sections
In disc mode, switching angle
PIC 3
Repeat
-- In radio mode, select current
band,preset channels;
In Bluetooth mode, input
phone numbers
8
Getting Started
Resetting the unit
Before operating the unit for the first time, or after replacing the car battery or changing the
connections, you must reset the unit-- Press the reset button (with a pointed object, such as
a ball-point pen.)
Note
Pressing the reset button will erase the clock setting and some stored contents.
Main Sources Screen display: (When no source is selected)
Main Source List 1 Main Source List 2
– Change dimmer levels (brightness of the LCD screen)
-- Enter setting interface
-- Enter radio mode; -- Enter TV mode
-- Enter disc mode; -- Enter navigation mode
-- Enter Bluetooth mode; -- Enter iPod mode
-- Enter USB mode; -- Enter USB mode
-- Enter AUX mode; -- Enter CD changer mode
(this model has no this function)
-- Enter front camera mode
-- Switch between main source list 1 and main source list 2
-- SOURCE LIST on the lower left corner shows the current source name
PIC 4 PIC 5
-- Time display on the lower right corner shows the current local time
9
__________________________
__________________________

Tuner Operation
Touch “RADIO”
Touch “SOURCE LIST”, then “RADIO”. The radio reception display appears:
-- Go back main source list
-- Enter setting interface
Touch “BAND”
The band list appears:
Touch the desired band (“FM1,” “FM2,” “FM3,” “AM1” or “Am2”);
Touch “AUTO SEARCH” to tune, it will store received stations to the desired band automatically.
Touch “BAND” to close the band list.
PIC 6 PIC 7
PIC 8
PIC 9 PIC 10
-- Close current interface
-- Open band list (see ) PIC 9
-- Half auto-tune to lower/higher frequences when press and hold of these keys
Touch these keys by one short touch to skip frequencies by step continuously
-- Adjust sound volume level
-- Open preset list(see )PIC 10
-- Tune automatically
– When RDS on, touch to open AF/TA list (see ) PIC 8
-- When RDS on, touch to open PTY list(see ) PIC 7
10
Tuner Operation (Advanced)
Storing automatically
1. To change the band, touch “Band”, then select the desired band
2. Touch “Preset List,” then “Search”, the unit stores stations in order of frequency in the preset
list (button 1 to button 5).
Setting AF and TA
1. During reception/playback, touch “AF/TA” the TA/AF interface will appear.
2. Touch to activate/deactivate
Storing manually
1. While receiving the station that you want to store, touch “Preset List.”
2. Then long touch the button in the list (button 1 to button 5”), the station is stored.
Receiving stored stations
1. Select the band, then touch “Preset List.”
2. Touch the desired button (button 1 to button 5).
Selecting PTY
1. During FM reception, touch “PTY”, the PTY list appears if the station is transmitting PTY data.
2. Touch the desired program type, the unit searches for a station broadcasting the selected
program type. To close the PTY list, touch “PTY.”
RDS
Overview:
FM stations with Radio Data System (RDS) service send inaudible digital information along with
the regular radio program signal.
AF (Alternative Frequencies)
Selects and retunes the station with the strongest signal in a network. By using this function, you
can continuously listen to the same program during a long-distance drive without having to retune
the same station manually.
TA (Traffic Announcement)/TP (Traffic Program)
Provides current traffic information/programs. Any information/program received, will interrupt the
currently selected source.
PTY (Program Types)
Displays the currently received program type. Also searches your selected program type.
CT (Clock Time)
The CT data from the RDS transmission sets
Note
If you try to store another station on the same number,the previously station will be replaced.
11
_______________________
_______________________

Playing discs
Insert a disc
Insert a disc into the slot, and the unit will change to disc mode automatically.
Eject the disc
Press to eject the disc.
If the DVD menu appears
Touch the item in the DVD menu directly. You can also use the menu control panel whichcan be
shown by touching the display in a place other than menu item area.
If the disc contains JPEG files
The slide show starts automatically.
File type supported
Audio file: MP3(*.mp3), WMA(*.wma)
Video file: MP4 (*.avi, DIVX3.11/4.0/5.0/6.0 /7.0)
MPEG 2 (*.vob)
MPEG 1 (*.dat)
Picture file: JPEG (*.jpg)
MP3 file: ISO 9660 or ISO 9660 + Joliet format -- Max.30 characters; Max. nested directory is 8
levels; the max. album number is 99.
The max. length of each track is 99 minutes 59 seconds.
Supported sampling frequency for MP3 disc: 8KHz to 48KHz (44.1KHz preferably).
Supported bit-rates of MP3 disc are: 32 - 320kbps (128 kbps preferably).
Disc and files NOT supported
*.AAC, *.DLF, *.M3U, *.PLS, MP3 PRO files and files with DRM.
Open session discs.
Please confirm whether there is a disc in the unit before you insert another one. The unit will exit
current playing source and enter DVD mode when one disc is inserted. Some recorded discs,such as
CD-R,CD-RW, DVD-R, DVD+R, DVD-RW, DVD+RW cannot be played back because of different
recording status. Otherwise, the discs without being closed could not be played back.
Note
Note
13
• After ejecting the disc, the unit reverts to other mode automatically.
• You can eject a disc when the unit powered off. The unit remains off after the disc ejected.
• If the disc is not removed from the unit within 10 seconds, the disc will be reloaded to prevent
accidental damage.
Playback controls(CD/USB/SD)
Touch the display if the playback controls are not shown.
– Go back to main source list
-- Enter settings main menu interface
-- Close/ go back to previous interface
-- It shows track name; -- It shows artist name; -- It shows album name.
-- The indicator bar shows playback status
-- Volume indicator and volume-/volume+ buttons
-- Skip backward/foward a chapter/section/scene/image/file
-- Touch and hold momentarily to fast-backwardreverse/fast-forward the video; and then
repeatedly to switch the speed (x 2, x 4, x 8…). To cancel, touch play .
-- Pause/resume play after pause
-- Stop playing chapter/track/scene/image/file
-- List up tracks/images/video files. (Picture on the right)
-- Scroll down to next page / up to previous page
--Touch to list audio files; --Touch to list pictures; --Touch to list video files.
PIC 14
PIC 13
Note
-- Close/open folder; touch files inside the folder and it will start to play
12
_________________________
___________________________

Playback controls
Touch the LCD screen, the playback controls menu interface appears:
-- Return to main source(homepage)
-- Exit menu interface and return to disc playback mode
-- Enter settings interface where user can make settings
-- Enter information interface where user can check disc information
-- Enter digital keyboard interface for selecting sections by directly input the numbers
-- Play or to pause the current selectedd program
-- Stop playing/eject disc
-- Play last section;
-- Play next section
-- Fast backward
-- Fast forward
Enter next page
-- Enlarge images
--
PIC 11 PIC 12
-- Repeat playing current section
-- Repeat playing between point A and point B
-- Select sound track
-- Show subtitle (if the disc supports it)
-- Show root menu
-- Show primary disc menu
-- Adjust view angles
-- Go back to previous page
14
USB/SD Operations
Playing a SD card
Remove the cap from the SD card slot, and insert the card to the SD card reader slot, playback
starts automatically.
If a SD card already is in the slot, to start playback, touch “SOURCE LIST”, then “SD CARD”
Playing a USB device
Remove the cap from the USB connector, and connect the USB device to the USB connector,
playback starts automatically.
If a USB device is connected, to start playback, touch “SOURCE LIST”,then “USB”
About the controls and indications during playback
You can control USB/SD playback in the same way as disc playback. For details,
see “Playback controls” on page
To disconnect the USB device /SD card
Stop playback, then disconnect it.
Do not disconnect during playback, as data in the USB device / SD card may be damaged
Notes on use
• Do not use USB devices so large or heavy that they may fall down due to vibration, or cause a
loose connection.
• Do not leave a USB device in a parked car, as malfunction may result.
• This unit cannot recognize USB devices via a USB hub.
Notes on playback
• If a USB/SD device contains multiple file types, only the selected file type (audio/video/image)
can be played.
• Displayed indications will differ, depending on the USB device, recorded format and settings.
• The maximum number of displayable data is as follows.
– folders (albums): 256
– files (tracks): 2,000
• It may take time for playback to begin, depending on the amount of recorded data.
• During playback or fast-forward/reverse of a VBR (Variable Bit Rate) MP3/WMA/AAC file,
elapsed playing time may not display accurately.
• Playback of a lossless compression file is not supported.
• Connect the USB device after starting the engine. Depending on the USB device, malfunction or
damage may occur if it is connected before starting the engine.
• A large-sized file may take time to star playing back.
Note
15
_______________________
________________________

iPod Operations
Playing an iPod
Reduce the volume on this unit. Remove the cap from the Ipod connector, and connect the iPod
to the connector. Playback starts automatically. If an iPod is already connected, to start playback,
touch “SOURCE LIST,” then “iPod”
Controls and indications during playback:
– Return to main source list
-- Enter settings interface
-- Close/Go back to prev interface
--It shows track name; -- It shows artist name; -- It shows album name.
-- The indicator bar shows playback status
-- Open/close playlist (see PIC 16)
-- Switch to iPod video mode for controlling from iPod device
-- Open iPod setting menu interface
-- Skip to last/next songs/pics
-- Pause/resume playing after pause
-- Turn to previous or next pages
-- Go back to iPod playback
PIC 15 PIC 16
16
iPod Operations
Operating an iPod directly
You can directly operate an iPod connected to this unit.
During playback, touch “Video”, the play mode changes to resuming mode.
To close the play menu, touch “Music”
Note
• To output video to this unit, you need to activate the video output of iPod.
• The volume can be adjusted only by this unit.
Repeat and shuffle play
During playback, touch “Menu,” then the “Repeat” or “Shuffle” box repeatedly until the desired
option appears. Repeat or shuffle play starts. To close the play menu, touch “Back.”
Bluetooth Operation
Basic procedure of the Bluetooth function
1. Pairing
When connecting Bluetooth devices for the first time, mutual registration is required. This is
called “pairing”. This registration (pairing) is required only for the first time, as this unit and the
other devices will recognize each other automatically from the next time.
Note
If you delete the device registration from this unit,you need to perform pairing again.
2. Connection
After pairing is made, connect this unit and the Bluetooth device. Depending on the device,
connection is automatically made along with the pairing.
3. Handsfree calling/Audio streaming
You can make/receive a handsfree call, or listen to audio through this unit.
17
_________________________
____________________________

iPod Operations
Playing an iPod
Reduce the volume on this unit. Remove the cap from the Ipod connector, and connect the iPod
to the connector. Playback starts automatically. If an iPod is already connected, to start playback,
touch “SOURCE LIST,” then “iPod”
Controls and indications during playback:
– Return to main source list
-- Enter settings interface
-- Close/Go back to prev interface
--It shows track name; -- It shows artist name; -- It shows album name.
-- The indicator bar shows playback status
-- Open/close playlist (see PIC 16)
-- Switch to iPod video mode for controlling from iPod device
-- Open iPod setting menu interface
-- Skip to last/next songs/pics
-- Pause/resume playing after pause
-- Turn to previous or next pages
-- Go back to iPod playback
PIC 15 PIC 16
16
iPod Operations
Operating an iPod directly
You can directly operate an iPod connected to this unit.
During playback, touch “Video”, the play mode changes to resuming mode.
To close the play menu, touch “Music”
Note
• To output video to this unit, you need to activate the video output of iPod.
• The volume can be adjusted only by this unit.
Repeat and shuffle play
During playback, touch “Menu,” then the “Repeat” or “Shuffle” box repeatedly until the desired
option appears. Repeat or shuffle play starts. To close the play menu, touch “Back.”
Bluetooth Operation
Basic procedure of the Bluetooth function
1. Pairing
When connecting Bluetooth devices for the first time, mutual registration is required. This is
called “pairing”. This registration (pairing) is required only for the first time, as this unit and the
other devices will recognize each other automatically from the next time.
Note
If you delete the device registration from this unit,you need to perform pairing again.
2. Connection
After pairing is made, connect this unit and the Bluetooth device. Depending on the device,
connection is automatically made along with the pairing.
3. Handsfree calling/Audio streaming
You can make/receive a handsfree call, or listen to audio through this unit.
17
_________________________
____________________________

Note
Bluetooth Operation
Touch the number keys to enter the phone number, then touch to make a call.
To delete an entered number, touch .
The call is made and the calling display appears until the other party answers.
During talking through the car Bluetooth, touch to switch calling between your mobile
phone and the car raido.
To stop the calling/talking, touch .
-- Scroll down/up pages
-- Received calls
-- Dialed calls
-- Missed calls
-- Hang up the phone
-- Contact list/phonebook
2. Touch “Dial Pad”, the number input display appears(see ).PIC 18
PIC 19
PIC 18
3. Touch “Contacts”, the contact interface appears (see )PIC 19
18
1) When your mobile phone is paired successfully to the car unit , the phonebook will be synced
with with the car unit bluetooth device.
2) The transmission of contact lists needs several minutes, please don’t touch promptly
after pairing.
3) The amount of synced contact names are the first 40 from the phone.
4) Some phones doesn’t support phonebook transmission.
5) When your mobile phone is disconnected with the car unit, the contact list will disappear;
it will get synced when Bluetooth gets connected again.
Bluetooth Operation
Pairing
• Pairing is required only the first time you connect to a Bluetooth device(cellular phone, etc.).
• To pair this unit to a Bluetooth device, you need to enter password to the Bluetooth device. The
password is 0000. Passkey may be called “passcode,” “PIN code,” “PIN number,” “password,” etc.
depending on the Bluetooth device.
• In Bluetooth main page, touch PAIR, then “WAITING FOR PAIRING“ appears on the TFT.
• Turn on Bluetooth function of your mobilephone, keep phone within 3 meters to the unit and star to
search for Bluetooth devices.
• After the name of the Bluetooth module “CARKIT” appears on the pairing list of your mobile phone,
select it. At this time, a passkey is required. Enter the pairing code(“1234” by default), the Bluetooth
pairing will process automatically. Some mobile phones may instruct you to select connect or
disconnect, please select connecting.
• After pairing successfully, the Bluetooth icon stops blinking, “PAIR OK” will appear on the LCD
screen.
Exit Pair
After pairing successfully, if you want to disconnect, press PAIR button, “EXIT PAIR” will appear on
the LCD screen, the Bluetooth icon disappears.
BT Audio
(if the mobile phone has the A2DP & AVRCP functions)
After pair successfully, in Bluetooth main menu,touch A2DP. At this time, the screen will appear
“MUSIC PLAYING”, and the audio will be transferred from the mobile phone to the unit. Some mobile
phones may hint that to connect with the unit.
Handsfree calling
Once the unit is connected to the cellular phone, you can make/receive handsfree calls by operating
this unit.
1. Making calls
Touch “SOURCE LIST” then “BLUETOOTH”, the Bluetooth main display appears(see ). PIC 17
PIC 17
-- Return to main source list
-- Enter A2DP interface
-- Pair phone and car unit
-- Close/return to last interface
• Bluetooth-- Touch to enable/disable Bluetooth function;
• Auto Connect-- Touch to set automatic connection function;
• Auto Answer-- Touch to set automatic answer function.
-- Enter Dial Pad interface
-- Enter Contacts interface
19
_________________________
________________________
This manual suits for next models
1
Table of contents
