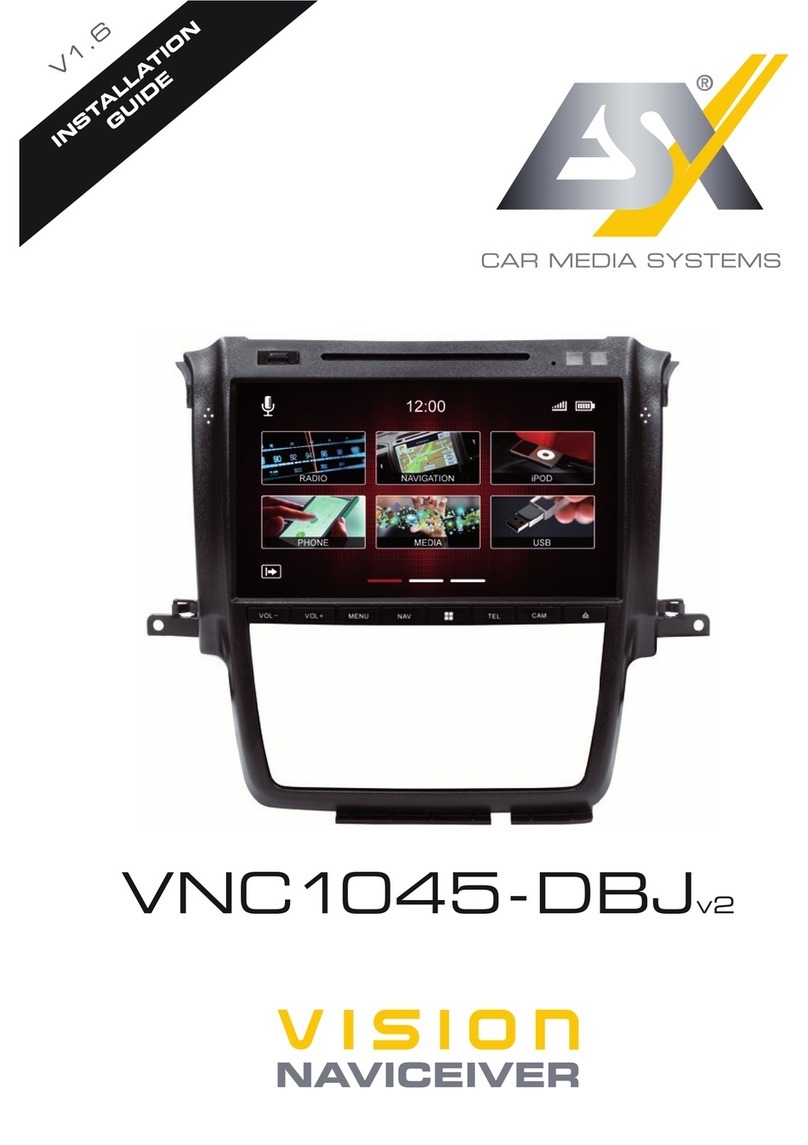
ESX VISION VNC1045-DBJ User manual

1
VNC1045-DBJ
V1. 2
OWNER‘S
MANUAL

2
Safety Information......................................................................................................................... 4
Notes for the intended use ........................................................................................................... 5
Specications ................................................................................................................................ 6
Operating elements....................................................................................................................... 7
First steps ...................................................................................................................................... 8
System settings............................................................................................................................. 9
Camera settings........................................................................................................................... 13
Mani menu.................................................................................................................................... 14
Navigation .................................................................................................................................... 15
Radio............................................................................................................................................. 16
Overview of FM functions ....................................................................................................... 16
Store stations.......................................................................................................................... 16
Switching between bands ....................................................................................................... 17
Overview of DAB+ functions................................................................................................... 17
Settings FM............................................................................................................................. 18
Settings DAB+ ........................................................................................................................ 19
DISC/DVD ..................................................................................................................................... 20
Phone............................................................................................................................................ 23
Phone pairing.......................................................................................................................... 23
Key functions in the phone menu ........................................................................................... 24
Call history .............................................................................................................................. 25
Phone book............................................................................................................................. 25
Call contact from the phone book ........................................................................................... 27
iPod............................................................................................................................................... 28
General ................................................................................................................................... 28
Key functions in the iPod menu .............................................................................................. 29
Repeat/shufe....................................................................................................................... 29
Key functions in the iPod submenu ........................................................................................ 30
Menu albums .......................................................................................................................... 31
Menu artists ............................................................................................................................ 32
Menu playlists ......................................................................................................................... 33
Menu songs ............................................................................................................................ 34
A2DP (Bluetooth Audio Streaming) ........................................................................................... 35
USB & SD Menu........................................................................................................................... 36
General ................................................................................................................................... 36
Key functions in the USB & SD menu..................................................................................... 36
Key functions in the USB & SD submenu............................................................................... 37
Menu albums .......................................................................................................................... 38
Menu artists ............................................................................................................................ 39
Menu songs ............................................................................................................................ 40
Menu video ............................................................................................................................. 41
Menu picture ........................................................................................................................... 42
Save bootlogo......................................................................................................................... 42
Menu USB & SD folder structure ............................................................................................ 43
INDEX
3
Always follow the instructions in this manual before using the device. Please keep this man-
ual easily accessible in the vehicle for future reference.
INDEX
File ................................................................................................................................................ 44
General ................................................................................................................................... 44
Keyfunctionsinthelemenu................................................................................................. 44
Audio ............................................................................................................................................ 45
General ................................................................................................................................... 45
Fader - Balance - Delay.......................................................................................................... 46
Bass - Middle - Treble............................................................................................................. 46
Equalizer ................................................................................................................................ 47
Source .................................................................................................................................... 48
Further settings....................................................................................................................... 49
Android Link ................................................................................................................................ 50
Settings on the smartphone.................................................................................................... 50
Android Link operation............................................................................................................ 51
Firmware Update ......................................................................................................................... 52
Voice control ................................................................................................................................ 53
TV & DVB-T2 ................................................................................................................................ 53
Station logos................................................................................................................................ 54
Start screen / Boot logo.............................................................................................................. 56
Troubleshooting / Frequently Asked Questions....................................................................... 57
General information .................................................................................................................... 58

4
• In general, the assembly and installation of the device must be performed by a trained and
technically skilled specialists, as the installation and connection of the device requires complex
knowledge.
• This device is only suitable for the operation in a vehicle with an on-board voltage of 12 volts,
negative ground.
• Improper installation or use may void the warranty.
• Noteanytimethetrafcregulationsofthecountryinwhichthedeviceisoperated.
• Please ensure, that with the engine turned off the vehicle‘s battery does not discharge fully. The
device is another electrical consumer which must be operated with the engine running, oth-
er-wise the vehicle‘s battery will be discharged and the vehicle can not be started.
• Set the volume of the device only as loud, that you are still be able to hear warning signals (e.g.
policesirens)andtrafcnoiseinsidethevehicle.
• Operate the device as driver only if it‘s absolutely necessary and in the driving safety is not com-
promised. The same stands for looking at the screen. If necessary, better park your vehicle at a
safe and appropriate location.
• ThetrafcrulesoftheEUprohibittoviewmovingpicturesormovieswhiledriving,ifthescreen
of the device is installed within sight of the driver, as he may be distracted. View the screen as
driveronlyforthenavigationfunction,andthenonlybrieythatyouwillnotbedistracted.Note
atanytimethelocaltrafcregulations.Inanaccident,regressclaimscouldbemadebythecar
insurance company.
• This device is not a substitute for your personal judgment or perception. All suggested routes
fromthenavigationsystemshouldneverbetakenasareasontodisregardthelocaltrafcrules.
Yourpersonalassessmentoftrafcoryourknowledgeofsafedrivingpracticesisparamount.
Alwaysmatchyourdrivingwiththecurrenttrafcsituation.
• Do not follow the suggested routes, if the navigation system instructs you to take an unsafe or
illegal way, puts you in an unsafe situation, or directs you into an area which you consider unsafe.
• If problems occur while driving, park the vehicle in a safe and appropriate place to continue
before you operate.
• The device supports only DVD/CD standard disk size of diameter with 12 cm. Do not attempt to
insert disks with a different size or any other object into the disk slot. Be sure to load only one
disk at the same time.
• Pleaseuseonlytheincludedoriginalaccessories.Ensureasufcientmountingofthedeviceby
using the included installation accessories, as in the event of an accident enormous accelera-
tions may occur. Poorly installed devices and equipment in accidents could represent a severe
risk to the driver and the other passengers of the vehicle.
• Note under all circumstances the regulations and advice of the vehicle manufacturer and do not
makeanymodicationstothevehicle,whichcouldinterferewithsafedriving.Pleasetreatall
parts of the device and the components of your vehicle always with caution.
• Please avoid short circuits and make sure that no metal objects can get inside the device. Also
make sure that all connections are properly connected and avoid the interchanging of the polarity
of all connections. Complete the installation only while the ignition is turned off.
• In the event of a defect or malfunction, do not attempt to repair it by yourself or open the device,
SAFETY INFORMATION

5
this is dangerous and could cause injury or damage to the equipment or vehicle. A repair should
be done by trained and authorized personnel only. The device uses a Class 1 laser to read the
disk. Eye contact with a laser is very dangerous to the human eye.
• Ifyou connectanexternaldevice,youshouldrstreadtheinstructionmanualoftheexternal
device and make sure that it is compatible. Avoid connecting an incompatible external device.
• Ifyouinstallexternalapplicationsontotheoperatingsystemofthedeviceoroperateles,make
sure that they are „virus free“ and compatible with Windows CE 6. Otherwise there is a risk that
the operating system no longer works properly and must be reinstalled.
• Do not damage or scratch the screen with sharp objects. Do not operate the screen with hard
objects.
• Please refer the notes in chapter GENERAL NOTES on page 58
SAFETY INFORMATION
NOTES FOR THE INTENDED USE
Only use the device in the area intended for it. In the event of misuse, incorrect installation or mod-
ications,theoperatingpermitandthewarrantyexpire.
Do not use mini-discs or other shaped media than regular CDs / DVDs, otherwise the drive may be
damaged or the media can no longer be ejected.
The CD / DVD drive has transport locks. Remove these before installation, otherwise no media can
be inserted into the drive.
Labeling of devices with laser scanners:
This designation indicates that there are components in the device
that use a weaker Class 1 laser to scan media.
Class 1
Laser Product

6
SPECIFICATIONS
Technical features:
Operating system: WinCE with own developed
rmwareDynOS
CPU: 833MHz
External connections: Video Output
Audio Output
A/V Input
DVB-T2Input
General features:
Directaccesskeys: Louder,quieter,menu,functionkey,
navigation,phone,camera,ejectCD
Keytones: Yes
Bluetooth: Parrot
Navigation: Yes (iGo Primo Europe)
SDcardslot: 2x(1xnavigation/1xmediaplayback)
USB: Yes,ontherearside(MediaUSB)
Steeringwheelcontrol: Yes(optionaladapterrequired)
Updateable: Yes
Dualzone: Yes
Camerainput: 2x
Camera guiding lines: Yes
Amplierremoteout: Yes
Dimmingfunction: Yes(automatic/lightsensor/manual)
Display:
Size: 10,2“/25,9cm
Displaytype: IPS-16:9(AntireexDisplay)
Touchscreenfunction: Yes(Capacitivetouchscreen)
Resolution: 1024*600
Brightnesscontrol: Yes
Saturation: Yes
Bluetooth:
Bluetoothchip: Parrot
Handsfree: Yes
Audiostreaming(A2DP): Yes
Phonebook: Yes(upto1000entries)
Phonebooksearch: Yes
Shortcutkeys: Yes(upto8shortcutkeys)
USB/SD funktion:
USBStandard: USB2.0
Playback: MP3/AAC/WMA/AVI/MP4
Selectionoption: Album/Artist/Song/
Podcast/Audiobook
Massstorage: Upto64GB
Alphabeticalsearch: Yes
Operation via touchscreen: Yes
CD/DVD drive:
Drive: Yes(CD,DVD)
Playablemedia : CD/CD-R/CD-RW/
DVD+/-RW+/-DVD-RV/
DVD-Video/Audio
Readableleformats: MPEG/AVI/MP4/RM/
FLY/ASF/WMV/MKV/
OGM/DivX/WMA/FLAC
Shufeplayback: Yes
Repeat mode: Yes
Operation via touchscreen: Yes
iPod:
iPodconnection: ViaUSB/iPodchargecable
Operation via touchscreen: Yes
Playlists: Yes
Selectoption: Playlist/Album/Artist/
Song/Podcast/Audiobook
Alphabeticalsearch: Yes
Titleinformation: Id3
CompatibilityiPod: Classic-80GB/120GB/
160GB(30pin)
Touch:1G-4G
Video:5G/6G
Nano:1G-5G
CompatibilityiPhone: iPhone3Gupwards
Audio (DSP):
Max.outputpower: 4x45Watts
BassBoost: Yes
Pre-amplieroutputs: Yes
AV inputs: Yes (RCA input)
AV output: Yes (RCA output)
Soundadjustment: Yes
Balance/Fader: Ja
Outputlevel: 4V
Soundsettings: -Subwooferlevel
-DynaBasslevel
-Basscenterfrequency
-Bassbandwidth
-Equalizer9-Band
-Timealignment
Compatibility (May 2018):
FiatDucatoIII,CitroenJumperII,PeugeotBoxerII
(Type250,since2006*)
FiatDucatoIV,CitroenJumperIII,PeugeotBoxerIII
(Type290,since2015*)
* possibly with restrictions on OEM radio/navigation and increased
installation efforts
Note:
PlugandPlayinstallationonthemodelsType250/290withradio
preparation.
Requiresadditionaleffortsandinstallationmaterialsformodelswith
CANBUS/OEMradiowork-Refertotheinstallationguide.
Forthesteeringwheelcontrol,anoptionaladapterisrequired.

7
Key assignment on the device
VOL + Increases volume
VOL - Reduces volume
MENU Main menu
Freely assignable multifunction key
NAV Starts navigation
TEL Starts phone menu
CAM Starts camera menu
Ejects inserted CD/DVD
Radio restart
Press and hold the multifunction button for 10 seconds.
Radio turn on / turn off
Press the MENU button for 2 seconds.
OPERATING ELEMENTS

8
Note:
Before you use the device, you should save a backup copy of the navigation software on your PC.
Afterswitchingonthedeviceforthersttime,theradiointerfaceappears.
FIRST STEPS
How the touchscreen works
Most functions of the device are controlled via the touchscreen.
To facilitate operation, some functions and actions that you can perform on the touchscreen are indicated by icons
in the instructions of this owner‘s manual.
Touch the screen (short)
Touch the screen (longer)
Press & hold and then move
You can move the screens like on a smartphone. To do this, touch the screen and slide it to the left or right.

9
If the check mark for „Handbrake“ is not set, you will get the message „Attention you can not use this function
while driving“. Check the box if you want to watch videos.
Handbrake activation of the video playback while driving
- Activate the item Handbrake in the system settings
Inordertoavoidbeingdistractedwhiledriving,theplaybackofvideolesortheplaybackofDVB-T2isprevented.
As soon as you check off the handbrake, you will see an information screen indicating that this is not allowed
while driving.
WARNING:
Informyourselfinyourcountryaccordingtothespecicationsandlegalregulations.Ifyouactivatethisoption
withoutpermission,thiscanleadtoconsiderablenes.ThisisasettingthatisnotenabledbyESXforgeneraluse
and assumes no liability. This setting is only activated by the user and owner, who thus assumes all responsibility
for the activation.
In the system settings, you can set some basic options and settings of the device. A short touch of the box next to
the caption will activate the option. A check mark will show you that the option is selected.
SYSTEM SETTINGS
Region
Here you can set the system language.
Skin
Select the desired user interface (skin) design.
The freely assignable multifunction key
You can assign this key freely. In the dropdown menu, select the desired function that you want to start with this
hardware key on the device.

10
Brightness
There are several options for setting and controlling the brightness.
This also includes the dimming function.
First of all, touch the arrow down button to the right of the menu item Auto / Manual
After you have touched the arrow, the submenu opens. Depending on the selected function, another option will
be enabled in the settings.
Auto = Automatic adjustment of the brightness
Lighting = Adjustment of the brightness via the light switch
Sensor = Adjustment of the brightness via the installed sensor in the device
Manual = Manual adjustment of the brightness
After selection, a new button with sliders will be displayed. Either to the right of Manual right or below Auto.
A short press on the slider, opens the dimming function setting knob. The screen brightness can be adjusted by
the slider to the desired value.
Time zone
In this menu item you can set the time zone in which you are.
For example in Germany: winter time (UTC +01: 00) and summer time (UTC +02: 00).
SYSTEM SETTINGS

11
Parking aid
Off : If no camera is installed
Camera : If at least one camera is installed
If you select Off, nothing will happen when engaging reverse gear, the screen will remain in the menu you are
currently in.
If you select Camera, you will see the camera image when engaging the reverse gear.
Please note that the representations of the systems offer only a supportive function. Incorrect measurements due
to improperly installed systems or environmental effects caused by environmental effects can not be compen-
sated by the system.
Please note that when transferring the image by adjusting the camera and the mounting angle, or external inter-
ference, the view may be impaired.
WARNING
These systems do not replace personal control and minimum clearance.
SYSTEM SETTINGS

12
Front Camera Enable
If a front camera has been installed, this can be used to set how long the front camera remains switched on after
leaving reverse gear.
Video Input
Adjust the brightness and contrast for video sources.
Dual zone
If you have activated the option, for example, the navigation will be displayed on the monitor of the device and a
movie will be played in the passenger area.
Steering wheel control
If you have a multifunction steering wheel, you can assign the buttons of the steering wheel using this key. To
do this, select a function on the touchscreen and then press the desired button on the steering wheel to control
this function.
Reset start logo
Clicking on this button will reset the start logo (bootlogo) of the device.
Reset to factory settings
Click on this key to reset the system back to the factory settings.
SYSTEM SETTINGS

13
Marker
Show or hide the markers (red, yellow, green)
Vehicle angle (indication depending on vehicle and year of construction, or not available)
Show or hide vehicle angle
Reset camera image mirroring
Camera image mirroring
Select line to adjust (1, 2 or 3)
Step back
Decrease the marker
Expand the marker
Drag the marker
Push the marker
Reset all settings
1.
2.
3.
4.
5.
6.
7.
8.
9.
10.
11.
94
83
72
61 5 5
10
11
Touch the settings icon to make the following settings for the camera:
CAMERA SETTINGS

14
The main menu is divided into three pages. You can reach the next page by pressing on the page navigation lines
or by sliding. Depending on the selected user interface, the display of the functions may vary.
Touchthescreenwithonengerandthenmoveittotherightorleft.Thiswillmoveyoutoeachpageofthemain
menu.
The three lines on the bottom of the display show you which menu page you are on. By a short click on the re-
spective line, you can also go directly to the corresponding page.
MAIN MENU

15
NowgotothemainnavigationmenuorpresstheNAVbuttononthedevice.Therststartmaytakeamoment.
The owner’s manual for the navigation software can be downloaded from our website www.esxnavi.de in the
download area.
Start the navigation
To perform a map update, you need to download software from the navigation software vendor. The software
(Naviextras Toolbox) can be found for free at www.naviextras.com.
Instructions for the implementation of the update and the individual steps can be found in the download area of
our homepage www.esxnavi.de.
Carry out map update
Navi Path
If the navigation does not start or you want to use the device with another compatible navigation software, you
can set the path to the navigation software here.
NAVIGATION

16
ToopentheRadiomenu,pressRadioontherstpageofthemainmenu.
Store stations
Press and hold the station memory of your choice for
2 seconds. The station is then stored in this station
memory.
Station logos
To save the station logos, please follow the instructions on page 54.
Changing station
Station memory 1-15
Slide left or right to view all station memories
Back to main menu
FM
Band Show / change frequency band
Station list
Set the frequency manually
FM settings
Overview of FM functions
RADIO

17
Station logos
To save the station logos, please follow the instructions on page 54.
Store stations
Press and hold the station memory of your choice for
2 seconds. The station is then stored in this station
memory.
Changing station
Station memory 1-10
Slide left or right to view all station memories
Back to main menu
DAB+
Band Show / change frequency band
Station list
APS = Start automatic search
Show station info
DAB+ settings
Overview of DAB+ functions
Change frequency band
To change the frequency band (for example, FM to DAB+), press the „FM Band“ key. Subsequently, another
window opens. Select „DAB+“ here.
RADIO

18
FM settings
A short touch of the box next to the caption will activate the option. A check mark will show you that the option
is selected.
High-Cut
The high-cut function automatically converts the signal from stereo to mono.
TA = Trafc Announcement
Ifthisoptionisactivated,trafcannouncementsareautomaticallyimportedintotherunningprogram.Withapop-
upmenuyouhavetheoptiontoturnoffthetrafcnewsorcontinuelistening.Setthevaluebyhowmanyvolume
levels the radio should be louder.
Radio Text
If you have activated this function, information from the radio station can be transmitted to the radio. Such as
information about the currently playing song or station program, as well as the station name.
RADIO

19
AF = Alternative frequency
When AF is activated, the radio automatically switches to another frequency with better reception.
Auto
The radio always switches to a radio station, which currently promises the best reception, even if a regional
program is interrupted.
Manual:
With a manual alternative frequency setting, the radio switches only to alternative frequencies of the current
station with an identical regional program.
Seamless Service Function
As soon as this function is activated, the radio automatically switches from DAB+ to FM, if the reception for DAB
+isnotsufcient.Assoonasthereceptionisback,theradioautomaticallyreturnstoDAB+.
Note: Due to technical reasons, this can lead to short sound interruptions due to a small time offset during
switching.
Favorite Stations Clean
Resets all stored station memories.
DAB+ settings
RADIO

20
Insert a CD or DVD in the drive. After loading the media, the movie starts playing or the start menu of the movie
is displayed.
To eject the CD/DVD, press the eject button on the front of the device.
Ifyoudonotwanttoejectthemedia,butwanttoreturntothepreviousmenu,brieypresstheMENUbuttonon
the front of the device.
Menu when inserting a CD/DVD:
Bybrieypressingthekeysyoucanmakethefollowingselection:
DISC/DVD
Opens all information of the disc in a
directory structure
Opens the input menu for searching
with a virtual keyboard
Back to the currently played
title/video
Opens all music formats on the disc
Opens all movie formats on the disc
Opens all picture formats on the disc
Other manuals for VISION VNC1045-DBJ
1
Table of contents
Other ESX Car Navigation System manuals

ESX
ESX i40 Quick start guide

ESX
ESX VISION VNC1045-DBJ User manual

ESX
ESX VN710 KI-SORENTO User manual

ESX
ESX VNS720 VW-U1 User manual

ESX
ESX VNS830 SK-OC3 User manual

ESX
ESX VN720 VO-P6C User manual

ESX
ESX VISION ANDROID Series User manual

ESX
ESX VN710 CV-AVEO User manual

ESX
ESX VN830 User manual

ESX
ESX VN830 SK-OC3 User manual
Popular Car Navigation System manuals by other brands

Alpine
Alpine NVE-P1 - Navigation System Module owner's manual

Magellan
Magellan Maestro 4210 - Automotive GPS Receiver user manual

AIRIS
AIRIS T605 TOMTOM 2005 installation guide

Volvo
Volvo VOLVO NAVIGATION SYSTEM (VNS) operating manual

Tresco
Tresco Radar Overlay Operator's manual

Garmin
Garmin nuvi 660 owner's manual