Bluerock Tools 120D Quick start guide

OPERATIONAL MANUAL
MODEL: 120D GRINDER/SANDER/POLISHER
by BLUEROCK ® Tools
Volume
1.1

120D BURNISHER/GRINDER/SANDER/POLISHER
UNPACKING THE ITEM
Caution: This machine is packed together with items that may be sharp, oily and overly heavy objects. Remove the machine from
the packaging in a safe manner. Check to ensure all accessories are included with the item while unpacking. If any parts are found
to be missing, contact the retailer as soon as possible. Do not throw away the packaging until the item is out of the guarantee
period. Dispose of the packaging in an environmentally responsible manner. Recycle if possible. Keep all plastic bags away from
children due to risk of suffocation.
WEEE - Waste Electrical & Electronic Equipment. Note this machine should be disposed of as electrical & electronic waste.
©THE NEWMAN TRADING COMPANY LLC DBA BLUEROCK® TOOLS 2016
1100 SW 16th St • Suite D
Renton, WA 98057
Phone 206.604.8363 • Fax 425.572.5167
www.bluerocktools.com

120D BURNISHER/GRINDER/SANDER/POLISHER
Table&of&Contents&
SAFETY' 1!
PRE-OPERATIONAL SAFETY CHECKS! 1!
OPERATIONAL SAFETY CHECKS! 1!
HEALTH WARNINGS! 2!
SPECIFICATIONS' 3!
INCLUDED'ACCESSORIES' 3!
ADDITIONAL'AVAILABLE'ACCESSORIES' 3!
ADDITIONAL ACCESSORIES FOR THIS MACHINE CAN BE FOUND IN BLUEROCK ®TOOLS ONLINE SHOP AT
WWW.BLUEROCKTOOLS.COM OR FROM YOUR LOCAL RETAILER.! 3!
OPERATIONS' 4!
PURPOSE! 4!
MACHINE COMPONENTS! 4!
TRANSPORTING THE MACHINE! 5!
RUNNING THE MACHINE! 5!
INSTALLING SANDING BARRELS! 6!
TROUBLESHOOTING' 7!
GENERAL'MAINTENANCE' 8!
OCCASIONAL'MAINTENANCE' 8!
PARTS'LIST' 9!
BREAKDOWN'VIEW'10!

120D BURNISHER/GRINDER/SANDER/POLISHER
1
Safety
DO NOT USE THIS MACHINE UNLESS YOU HAVE READ THE OPERATING INSTRUCTIONS!
Safety glasses must be worn at all times in
work areas. Use a full face mask whenever
possible.
Long and loose hair must be
contained.
Appropriate footwear must be worn.
Close fitting/protective clothing
must be worn.
Safety gloves should be worn at all times and
jewelry must not be worn.
Hearing protection should be worn
when using this machine.
Read operational manual prior to use.
Dust mask must be worn while
using this machine.
PRE-OPERATIONAL SAFETY CHECKS
ØExamine the power cord and plug for damage.
ØExamine the body of the machine and inspect for damage or defects.
ØExamine the sanding barrel to insure it is operable.
ØEnsure that the sanding barrel and metal guard are securely attached to the machine.
oSee section below for installing and replacing barrel.
ØMake certain the on/off switch is in the off position.
OPERATIONAL SAFETY CHECKS
ØONLY to be operated by qualified personal who have read instructions.
oNOTE: Failure to read and follow instructions could result in electrical shock, fire, property damage and/or
serious injury!
ØDO ensure all non-essential people are clear of the immediate work area.
ØDO keep body parts, clothing & power cords clear of turning pieces.Stay alert and use common since when using
this tool.
ØDO allow machine to reach operating speed before contacting with surface.
Chapter
1

120D BURNISHER/GRINDER/SANDER/POLISHER
2
ØDO use both hands when using this machine.
ØDO unplug machine while changing or adjusting barrel so as not to accidentally turn machine on.
ØDO guard against electric shock by preventing body contact with grounded surfaces such as pipes, radiators, ranges,
refrigerators, etc.
ØDO be mindful that power tools can expose an operator to vibrations transmitted trough contact with the machine.
Prolonged exposure can lead to medical issues which should be discussed with a medical professional.
ØDO use a dust extraction system for working materials that create dust. The operator should also wear a protective
respiratory device.
ØDO NOT make adjustments to machine while the machine is running.
ØDO NOT use this machine with water or any type of liquids.
ØDO NOT leave the machine running when not in use.
ØDO NOT hold the work piece by hand or using body. Always mechanically clamp or secure work piece.
ØDO NOT allow liquids or dust to enter the machine’s ventilation system.
ØDO NOT operate machine outside of machine specifications.
ØDO NOT touch moving parts while the machine is running as death or dismemberment could occur.
ØDO NOT remove machine components while machine is connected to a power source. Only to be removed for
service by qualified personal and put back on the machine after service is complete.
ØDO NOT allow children or untrained personal to operate machine.
ØDO NOT use this machine in the rain or a wet environment. If using outdoors, make sure the surface is clean and dry.
ØDO NOT operate in the presence of explosive materials as power tools create sparks which may ignite dust or fumes.
ØDO NOT use on a work area that may contain a live electrical wire/circuit.
ØDO NOT operate this machine on the same work surface where welding is being performed. This could result in
severe damage to the machine or personal injury to the user.
ØDO NOT operate this machine on a lower voltage as this could limit the motor life and work efficiency.
oNOTE: Use of long small gauge power extension cords can result in decreased voltage. As local voltages
can vary, it may be a good idea to test the voltage at the end of the extension cord to ensure proper voltage
requirements are met. You might also consult an electrician to make sure the length of cord matches up
with the proper wire gauge for this size motor. Make sure to use outdoor cords when operating outdoors.
Use a GFCI circuit if using in wet locations.
HEALTH WARNINGS
ØCertain dust created by sanding contains chemicals known to cause a variety of health issues including cancer, birth
defects or other reproductive harm. Examples of some of these chemicals are below (this is not an exhaustive list):
oLead from lead based paint.
oCrystalline silica from bricks, cement and assorted masonry products.
oGlues in certain woods.
oMetal fragments.
§TO REDUCE RISK OF EXPOSURE TO THESE CHEMICALS, WORK IN A WELL-VENTILATED
AREA WITH VACUUM SYSTEMS, RESPIRATORS AND WITH ALL SUITABLE SAFETY
EQUIPMENT. DO FOLLOW ALL LOCAL AND NATIONAL SAFETY STANDARDS WHEN
WORKING WITH SPECIFIC MATERIALS.

120D BURNISHER/GRINDER/SANDER/POLISHER
3
Specifications
ELECTRICAL DATA
Voltage
110V, 60Hz
Current
8.18 Amps
Motor Size
900W
Power Connection
US Standard 2 Prong Plug
MECHANICAL DATA
Barrel Length
120mm (4.75”)
Barrel Diameter
100mm (4”)
Machine Speed
900-2800 RPM Variable Speed Gearbox
SHIPPING DATA
Shipping Weight
9 Lbs
Shipping Carton
15” x 8” x 6”
Included Accessories
DESCRIPTION
QTY
Instruction Manual
1
Secondary Handle
1
#80 Sanding Barrel
1
Spare Brush
2
Additional Available Accessories
Additional accessories for this machine can be found in BLUEROCK ® Tools online shop at
www.bluerocktools.com or from your local retailer.
Chapter
2
120D Available Barrels
#80 Coarse Grit Non-woven Nylon Polishing Barrels

120D BURNISHER/GRINDER/SANDER/POLISHER
4
Operations
Note
THOROUGHLY READ THROUGH THE ENTIRE MANUAL BEFORE OPERATING THIS MACHINE!
PURPOSE
ØThe purpose of the 120D is to sand, grind, burnish and polish a variety of surfaces from wood to steel.
ØThis machine uses a round barrel type sanding head, which allows for use on flat and round surfaces. This
increases the sanding surface area making for a faster more uniform surface treatment.
ØThe main round machine shaft rotates in a forward direction (when holding the machine by the main
handle). The motor connects to the main barrel.
MACHINE COMPONENTS
ØThe main components of the 120D are the barrel, gearbox, motor, housing and main handle and secondary
handle. The barrel is driven by the gearbox and the motor.
oThese components must be not be removed except by a qualified technician. Power must be
disconnected prior to any service.
ØThe machine has a variable speed switch located on the main handle by the power cord base. This switch
has numbers signifying low (1) to high (6) speeds.
1)
Sanding Barrel
6)
Variable Speed Switch
2)
Barrel Bolt
7)
Gearbox
3)
Secondary Handle
8)
Lock for Barrel Bolt
4)
Metal Guard
9)
On/Off Switch
5)
Main Handle
Chapter
3

120D BURNISHER/GRINDER/SANDER/POLISHER
5
TRANSPORTING THE MACHINE
ØWhen transporting the machine, always carry with both handles.
ØIf transporting inside a vehicle, it is recommended to transport it on its side so as to avoid the item falling
over.
ØDO NOT carry the machine by the cord.
ØDO NOT allow the cord or plug to drag along the floor when transporting.
RUNNING THE MACHINE
ØDo all pre-operational and operational safety checks from Chapter 1.
ØConsider your security and stability as well as the orientation of the machine in the work area.
oConsider the work surface material, condition, strength, density and rigidity. These factors
directly affect the tools operation and user safety.
ØEnsure the secondary handle is securely attached.
ØEnsure the work surface is free of debris, oil, etc.
ØSelect rotational speed 1-6 using speed chart below (meters per second):
o1
o2.7 m/s
o4
o6.3 m/s
o2
o3.8 m/s
o5
o7.6 m/s
o3
o5.1 m/s
o6
o8.5 m/s
ØPlug the machine into power source.
ØTurn the machine on.
oStart the machine by sliding switch 1 in picture below forward.For continuous operation, tilt
switch downwards until it engages. Stop the machine by sliding the switch backwards and
release.
o
ØVery slowly engage the sanding barrel with the material surface by lightly engaging towards the material.
Ensure the sanding barrel is parallel to the work surface. Operating at right angles will ensure the barrel
does not fall off the rollers.
oNOTE: Do not force the sanding. Let the machine do most of the work. Excessive physical effort
should be avoided as it can cause damage to the machine or the user.
oCAUTION: This machine is equipped with motor overload protection. If the unit shuts down due
to overload, turn switch off. Wait 5 seconds and turn the machine back on and run under no-load
for 20 seconds to allow for motor cooling. Not doing this could result in motor failure.
oIf the motor stops due to barrel failure, stop the machine immediately to prevent injury.
Disconnect the machine from the power supply and change barrel.
ØFinish sanding the surface.
ØTurn the motor off.
oCAUTION: Only lay the machine down on surface once the barrels have come to a complete stop.

120D BURNISHER/GRINDER/SANDER/POLISHER
6
INSTALLING SANDING BARRELS
ØCheck that the replacement barrel is not damaged.
oSanding barrels that are damaged should not be used.
ØMake certain the machine is unplugged from power.
ØDepress the lock for the barrel bolt.
ØUsing a hex wrench unscrew the hex bolt that attaches the barrel to the gearbox.
ØPlace the new sanding barrel on the machine and securely tighten the barrel locking bolt.
oMake certain the barrel lock is depressed when tightening or loosening the lock bolt.
ØRelease lock for the barrel bolt.
ØDouble check the metal guard is secure.

120D BURNISHER/GRINDER/SANDER/POLISHER
7
Troubleshooting
Note
SERVICING SHOULD ONLY BE DONE BY A QUALIFIED TECHNICIAN.
DON’T FORGET TO UNPLUG POWER TO UNIT PRIOR TO SERVICE!
PROBLEM
SOLUTION
Motor does not turn on.
1) Check external power source (extension cord, breaker, etc).
2) Loose internal wire. Check and secure if necessary.
3) Motor brushes defective. Replace if necessary.
4) Check to ensure the motor on/off switch is operable. Replace if necessary.
5) Variable speed switch is defective. Replace switch.
Excessive sparking when
motor is running.
1) This may indicate the presence of debris in the motor or worn out carbon brushes.
Check the brushes for unusual wear and replace if necessary. Clean out the
internal motor armature if necessary.
2) Armature has a rough edge. Inspect and replace if necessary.
Machine is not sanding.
1) Barrel is dull. Replace barrel.
2) Work area material is not appropriate for barrel type.
Chapter
4

120D BURNISHER/GRINDER/SANDER/POLISHER
8
General Maintenance
ØInspect electrical cords and electrical connections.
ØKeep machine clean and free of debris.
ØCheck for misalignment, binding and breakage of all moving parts. If damaged, repair tool before use.
Occasional Maintenance
ØHave the power tool serviced by a qualified service technician using identical replacement parts.
oChange motor brushes:
1) Disconnect machine from power.
2) Take of motor handle housing.
3) Unscrew left and right side brush holder caps.
4) Take out old brushes.
5) Replace with exact same size new brushes.
6) Screw in brush holder caps tightly.
7) Replace motor handle housing.
Chapter
5

120D BURNISHER/GRINDER/SANDER/POLISHER
9
Parts List
Part No
Description
QTY
Part No
Description
QTY
1
Flat key
1
29
Bearing housing
1
2
Woodruff key
1
30
Wind cover
1
3
Output shaft
1
31
Screw
2
4
Screw
4
32
Stator
1
5
Front cover
1
33
Housing
1
6
Bearing
2
34
Flat washer
1
7
Gland
1
35
Screw
1
8
Gland screw
3
36
Thumb button
1
8-1
Flat washer
1
37
Switch lever
1
9
Gear (big)
1
38
Screw
1
10
Screw
2
39
Cable disc
1
11
Screw
2
40
Switch
1
12
Clamp spring
1
41
Screw
1
13
Clamp spring
1
42
Rear cover (right)
1
14
Quill roller
1
43
Screw
2
15
Spring
1
44
Cable sheath
1
16
Self-locking button
1
45
Cable
1
17
Gear cap
1
46
Rear cover (left)
1
18
Screw
2
47
Speed-controller
1
19
Clamp spring
1
48
Carbon brush
1
20
Gear (small)
1
49
Brush holder
1
21
Bearing
1
50
Ground wire
1
22
Gear case spindle
1
51
Capacitance
1
23
Spur gear (small)
1
52
Inductance
2
24
Bearing retainer
1
53
Additional handle
1
25
Bearing
1
54
Protective cover
1
26
Rotor
1
55
Sanding roller
1
27
Magnet ring
1
56
Spacer
1
28
Bearing
1
57
Screw
1
Chapter
6

120D BURNISHER/GRINDER/SANDER/POLISHER
10
Breakdown View
Table of contents
Other Bluerock Tools Grinder manuals
Popular Grinder manuals by other brands
Bona
Bona AMO310002 operating manual

Coleman
Coleman Powermate Professional P024-0101SP instruction manual

Pentair
Pentair Hydromatic TL-Pro Installation and service manual

BRODBECK IRONWORKS
BRODBECK IRONWORKS 2X72 GRINDER Assembly instructions

WilTec
WilTec 30297 user manual
EINHELL
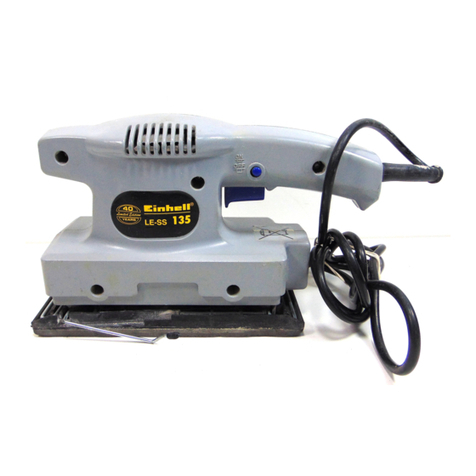
EINHELL LE-SS 135 operating instructions
