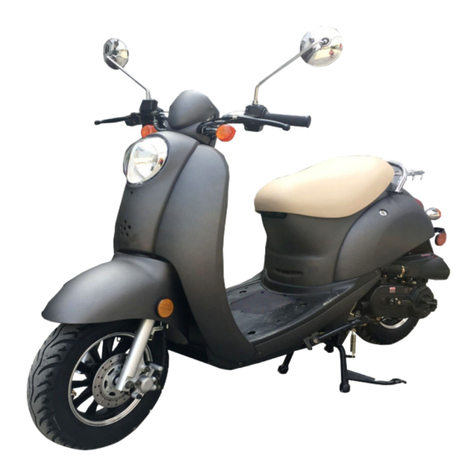
BLUESHARK R Series User manual

Blueshark R Series Smart Electric Scooter
User Manual

Thank you for “riding the tide” with Blueshark!
Thank you for purchasing the Blueshark R Series (including the “Blueshark R1” and the “Blueshark R1 lite” smart electric scooters). Wish you
smooth and enjoyable riding.
Safety Precautions
• Before riding, please read this manual carefully and clearly understand the operations of this product and important safety precautions,
and retain it properly for future reference. Failure to do so may result in death or serious injury.
• The Blueshark R Series products are categorized as vehicles. While driving in public areas and on roads, please strictly obey the laws and
regulations of the local country and state.
• Please do not dismantle, modify, alter the vehicle or use unauthorized third-party replacement parts. All losses arising therefrom will be
borne by the user. Failure to follow this warning will void the Warranty Card.
User Feedback
In case of any doubts on Blueshark R Series products, please report it to a Blueshark authorized store or after-sales service center.

Table of Contents
Legal Notice
Link Vehicle
Intended Use
Controls
Vehicle Function & Operations
On Using Battery
Riding Procedure
Safe Riding
Vehicle Maintenance & Service
Maintenance & Repairs
Troubleshooting Checklist
Vehicle DTCs & Solutions
Warranty Records
01
02
03
04
05
12
15
17
20
23
24
27
31

is a registered trademark of Sharkgulf Technologies Group Limited worldwide. Without the prior written permission or
authorization of Sharkgulf Technologies Group Limited, no organization or individual may use, duplicate, modify, transcribe or sell this
trademark in any form or by any means. Sharkgulf will pursue legal responsibility for any individual, company or enterprise that infringes upon
our trademark rights.
This manual contains the use instructions and precautions for various functions of the product. However, due to continuing product
optimization, design or function changes and software upgrades, the actual product may slightly differ from the manual. Please refer to the
actual product.
It is hereby declared that the final interpretation of this manual belongs to Sharkgulf Technologies Group Limited.
Legal Notice
01

Before you activate the vehicle, please place the vehicle in an environment with
good cellular signals, so that you can start the following procedures smoothly.
Step 1
Please search and download the “Blueshark” App in the mobile App store and complete the sign-up;
Step 2
Use the remote control to unlock the vehicle and power on the panel display. Within the time given, following the instructions on the App, so
the vehicle will enter the to-be-linked mode.
Step 3
On the app, tap “Add Vehicle” to enter the linking process. Select “Pre-link Vehicle” to link it according to the vehicle color and the VIN (Vehicle
Identification Number).
Step 4
The linking PIN code will be displayed on the panel screen. Enter the PIN code in the corresponding location of the App to complete the
linking process.
• After the vehicle enters the to-be-linked mode, the vehicle will return to the waiting state if there is no activity within 2 minutes or the
[READY] button is pressed. To re-link the vehicle, please repeat the above steps.
Link Vehicle
02

Thank you for purchasing the Blueshark R Series smart electric vehicle. You will get the following information and materials when you
purchase this vehicle. Please read and follow it carefully.
Please verify the following information when purchasing the vehicle:
"User Manual" "Certificate of Conformity"
"Warranty Card" "Vehicle Activation and linking"
Please confirm the following:
Correct use of vehicles
Methods of daily inspection and routine maintenance
Warranty Policies
• If the vehicle is resold, the manual must always be handed over to the new owner.
• Do not let inexperienced riders or persons without a valid license use your vehicle.
• All parameters or functions of this product are subject to change without notice. For this reason, the illustrations in this manual might
differ from your vehicle. If you have any questions, please contact the Blueshark official customer service center.
Intended Use
Warning symbols and definitions
Indicates precautions related to personal safety.
Means "prohibited" and involves behavior that may cause a safety accident
Indicates that improper use may result in accidental injury
Indicates that improper use may result in personal injury or damage to parts
Attention
03
Warning

Blueshark R Series
Controls
Rear-view mirror
Front
shock absorber
Rear
shock absorber
Brake lever
Rear wheel hub
Rear handgripWindshield
Coat hook
Front brake disc
Front wheel hub Side stand Center stand Electric motor
Footrest
Seat cushion
Rear mud guard
holder
Physical seat lock
Panel screen
Rear brake disc
Front camera*
Rear camera*
Ultrasonic
sensor*
* This component and its related features only apply to the Blueshark R1 and are not meant for the Blueshark R1 lite.
Note: After opening the package, please check whether the vehicle body and all accessories are intact, and all painting surfaces are not
scratched.
04
Speaker*

Blueshark R1 - Instrument Panel & Function Buttons
Vehicle status area
Left turn
indicator
READY status
indicator
Fingerprint
reader
Right turn
indicator
High beam
Riding status area
Low beam
Battery status
indicator
Malfunction
indicator
Map & navigation area
Vehicle Function & Operations
05

Battery level Speed
Cruise control
indicator
Range (km)
Total range
Blueshark R1 Lite - Instrument Panel & Function Buttons
Vehicle Function & Operations
Left turn
indicator
Right turn
indicator
High beam
Low beam
Charging
indicator
Time
Display Regular Gear
Race Mode
Moving
Mode
Lateral
Kickstand
Instruction
BS Signal
Indicator
GPS Signal
Indicator
BLE Connect
Indicator
Ready
Indicator
Low Battery
Indicator
Fault Indicator
Start/Stop
Switch
Music Player
Indicator
Battery status
indicator
Battery
compartment
identification
06

Blueshark R1 Lite Instrument Display and Function
Charging indicator
Time Display
Fault Code
Pairing Code
Regular Gear
Race Mode
Moving Mode
Lateral
Kickstand
Instruction
On 96V Mode
48V Mode
Turbo available
Turbo unavailable
BS Signal
Indicator
GPS Signal
Indicator
BLE Connect
Indicator
Left/Right Turn
Signa
Ready Indicator
Low Battery
Indicator
Fault Indicator
High /Low Beam
When the turn signal lights up, the corresponding
indicator lights up
The indicator is off in parking mode and on in
riding mode
The indicator lights up when the battery is low.
The system will switch the power supply mode,
and it is necessary to charge the flat battery as
soon as possible.
The indicator lights up when the motorcycle
detects an abnormality.It can be detected again
by switching the Start/Stop switch. If any fault is
detected again, please contact the after-sales
personnel.
The indicator lights up when the high/low beam
lights up.
Start/Stop Switch
When the switch is off, press and hold the button
to switch on with the key close to the motorcycle .
When the switch is on, press and hold the button
to switch off.
Music Player
Indicator
The indicator will light up after the
communication module is connected to the
network
The signal will light up after GPS positioning
After BLE connects to the app,
the indicator lights up
If the motorcycle is equipped with audio, you
can play music through Bluetooth connection
and it will light up for a short time during volume
adjustment
Battery in compartment 1 is discharging
The system will automatically obtain the time
according to GPS, but it can only obtain the time
zone information through the app
After detecting a fault, the system will display the
fault of E***, please check the list for related faults
Gear +- can be used to switch gears. As there are
different power modes, the acceleration and
maximum speed may be different
When the motorcycle enters the pairing mode,
the pairing code will be displayed for APP
authentication
In 96V mode, you can enter the race mode,
which means better starting and acceleration
performance
When engaging this gear, the motorcycle can be
moved forward and backward at low speed
Not ready is displayed when the kickstand is down,
and the driving mode cannot be entered
Battery in compartment 2 is discharging
Note: The motorcycle will actively adjust the power supply mode according to
the service condition of the battery.
None
1
2
Battery status
indicator
Battery
compartment
identification
When the battery is charging: On
07
Vehicle Function & Operations

Remote Key & Vehicle Lock
When you are ready to ride, press this button
within 30 meters of the vehicle to unlock the
vehicle. In this case, the steering lock is
disengaged and enters the unlock state.
Meanwhile, sound and light should be
accompanied to indicate unlocking is
successful.
Unlock Button
After riding, press this button within 30
meters of the vehicle, the electric door will be
closed, the steering lock will be engaged and
the vehicle will enter the lock mode.
Meanwhile, sound and light should be
accompanied to indicate lock is successful.
Lock Button
When you leave the seat cushion and press
the electronic seat lock button, the seat
cushion will be released and then
automatically lift slightly.
Seat Lock Button
Vehicle Function & Operations
08

Blueshark R1 lite - Controls
Vehicle Function & Operations
1. Overtaking/low beam/high beam: Push to switch
overtaking ON (the light will flash); push to set low beam
ON; push to set high beam ON.
2. Turn indicator: pushed left: left turn ON; pushed right:
right turn ON; press the middle switch: back to its initial
position.
3. Horn button: Hold and press it to start warning horn.
Release it to cancel.
4. Smart Button: To set the vehicle on Guard mode without
alarms.
5. Race Mode: Press it to activate the Turbo Mode when
the Indicator on the instrument panel shows its availability.
availability. Press again to exit the mode.
6. Cruise control button: Short press it to turn the cruise
control ON. Press it again / turn the throttle twist grip / brake
lever to set it OFF.
7. Hazard indicator: When the vehicle malfunctions or an
emergency condition occurs, press it to activate the
"Hazard” function.
a. Left-hand switch
09
1. Overtake/Low
beam/High beam 4. Smart Button
2. Turn indicator
5. Race Mode
3. Horn button 6. Cruise control
button
7. Hazard
indicator

8. Steering lock &
seat lock buttons
9. Play & Reverse
buttons
10. Mode shift
switch
11. Volume + & Volume -
buttons
12. READY button
Blueshark R1 lite - Controls
b. Right-hand switch
Vehicle Function & Operations
8. Steering lock & seat lock buttons: Press to engage the
steering lock (only when the vehicle is stopped); When the
vehicle is energized, press , the seat cushion will be
automatically lifted slowly.
9. Play & Reverse buttons: Press to control the music
player when connected to a mobile phone. Press to put
the vehicle into the reverse mode.
10. Mode shift switch: Push right to upshift; push left to
downshift.*
11. Volume + & Volume – buttons: Press to decrease v
olume;
press to increase volume.
12. button: Press it to switch between driving mode
and parking mode. In the driving mode, long press it t
o enter
EPM mode, so you can slightly twist the speed regulat
or and
push the vehicle forward slowly; keep pressing the button
to reverse your vehicle slowly, stop when you release it.
Under the EPM mode, press the Ready button again to
return to the parking mode.
10

1. Overtake/Low
beam/High beam 4. Smart Button
2. Turn indicator
5. Race Mode
3. Horn button 6. Cruise control
button
7. Hazard
indicator
1. Overtaking/low beam/high beam: Push to switch
overtaking ON (the light will flash); push t
o set low beam
ON; push to set high beam ON.
2. Turn indicator: pushed left: left turn ON; pushed right:
right turn ON; press the middle switch: back to its initial
position.
3. Horn button: Hold and press it to start warning horn.
Release it to cancel.
4. Smart button: Activates and toggles the smart menus.
a. When the vehicle is stopped, press it to call out the
system application menu and perform the
corresponding functions.
b. When the vehicle is in riding mode, press it to toggle the
functions of the infotainment and riding status areas.
5. Race Mode: Press it to activate the Turbo Racing
Mode when the Indicator on the instrument panel shows its
availability. Press again to exit the mode.
6. Cruise control button: Short press it to turn the cruise
control ON. Press it again / turn the throttle twist grip / brak
e
lever to set it OFF.
7. Hazard indicator: When the vehicle malfunctions or an
emergency condition occurs, press it to activate the
"Hazard” function.
Blueshark R1 - Controls
Vehicle Function & Operations
a. Left-hand switch
11

Blueshark R1 - Controls
b. Right-hand switch
Vehicle Function & Operations
8. OK & Back buttons: is used to confirm the operation(s)
on the instrument panel; is used to return to the
previous operation.
9. Play & Reverse buttons: Press to control the music
player when connected to a mobile phone. Press to put
the vehicle into the reverse mode.
10. Mode shift switch: Push right to upshift; push left to
downshift.*
11. Volume + / – & Toggle buttons : Press and to decr
ease
and increase volume, or to toggle the cursor left (down) /
right (up) in the operations of the instrument panel.
12. button: Press it to switch between driving mode
and parking mode. In the driving mode, long press it t
o enter
EPM mode, so you can slightly twist the speed regulat
or and
push the vehicle forward slowly; keep pressing the butt
on
to reverse your vehicle slowly, stop when you release it.
Under the EPM mode, press the Ready button again to
return to the parking mode.
12
8. OK & Back
buttons
9. Play & Reverse
buttons
10. Mode shift
switch
11. Volume + / - & Toggle buttons 12. READY button

On Using Battery
Charging Methods
There are two fast charging methods available for the Blueshark R Series smart
electric vehicles:
(1) Charging Cradle (see ”Charging Cradle Diagram" on the right)
• Please place the docking charger on a flat surface. Before charging, please
make sure that the ambient temperature is not extremely high or low and the
charging environment is not humid.
• Connect one end of the special direct battery charger to the power supply, and
the other end to the charging base. Dock the battery on the base correctly to
start charging. To charge two batteries simultaneously, please connect the
included splitter to the charger and the two charging bases respectively.
• The charging base needs to be used together with a direct charging charger.
(2) Direct charge
• It can be charged directly within the vehicle. Plug the power supply into the
charging port to start charging. Observe the instrument panel to check
whether the battery is fully charged.
Charging Environment
•Charging ambient temperature: 0 ~ 40 .
• Please make sure to charge the vehicle or the batteries in an environment with
good ventilation.
• Please keep the charger away from any source of heat.
Charging Cradle Diagram
Note: when the batteries have not been used for a long time so it cannot be charged, please place them on the charging cradle and reconnect
the charger.
13

Working environment
•The battery needs to work at an ambient temperature of -10~45 .
• Do not expose the battery to rain or water.
• Protect foreign metal objects from falling into the battery compartment.
• Never place the battery near naked flames, flammable or explosive gases.
Battery capacity degradation
Under low temperature conditions, the available battery capacity may vary by different temperatures. The reference value is:
•-10 : about 70% capacity
•0 : about 85% capacity
•25 : about 100% capacity
Safety precautions
If the battery has been subjected to abnormal conditions, such as heating, deforming or producing strange smell, please stop using it
immediately and stay away from it. Contact the after-sales service center for service and do not dismantle the battery by yourself.
Dismantling the battery without authorization may lead to fire, explosion and other hazard. Failure to follow this warning will automatically
invalidate your warranty rights.
Connecting two charging cradles with the splitter
On Using Battery
14

Do not insert objects at the battery contacts.
Inserting objects at the contact points may lead to poor contact
and make it operate improperly. Metal objects such as needle
tips may cause a short circuit and even an electric shock.
Do not expose or throw the battery in water.
The soaked battery may cause a short circuit and electric
shock.
In addition, after the battery is put into the water, its function will
be lost and cannot be used.
Do not throw the battery into the fire.
Never throw the battery into the fire or it will get damaged or
even explode.
Please strictly follow the official recycling procedure to dispose
of batteries that are no longer used.
Do not use in case of abnormal noise or deformation.
Continued use of the battery may lead to safety accidents such
as overheat, rupture or burns. Please contact the authorized
store or after-sales service outlet directly.
Do not use a damaged battery.
Failure to heed this warning may lead to battery malfunction.
Please have it tested at an authorized store or after-sales
service outlet.
Warning Warning
Safety Precautions
On Using Battery
15
Warning: Please remove the battery from the motorcycle during
long-term storage (more than seven days).
Do not drop or impact the battery
Please be careful not to drop or impact the battery, especially
avoid hitting a sharp corners. If the battery is damaged, there
may be internal circuit damage, which is prone to short circuit
or other safety accidents.
Do not use the battery on other electrical products
This battery can only be used together with Blueshark R smart
electric motorcycle, Blueshark charger and charging cradle. Do
not use it for other electrical products. In case of violation,
battery failure, damage or other safety accidents may be
caused, and all consequences arising therefrom shall be borne
by the user.
Short-term Storage
Please keep the motorcycle in a flat, stable, well-ventilated and
dry place. Charge the battery to 50% before storage to prolong
battery life.
Long-term Storage
Before storage, charge the battery to 50%, keep the temperature
of 0℃-20 ℃and the humidity of 30% - 70%.
Carry out a charge and discharge cycle at least every 2 months.
After long-term storage, charge the battery to 100% first.
Check all parts carefully before riding to make sure there are no
problems.
If there are any problems, take the motorcycle to the dealer for
maintenance or repair.

Riding Procedures
Before riding, please check the following items to ensure that the vehicle is in
normal condition.
1. Check whether the vehicle can be energized normally, and whether the lighting and other conditions are normal.
2. Check whether the front and rear brakes can work normally.
3. Check whether the tire pressure is normal.
4. Check whether the handlebar and front and rear wheels are fixed, and whether the steering lock is disengaged.
5. Ensure that the battery is fully charged.
6. Check whether there are other fault prompts.
During riding, please pay attention to the following:
1. Always keep the side stand fully up in a horizontal position.
2. Avoid operations that may lead to set the Guard mode on.
After parking, please follow the instructions below to ensure safe parking.
1. Check whether the POWER is off and the READY button is off.
2. Check whether the side stand/center stand is steadily parked.
3. Check whether the Guard mode is activated successful and whether the steering is locked.
16

Unlock vehicle
The vehicle can be unlocked in any of the following three ways:
1. Remote control: (1) Press the "UNLOCK” button on the remote control; (2) Hold it close to the vehicle, tap the "POWER” button at the bottom
of the instrument panel.
2. Mobile phone: Open the mobile phone app and tap "One-Key Unlock”.
3. Fingerprint (Blueshark R1 only): In this case, the rider may have no key or mobile phone with you when riding. After the rider's fingerprint is
recorded, touch the finger on the fingerprint reader under the instrument panel to unlock the vehicle.
Moving off
1. Wear a helmet and other proper protective riding gear that complies with safety regulations.
2. Keep the side stand or center stand fully up (in a horizontal position) and sit on the vehicle.
3. Press the "READY" button on the right-hand switch and the READY indicator will light up, and now the vehicle is ready to move.
Parking
1. After arriving at the destination, press the "READY" button to disable it.
2. Stop the vehicle, then put it on the side stand or center stand.
Lock vehicle
Follow any of the following three ways to lock the vehicle:
1. Remote control: Press the LOCK button on the remote control;
2. Mobile phone: Launch the mobile app and tap "One-key Lock”;
3. Vehicle body: Short press the "LOCK” button or button on the vehicle handlebar;
4. Long press the power switch under the instrument panel screen.
Riding Procedures
17
This manual suits for next models
2
Table of contents
