BMT Pi Quadro Operating and maintenance manual
Manuale d’istruzioni
SCHEDA PRODOTTO
INSTRUCTIONAL MANUAL
product data
Pi Quadro

3
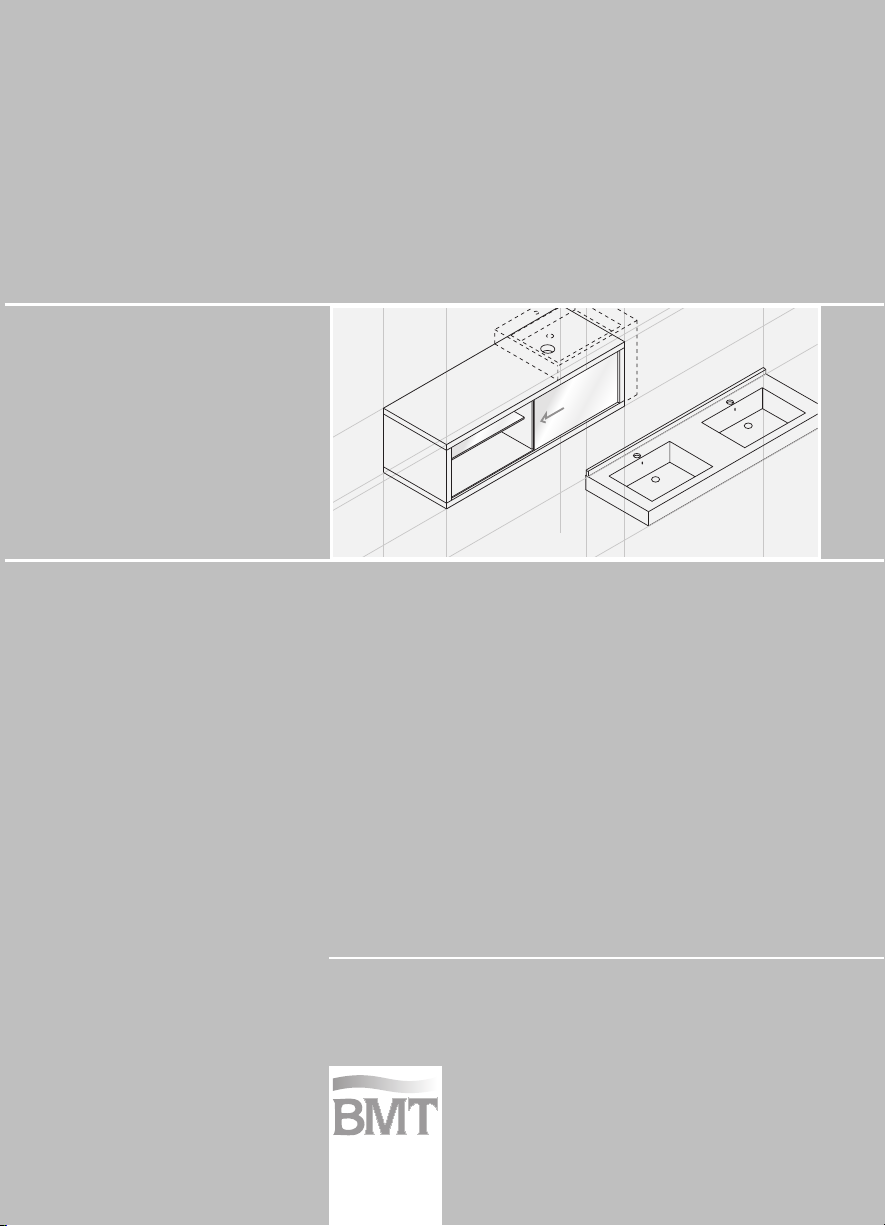
SCHEMA ALTEZZA ATTACCHI IDRICI
LAY-OUT TO HANG THE FURNITURE ON THE WALL
50
55
85
A
B
60
42
10
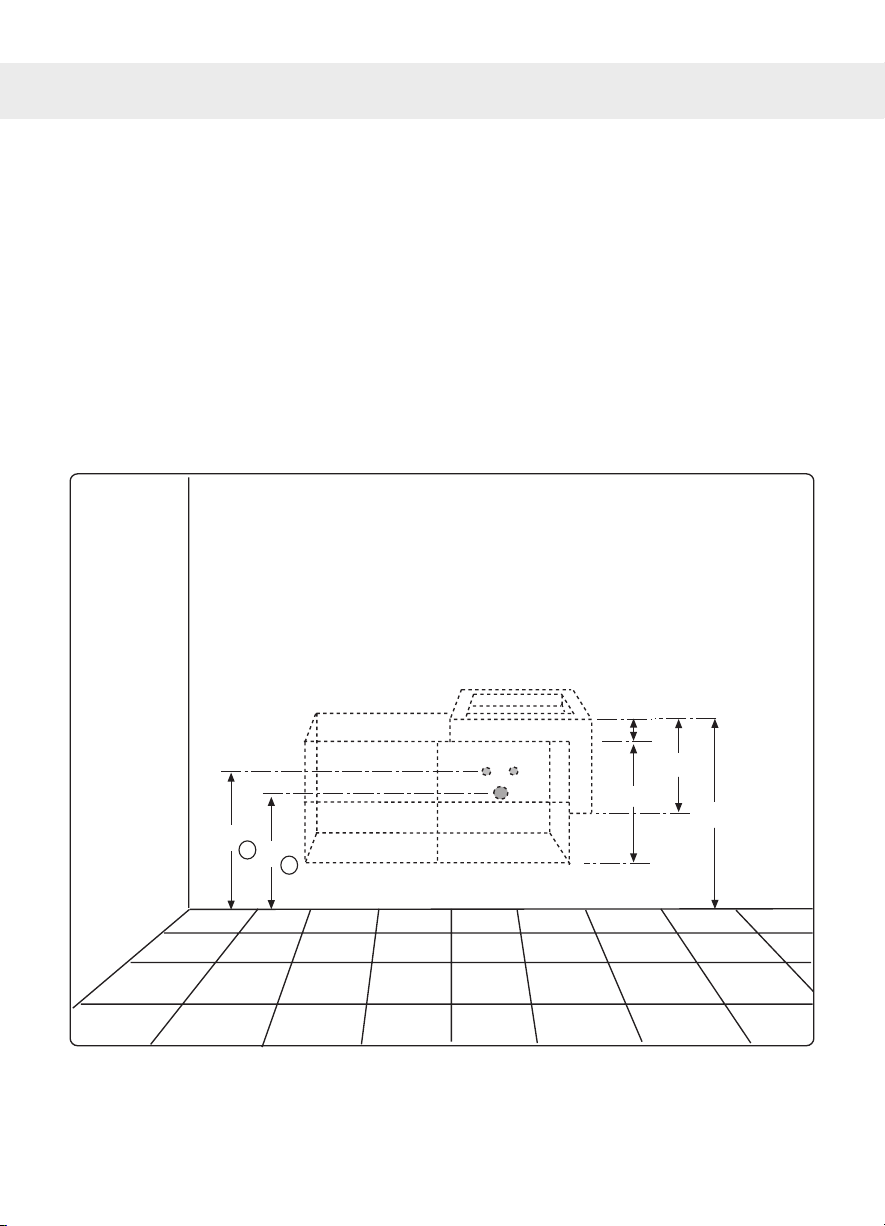
- Si consiglia il fissaggio del mobile a 82/85 cm. da terra.
- Controllare attentamente che la posizione del carico
(B) / scarico (A) dell’acqua siano alle altezze stabilite
nello schema sottostante.
It is recommended to fix the furniture at 82/85cm from the ground
- It is necessary to carefully check out that the water flow pipes
position (B) and the drainage one (A) are at the height specified
by the following lay-out.

1
SCHEMA ALTEZZA ATTACCHI IDRICI
LAY-OUT TO HANG THE FURNITURE ON THE WALL
INDICE
INDEX
INFORMAZIONI GENERALI 2
GENERAL INFORMATION
SCHEMA ALTEZZA ATTACCHI IDRICI 3
LAY-OUT TO HANG THE FURNITURE ON THE WALL
PREPARAZIONE TOP IN MARM0/CRISTALLO 4
PREPARATION OF MARBLE/GLASS TOP
LISTA FERRAMENTA 5
IRONMONGERY LIST
ISTRUZIONI PER IL MONTAGGIO DEL PORTALAVABO E DELLA BASE 6
FITTING INSTRUCTIONS OF A BASE AND A SINK HOLDER
ISTRUZ. PER IL MONTAGGIO DEL LAVABO IN APPOGGIO SU TOP MARMO/CRISTALLO 7
FITTING INSTRUCTIONS OF A SINK SUPPORTED IN A MARBLE/GLASS WORKTOP
ISTRUZIONI PER IL MONTAGGIO DELLA BASE CON LAVABO AD INCASSO 8
FITTING INSTRUCTIONS OF A BASE WITH A FULLY-FIXED SINK
ISTRUZIONI PER IL MONTAGGIO DELLA TAVOLA CON LAVABO IN APPOGGIO 9
FITTING INSTRUCTIONS OF THE PLANK WITH A FREE STANDING BASIN
ISTRUZIONI DI MONTAGGIO DELLA TAVOLA BASSA 11
FITTING INSTRUCTIONS OF THE DOWN PLANK
ISTRUZIONI PER IL MONTAGGIO DEL LAVABO TECNORIL 12
FITTING INSTRUCTIONS OF THE TECNORIL'S BASIN
ISTRUZIONI PER IL MONTAGGIO DELLA SPECCHIERA CON NEON INTEGRATO 14
FITTING INSTRUCTIONS OF THE MIRROR WITH AN INTEGRATED NEON
ISTRUZIONI PER IL MONTAGGIO DELLA SPECCHIERA SENZA TOP 16
FITTING INSTRUCTIONS OF THE MIRROR WITHOUT TOP
ISTRUZIONI PER IL MONTAGGIO DELLA SPECCHIERA TRITTICO 17
FITTING INSTRUCTIONS OF THE TRYPTIQUE MIRROR
ISTRUZIONI PER IL MONTAGGIO DELLA COLONNA / PENSILE 18
FITTING INSTRUCTIONS OF THE COLUMN/ WALL CABINET
RIMOZIONE E REINSERIMENTO DEL FRONTALE DI UN CASSETTO 19
REMOVAL AND FITTING OF THE DRAWER FRONT PART
REGOLAZIONE DI UN CASSETTO IN VERTICALE 19
ADJIUSTING OF A DRAWER ON A LEVER'S VERTICAL POSITION
RIMOZIONE E REINSERIMENTO DI UN CASSETTO 20
REMOVAL AND FITTING OF A DRAWER
REGOLAZIONI CERNIERE 21
HINGE REGULATION
SCHEDA PRODOTTO 22
PRODUCT INFORMATION SHEET
SCHEDA PRODOTTO GENERICA 23
GENERAL PRODUCT INFORMATION SHEET

2
INFORMAZIONI GENERALI
GENERAL INFORMATION
Questo manuale in dotazione in ogni mobile, contiene le istruzioni di montaggio e manutenzione.
Pertanto si consiglia di consultarlo nel tempo.
Per far si che il mobile venga installato correttamente e di conseguenza venga ben conservato nel tempo è necessario
seguire attentamente i suggerimenti che vi proponiamo per il montaggio.
Si raccomanda di leggere attentamente queste avvertenze prima dell’installazione.
- E’ bene che l’installazione del mobile e i collegamenti idraulici e elettrici, venga eseguita solo da personale esperto
e abilitato;
- Prima di installare o sostituire parti elettriche assicurarsi che la tensione di rete sia stata interrotta;
- I materiali utilizzati pur avendo caratteristiche che sopportano bene l’umidità e si adattano bene ad un ambiente da
bagno, possono creare problemi con un’eccessiva permanenza a contatto con l’acqua.
- Tutte le parti laccate e soprattutto le essenze, se esposte per un determinato periodo a fonti luminose, possono
variare, anche se uniformemente, di intensità e tinta;
- L’eventuale manomissione o una scorretta installazione, declina la BMT da ogni eventuale responsabilità.
The correct installation of furniture will ensure that it remains in good condition over the years. To this end it is necessary
to follow with care the suggestions given for assembly.
These instructions will be enclosed with the metal parts of each piece of furniture and will accompany it until installation
has been completed. This will allow the installer to assemble all parts correctly.
Please read through these points carefully before installation:
- It is advisable to call in qualified and expert workers to assemble the furniture and carry out necessary plumbing
and electrical connections;
- before installing or replacing electrical parts make sure that the electric power has been switched off;
- although the component materials with stand damp are suitable for use in the bathroom, they could cause problems
with a direct contact of water for an excessively long period;
- All lacquered parts and particularly those treated with essential oils, may uniformely vary the tone and shade of
colour, if exposed to a source of light for some time;
- BMT declines all responsibility for the consequences of misure or incorrect installation.
PULIZIA E TRATTAMENTO
Per la pulizia dei mobili è rigorosamente vietato l’uso di diluenti, acetoni e solventi in genere. Si consigliano detergenti neutri
e non abrasivi.
Per la pulizia dei top usare detergenti neutri, assicurandosi che non siano acidi e che non vadano quindi ad intaccare,
aggredendo e corrodendo, la superficie calcarea del marmo. Non usare prodotti deceranti e alcalini che andrebbero ad
eliminare il protettivo, applicato al marmo, al momento della lucidatura.
CLEANING AND TREATMENT
To clean the furniture it is absolutely forbidden to use thinners, acetone or solvents in general. Take care to use only neutral
detergents which are non-abrasive.
To clean the tops, check that detergents are really neutral and not in any way acid, because this would attack and damage
the calcareous surface of the marble. Do not use alkalines or wax removers since these would eliminate the protective
surface applied to the marble after polishing.
N.B.
I fischer in dotazione nelle varie buste ferramenta sono adatti esclusivamente ad un muro in forati.
N.B.
The fischer screws contained in the different ironmongery envelopes are exclusively brick made walls.
BMT declina ogni responsabilità da un uso diverso del prodotto da quello per cui è destinato.
BMT declines every responsibility of a different use of the product from the one to which it
has been designed.
3
SCHEMA ALTEZZA ATTACCHI IDRICI
LAY-OUT TO HANG THE FURNITURE ON THE WALL
50
55
85
A
B
60
42
10
- Si consiglia il fissaggio del mobile a 82/85 cm. da terra.
- Controllare attentamente che la posizione del carico
(B) / scarico (A) dell’acqua siano alle altezze stabilite
nello schema sottostante.
It is recommended to fix the furniture at 82/85cm from the ground
- It is necessary to carefully check out that the water flow pipes
position (B) and the drainage one (A) are at the height specified
by the following lay-out.
Table of contents
Other BMT Indoor Furnishing manuals

Popular Indoor Furnishing manuals by other brands

Regency
Regency LWMS3015 Assembly instructions

Furniture of America
Furniture of America CM7751C Assembly instructions

Safavieh Furniture
Safavieh Furniture Estella CNS5731 manual

PLACES OF STYLE
PLACES OF STYLE Ovalfuss Assembly instruction

Trasman
Trasman 1138 Bo1 Assembly manual

Costway
Costway JV10856 manual


