BN Products BNCE-20-24V SN Administrator Guide

~ Page | 1 ~
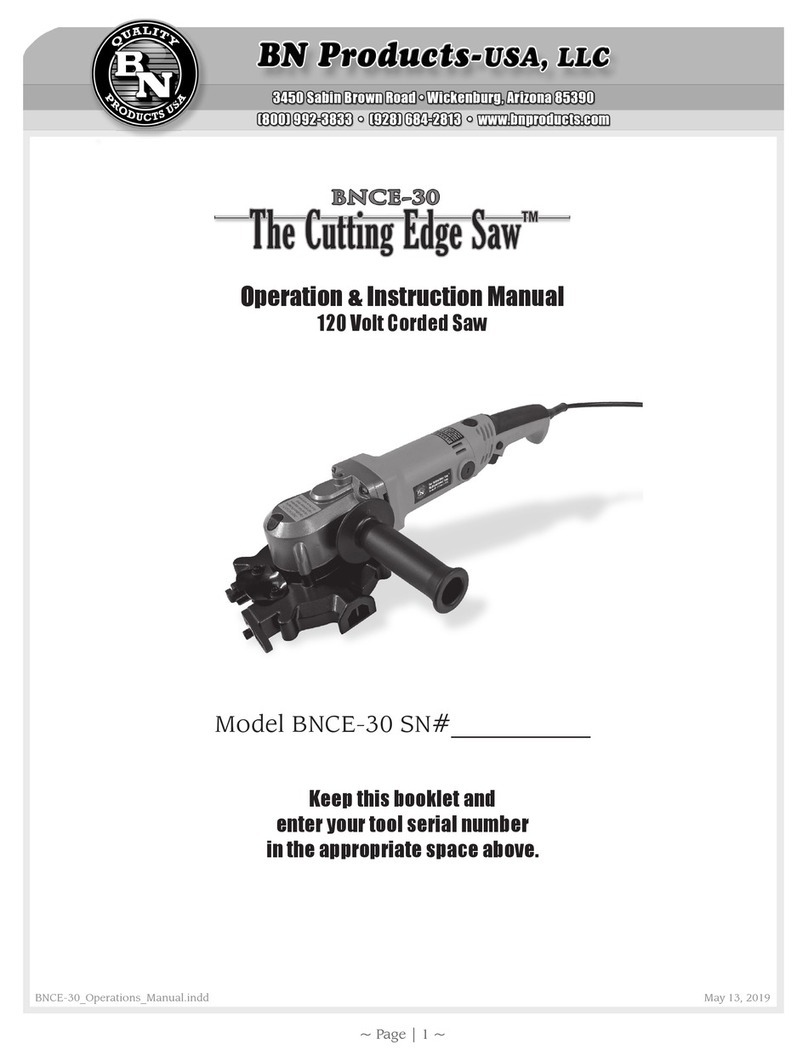
Operation & Instruction Manual
Model BNCE-20-24V SN#___________
Cordless Saw
Keep this booklet and enter your tool serial number
in the appropriate space above.
BNCE-20-24V_Operations_Manual_2017.indd

~ Page | 2 ~
Contents
3 General Safety Rules
3 Work Area Safety
3 Electrical Safety
3 Personal Safety
3 Power Tool Use and Care
4 Service
4 Cutting Edge Saw™ Package
4 Functions and Applications
4 Specication
5 Standard Blade
5 Operation
5 Operation Instructions
5 Check The State of Your Work Site.
5 Remove Hazardous Substances.
6 RB-BNCE-KNH Blade
6 General Operating Cautions
6 Battery and Charger Usage
7 Charging
7 Charger Light
9 Exploded View
10 Parts List
Instruction Manual
Please read this manual before operating this tool.
Purpose of this manual - This manual is intended to provide users with cor-
rect knowledge and the procedures for operation, maintenance and inspec-
tionofthetool,amultipurposeushcuttingsawforcuttingreinforcingbar,
coil rod, all-threaded rod, pipe, tubing, and conduit. Improper use of the tool
may possibly lead to a serious accident. Therefore, always read this instruc-
tion manual before using the tool to familiarize yourself with its correct us-
age, operating method, and warnings.

~ Page | 3 ~
General Safety Rules
Warning! Read and understand all
instructions. Failure to follow all
instructions listed below may result
inelectricshock,reand/orserious
personal injury.
PLEASE SAVE THESE INSTRUCTIONS!
Work Area Safety
• Keep work area clean and well lit. Cluttered or
dark areas invite accidents.
• Do not operate power tools in explosive atmo-
spheres,suchasinthepresenceofammable
liquids, gases or dust. Power tools create
sparks which may ignite the dust or fumes.
• Keep children and bystanders away while
operating a power tool. Distractions can cause
you to lose control.
Electrical Safety
• Do not expose power tools to rain or wet condi-
tions. Water entering a power tool will increase
the risk of damage.
Personal Safety
• Always wear eye protection. Care must be tak-
en to prevent chips from hitting other workers
in the same area.
• Stay alert, watch what you are doing and use
common sense when operating a power tool.
Do not use a power tool while you are tired or
undertheinuenceofdrugs,alcoholormedi-
cation. A moment of inattention while operat-
ing power tools may result in serious personal
injury.
• Use personal protective equipment. Always
wear eye protection.Protective equipment
such as dust mask, non-skid safety shoes, hard
hat, or hearing protection used for appropriate
conditions will reduce personal injuries.
• Prevent unintentional starting. Ensure the
switchisintheo-positionbeforeconnecting
topowersourceand/orbatterypack,picking
up or carrying the tool. Carrying power tools
with your nger on the switch or energizing
power tools that have the switch on invites ac-
cidents.
• Remove any adjusting key or wrench before
turning the power tool on. A wrench or a key
left attached to a rotating part of the power
tool may result in personal injury.
• Do not overreach. Keep proper footing and
balance at all times. This enables better con-
trol of the power tool in unexpected situations.
• Dress properly. Do not wear loose clothing or
jewelry. Keep your hair, clothing and gloves
away from moving parts. Loose clothes, jew-
elry or long hair can be caught in moving parts.
• If devices are provided for the connection of
dust extraction and collection facilities, ensure
these are connected and properly used. Use of
dust collection can reduce dust-related haz-
ards.
Power Tool Use and Care
• Do not force the power tool. Use the correct
power tool for your application. The correct
power tool will do the job better and safer at
the rate for which it was designed.
• Do not use the power tool if the switch does not
turnitonando.Anypowertoolthatcannot
be controlled with the switch is dangerous and
must be repaired.
• Disconnect the plug from the power source
and/or the battery pack from the power tool
before making any adjustments, changing ac-
cessories, or storing power tools. Such preven-
tive safety measures reduce the risk of starting
the power tool accidentally.
• Store idle power tools out of the reach of chil-
dren and do not allow persons unfamiliar with
the power tool or these instructions to operate
the power tool.

~ Page | 4 ~
• Power tools are dangerous in the hands
of untrained users.
• Maintain power tools. Check for misalign-
ment or binding of moving parts, breakage of
partsandanyotherconditionthatmayaect
the power tool’s operation. If damaged, have
the power tool repaired before use. Many ac-
cidents are caused by poorly maintained power
tools.
• Keep cutting tools sharp and clean. Properly
maintained cutting tools with sharp cutting
edges are less likely to bind and are easier to
control.
• Use the power tool, accessories and tool bits
etc. in accordance with these instructions, tak-
ing into account the working conditions and
the work to be performed. Use of the power
tool for operations dierent from those in-
tended could result in a hazardous situation.
Service
• Have your power tool serviced only by a
qualied repair person using only identi-
cal replacement parts. This will ensure that
the safety of the power tool is maintained.
Cutting Edge Saw™ Package
Upon purchasing the Cutting Edge Saw, open the
carrying case and check the contents for the fol-
lowing:
1. BNCE-20-24V Cutting Edge Saw with
blade
mounted : 1 unit
2. Removable Side Handle and chip collector
attachment: 1 unit
3. Allen Wrenches for Blade Removal and
Installation: 1 unit
4. Additional Saw Blade: 1 unit
5. Additional Battery
6. Operation Manual: 1 copy
If anything is missing or damaged please do not
return this packaged unit to the distributor, please
call the Benner-Nawman customer service depart-
ment: 800-992-3833 or 928-684-2813
Functions and Applications
This section describes the functions, applications,
service environment and other aspects of the Cut-
ting Edge Saw. The Cutting Edge Saw is a power
tooldevelopedforfastandecientcuttingofvari-
ous ferrous and non-ferrous materials. This multi-
purpose tool can be used by a variety of contractors
howevertheprimarydesignwasforushcutting
or free cutting reinforcing bars, coil rod and all-
threaded rod used in the construction industry.
Application of the Tool - Actual areas of applica-
tion the Cutting Edge Saw is used for are as fol-
lows:
3/8” to 3/4“or 10 mm to 19 mm grade 60 rebar
(reinforcingbars),upto½”I.Dpipe,¾”O.D.cop-
perwaterpipe,¾”O.D.tubing,1/2”conduit,¾”
squaresteeltubing&bar,andupto7/8”O.D.all-
threaded or coil rod.
Rules of Use and Storage - To use the tool to its
fullest performance, the user is required to be fully
familiar with the saw itself, the cutting blades, and
storage procedures upon completion of work.
Specication
The power tool is a multipurpose saw with an
enclosedguardandushcuttingcapabilities.The
specicationsofthemainunitareasfollows.

~ Page | 5 ~
Standard Blade:
(Best for Ferrous Metals)
Supplied with (2) each 110 mm Blade diameter ×
1.6mm thickness, 24 teeth. The maximum blade
RPM is 2000. The blade replacement number is:
RB-BNCE-NH
Operation
Checking and Preparation of Working Environ-
ment:
Check the following before using the Cutting Edge
Saw. Always observe the instructions and prohib-
ited items.
Checking of weather conditions, do not use in the
rain or snow:
!DANGER: The Cutting Edge is
not a waterproof power tool. If it
becomes wet, the power source sys-
tem may become faulty or the op-
erator may get an electric shock.
Therefore, when it is raining or
snowing, never operate this saw outdoors, on top
of buildings or under roofs where rain or snow en-
ters freely. Do not use where water accumulates or
where water splashes.
Operation Instructions
Locate the front handle in the mounting hole
that provides the best grip. To operate the trig-
ger, depress the trigger to start the saw. Start the
saw before cutting and then apply a light pressure
moving forward through the cut.
! DANGER: Electric Shock Haz-
ard. Ignoring this warning may lead
to death or serious injury. When
raining or snowing, do not operate
outdoors or indoors where rain or
snow enters freely or in extreme temperatures.
Do not use under high temperature and humidity or
extremely cold temperature conditions. The tool is
designed for use under an allowable environmental
temperature of 0 to 120°F.Operation at higher tem-
perature may cause the tool’s main unit to overheat.
Operation at high temperature with high humidity
may cause the tool to fail due to condensation.
Also, do not operate the Cutting Edge Saw™ in very
cold places or inside refrigerators where the tempera-
ture is freezing or below.
Check The State of Your Work Site.
Before using the tool, check whether the state of the
work site is as follows. Is the worksite free of foreign
objects, debris, water, ice, snow, powered electri-
calcables,andexcessivedust?Istheoorfreeof
obstructions? Is their adequate ventilation? Is the
worker properly insulated from the ground. Fol-
low the operation instructions and avoid prohibited
items.
Remove Hazardous Substances.
Since the tool is an battery operated, it may spark
andcauseanexplosionorareifoperatedneargas
cylinders, thinner, or explosive and other hazardous
substancesorinaplacelledwithammablegas,etc.
Therefore, do not use the tool in places where such
hazardous substances are present. Ignoring this warn-
ing may cause death or serious injury. Never use the
toolinplaceslledwithammablegasornearhazard-
oussubstancesofhighammability.
Maintenance of the Main Unit
Clean the entire unit occasionally by removing dust,
debrisandoils.Occasionallyremovetheushcutting
bottom plate; then remove any cutting chips that re-
main lodged in the area the cutting blade rotated.
It is also recommended that the cutting blade be re-
moved and inspect for any materials that did not exit
out the chip exhaust area. This should be done af-

~ Page | 6 ~
ter 4-8 hours of use. Most material cutting chips
would normally exit out the chip exhaust area and
into the Cutting Chip Catch Bag. It is recommend-
ed that the Cutting Chip Catch bag be emptied
whenitbecomes2/3fullofcutmaterial.
RB-BNCE-KNH Blade
The Blade for the BNCE-20-24V Cutting Edge
Saw™ should be replaced when the blade is dull
or chipped and a noticeable increase in cutting
time has occurred.
To change the Blade, remove the screws that hold
the Blade Cover to the Body. Remove the cover
and unscrew the four bolts holding the blade to
the Hub. The replacement blades that you pur-
chase have new screws to be used when installing
the new blade. Make sure that when you remove
the blade you clean out any metal debris that has
not escaped the tool.
An optional Steel Mesh Blade is available to im-
prove the cutting capability of the BNCE-20-24V
when cutting mesh materials. Please see your
distributor or call BN Products-USA, LLC (www.
bnproducts.com) for more information.
General Operating Cautions
The following describe the general cautions on op-
erating tool. Always observe the cautions stated in
each item.
• Do not press the operation switch if the tool
is pointed towards anyone. Operating the tool
by holding it toward anyone may cause injury
from contact with the blade.
• Do not apply the Cutting Edge Saw for purpos-
es it is not intended.
• Do not use the tool for lifting or hammering
etc. instead, only use this tool for cutting. Oth-
erwise, the main unit may be broken or dam-
aged, causing injury.
•
Battery and Charger Usage
Charger for BNCE-24VLI Battery
Model BNCE-24VCHGR
Input A.C. 120 V 50-60 Hz
Output D.C. 14.4V - 21.6V
Weight 1 lbs. (.45 kgs)
Manufacturerreservestherighttochangespecicationswith-
out notice.
IMPORTANT SAFETY INSTRUCTIONS
SAVE THESE INSTRUCTIONS — This manual con-
tains important safety and operating instructions for
battery charger. Before using battery charger, read all
instructions and cautionary markings on (1) battery
charger, (2) battery, and (3) product using battery.
CAUTION — To reduce risk of
injury, charge only BN Products-
USA rechargeable batteries
marked on the charger label. Other
types of batteries may burst caus-
ing personal injury and damage.
• Non-rechargeable batteries cannot be charged
with this battery charger.
• Useapowersourcewiththevoltagespeciedon
the nameplate of the charger.
• Do not charge the battery cartridge in presence of
ammableliquidsorgases.
• Do not expose charger to rain or snow.
• Never carry charger by cord or yank it to discon-
nect from receptacle.
• After charging or before attempting any mainte-
nance or cleaning, unplug the charger from the
power source. Pull by plug rather than cord when-
ever disconnecting charger.
• Make sure cord is located so that it will not be
stepped on, tripped over, or otherwise subjected
to damage or stress.

~ Page | 7 ~
• Do not operate charger with damaged cord or
plug. If the cord or plug is damaged, ask BN
Products-USA authorized service center to
replace it in order to avoid a hazard.
• Do not operate or disassemble charger if it has
received a sharp blow, been dropped, or oth-
erwise damaged in any way; take it to a quali-
edserviceman.Incorrectuseorreassembly
mayresultinariskofelectricshockorre.
• The battery charger is not intended for use by
young children without supervision.
• Young children should be supervised to
ensure that they do not play with the battery
charger.
• Do not charge battery cartridge when room
temperature is BELOW 10°C (50°F) or
ABOVE 40°C (104°F). When the battery tem-
perature is under 0°C (32°F), charging may
not start.
• Do not attempt to use a step-up transformer,
an engine generator or DC power receptacle.
• Do not allow anything to cover or clog the
charger vents.
Charging
• Plug the battery charger into the proper AC
voltage source. Charging light will start blink-
ing green.
• Insert the battery cartridge into charger.
• When the battery cartridge is inserted, the red
charging light will light up and charging will
begin.
• When the battery is charged, the charging
light will change from red to green.
• After charging, remove the battery cartridge
from charger and unplug the charger.
NOTE: The battery charger is for
charging BN Products-USA-bat-
tery cartridge. Never use it for
other purposes or for other
manufacturer’s batteries.
Ifcharginglightashesred/green,batterycondition
is as below and charging may not start.
• Battery cartridge from just-operated tool or
battery cartridge that has been left in a location
exposed to direct sunlight for a long time.
• Battery cartridge that has been left for a long time
in a location exposed to cold air.
When the battery cartridge is too hot, charging will
begin after the cooling fan installed in the charger
cools the battery cartridge. Charging will begin after
the battery cartridge temperature reaches the degree
at which charging is possible. When the temperature
on battery is more than approx. 70°C, two charging
lightsmayashinredcolor,andwhenapprox.50°C
– 70°C, one charging light in red color.
Ifthecharginglightashesalternatelyingreenand
red color, charging is not possible. The terminals on
the charger or battery cartridge are clogged with dust
or the battery cartridge is worn out or damaged.
Charger Light
• Blinking Green Light waiting to charge.
• Solid Red Light as the battery charges
• Solid Green Light the battery is fully charged.
• Red Green Light damage or overheat signal

~ Page | 8 ~
Product Parts
and
Assembly

~ Page | 9 ~
Exploded View

~ Page | 10 ~
Parts List
Parts List for BNCE-20-24V
No. Description Qty
1 Hexagon Socket Countersunk
Head Bolt M5x14 (class 12.9)
4
2 Blade Cover 1
3 Hexagon Socket Countersunk
Head Bolt M5x8 (class 12.9)
4
4 Blade-New Style 1
5 Hub-New Style 1
6 Cutting Blade Spindle-New
Style
1
7 Hexagon Socket Head Cap
Head Screw M5x30
4
8 Spring Lock Washer-5mm 5
9 Plain Washer-5mm 4
10 Hexagon Socket Head Cap
Head Screw M5x16
1
11 Big Plain Washer-5mm 1
12 Movable Cutting Guide Bolck 1
13 Fixed Cutting Guide Block 1
14 Left and Right Rubber Plate 1
15 Big Plain Washer-4mm 2
16 Spring Lock Washer-4mm 2
17 Hexagon Socket Head Cap
Head Screw M4x16
2
18 Flat Key-5x5x14 1
19 Gasket Seal 1
20 Ball Bearing-6002-2RS 1
21 Spacer 1
22 Big Gear 1
23 Shaft Clip-15 1
24 Ball Bearing-608-2Z 2
Parts List for BNCE-20-24V
No. Description Qty
25 Alunmium Housing 1
26 Ball Bearing-628-2Z 1
27 Gear Shaf 1
28 Big Bevel Gear 1
29 Pin-A5x16 1
30 Alunmium Gear Box Housing 1
31 Steel Ring-5mm 1
32 Spring for Lock Button 1
33 Locking Button 1
34 Six Flower Shaped Pan Head
Tapping ScrewsT15
4
35 Nut 1
36 Bevel Pinion 1
37 Ball Bearing-608-2RS 1
38 Diaphragm 1
39 Rotor 1
40 Ball Bearing-696-2RS 1
41 Stator 1
42 Switch Assembly 1
43 Side Handle 1
44 Switch Button 1
45 Pole Switch 1
46 Right Housing 1
47 Dust Protection-Right 1
48 Six Flower Shaped Pan Head
Tapping ScrewsT10
6
49 Left Housing 1
50 Dust Protection-Left 1
51 Battery 2
52 Charger 1

~ Page | 11 ~
Safe - Minimal sparks or burrs
Versatile - Flush cutting capability up to
7/8”“diametersteelrod
Economical - Up to 150 cuts on #5 - 60
grade rebar
Durable - One-year warranty
includes a carrying case, extra 24V Battery,
Charger and two cutting blades
BNCE-20-24V_Operations_Manual_2017.indd • January 9, 2018
Chip Exhust Port (shown without
attachable Cutting Chip Catch Bag)
Safety Trigger Switch
Removable Side Handle
(Three Positions)
Flush Cutting Bottom Plate
Cutting Slot Opening
And Blade
Adjustable Slot
For Cutting
Blade Spindle Locking Button
Lithium-Ion 24V Batteries
With Charger
Special Tungston
Carbide Tipped Cutting Blades
Model No. BNCE-20-24V Cutting Edge Saw™
Power Supply 24V Lithium-Ion Battery (2 Supplied)
No-Load Blade Speed 2,000 RPM
Max Cutting Capacity 3/4”(20mm)
Cutting Blade RB-BNCE-NH (TCT Type Blade)
Proprietary (Two Supplied)
Blade Diameter 110mm(4.38”)
Other manuals for BNCE-20-24V SN
2
Table of contents
Other BN Products Cordless Saw manuals

