manuals.online logo
Brands
  1. Home
  2. •
  3. Brands
  4. •
  5. BOERPLAY
  6. •
  7. Play Set & Playground Equipment
  8. •
  9. BOERPLAY Hill Slide 1m H0.51-0.85 User manual

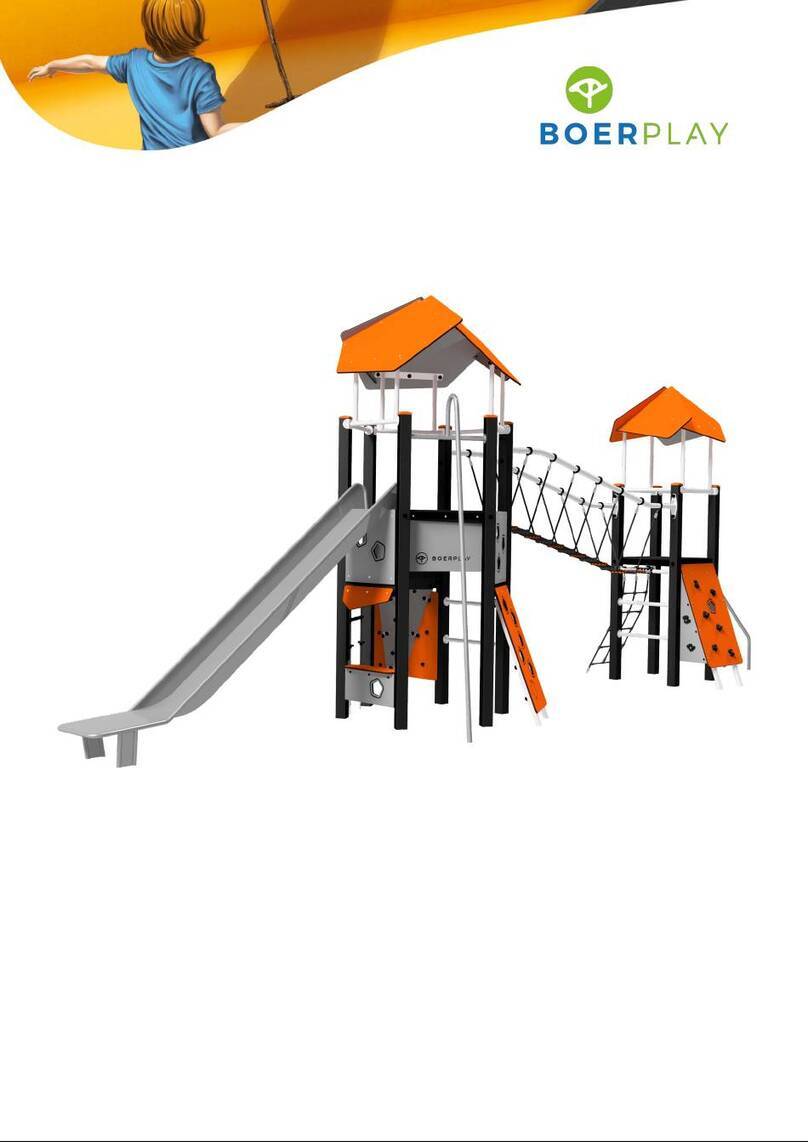
BOERPLAY Hill Slide 1m H0.51-0.85 User manual

Hill Slide 1m H0.51-0.85
SOLE030.341
Powered by TCPDF (www.tcpdf.org) 1 / 1
Benaming
Title
Opmerking
Comment
Datum
Date
Tekening
Drawing
TOE SOL 030 341
Taludglijbaan
tbv Talud 61 - 85 cm
1-5-2014
BOER
SPEELTOESTELLEN
Afmetingen
Dimensions
1,53m
0,00 m
0,90 m
1,67 m
2,12 m
<0,35m
2,35 m
0,25 m
Benaming
Title
Opmerking
Comment
Datum
Date
Tekening
Drawing
TOE SOL 030 341
Taludglijbaan
tbv Talud 61 - 85 cm
1-5-2014
BOER
SPEELTOESTELLEN
Obstakelvrije zone
Obstacle free zone
Obstakelvrije zone
Obstacle free zone
Opvangzone
Impact area
5,33m
R1,50m
4,50 m
R1,00m
2,27m
2,95 m
Benaming
Title
Opmerking
Comment
Datum
Date
Tekening
Drawing
TOE SOL 030 341
Taludglijbaan
tbv Talud 61 - 85 cm
1-5-2014
BOER
SPEELTOESTELLEN
Bodemplan
Groundplan
0,61m
0,67m
38°
1,70 m 1,37 m 0,71 m 1,54 m
1,54m
0,71m
0,71m
1,54m
1,25 m
0,25 m
0,25 m
o
0,71 m
Benaming
Title
Opmerking
Comment
Datum
Date
Tekening
Drawing
TOE SOL 030 341
Taludglijbaan
tbv Talud 61 - 85 cm
1-5-2014
BOER
SPEELTOESTELLEN
Modules
Modules
Opmerking
BenamingRev.Bew.
Volgnr
Progr.Type#
Nr
VRIJBUITERDRIE OEKVLOER 009TVRBMOD11
DIAGONAALBUIS
050
TVRB
MOD
1
2
100x100
Paalkap
069
TVRB
MOD13
25 CMStaander V0
121
TVRB
MOD
14
145 CMSTAANDER
150
TVRB
MOD2
5
Breed, TGlijbaan 0,93 m
241
TVRB
MOD16
1
6
4
5
2
3
Typeplaatje
Identification plate
B
Geleverde modules:
Zie tabel
ontageinstructie:
- De hoofdmaten geven de maten van de staanders en vloeren aan
- De detailtekeningen geven specifiek de maten van de verbindingen aan
- De modules met buizen zijn op de tekeningen bemaat op bovenkant kopplaat
- Overige modules zijn bemaat op de bovenkant (klimwanden, paalkappen, etc.)
ontagevolgorde:
1 - Graaf de gaten volgens het bodemplan
2 - Plaats toren met 1,2,3,4,5(2x)
3 - Plaats toren
4 - Plaats 6 en verbind deze aan toren
5 - Controleer of het toestel voldoet aan de afmetingen zoals op blad 'afmetingen'
6 - Dicht de gaten en verdicht het zand
Controles:
1 - Correcte opbouw en alle bevestigingsmiddelen
2 - Controleer de afmetingen van de valbodem t.o.v. het toestel
Supplied modules:
See table
Assembly instruction:
- The main dimensions indicate the dimensions of the posts and floors
- The detailed dimensions show the specific dimensions of the connections
- The modules which contain tubes are dimensioned at the top of the flanges
- Other modules are dimensioned at the top (climbing walls, caps for the posts, etc.)
Assembly sequence:
1 - Dig the holes according to the ground plan
2 - Place tower with 1,2,3,4,5(2x)
3 - Place tower
4 - Place 6 and attach it to tower
5 - Check that the equipment conforms to the dimensions shown on sheet 'dimensions'
6 - Close the holes and compact the sand
Checks:
1 - Correct assembly and all the fasteners
2 - Check the dimensions of the safety area with regard to the play equipment
LOGBOOK
Type indication Vrijbuiter
Article number SOLE030.341
Product Name Hill Slide 1m H0.51-0.85
Maximum fall height 0,4 m
Construction year 2023
Certificate 043578
Inspection body TUV Nederland QA BV
Ekkersrijt 4401
5692 DL Son
Manufacturer name Boer Speeltoestellen
Hyacintstraat 2 - 4255 HX Nieuwendijk
Phone: +31 (0)183 40 23 66
Fax: +31 (0)183 40 35 64
Installer name _______________________________________________________
_______________________________________________________
_______________________________________________________
Playground location _______________________________________________________
Information about the owner of the playground
Name: _______________________________________________________
Address: _______________________________________________________
Zipcode and city: _______________________________________________________
Contact: _______________________________________________________
Phone number: _______________________________________________________
Information about the manager of the playground
Name: _______________________________________________________
Address: _______________________________________________________
Zipcode and city: _______________________________________________________
Contact: _______________________________________________________
Phone number: _______________________________________________________
Powered by TCPDF (www.tcpdf.org)
LOGBOOK
Inspection and maintenance
Date of
inspection
maintenance
Time of
inspection
maintenance
Name
executor of
inspection
Name
executor of
maintenance
Found defects Parts to be
replaced
Accidents
Date
accident
Age of
victim Probable cause of injury Occurred injury Measures taken
after accident
Inspection and maintenance intervals
Nr Inspection Maintenance
months
between
inspections
1
Verify equipment's stability, junctions and
missing parts Inspect bolts, screws and nuts for
absence, jams, corrosion and wear
Add missing parts, secure joints, apply
missing fixing agent and replace
corroded parts
1
2
Check suspension for wear Replace worn parts and/or remove non-
functioning parts
1
3
Inspect rotating parts such as hinges, rolling-
element bearings, etc for wear and acceptability
Replace worn parts and/or remove non-
functioning parts
1
4
Check wood for splinters, unacceptable damage
and signs of rot, especially at ground level
Repair damage Replace affected wood
Smoothen splintered wood and sharp
edges
1
5
Inspect foundation for stability, tearing and
coverage
Restore foundation and covering
material
3
6
Examine rubber and synthetic parts for wear,
damage and breakage Replace for OEM original parts
3
7
Examine fibre reinforced plastic parts, especially
slides, for wear
Replace for OEM parts if the fibres are
visible
6
8
Inspect metal for corrosion and damage in the
coating
Restore any damaged coating (after
removing rust and applying primer)
6
9
Check ropes, cables, chains and nets for wear
and damage Steel cables and nets which are
tensioned must be checked for tension
Replace parts where necessary Steel
cables and nets must be tensioned
3
10
Inspect equipment for unsafe changes and
additions
Remove unsafe additions and correct
unsafe changes
1
11
Inspect safety surfaces Restore and repair where necessary
1
Remarks
1 If used intensively, all points require extra attention
2 Extreme weather conditions and locations may require a higher inspection frequency Discuss this with the
supplier
3 Vandalism-sensitive locations require stricter inspections, possibly daily
4 Re-tighten all connections in Robinia equipment two months after first use
5 Re-span spatial networks two months after first use
6 Check the terrain regularly for items that do not belong there, are unsafe or may be used wrongly Examples
are poisonous plants, glass shards, etc Frequency depends on strain
7 Remember that bad maintenance leads to unsafe conditions and notably faster impoverishment of the
playground area
8 Replacement parts can be ordered at the manufacturer with the OEM part numbers on the module drawing
Drawings can be found in the user guide
9 The impact area shall be provided with impact attenuating surface according to the specified falling height
•Up to 0,6m height of fall: no requirements regarding impact attenuation
•Turf, topsoil: suitable up to 1000mm height of fall
•Loose fill (sand, gravel, bark, woodchips): up to 3000mm height of fall Layer thickness is height
of fall / 10 +100mm, with a minimum of 300mm
•Synthetic surfaces (Rubber tiles, artificial turf, wetpour, tigermulch etc ): height of fall and layer
thickness according to the information of the supplier
10 This list is conform the CEN-standard "playground equipment and surfacing NEN-EN 1176-7"
Improving the
foundations
(for equipment without concrete in the standard
foundation)
If the impact area is loose fill (sand, gravel, bark,
woodchip, etc ), or if the soil itself does not add to
stability of the equipment (i e sand, pumice, peat soil)
pour 50l of concrete per post
For instance:
Square: 0,6 x 0,6 x 0,16m
Round: ø0,35 x 0,5m
Round: ø0,50 x 0,2m
Opmerking
BenamingRev.Bew.
Volgnr
Progr.Type#
Nr
M10 x 110 - RVS A2-70
Zeskantbout
110010021BSR3
1
M10 x 30 x 2,5CARROSSERIERIN
030010035BSR32
ROND 15LAMELLENSTOP
005015
LAM
KST33
M10 x 40DRAADBUS
040M10BUS
RNT
3
4
DRIEHOEKVLOER VRB
B
COA002
VRB
SHO1
5
Benaming
Title
Opmerking
Comment
Datum
Date
Tekening
Drawing
MOD VRB HHT 009
DRIEHOEKVLOER
VRIJBUITER
10-1-2008
BOER
SPEELTOESTELLEN
Samenstelling module
Assembly module
Opmerking
BenamingRev.Bew.
Volgnr
Progr.Type#Nr
5 x 50SCHROEF
050005002BSR
11
AluminiumPaalkap 100x100
B
100
KAP
OME12
Benaming
Title
Opmerking
Comment
Datum
Date
Tekening
Drawing
MOD VRB HHT 069
Paalkap
100x100
16-4-2014
BOER
SPEELTOESTELLEN
Samenstelling module
Assembly module
2
1
Opmerking
BenamingRev.Bew.
Volgnr
Progr.Type#
Nr
5 x 50 - RVS A2-70
Schroef Assy
050005002BSR81
M5 - RVS A2-70Facet ring 015005
036
BSR
8
2
VR JBU TER RVSSYSTEEMBU S
D
320505
VRB
SME
1
3
Benaming
Title
Opmerking
Comment
Datum
Date
Tekening
Drawing
MOD VRB HHT 075
SYSTEEMBU S
ENKEL
25-9-2006
BOER
SPEELTOESTELLEN
Samenstelling module
Assembly module
3 1 2
Bovenkant bordes
(Top platform)
0,77m*
*Gebruikt als railing
*Used as railing
Opmerking
BenamingRev.Bew.
Volgnr
Progr.Type#
Nr
5 x 50 - RVS A2-70
Schroef Assy
050005002BSR
5
1
100x100, lengte=850Staander HH
020100HHOHO12
100 x 100VoetplaatC
VZP
903
VRB
OME
1
3
Benaming
Title
Opmerking
Comment
Datum
Date
Tekening
Drawing
MOD VRB HHT 121
Staander V0
25 CM
7-4-2009
BOER
SPEELTOESTELLEN
Samenstelling module
Assembly module
1
2
3
OPMERKINGBENAMING
RBEH.
NR.
PROJ.TYPE
N
POS
5 x 50 - RVS A2-70
Schroef Assy
050005002BSR61
AluminiumPaalkap 100x100
B502100APOME12
100x100, lengte=2050Staander HHT
010100
HHT
OHO13
100 x 100
Voetplaat
CVZP903VRBOME14
Benaming
Title
Opmerking
Comment
Dat m
Date
Tekening
Drawing
MOD VRB HHT 150
STAANDER
145 CM
22-11-2006
Samenstelling module
Assembly module
1
3
2
1
1
4
B
BB
Be
ee
en
nn
na
aa
am
mm
mi
ii
in
nn
ng
gg
g
Title
O
OO
Op
pp
pm
mm
me
ee
er
rr
rk
kk
ki
ii
in
nn
ng
gg
g
Comment
D
DD
Da
aa
at
tt
tu
uu
um
mm
m
Date
T
TT
Te
ee
ek
kk
ke
ee
en
nn
ni
ii
in
nn
ng
gg
g
Drawing
MOD VRB HHT 241
Glijbaan 0,93 m
Breed, HHT
19-3-2014
BOER
S
SS
SP
PP
PE
EE
EE
EE
EL
LL
LT
TT
TO
OO
OE
EE
ES
SS
ST
TT
TE
EE
EL
LL
LL
LL
LE
EE
EN
NN
N
Samenstelling module
Assembly module
Opmerking
BenamingRev.Bew.
Volgnr
Progr.Type#
Nr
BORG RVS M10DOPMOER
020010011BSR101
M10 40SLOTBOUT
040010026BSR102
M10 30 2,5CARROSSERIERING
030010035BSR103
93 cm
Glijbaan breed
320627
VRB
SME1
4
2
4
3
1
L
LL
Le
ee
et
tt
t
o
oo
op
pp
p
: toestel bij voorkeur niet met
de glijbaan op het zuiden plaatsen
A
AA
At
tt
tt
tt
te
ee
en
nn
nt
tt
ti
ii
io
oo
on
nn
n
: it is advisable not to orient
playground equipment with the slide
facing south
Powered by TCPDF (www.tcpdf.org)

This manual suits for next models

1

Other BOERPLAY Play Set & Playground Equipment manuals

BOERPLAY Village Teruel User manual

BOERPLAY

BOERPLAY Village Teruel User manual

BOERPLAY Castle Wartburg User manual

BOERPLAY

BOERPLAY Castle Wartburg User manual

BOERPLAY BBI.112.CBR User manual

BOERPLAY

BOERPLAY BBI.112.CBR User manual

BOERPLAY BBI.111.CUR User manual

BOERPLAY

BOERPLAY BBI.111.CUR User manual

BOERPLAY BBI.110.CBP User manual

BOERPLAY

BOERPLAY BBI.110.CBP User manual

BOERPLAY BBI.114.CBP User manual

BOERPLAY

BOERPLAY BBI.114.CBP User manual

BOERPLAY BBI.108.CUR User manual

BOERPLAY

BOERPLAY BBI.108.CUR User manual

BOERPLAY BBI.004.03A User manual

BOERPLAY

BOERPLAY BBI.004.03A User manual

BOERPLAY BBIE906.U User manual

BOERPLAY

BOERPLAY BBIE906.U User manual

BOERPLAY Castle Heidelberg User manual

BOERPLAY

BOERPLAY Castle Heidelberg User manual

BOERPLAY BBIE204.HBP User manual

BOERPLAY

BOERPLAY BBIE204.HBP User manual

BOERPLAY BBPE161.9BP User manual

BOERPLAY

BOERPLAY BBPE161.9BP User manual

BOERPLAY BBPE213.4UR User manual

BOERPLAY

BOERPLAY BBPE213.4UR User manual

BOERPLAY BBI.203.HUR User manual

BOERPLAY

BOERPLAY BBI.203.HUR User manual

BOERPLAY UKPE014.02R User manual

BOERPLAY

BOERPLAY UKPE014.02R User manual

BOERPLAY Uneven bridge User manual

BOERPLAY

BOERPLAY Uneven bridge User manual

BOERPLAY Springer elephant User manual

BOERPLAY

BOERPLAY Springer elephant User manual

BOERPLAY PSTE120.022 User manual

BOERPLAY

BOERPLAY PSTE120.022 User manual

BOERPLAY BBI.101.CUP User manual

BOERPLAY

BOERPLAY BBI.101.CUP User manual

BOERPLAY PSTE120.021 User manual

BOERPLAY

BOERPLAY PSTE120.021 User manual

BOERPLAY Tankstation User manual

BOERPLAY

BOERPLAY Tankstation User manual

BOERPLAY SOLE030.102 User manual

BOERPLAY

BOERPLAY SOLE030.102 User manual

BOERPLAY Trackride User manual

BOERPLAY

BOERPLAY Trackride User manual

BOERPLAY Locomotive User manual

BOERPLAY

BOERPLAY Locomotive User manual

Popular Play Set & Playground Equipment manuals by other brands

SereneLife SLSNJWR50 user manual

SereneLife

SereneLife SLSNJWR50 user manual

AGame Bounce N Play Metal Play Set MSC-3242-BM Assembly instructions and user's manual

AGame

AGame Bounce N Play Metal Play Set MSC-3242-BM Assembly instructions and user's manual

stilum supra 4 Robinia Maintenance instructions

stilum

stilum supra 4 Robinia Maintenance instructions

Sove 21-350-031 Assembly instructions

Sove

Sove 21-350-031 Assembly instructions

HAGS Lillie SW68420 installation guide

HAGS

HAGS Lillie SW68420 installation guide

Kinderfeets Cornhole Game manual

Kinderfeets

Kinderfeets Cornhole Game manual

Ledon 185 Assembly instructions

Ledon

Ledon 185 Assembly instructions

GigaTent CT-019 owner's manual

GigaTent

GigaTent CT-019 owner's manual

wendi toys Nordic Lodge Installation and operating instructions

wendi toys

wendi toys Nordic Lodge Installation and operating instructions

PlayNation Play Systems Colossal Kingdom Deluxe manual

PlayNation Play Systems

PlayNation Play Systems Colossal Kingdom Deluxe manual

stilum papilio1 Mounting instructions

stilum

stilum papilio1 Mounting instructions

Gorilla Playsets High Point II manual

Gorilla Playsets

Gorilla Playsets High Point II manual

Smoby 840201 manual

Smoby

Smoby 840201 manual

LifeSpan Kids WALLABY 2 CUBBY HOUSE owner's manual

LifeSpan Kids

LifeSpan Kids WALLABY 2 CUBBY HOUSE owner's manual

Trigano ULTRA Xplorer manual

Trigano

Trigano ULTRA Xplorer manual

stilum gravis 1A Mounting instructions

stilum

stilum gravis 1A Mounting instructions

HUCK Seiltechnik Easy-Climb 4 Assembly instruction

HUCK Seiltechnik

HUCK Seiltechnik Easy-Climb 4 Assembly instruction

habitat et jardin LANA manual

habitat et jardin

habitat et jardin LANA manual

manuals.online logo
manuals.online logoBrands
  • About & Mission
  • Contact us
  • Privacy Policy
  • Terms and Conditions

Copyright 2025 Manuals.Online. All Rights Reserved.