Bohle GlassBuddy Plus User manual
GlassBuddy Plus®
2
Table of Contents
01 Contents of the Box 6
02 Features of the GlassBuddy Plus 6
03 The Keypad 6
04 The Display 7
05 First Steps – Basic Information about Working with the GlassBuddy Plus 7
06 Analysing Glass with the GlassBuddy Plus 10
07 Reading the Measurement Results 10
08 Error and Warning Messages 11
09 Charging the Battery 12
10 Care and Maintenance 12
11 Installation and Operation of the GlassBuddy Plus Software 13
12 Glass Types and Measuring Ranges 17
13 Firmware Update 18
14 Technical Data 19
15 Technical Support 19
16 Tips and Tricks 19

EN
3
Thank You
for purchasing the GlassBuddy Plus,a top quality measuring device for analysing flat glass. Regardless of
whether you analyse single-pane, laminated or insulated glass units, fitted or not, you deal with monolithic glass, or
1-gap or 2-gap insulating glass – with the press of a button the laser technology in the device will provide you with
information about glass thickness, the composition of the glazed units, coatings, interlayers and their position, all
with only one measurement and an accuracy of +/- 0.1 mm. Please read the operating instructions carefully to famil-
iarise yourself with the operating procedures and allow you to get the most out of your new GlassBuddy Plus.
Intended Use
The GlassBuddy Plus is an optical measuring device for determining the thickness of monolithic glass compounds,
1-gap and 2-gap insulating glass, even when already installed. Additionally, up to three highly reflective coatings can
be detected. Especially in the case of coatings which do not interact suciently with the used laser wavelength or in
case of glazed units which strongly deviate from the standards, erroneous results may occur in individual cases (wea-
kly reflective/absorbent coatings). Therefore, the measurement results should always be checked with due expertise.
The GlassBuddy Plus also recognises some of the coatings currently available on the market. Fire resistant glazing
with intermediate layers of fire protection gel as monolithic glazing or as double insulating glazing (see also chapter
05). The maximum measurable glass thickness in relation to the space between the panes (SZR) is 100 mm (see also
chapter 12). The GlassBuddy Plus is not suitable for detecting and measuring plastic panes (acrylic glass, polycar-
bonate, etc.), neither as glazed unit nor as individual panes. The GlassBuddy Plus is a high-precision device which
can determine the thickness and the composition of glazed units by means of an optical evaluation of laser beam
reflections and light refraction. This procedure requires that the GlassBuddy Plus is previously set to detecting cer-
tain specifications. Additionally, coatings and their position, as detected with the laser used, can also be displayed.
We strive to regularly update the software with new compound types in order to guarantee a reliable measuring
result. The GlassBuddy Plus is designed for interior use.
Safety Instructions
This manual must be printed and kept in the vicinity of the device for the entire duration of its service life. The manual
forms part of the device and must be handed over to every subsequent owner or user. The device and its accessories
are exclusively intended for commercial use and must be kept out of the reach of children (especially toddlers). The
operator must be conversant with the relevant procedures to be observed according to the prevalent accident preven-
tion regulations. Every person entrusted with operating the device must have read and understood this instruction man-
ual and especially the safety instructions. All safety instructions contained in this manual and the safety instructions on
the device must be observed. The device must only be operated in an impeccable condition. Modifications of the con-
struction of the device are inadmissible. Opening the device terminates all statutory warranty entitlements. Only Bohle
AG is entitled to perform repair works on the device. Please contact your dealer. For determining the glass thickness,
the GlassBuddy Plus uses a class 2M laser source (<1mW). Please bear in mind the prevalent accident prevention reg-
ulations. Never look directly or with optical instruments into the laser beam. Make sure when using the device that no
person(s) in the immediate surroundings is (are) harmed by the laser beam or its reflections.
The device must always be stored in the supplied carrying case. The rigidly installed accumulator must only be charged
with the supplied USB C. Charge current: 5V, 500mA. Disconnect the cable as soon as the battery is completely charged.
Disposal
Waste electrical equipment must not be disposed of together with the standard, unsorted municipal waste for rea-
sons of environmental protection and in order to enable a high recycling rate of electronic waste. Please arrange the
professional disposal of the GlassBuddy Plus and its accessories at the end of their service lives. You can send the
parts back to Bohle AG for proper disposal. Please contact your dealer. WEEE Reg. No. DE33122269

4
Declaration of Conformity
Bohle AG, Dieselstr. 10, D-42781 Haan
Authorised Representative for the Compilation of Technical Documentation:
Edgar Höhn, Bohle AG, Dieselstraße 10, D-42781 Haan, Germany
We hereby declare that the delivered models of the following products:
GlassBuddy BO 5164755
Year of manufacture starting from 2022
comply with the relevant provision:
Electromagnetic Compatibility Regulations 2016
Haan, May 2022
Dr. Thorsten Böllinghaus, Bohle AG Chief Technology Ocer
Dieselstraße 10, D-42781 Haan, Germany
Intended Use
The GlassBuddy is a device to analyse dierent layers of monolithic flat glass and insulated glass.
All other applications are excluded.
Bohle does not accept liability if:
· The GlassBuddy is used improperly.
· The GlassBuddy is modified or altered without authorisation.
· Components or spare parts of other manufacturers are used.
· The GlassBuddy is used incorrectly or by non-authorised persons.
· The GlassBuddy is not serviced regularly.
· The warnings, instructions and regulations of this manual are not observed.
Warning
The device might present a danger if not used as intended!
· The GlassBuddy must be used exclusively according to its intended use.
· All procedures described in these operating instructions must be adhered to.
!
EN
5
EG Declaration of Conformity
Bohle AG, Dieselstr. 10, D-42781 Haan
Authorised Representative for the Compilation of Technical Documentation:
Edgar Höhn, Bohle AG, Dieselstraße 10, D-42781 Haan, Germany
We hereby declare that the delivered models of the following products:
GlassBuddy BO 5164755
Year of manufacture starting from 2022
comply with the relevant provision:
Electromagnetic Compatibility Regulations 2016
Applicable harmonised standards:
DIN EN 61326-1:2006 „Electrical equipment for measurement, control and laboratory use – EMC requirements –
Part 1: General requirements“
EN 55022:2010 “Information technology equipment - Radio disturbance characteristics - Limits and methods of
measurement”
Haan, May 2022
Dr. Thorsten Böllinghaus, Bohle AG Chief Technology Ocer
Dieselstraße 10, D-42781 Haan, Germany
Intended Use
The GlassBuddy is a device to analyse dierent layers of monolithic flat glass and insulated glass.
All other applications are excluded.
Bohle does not accept liability if:
· The GlassBuddy is used improperly.
· The GlassBuddy is modified or altered without authorisation.
· Components or spare parts of other manufacturers are used.
· The GlassBuddy is used incorrectly or by non-authorised persons.
· The GlassBuddy is not serviced regularly.
· The warnings, instructions and regulations of this manual are not observed.
Warning
The device might present a danger if not used as intended!
· The GlassBuddy must be used exclusively according to its intended use.
· All procedures described in these operating instructions must be adhered to.
!
6
01 Contents of the Box
n1 x GlassBuddy Plus
n1 x Carrying case
n1 x USB stick with operating
instructions and PC software
n1 x USB-C connection cable
02 Features of the
GlassBuddy Plus
nDestruction-free analysis of glass, even when
installed
nMeasuring monolithic glass with a thickness
between 2.6mm and 19mm
nAnalysing laminated glass, multiple laminated
glass, fire protection glass, double and triple
insulating glass panes (only without fire
protection function)
nMeasuring up to a total build-up of 100 mm, see
also chapter 12
nRecognition of PVB films (up to a max. of 8 films
per compound), indication of their thickness and
position
nRecognition of up to 3 coatings and
determination of the coating position
nAccuracy: 0.1mm, tolerance: 1% on measuring
range
nStorage of up to 250 measuring results
nUSB interface
nSimple and self-explanatory menu operation,
graphic display
nHigh quality Li-ion battery for up to 8 hours of
continuous operation
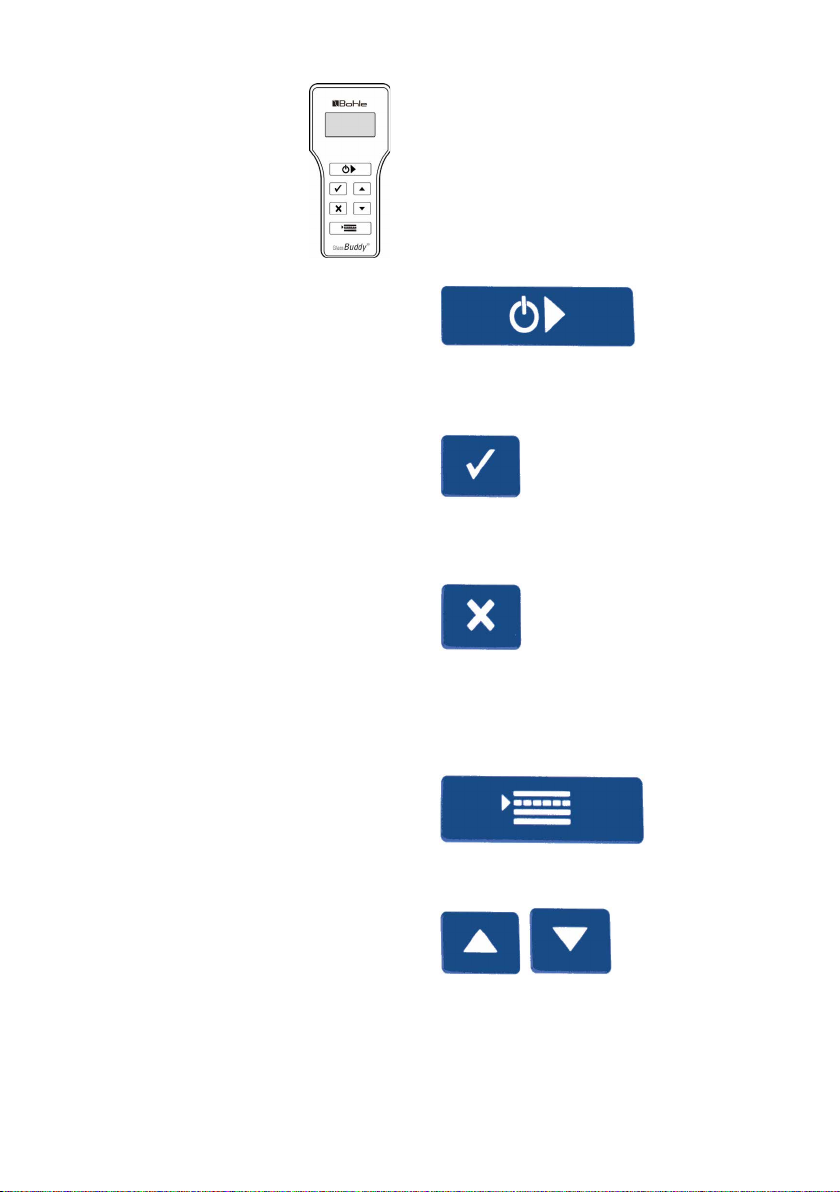
03 The Keypad
Despite the numerous functions of the GlassBuddy
Plus, only a few keys are needed. The user interface
is intuitive and can be learned quickly and easily.
This chapter explains the functions of the individual
keys.
Press
nto switch the GlassBuddy Plus on
nto start measuring
nto save the results after the measurement
nto confirm input
nto delete the current result
nto quit the menu
nto interrupt the deletion of saved data
nto delete error messages
nto go to the menu
nto scroll through the measuring results
nto scroll through the menu
nto adjust date and time
nto switch on the light
EN
7
04 The Display
Explanation of the symbols used
4or 4.2 Glass thickness, film thickness or air
gaps between panes in mm or inch or
as inch fraction
« or » Coating position, the direction of the
arrow indicates the position
!Signal indicating that not all proper-
ties could be detected unequivocally.
G1, G2, … Glass pane with position
G 1.1, G 1.2 Glass pane with position in laminated
compound
SZR1, SZR2 Air gap and its position
Film 0.38 Thickness of the film used within the
compound
Gel 1,4 Thickness of the fire protection gel
used within the compound
Layer 4,3 Thickness of the interlayer used within
the compound
05 First Steps
Basic Information about Working with the
GlassBuddy Plus
Press and hold for approximately 2 seconds
to switch the GlassBuddy Plus on. Choose the
glass type you wish to analyse on the four-line illu-
minated display (see also sub-item “GLASS TYPE”).
After choosing, the GlassBuddy Plus will inform
you about today’s date, the time and the selected
glass type.
For energy-saving reasons, the display lighting will
switch o after approximately 60 seconds; however,
it can be switched on again by pressing or .
The GlassBuddy Plus will switch o automatically
after about 10 minutes if no keys have been
pressed.
Explanation of the Menu Items
The menu can be accessed via ; or
allow you to select between the various menu
items: The respectively active menu item is located
in the centre and bordered by arrows to the right
and left sides. For selecting a menu item, press the
button.
Off
This button will switch the GlassBuddy
Plus o.
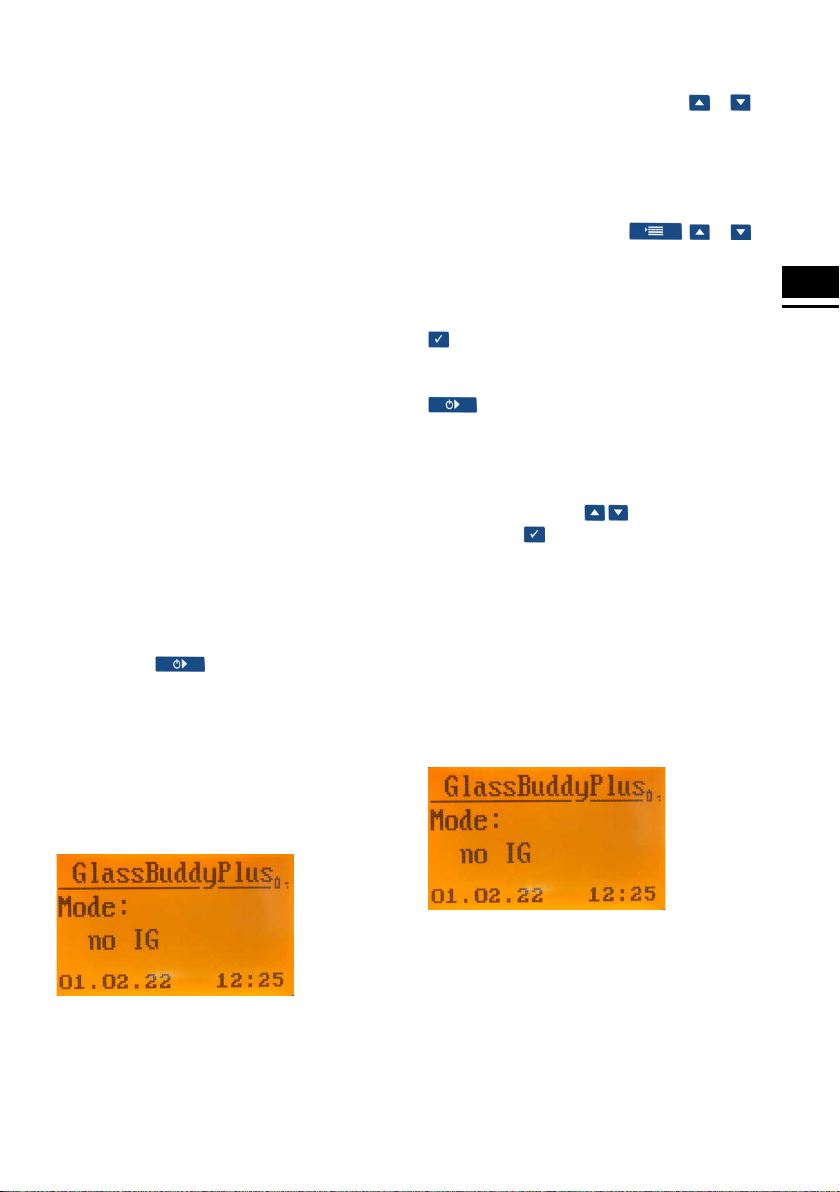
Glass Type
Here you can select the type of glass you wish to
analyse by pressing the keys. Confirm your
selection with .
nNo insulating glass (menu display: no IG)
– for the analysis of 2.6mm to 19mm
monolithic glass
– for the analysis of monolithic laminated and
laminated safety glass (lam and lam-safety)
– for the analysis of monolithic multi-laminated
glass (multi-lam), with the exception of fire
protection glass
Note: If you measure other glass types with this
setting, this can lead to erroneous measuring
results.
8
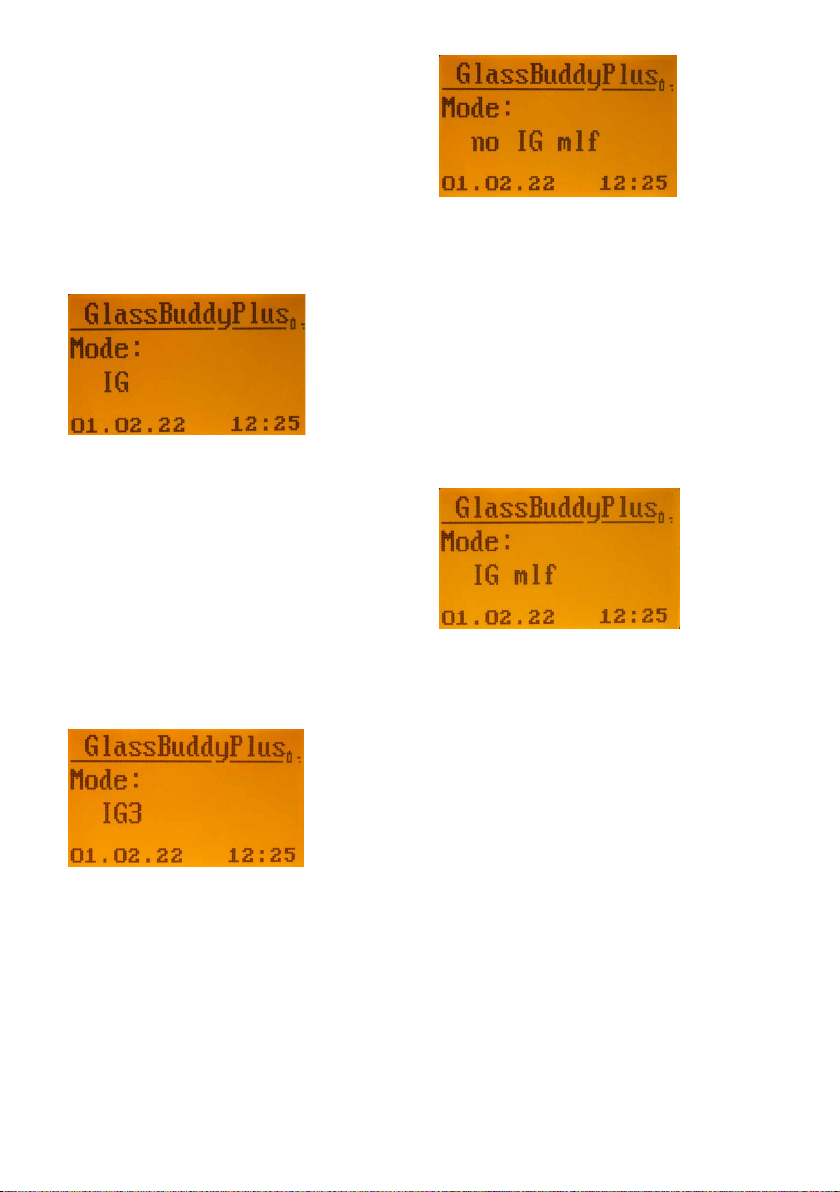
nInsulating glass (menu display: IG)
– for the analysis of 1-gap insulating glass made
of 2 x monolithic glass
– for the analysis of 1-gap insulating glass with
laminated glass
– for the analysis of 1-gap insulating glass with
laminated safety glass
– for the analysis of 1-gap insulating glass with
multi-laminated glass, with the exception of
fire protection glass
Note: If you measure other glass types with this
setting, this can lead to erroneous measuring
results.
nIG3 glass (menu display IG3)
– for the analysis of 2-gap insulating glass made
of 3 x monolithic glass
– for the analysis of 2-gap insulating glass with
laminated glass
– for the analysis of 2-gap insulating glass with
laminated safety glass
Note: If you measure other glass types with this
setting, this can lead to erroneous measuring
results.
nNot IG fire protection glass
(Menu display: not IG mlf)
– for the analysis of monolithic multi-laminated
glass (multi-lam) as fire protection glass
Note: If you measure other glass types with this
setting, this can lead to erroneous measuring
results. Only fire protection gels from 1.4 mm - 3.2
mm are displayed as “Gel”. Fire protection gels from
3.9 mm - 7.0 mm are displayed as “Layer”. Build-ups
deviating from this cannot be measured correctly.
nIG with fire protection glass
(Menu display: IG mlf)
– for the analysis of 1-gap insulating glass with
multi-laminated glass as fire protection glass
Note: If you measure other glass types with this
setting, this can lead to erroneous measuring
results. Only fire protection gels from 1.4 mm - 3.2
mm are displayed as “Gel”. Fire protection gels from
3.9 mm - 7.0 mm are displayed as “Layer”. Build-ups
deviating from this cannot be measured correctly.
The selected glass type setting is displayed in the
menu.
Note: The GlassBuddy Plus will automatically
return to the default settings once the device is
switched
o. When switching it on again, you must select the
glass type again.
Average
In order to carry out an average measurement, you
must first select the correct glass type. You can acti-
vate the average measurement in the menu under
the menu item “Average”. The Ø sign next to the

EN
9
glass type indicates that the average measurement
is activated. Up to 19 individual measurements can
be used in order to generate an average measuring
result. The individual measurements are carried
out one by one by repeatedly pressing and
sorted alphabetically. After completing 2 to 19
individual measurements, the arithmetic mean is
calculated by pressing . For a better overview, the
average measurements displayed in the
“Display data” mode are marked with a space after
the first two numbers. The individual measurements
are named consecutively beginning with “a“.
Example:
03a310113_1415
03b310113_1416
03c310113_1417
03_310113_14:18
The first two numbers stand for the number of
the measurement. The third item indicates the
sequence of individual measurements. The
following numbers are reserved for date and time.
If the third item has an underscore _, this indicates
the calculated average value.
As all individual and average measurements can be
saved if desired, unrealistic measured values can
still be detected ahead of time.
Settings
You can adjust the following settings here:
Language
Here you can reach the sub-menu by pressing
after making a selection. You can change the
settings using the or keys. Confirm your
changes with .
Note: In order to prevent an inadvertent, permanent
change of the language, the GlassBuddy Plus
changes back to the previously chosen language
when switching the device on again. In order to per-
manently change the language, connect the
GlassBuddy Plus to the PC and then adjust the lan-
guage as described above.
Units
Here you can reach the submenu by pressing
after making a selection. You can change the
settings using the or keys. Confirm your
changes with .
Note: To prevent accidental, permanent adjustment
of the unit, the GlassBuddy Plus will revert to the
previously set unit when it is switched on again. To
permanently change the unit, connect the Glass-
Buddy Plus to the PC and only then set the unit as
described above.
Version
Displays the serial number of the device and the
device firmware version.
Date
Here you can reach the sub-menu by pressing
after making a selection. You can change the
settings using the or keys. Confirm your
changes with .
Time
Here you can reach the sub-menu by pressing
after making a selection. You can change the
settings using the or keys. Confirm your
changes with .
Font Size
Here you can reach the sub-menu by pressing
after making a selection. Here you can change the
settings using the or keys . Confirm your
changes with .
Note: In the symbol language, the font size cannot
be changed to a smaller size.
Information About the Device
Display of the device information which can be
saved in the device as customised entries such as
company name and address. This information can be
entered with the aid of the PC software (see chapter
11).
Delete Data
Here you will be asked if you really want to delete
all measuring results after pressing . It is not
possible to delete only individual measurements. By
pressing again, all saved measuring results will
be deleted. Press to return to the menu without
deleting the data.

10
Show Data
Here you can display a list of your previously saved
measurements by pressing . By pressing the
or keys you can select the measurement result of
your choice and display it by pressing .
06 Analysing Glass with the
GlassBuddy Plus
The glass must always be clean and dry. Even a
fingerprint can cause unwanted refraction and con-
sequently incorrect measurement results. Glass
that is laid flat should always be placed on a dark,
non-reflecting base (e.g. a black felt cloth) for ana-
lysis, as incorrect results can occur on reflective
bases. Already installed insulated glass panes
should be preferably analysed in the marginal areas.
Switch on the GlassBuddy Plus, select the glass
type (see point 5) and place it on top of the glass
surface in a way that all plastic feet touch the glass
and keep the device from slipping. Press .
The light turns o and the following message
appears on the GlassBuddy Plus display:
Measuring –
please wait …
Note: The GlassBuddy Plus should not be moved
during the measuring procedure as this could lead to
inaccurate measuring results. After 1-2 seconds, the
light will turn on again and you can remove the
GlassBuddy Plus from the glass.
The measurement result is shown on the display.
Use or to scroll through the measuring
results. After the rounded individual measurements,
the single values (accurate to + / -0.1 mm) are dis-
played. Afterwards the structure of the glass pane is
shown graphically. The graphical display shows the
structure from left to right as analysed by the Glass-
Buddy Plus. The measuring results are shown in a
scrolling display.
The measuring result can be rejected with .
When pressing , you can choose between the
following options:
Save
The current measuring result can be saved in the
GlassBuddy Plus by pressing . The result is
saved under the number shown in the top left of the
GlassBuddy Plus display together with the result.
Hint: If in individual cases the message
“Measurement not possible” appears on the display
after measuring, even this result can be saved, also
see chapter 8.
Reject
You can delete the current measuring result by
pressing . You can always directly delete the
result by pressing .
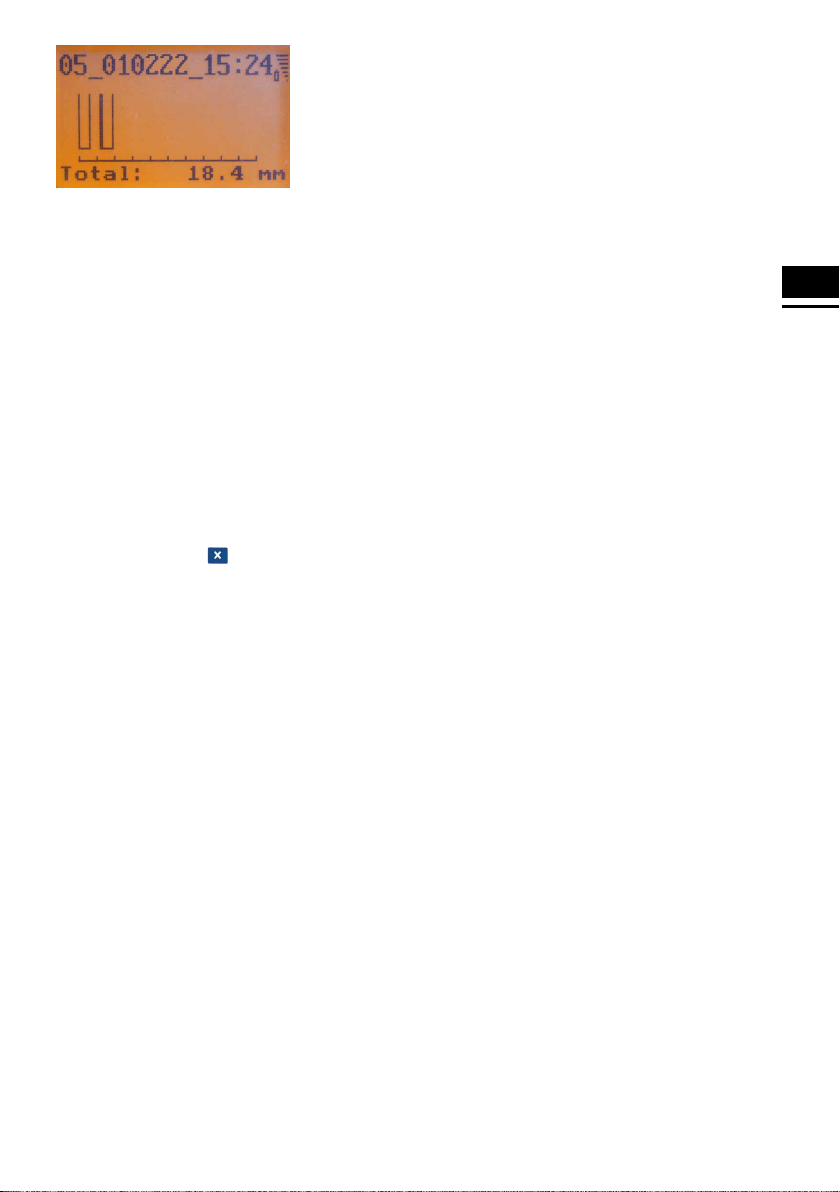
07 Reading the
Measurement Results
After the measuring procedure described above, the
GlassBuddy Plus shows the result on the illuminat-
ed display. You can page up and down the measur-
ing results row by row with the or keys.
In the first row, the GlassBuddy Plus shows the
position under which the measuring result is saved
(here position 05; there are a total of 250 memory
slots available). After this you can see the date and
the time of the measurement.
In the second line, the GlassBuddy Plus displays
the measured total thickness of the measured
object.
The details of the pane composition, rounded to
trading thicknesses, are displayed starting from the
third line. Afterwards the measuring results of the
individual layers are displayed, followed by the
graphical presentation of the configuration of panes.
The measuring results are shown in a scrolling
display.
EN
11
08 Error and Warning
Messages
Please make sure that the GlassBuddy Plus is able
to measure correctly. The GlassBuddy Plus uses
the reflection of a laser beam for measuring and cal-
culating the result. Everything which has an influ-
ence on the individual interlayers, also has an influ-
ence on the calculated result.
The GlassBuddy Plus uses a number of messages
to notify you of errors or warn you about the battery
status. All information is shown in plain text and can
be deleted by pressing .
n“Measurement not possible”
– This message appears if the object you are
measuring does not generate any reflections
which the GlassBuddy Plus can convert into a
reading.
– This message also appears if the total thick-
ness of a glass pane is less than 2.6mm.
– The message “Measurement not possible”
does not mean that the measurement has
not taken place. The GlassBuddy Plus was
just not able to calculate a reasonable result.
Therefore, a measurement was carried out.
This measurement can also be saved.
By sending the file in .gdm format to
[email protected], you can assist us
with troubleshooting and further developing
the device. Analysing the data records is not
possible with the supplied PC programme
and can only be done by Bohle.
– This message appears if the GlassBuddy Plus
receives an odd number of reflections from the
measuring procedure.
Reason: e. g. a tinted pane, where only the surface
gives o a reflection and the laser cannot
penetrate to the underneath of the pane
Reason: A very light coloured base on which the
glass is lying can give o an additional
reflection.
Solution: Place the glass for analysis on a dark
non-reflecting base.
nDetails not available
– This message appears if the GlassBuddy Plus
is able to measure the total thickness but can-
not determine any further details about the
configuration of panes.
n“No IG”
– This message can appear for the setting
“no IG”, if you try to analyse a glass structure
other than no IG.
Solution: Please check the settings and change
them if necessary.
n“No IG”
– This message can appear for the setting IG, if
you try to analyse a glass structure other than
IG.
Solution: Please check the settings and change
them if necessary.
n“No IG3”
– This message can appear for the setting
“ISO3”, if you try to analyse a glass structure
other than 2-gap insulating glass.
Solution: Please check the settings and change
them if necessary.
n“Battery empty”
– This message appears if the battery charging
status is below 5%.
Solution: Please charge the battery. To be able
to continue measuring, charging for
5 to 10minutes will suce.
n“Glass too highly reflective”
– This message can appear when analysing
highly reflective glass.

12
Solution: Not every highly reflective or mirrored
glass can be measured. The measurement
might be successful from the rear side of
the glass.
n“Memory full”
– This error message appears when all 250
memory slots are full. If you have saved the
average measurements, they will occupy
several storage locations!
Solution: Before saving more data, you should
transfer the saved measurement results to
your PC and then delete all data saved in
the GlassBuddy Plus (see section 5).
n“Glass outside measuring range”
– This error message appears if the complete
structure of the pane exceeds the measuring
range of 100 mm.
n“Error”
– This error message appears if there is an
internal error in the GlassBuddy Plus.
Solution: If the message Error is repeated, the
GlassBuddy should be returned to the
manufacturer for inspection.
n“No Data”
– This message appears if there is no data in the
memory that can be shown.
09 Charging the Battery
When the battery is fully charged, the device can
work permanently for at least 8 hours. When
charged, the battery usually lasts for one to two
weeks under normal conditions of use. At a battery
status of approximately 10%, you will be shown the
message “Charge battery”. Measurements can still
be taken but the GlassBuddy Plus should be
charged as soon as possible to ensure problem-free
operation.
For charging the battery, connect the GlassBuddy
Plus with the supplied USB cable to a suitable USB
port. The USB port used must be able to provide 5V,
500mA.
When the battery is almost empty, it takes appro-
ximately 120minutes to charge it to 100% again
(if the GlassBuddy Plus remains switched on during
charging, the charging time is longer). The
GlassBuddy Plus will indicate when the charging
process is over. The display will then show PC
connection - battery is charged, but the Glass-
Buddy Plus has to be switched on for this message
to be displayed.
The GlassBuddy Plus contains a permanently
installed top quality Li-ion rechargeable battery with
a very long service life. If the performance of the
battery diminishes over the years, Bohle can replace
it for a fee.
10 Care and Maintenance
To avoid damage or malfunctions of your
GlassBuddy Plus, please strictly observe the
following:
nThe GlassBuddy Plus must always be stored in
the supplied carrying case as this is the only way
to eectively prevent damage.
nTo avoid damage, the GlassBuddy Plus must
only be operated and/or stored at temperatures
between + 5°C and + 40°C.
nThe GlassBuddy Plus must not be exposed to
vibrations or impacts.
nThe GlassBuddy Plus is neither dust- nor water-
proof. Therefore keep it away from the relevant
sources of contamination.
nOnly clean the display window and casing with a
dry, clean and soft cloth. Under no circumstances
must cleaning liquids, thinning or abrasive
agents be used for cleaning.
nThe laser opening and the sensor slit may only
be cleaned carefully (!) with a dry, clean and soft
brush or with clean compressed air.
nNever remove the plastic feet from the device. If
one foot or several feet become loose, the
device must be sent to Bohle AG for installing
new feet and calibrating the device accordingly.
These repair works involve costs. Please contact
your dealer.
nRepairs may only be performed by the manufac-
turer, please contact your dealer.

EN
13
11 Installation and Operation
of the GlassBuddy Plus
Software
Installation of the GlassBuddy Plus software must
be done with full administrative rights to the com-
puter. Use with another operating system, eg iOS or
Android, is only possible with emulator software.
Installation
To install the software, connect the supplied USB to
your computer and start the programme setup.exe in
the Explorer.
The programme will then be installed onto your
computer. After installation you will need to restart
your computer.
Programme Start
To start the GlassBuddy Plus programme, dou-
ble-click the GlassBuddy Plus programme icon on
your desktop.
Programme Description
This programme allows you to transfer data from the
memory of the GlassBuddy Plus to your computer.
To do this, the device needs to be connected to your
PC via the supplied USB cable.
In addition, you can also call up any previously
imported and saved data using the programme
without a connection to the GlassBuddy Plus.
Programme Screen
Once the programme has started, you will see the
empty programme screen with the following areas:
Pane List
The measurements transferred from the Glass-
Buddy Plus are listed here according to the
sequential number. The date of the measurement,
the time, the total thickness of the glass structure as
well as the measuring mode are also shown.
The graphic shows you the pane composition of the
selected glass in the corresponding list. The results
for glass (green), film (blue), fire protection gel
(yellow) and layer (purple) are highlighted in dier-
ent colours.
The field below the graphic shows the following
information about the device: name (if applicable),
serial number and model number of the device
firmware.
Connected
This field is dark green if the GlassBuddy Plus is
not connected to the programme and light green if
the GlassBuddy Plus is connected to the
programme.
Component Number
Here you can assign a component number for the
selected measurement.
Pane Size
Here you can indicate pane width and height for the
selected measurement.
Comments
If you have selected a measurement from the pane
list, you can add an individual comment to this
measurement.
Details
If you have selected a measurement from the pane
list, all the results will be shown in detail here.

14
Data Transfer from the GlassBuddy Plus
To transfer the data stored on your GlassBuddy
Plus to your computer, first connect the device to
your computer using the supplied USB cable. Use
the USB-C port on the GlassBuddy Plus and a free
USB slot on your PC. Switch the GlassBuddy Plus
on. The display of the GlassBuddy Plus will show
“PC connection” and “Battery charging” or “Battery
charged”. The GlassBuddy Plus is now connected
to your PC.
Start the GlassBuddy Plus PC application. In the
programme screen you will see the field “Connect-
ed”, which is shown in dark green. The programme
is not yet connected to the GlassBuddy Plus. To
connect, please click on the menu item “Devices”
and then select “Update” in the drop-down menu.
The programme is now connected to the
GlassBuddy Plus. Once the connection has been
established, the field “Connected” in the
programme screen will turn light green. If
this field does not turn light green, click on
“Devices – Update” again.
To transfer the data stored in the GlassBuddy Plus,
click on the menu item “File” and then on “Transfer
Data” in the drop-down menu. After the data has
been successfully transferred, the measurement
results will appear in the pane list.
The transferred measurements can be stored on
your PC. To do this, click on the menu item “File”
and then on “Save Data” in the drop-down menu.
You can then save the measurements under a file
name of your choice. To finally save the file, please
confirm, after entering the file name, by pressing
Return or by clicking on “Save”. Please use the
menu item “Save Data” as standard saving method.
A .gdm file is generated which can be called and
displayed also by the PC application. Use the menu
item “Export” for exporting the data in .csv format.
The .csv file can subsequently be edited in a spread-
sheet. We recommend saving the data in .gdm for-
mat for archiving them.
Calling Up Saved Data
The .gdm files saved on the PC can neither be called
nor displayed, nor can a comment or the pane size
be added and saved again. To do this, click on the
menu item “File” and then on “Open Data” in the
drop-down menu. Select a saved series of measure-

EN
15
ments and double-click on the file name or click on
“Open”.
Devices
Under the menu item “Devices”, you will find the
submenu “Update”. If you are using several devices,
this is a way of switching between the dierent
GlassBuddys Plus.Only one GlassBuddy Plus can
communicate with the programme at a time.
Print
You have a number of options for printing the
measurement results. The results are printed on
the standard printer which is set in the operating
system.
Pane List
Here, all listed measurements from the pane list will
be printed as a list.
Marked Detail
If you have selected a measurement from the
pane list, you can print the details relating to
the measurement with any comments and any
additional information you might want to add.
All Details
This option allows you to print all measurements
stated in the pane list including the respective
details. One page with details and comments and
any other information you have added is printed per
measurement.

16
Language
In the “Language” menu you can choose between
English and German.
Auxiliary Options
Under the menu item “Auxiliary Options”, you
can now find the following entries:
Send Firmware
In this way, the firmware of the connected
GlassBuddys can be updated (see point 13).
Send Licence
With this menu item, you can send a license file to
your GlassBuddy Plus in order to carry out an
upgrade (involving costs) of Basic to Plus. Please
contact us if you are interested.
Device Information
Here the user can customise the GlassBuddy Plus
settings.
You can enter the desired information into the drop-
down menu. This information is then permanently
saved to the GlassBuddy and can only be changed
together with the corresponding PC programme.

EN
17
Transfer Languages
With this menu item, the graphical languages
(Russian, Corean, Chinese) are transferred from the
PC or laptop to the GlassBuddy Plus. The corre-
sponding language file must previously be requested
from Bohle and saved to your computer or laptop.
The graphical languages are not included in delivery.
interested.
Select Logo
You can replace the standard “Bohle” logo with your
own logo. For this purpose, the new logo must be
available as .bmp file with a maximum width of 300
pixels and a maximum height of 90 pixels and saved
in a folder on your hard disk.
12 Measuring Ranges
Measuring range depending on gap between
panes
The following glass types or structures cannot
be measured or only to a limited extent:
– Strongly dispersing glass like e.g. satin-finished or
sandblasted glass, cast glass
– Strongly absorbing glass such as e.g. laminated
glass with matt or coloured interlayers, entirely
coloured glass
– Glass with interference coating
– Highly reflective glass like e.g. solar control glass
– All basic glass products deviating from
DIN EN 572 Part 2
Gap between panes mm
Maximum total thickness
depending on gap in mm

18
Notes:
For making a reliable analysis of the structure of the
measured object, we recommend taking several
measurements at dierent points and from both
sides. In case of dealing with very large measuring
units or if the results obtained are very unreliable,
we recommend carrying out average measurements
on at least 4 spots distributed over the whole sur-
face of the glass pane.
The analysis of glass retrofitted with solar reflective
films or splinter protection films can lead to incorrect
results.
In the case of insulated glazed units, measurements
should always be taken 5cm away from the edge, as
the panes tend to “bend” depending on surface and
air pressure conditions, which means that measure-
ments taken from the centre may be inaccurate.
When analysing resin laminated glass, with resin
having the same refraction index as the glass, the
GlassBuddy Plus will calculate the total thickness.
If the GlassBuddy Plus cannot exactly indicate the
pane composition, you will receive the additional
message “Details not available”.
In a very small number of cases, the detailed
analysis of laminated or laminated safety glass is
not possible. In this event, the GlassBuddy Plus dis-
plays an exclamation mark in front of the individual
result. If the GlassBuddy Plus cannot exactly indi-
cate the pane composition, you will receive the addi-
tional message “Details not available”. In the graph-
ic display of the GlassBuddy Plus, results of this
kind are indicated by two horizontal lines. In the PC
software, these are represented by a vertical row
“?”. To achieve better measuring results, we recom-
mend a new analysis on the opposite side.
13 Firmware Update
A firmware update is available for GlassBuddy Plus.
Troubleshooting updates can be carried out by
the user. They can be found on our website
www.bohle.com in irregular intervals with
the article number BO 5164755 for Glass Buddy
Plus. For this purpose, the updated version found
under Downloads must be saved on your PC.
You can freely choose the storage location on the
hard disk of your PC or laptop. Please do not change
the file name in order to make sure that the update
is correctly recognised.
Please connect your GlassBuddy Plus to your PC or
laptop and connect the device to the PC software
(see point 6).
Click on “auxiliary options” for installing the update
and choose the sub-menu “send firmware”.
Now you have to choose the previously stored firm-
ware version.
Confirm the completed download to the GlassBuddy
Plus with ”OK”.
Then disconnect the GlassBuddy Plus from your PC
or laptop and switch the GlassBuddy Plus o. For
activating the updates press the and

EN
19
keys simultaneously and hold them for approx. 4 sec-
onds. In this way you reach the boot loader menu.
You can now choose between two firmware versions
which are displayed with their respective version
numbers. You can choose the desired version by
pressing the or keys and activate it by
pressing .
A maximum of two firmware versions can be saved
to the GlassBuddy Plus. When transferring a new
version to your device, the version which is currently
not activated will be overwritten.
14 Technical Data
Type V5.0
Power supply Lithium-ion – rechargeable
battery
Laser < 1 mW; class 2M
Laser wavelength 650nm
Measuring range GlassBuddy Plus
up to 100mm
Accuracy 0.1mm
Measuring tolerance 1% on measuring range
Display 64 x 128 pixels
Dimensions 180 x 83 x 42mm
Weight 350g
Working temperature + 5° C to + 40° C
15 Technical Support
Please address any technical questions, comments
or suggestions by e-mail to glassbuddy@bohle.de.
If you have questions concerning the measurements
you have carried out, please make available the
corresponding .gdm file.
16 Tips and Tricks
The GlassBuddy Plus works with a laser wave-
length of 650nm. Due to its conceptual design, the
GlassBuddy Plus cannot detect the characteristics
of glass und glazed units which cannot be displayed
with this wavelength.
All factors which have an influence on the reflection
of the laser beam on dierent surfaces, also have
an influence on the measuring result und thus the
evaluation. In individual cases this leads to addition-
al information, such as “!” or “Details not avail-
able” to be displayed together with the result.
In some cases, an insucient reflection on one
or several surfaces can generate the message
“Measurement not possible”. The correct result can
usually be obtained by repeating the measurement.
It often already suces to thoroughly clean the
accessible glass surfaces in order to improve their
reflection properties.
The weather-related steaming up of the sensor slit,
e. g. due to a quick transfer from a cold into a warm
environment, can lead to measuring errors. Please
wait for a few minutes until the device has adjusted
to ambient temperature.
Depending on the light conditions, it might also be
helpful to change the position of the GlassBuddy
Plus on the glass surface. The GlassBuddy Plus
does not necessarily need to be positioned vertically
for achieving correct measuring results. Only make
sure that all the four feet rest firmly on the surface
to be measured and that the GlassBuddy Plus is not
moved while performing the measurement.
The GlassBuddy Plus is supplied readily calibrated.
A new calibration is usually not required. If you
detect a permanent malfunctioning of your Glass-
Buddy Plus, a calibration (involving additional
costs) might be necessary. Please contact your
dealer.
10-2794 · 05-10 · 0,15 Na · D, GB, F, IT, ES, NL, SE
BX 64754
Bohle AG
Dieselstr. 10
42781 Haan
T +49 2129 5568-100
F +49 2129 5568-281
www.bohle.com
Bohle Worldwide
Germany
Bohle AG – Head Oce
42781 Haan
T +49 2129 5568-100
Croatia
Bohle d.o.o.
51000 Rijeka
T +385 051-329-566
Russia
Bohle Москва
108811 Москва
T +7 495 230-94-00
Sweden
Bohle Scandinavia AB
14175 Kungens Kurva
T +46 8 449 57 50
Austria | Hungary
Slovenia
Bohle GmbH
1230 Wien
T +43 1 804 4853-0
Estonia
Bohle Baltic
13619 Tallinn
T +372 6112-826
Russia
Bohle Санкт Петербург
198020 Санкт Петербург
T +7 812 4452792
United Kingdom
Bohle Ltd.
Dukinfield, Cheshire, SK16 4PP
T +44 161 3421100
Benelux
Bohle Benelux B.V.
3905 LX Veenendaal
T +31 318 553151
France
Bohle AG · Departement Français
42781 Haan, Germany
T +49 2129 5568-222
Spain I Portugal
Bohle Complementos del Vidrio S.A.U
08907 L´Hospitalet (Barcelona)
T +34 932 615 361
USA I Canada
Bohle America, Inc
Charlotte, NC 28273
T +1 704 247 8400
China
Bohle Trading Co., Ltd
Tianhe District, Guangzhou
T +86-20-38105870
Italy
Bohle Italia s.r.l.
20080 Vermezzo (MI)
T +39 02 94967790
South Africa
Bohle Glass Equipment (Pty) Ltd.
2125 Gauteng
T +27 11 792-6430
Other manuals for GlassBuddy Plus
1
Table of contents
Other Bohle Measuring Instrument manuals


Popular Measuring Instrument manuals by other brands

Endress+Hauser
Endress+Hauser Stamosens CXM750 Brief operating instructions

AEMC
AEMC MN379T user manual

PCB Piezotronics
PCB Piezotronics ICP HTM354C03 Installation and operating manual

NoiseMeters
NoiseMeters CEL24 Series Quick user guide

Xylem
Xylem wtw pHotoFlex pH quick start guide

Mitutoyo
Mitutoyo QM-Height user manual


