Boly MG983G-36M User manual

Infrared Mobile Digital Scouting Camera
User Manual
MG983G-36M

Content
1 Instruction......................................................................................1
1.1 General Description..................................................................1
1.2 Application.................................................................................1
1.3 Camera Overview......................................................................2
1.4 Shooting Information Display................................................3
1.5 Two Way Communication.......................................................4
2 Cautions.......................................................................................... 5
3 Quick Start Guide....................................................................... 6
3.1 Power Supply.............................................................................6
3.2 Insert SD card and SIM card..................................................6
3.3 Changing Camera Settings..................................................... 6
3.4 Manually Send a MMS or GPRS Photo................................9
3.5 SMS Control............................................................................ 10
3.6 Password Set........................................................................... 10
4 Advanced Operations..............................................................11
4.1 Work Mode.......................................................................... 11
4.2 Settings Menu.................................................................... 11
4.2.1 Setting Items........................................................... 12
4.2.2 Default Set............................................................... 17
4.3 Use the Remote Control................................................ 18
4.4 Load or Remove a Wireless Sensor......................... 19
4.5 Change the Settings via Android APP or SMS.....22
4.6 User Level............................................................................22
4.7 Use Android APP.............................................................. 23
4.8 SMS Command List.........................................................23
Appendix I: PIR Detection Zone............................................26
Appendix II: Error Code............................................................28
Appendix Ⅲ: Technical Specifications...............................30
Appendix Ⅳ: Parts List............................................................. 31

MG983G-36M 1 Instruction
Page 1
1 Instruction
1.1 General Description
This digital infrared surveillance camera has 3G
communication functionality, and has a high sensitive
Passive Infrared (PIR) motion sensor which can be
triggered by any human or animal movement. This
camera captures high quality pictures of up to 36M
pixels and records video clips at 1080 FHD. It sends
pictures instantly to your mobile device, or video (less
than 10M) to your e-mail via GPRS network. You’ll be
alerted when the camera is triggered or per custom
settings.
The camera takes color pictures and videos with
sufficient daylight, and uses built-in infrared LEDs to
help to take clear pictures or videos in the night.
There is a 2.3" color LCD display screen on the camera
and a sound recorder embedded in the camera. A laser
pointer is used to help target the photo area of the
camera.
The camera is resistant against water and snow, and can
also be used as a portable digital camera.
1.2 Application
This camera can be used as an automatic surveillance
device for guarding and recording unexpected intrusion
to homes, shops, schools, work sites, etc. It can also be
used as a trail camera for hunting or monitoring animals
by recording the traces of wild animals. This camera can
be left alone for weeks or months and will save records
automatically in digital format.
MG983G-36M 1 Instruction
Page 2
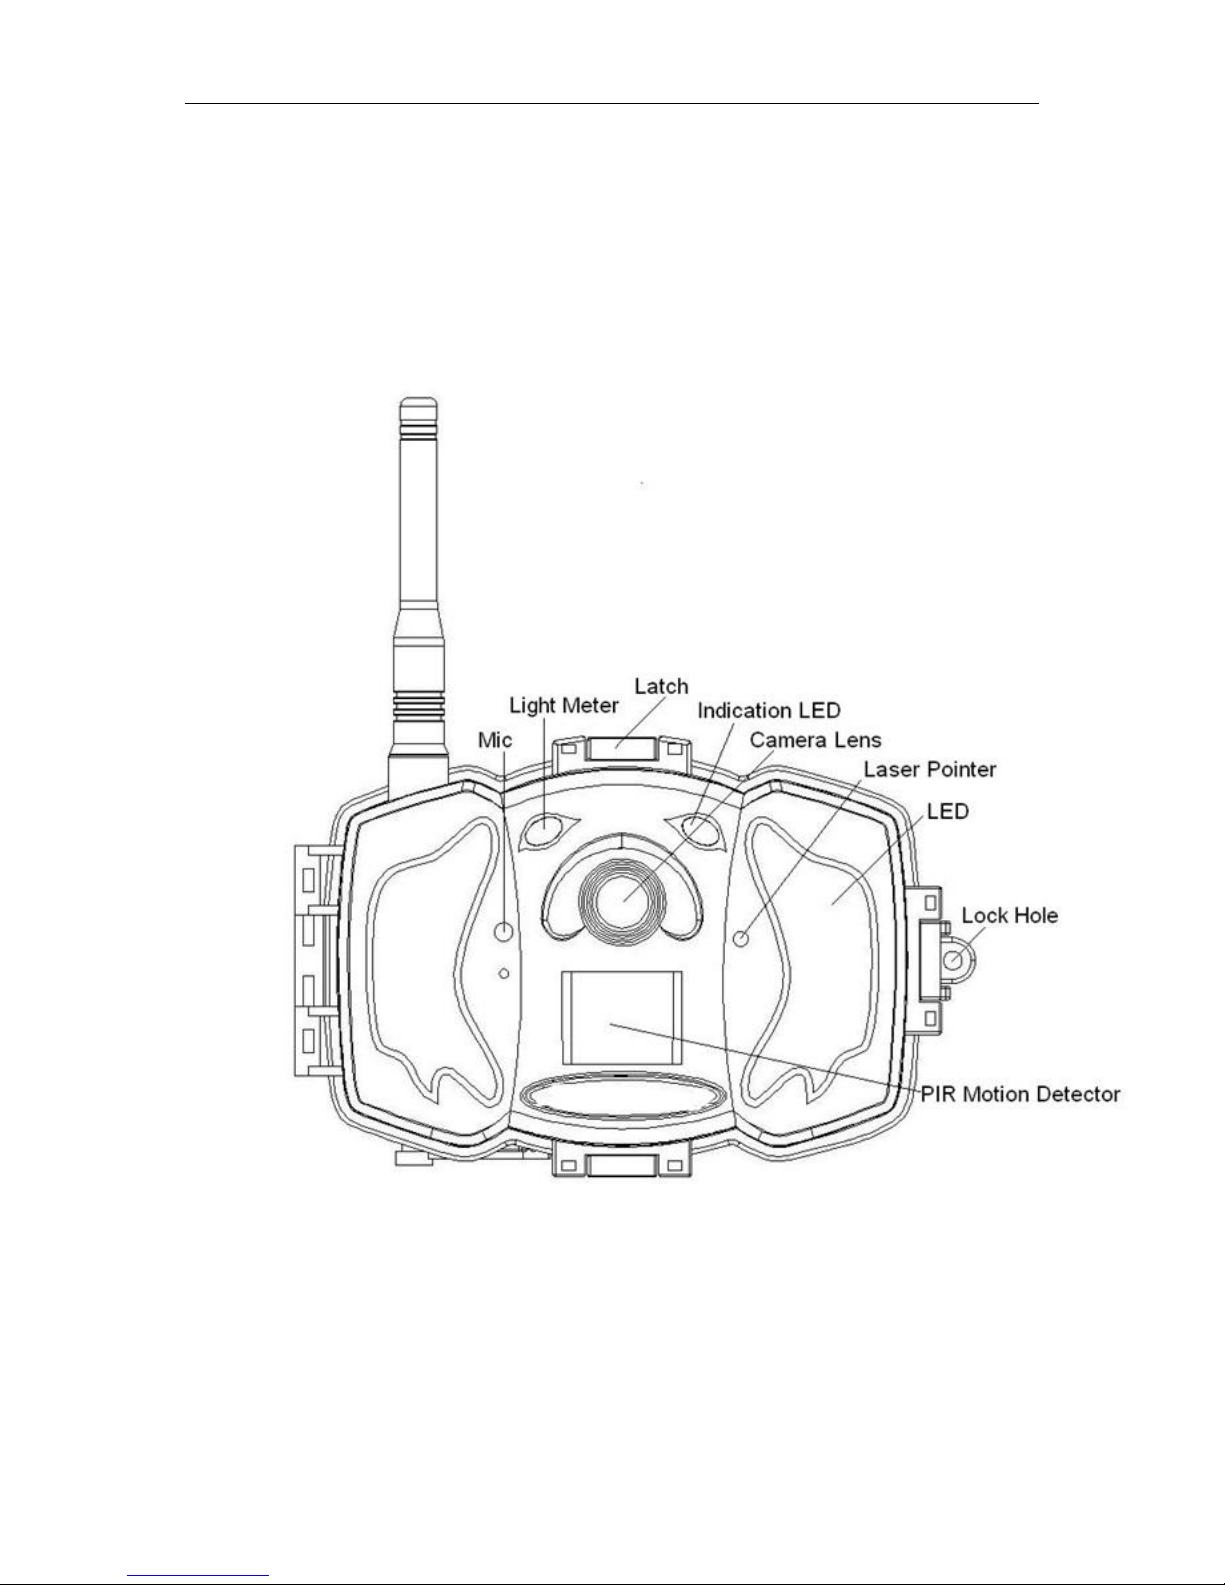
1.3 Camera Overview
Take a few moments to familiarize with the camera
controls and displays. It is helpful to bookmark this
section and refer to it when reading through the rest of
the manual.
Figure 1 Diagram of camera functional indicators

MG983G-36M 1 Instruction
Page 3
Figure 2 Inner panel view
Figure 3 Diagram of camera interfaces
1.4 Shooting Information Display
When the camera is turned on (the power switch is slid
to SETUP position), the current settings will be
Table of contents
Other Boly Digital Camera manuals


