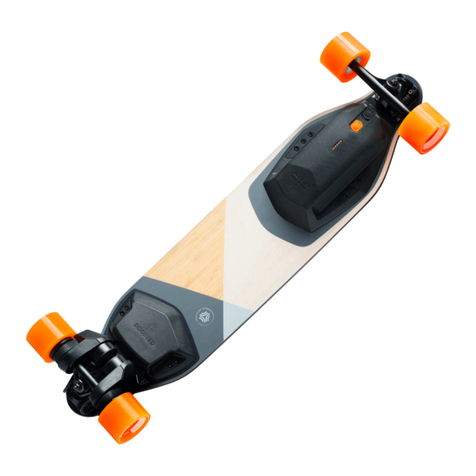
Boosted MINI User manual

MANUAL
BOOSTED MINI
English
Español
Français
Deutsch

2 Boosted Mini SR/XR Manual
TABLE OF
CONTENTS
ENGLISH
Warnings
Remote Glossary
Board Glossary
Proper Protection/Safety
Riding Basics
Powering On/O Remote
Powering On/O Board
Remote Charging
Board Charging
Checking Board Battery Life
Checking Remote Battery Life
Operating Board with the Remote
Checking Remote-Board Pairing
Changing Ride Mode
Removing Battery Pack
Replacing Battery Pack
More Information Online
Warnings & Safety Information
Safety & Compliance
Warranty
4
5
6
7
7
8
8
8
8
9
9
9
10
10
11
11
11
12-13
14
14
ESPAÑOL
Advertencias
Glosario del mando
Glosario del monopatín
Seguridad y protección
Conceptos básicos para ir en monopatín
Cómo encender y apagar el mando
Cómo encender y apagar el monopatín
Cómo cargar el mando
Cómo cargar el monopatín
Cómo comprobar la batería del monopatín
Cómo comprobar la batería del mando
Cómo manejar el monopatín con el mando
Cómo comprobar la conexión monopatín/mando
Cómo cambiar el modo del monopatín
Cómo retirar la batería
Cómo cambiar la batería
Más información en internet
Advertencias e información de seguridad
Seguridad y conformidad
Garantía
15
16
17
18
18
19
19
19
19
20
20
20
21
21
22
22
22
23
25
25

Boosted Mini SR/XR Manual 3
DEUTSCH
Warnungen
Glossar zur Fernbedienung
Glossar zum Board
Schutz- und Sicherheitshinweise
Einmaleins des Fahrens
Ein-/Ausschalten des Boards
Ein-/Ausschalten der Fernbedienung
Aufladen der Fernbedienung
Aufladen des Boards
Prüfen der Akkulaufzeit des Boards
Prüfen der Akkulaufzeit der Fernbedienung
Steuern des Boards mit der Fernbedienung
Kopplung von Fernbedienung und Board prüfen
Ändern des Fahrmodus
Entfernen des Akku-Packs
Austauschen des Akku-Packs
Ausführlichere Informationen online
Warn- und Sicherheitshinweise
Sicherheit und Vorschriften
Garantie
37
38
39
40
40
41
41
41
41
42
42
42
43
43
44
44
44
45
47
47
FRANÇAIS
Avertissements
Glossaire de la télécommande
Glossaire du skateboard
Protection adéquate/Sécurité
Notions de base pour rider
Allumer/éteindre la télécommande
Allumer/éteindre le skateboard
Chargement de la télécommande
Chargement du skateboard
Vérification de la charge de la batterie du skateboard
Vérification de la charge de la batterie de la télécommande
Utilisation du skateboard avec la télécommande
Vérification du jumelage télécommande-skate
Changement du mode de ride
Retrait de la batterie
Remplacement de la batterie
Plus d’informations en ligne
Avertissements et consignes de sécurité
Sécurité et conformité
Garantie
26
27
28
29
29
30
30
30
30
31
31
31
32
32
33
33
33
34
36
36
ESPAÑOL
Advertencias
Glosario del mando
Glosario del monopatín
Seguridad y protección
Conceptos básicos para ir en monopatín
Cómo encender y apagar el mando
Cómo encender y apagar el monopatín
Cómo cargar el mando
Cómo cargar el monopatín
Cómo comprobar la batería del monopatín
Cómo comprobar la batería del mando
Cómo manejar el monopatín con el mando
Cómo comprobar la conexión monopatín/mando
Cómo cambiar el modo del monopatín
Cómo retirar la batería
Cómo cambiar la batería
Más información en internet
Advertencias e información de seguridad
Seguridad y conformidad
Garantía

4Boosted Mini Manual
EN
WARNINGS: DO NOT RIDE WITHOUT
READING THIS MESSAGE
Your board can lose power and brakes at any moment
due to radio interference between your remote and
the board, a dead remote battery, unintentional
release of the Engage Button, braking when the
battery is fully charged, and other factors. Only ride
your Boosted board at speeds and on hills where
you’d be comfortable without power and brakes.
Braking downhill on a full battery will cause board
shutdown and temporary loss of braking power since
regenerative braking will overcharge the battery. To alert
you of this situation, the remote will warn you by beeping,
and you’ll lose your braking power. Safely come to a
stop by turning or foot braking and ride on flats or uphill
to drain the battery before attempting downhill again.
The Throttle Wheel in Expert Mode is extremely
sensitive to make the board responsive and
fun, but it also means fast or sudden inputs can
easily cause you to fall o. Start by trying to move
forward as slowly as possible in this mode.
Hills and high speed can be very dangerous because
crashes can cause serious injuries. Be extra careful when
riding the board, even if you’re an experienced rider.
Cars and other vehicles can kill you, so always be aware
of your surroundings when riding in the presence of other
vehicles. Ride defensively and assume other vehicles
can’t see you. Remember that your board may lose
power and brakes at any moment. Be aware of the laws
that govern the use of your board on public roads, bike
paths, sidewalks, or other places that you may ride.
Protect your board. We have engineered the board to
handle shock and vibration from riding over a wide
variety of terrain. However, riding o curbs, doing
jumps/hops, throwing the front down to the pavement,
and subjecting the board to other high-impact
events may damage internal electronic components
over time. We highly recommend that you regularly
inspect and maintain the board before riding.
Always wear a helmet. Other protective equipment (knee
pads, long sleeves, wrist guards) is highly recommended.
Warning:
Whenever you ride a Boosted board, you risk death or
serious injury from loss of control, loss of braking power,
collisions, and falls. To ride safely, you must read and
follow all warnings and instructions in this manual.
Warning:
Always wear a helmet when riding. Never ride in
water, on wet surfaces, in the rain, on slippery or
uneven surfaces, up steep hills, in traic, and over
cracks, train tracks, gravel, rocks, or any obstacles
that could cause a loss of traction. Avoid night riding,
areas with poor visibility, and narrow spaces.
Warning:
Do not ride a Boosted board in environments, on
inclines, or at speeds where you would not be
safely in control of an unpowered skateboard. In
the event of wireless interference, loss of brakes,
or battery fault, you may need to rely on skating
techniques like footbraking or sliding to stop.
Warning: Avoid Water
Do not ride on wet or icy pavement. Any amount of
water has the potential to damage the board’s electronics,
and water damage is not covered under warranty.
Riding on wet or icy pavement is extremely dangerous
due to the potential for losing traction and control.
Warning: Pinch Points
Keep fingers, hair, and clothing away from
belts, motors, wheels, and all moving parts.
Warning: Risk of Electric Shock
Do not open or tamper with electronics
housings which also voids the warranty.
Please ride responsibly and respect those around
you. How you ride will determine how people
view this new mode of transportation.

Boosted Mini Manual 5
EN
REMOTE GLOSSARY
Throttle Wheel
Board
Battery
Indicators
Engage Button
Connection &
Mode Indicator
Remote Battery Indicator
Multi-Button

6Boosted Mini Manual
EN
BOARD GLOSSARY
Hardware
Front Truck
Front Wheels
Power Button
Battery Housing
Deck
Motor Controller
Motor Caps
Rear Wheels
Kicktail
Bushings
Tail Puck
Motor
Mounts
Brushless Motors
Heat Sinks
Battery
Indicator Lights
Charging Port
Kingpin
Accessory
Port
Baseplate
Drive Belts

Boosted Mini Manual 7
EN
PROPER PROTECTION/SAFETY
• Always wear a helmet.
• Find an open, flat area with clean pavement
for your first ride.
• Read the warnings on the board and at the beginning
of this manual. For more details on riding, check out
the online tutorials at boostedboards.com/support.
• Other protective equipment is highly recommended
(knee pads, long sleeves, wrist guards).
RIDING BASICS
Some people can ride with either foot forward, but
most have a dominant foot. To determine which
is your dominant foot, stand on solid ground with
both feet together and lean forward to the point
of falling. Whichever foot you step forward with to
catch yourself from falling is likely your dominant
foot and the one you should lead with while riding.
If you lead with your left foot, you ride “regular”. If
you lead with your right, you ride “goofy”.
If you don’t know which foot to choose, opt for
whichever one allows you to face traic when riding.
Stance
Your Boosted board has a lot of power. Follow
these tips to ensure a safe riding experience:
• Place one foot over each truck.
• Keep a low center of gravity.
• Move the Throttle Wheel in small increments.
• Lean forward when accelerating.
• Lean backwards when braking.
More experienced riders may prefer placing their back
foot over the kicktail. This stance allows you to apply
pressure to the kicktail and lift the front end of the
board o the ground when going over cracks. Note:
Applying pressure to the kicktail increases your chances
of falling backwards or wheelying while accelerating.
Regular
Goofy
Avoid things that can cause loss of control or collision:
Gravel
Water
Steep Hills
Downhill
Tracks
Grates/Drains
Wet Surfaces
Rain
Obstacles
Larger Rocks
Cracks
Traic
Night Time
Poor Visibility
Narrow Spaces
Slippery Surfaces
Uneven Surfaces

8Boosted Mini Manual
EN
POWERING ON/OFF REMOTE
Press the Multi-Button for 2 seconds.
POWERING ON/OFF BOARD
Press the Power Button for 2 seconds.
2s
2s
REMOTE CHARGING
The remote takes between 1-4 hours to charge from
empty depending on your USB port capabilities. If the
remote is charged every time the board is charged
the remote should finish charging before the board.
BOARD CHARGING
Warning: Never leave the board unattended
while charging.
1:15h (S)
1:45h (X)
USB
1-4h

Boosted Mini Manual 9
EN
From the Board
When the board is on, press the Power Button 1 time
(1x). The battery lights will indicate the power level.
tap 1x
full charge
30-60 min
remaining
less than 30
min remaining
(potential
remote turn o
at any time)
Engage Button
must be held
to activate the
board. Release
to deactivate.
CHECKING BOARD BATTERY LIFE
From the Remote
When the board is on, press the Multi-Button 1 time (1x).
The board battery lights will indicate the power level.
tap 1x
OPERATING BOARD WITH THE REMOTE
Press and hold the Engage Button. Roll the Throttle Wheel
forward to move the board forward. Roll the Throttle
Wheel back to brake and reverse.
CHECKING REMOTE BATTERY LIFE
Warning: Never start a ride with a low remote
battery indication.

10 Boosted Mini Manual
EN
3 beeps / 3 flashes
2 beeps / 2 flashes
1 beep / 1 flash
tap 3x
CHANGING RIDE MODE
This board ships in Beginner Mode. Before following
the instructions below to switch modes, make sure
you have mastered the use of the remote and board.
Beginner: limited acceleration, top
speed of up to 11 mph, no hills.
Eco: moderate acceleration, top speed
of up to 16 mph, small hills.
Expert (Boosted Mini S): high acceleration, top
speed of up to 18 mph, up to 20% grade hills.
Expert (Boosted Mini X): high acceleration, top
speed of up to 20 mph, up to 20% grade hills.
Warning: The Throttle Wheel is much more sensitive
in Expert Mode.
To avoid getting thrown o the back of the board,
follow these tips:
• Place one foot over each truck.
• Keep a low center of gravity.
• Move the Throttle Wheel in small increments.
• Lean forward when accelerating.
• Lean backwards when braking.
CHECKING REMOTE-BOARD PAIRING
The Connection and Mode Indicator will turn solid
blue when the board is paired. If the indicator is
not lit, check that the board is powered on. If the light
is still not lit, press the Multi-Button on the remote
5 times (5x), followed by pressing the Power Button on
tap 5x
the board 5 times (5x) rapidly to pair your board.
Your board and remote have already been paired
prior to shipping, so you typically only need to
do this when pairing to a new board or remote.
To Cycle Through Modes
Come to a full stop. Tap the Multi-Button 3
times (3x) rapidly to change modes. Count the
LED flashes to identify which mode you are
in. Count the AUDIO beeps to identify which
mode you are in (1 beep, 2 beeps, 3 beeps).
tap 5x

Boosted Mini Manual 11
EN
REPLACING BATTERY PACK
• To insert a new battery pack, align the grooves on
both ends of the connector (board & battery pack).
• Insert, push together, and twist the two
ends of the connector together.
• Use the battery connector tools to ensure a secure fit.
• Lay the battery sideways so the connector
lays flat within the groove of the board, side
by side with the accessory wire.
• Rotate the battery into place.
• Ensure the connector lays flat within the groove of
the board side by side with the accessory wire.
• Replace and tighten the bolts with the hex wrench.
MORE INFORMATION ONLINE
This manual is intended for someone with some
skateboarding experience to get started. For more
advanced riding techniques, maintenance tips, or
more detailed tutorials on learning how to ride,
please visit: boostedboards.com/support
or youtube.com/boostedboards.
REMOVING BATTERY PACK
(MAINTENANCE ONLY)
Standard and extended range batteries are
not interchangeable on the Boosted Mini.
• First ensure that the board is turned o.
• Place the board upside down on a flat surface.
• Using a 4mm hex wrench, remove the six bolts
fastening the battery pack to the deck.
• Lift the top half of the battery and rotate the bottom.
• Then lift the entire pack to reveal the connector
between the deck and the battery pack.
• Using a pair of connector tools, carefully twist
and pull the battery connector apart.

12 Boosted Mini Manual
EN
WARNINGS & SAFETY INFORMATION
This equipment has been tested and found to comply
with the limits for a Class B digital device, pursuant
to part 15 of the FCC Rules. These limits are designed
to provide reasonable protection against harmful
interference in a residential installation. This equipment
generates, uses, and can radiate radio frequency
energy. If not installed and used in accordance with the
instructions, it may cause harmful interference to radio
communications. However, there is no guarantee that
interference will not occur in a particular installation.
If this equipment does cause harmful interference
to radio or television reception, which can be
determined by turning the equipment o and on, the
user is encouraged to try to correct the interference
by one or more of the following measures:
• Reorient or relocate the receiving antenna.
• Increase the separation between the equipment
and receiver.
• Connect the equipment into an outlet on a circuit
dierent from that to which the receiver is connected.
• Consult the dealer or an experienced radio/TV
technician for help.
• Prolonged exposure to UV rays, rain and
the elements may damage the enclosure
materials. Store indoors when not in use.
BATTERY SAFETY AND
HANDLING INFORMATION
Important Safety and Handling Information
Do not attempt to disassemble the product without
consulting Boosted’s service department. Should your
unit need service, contact Boosted Support
at support@boostedboards.com.
• Changes or modifications made to this
product not expressly approved by Boosted
may void the user’s warranty.
• Boosted Model L1SR and L1XR Skateboards are intended
only for use with Boosted Model B2 series batteries.
• Do not shock the battery by dropping it or throwing it.
• Always keep the battery out of reach
of infants or small children.
• Never expose this product or the battery to any liquids.
• Never throw the battery into a fire, as that
could cause the battery to explode.
• Never short-circuit the battery by bringing the
connector terminals in contact with another
metal object. This could cause personal injury
or fire and could also damage the battery.
Your device contains an internal rechargeable
lithium-ion battery which may present a risk of
fire or chemical burn if mistreated. Do not charge
or use the unit in a car or similar place where the
inside temperature may be over 40°C/104°F.
• Risk of explosion if battery is replaced by an
incorrect type. Dispose of used batteries
according to instructions.
Caution
Warning
• Failure to follow these safety instructions
could result in fire, electric shock, or
other injury or damage to the skateboard
and remote or other property.

Boosted Mini Manual 13
EN
Battery Charging Information
The charger supplied with the electric skateboard
should be regularly examined for damage to the
cord, plug, enclosure, and other parts. In the event of
such damage, the skateboard must not be charged
until the charger has been repaired or replaced.
Unplug the charger and disconnect it from
the skateboard when not in use.
Caution
• Only use the dedicated charger provided
for this unit. For indoor use only.
• Do not expose the charger to liquid, moisture
or extreme humidity.
• Do not charge Boosted Model L1SR and
L1XR skateboards or Boosted Model
R2 remote outdoors or in the rain.
• Power cord is used as a disconnection
device. To fully de-energize equipment for
service, disconnect the charger power cord.
• Stop charging the skateboard and/
or remote if charging isn’t completed
within the specified time.
• Stop charging the skateboard and/or
remote if the batteries become abnormally
hot, show signs of odor, discoloration,
deformation, or if abnormal conditions are
detected during use, charge, or storage.
• Do not charge the skateboard and/or
remote if the battery enclosure becomes
cracked, swollen, or shows any other signs
of misuse. Discontinue use immediately
and promptly dispose of unit.
Warning
PRODUCT AND BATTERY
DISPOSAL INFORMATION
• Your device should not be placed in municipal
waste. Please check local regulations for
proper disposal of electronic products.
• If this unit shows any type of damage, such as
bulging, swelling, or disfigurement, discontinue
use and immediately contact Boosted
Support by calling +1 (650) 933-5151.
• Dispose of used batteries in accordance
with the prevailing community regulations
that apply to the disposal of batteries.
• Never dispose of used batteries with
other ordinary solid wastes.
• Batteries contain toxic substances.
Disclaimer
Prior to using any Boosted product, we highly
recommend that you research your local regulations
and country specific laws. Ultimately, you are
responsible for complying with all applicable laws
and regulations and Boosted waives all liability
relating to your use of Boosted products.

14 Boosted Mini Manual
EN
EN
SAFETY AND COMPLIANCE
Optimal Operating Environment
Temperature: 5°C - 40°C/41°F - 104°F
Humidity: 0% - 90%
Electrical Specifications
Charger Input:
100-240VAC, 50/60Hz, 2.0A (indoor use only)
Charger Output: 54.4V, 2.21A constant
current, 120W max (indoor use only)
Model L1SR, L1XR Skateboards:
Rated input 54.4VDC, 2-5A
Model R2 Remote: 5VDC, 500mA
Product Weight
Board + Battery Pack: 14.99lb with standard range
and 16.75lb with extended range battery pack
Standard Range Battery Pack: 3.3lb
Extended Range Battery Pack: 4.96lb
Product Dimensions
Board + Battery Pack:
11.0” x 29.5” x 5.7” (W x L x H)
Standard Range Battery Pack Only:
7.5” x 10.8” x 1.8” (W x L x H)
Extended Range Battery Pack Only:
7.5” x 11.4” x 2.3” (W x L x H)
Estimated Riding Range
Standard Range Battery Pack: Up to 7 mi estimated
range is based on a total load of 176 lbs in Eco
Mode, on a smooth, flat surface with no wind.
Extended Range Battery Pack: Up to 14 mi estimated
range is based on a total load of 176 lbs, in Eco
Mode, on a smooth, flat surface with no wind.
Top Speed
Boosted Mini S: Up to 18 mph estimated top speed
is based on a smooth, flat surface with no wind.
Boosted Mini X: Up to 20 mph estimated top speed
is based on a smooth, flat surface with no wind.
Hill Grade
Test performed on a total load of 170 lbs on a 20% incline.
Environmental Protection
Boosted contributes to recycling and disposal
costs where applicable. Electrical and electronic
equipment, batteries, accumulators and packaging
material should not be disposed of with household
waste. Please recycle where facilities exist. Check
with your Local Authority for recycling advice.
WARRANTY
To review the Boosted, Inc. Return and Warranty
Policy, please go to www.boostedboards.com/
terms-and-conditions/return-warranty.
For all return shipping, please keep your shipping
box. The warranty does not include damage from
return shipping in insuicient packaging.
For any concerns regarding your board, please contact
Boosted Support by going to www.boostedboards.
com, or by emailing service@boostedboards.com.
Boosted Support can also be reached
by calling: +1 (650) 933-5151.

Boosted Mini SR/XR Manual 15Manual Boosted Mini 15
ES
ADVERTENCIAS: LEE ESTE MENSAJE
ANTES DE SALIR A RODAR
Tu monopatín puede apagarse y los frenos pueden
dejar de funcionar en cualquier momento si hay
interferencias de radio entre el mando y el monopatín,
se acaba la batería del mando, sueltas el gatillo
involuntariamente, frenas cuando la batería esté llena
o por otros factores. Conduce tu monopatín Boosted
solo a velocidades o en cuestas donde te sentirías
cómodo con el monopatín apagado y sin frenos.
Frenar cuesta abajo con la batería llena hará que el
monopatín se apague y los frenos dejen de funcionar
temporalmente, ya que el frenado regenerativo
sobrecarga la batería. Para avisarte, el mando emitirá
un pitido y los frenos se desactivarán. Detente de
manera segura girando o frenando con el pie y circula
con el monopatín en llano o cuesta arriba para gastar
batería antes de volver a rodar cuesta abajo.
En el Modo Experto, la rueda del acelerador es
extremadamente sensible. Esto hace que el monopatín
responda rápidamente y sea más divertido, pero los
cambios rápidos o repentinos pueden hacer que te
caigas con facilidad. Cuando utilices este modo, empieza
moviéndote hacia delante lo más despacio posible.
Circular en monopatín por cuestas o a gran velocidad
puede ser muy peligroso, ya que las caídas pueden causar
lesiones graves. Incluso si tienes mucha experiencia,
ten mucho cuidado al rular con tu monopatín.
Los coches y otros vehículos pueden matarte, así
que presta mucha atención a tu entorno cuando haya
vehículos cerca. Sé precavido y asume que los otros
vehículos no pueden verte. Recuerda que tu monopatín
puede apagarse y los frenos pueden dejar de funcionar
en cualquier momento. Ten en cuenta las leyes sobre
uso del monopatín en carreteras públicas, carriles
bici, aceras u otros sitios donde quieras usarla.
Protege tu monopatín. Hemos diseñado el monopatín
para absorber los golpes y las vibraciones sobre
muchos terrenos diferentes. Sin embargo, bajar
bordillos, saltar, golpear el asfalto con la parte delantera
y otros impactos pueden dañar los componentes
electrónicos internos con el tiempo. Te recomendamos
encarecidamente que revises el monopatín y hagas
un mantenimiento regular antes de usarlo.
Lleva casco siempre. También es muy recomendable
usar otros elementos de seguridad (guantes,
protecciones y ropa de manga larga).
Advertencia:
Cuando usas un monopatín Boosted, te expones a
un riesgo de muerte o sufrir heridas graves debido a
pérdidas de control o de frenos, choques y caídas. Para
utilizarlo de manera segura, debes leer y respetar todas
las advertencias e instrucciones de este manual.
Advertencia:
Usa un casco siempre que vayas en el monopatín.
Nunca te metas por agua o superficies húmedas y evita
la lluvia, los terrenos resbaladizos, desiguales o con
grietas y las cuestas pronunciadas. No patines en medio
del tráfico o en vías de tren, ni sobre grava, piedras
sueltas u otros obstáculos que puedan hacerte perder
adherencia. Evita utilizar el monopatín de noche, en
zonas con poca visibilidad o en espacios estrechos.
Advertencia:
No uses tu monopatín Boosted en entornos, cuestas
o a velocidades en los que no podrías controlar
con seguridad un monopatín sin motor. Si hay una
interferencia inalámbrica o la batería o los frenos
fallan, puede que tengas que usar técnicas de skate
como frenar con un pie en el suelo o derrapando.
Advertencia: Evita el agua
Evita pasar sobre superficies húmedas o con hielo. El
agua, incluso si es poca, puede dañar los componentes
electrónicos del monopatín, y la garantía no cubre los
daños por humedad. Usar el monopatín sobre superficies
húmedas o con hielo es extremadamente peligroso,
ya que puedes perder la adherencia y el control.
Advertencia: Puntos de pellizco
Mantén los dedos, el pelo y la ropa alejados de las correas,
los motores, las ruedas y las partes móviles en general.
Advertencia: Riesgo de descarga eléctrica
No abras o manipules las carcasas de los componentes
electrónicos. Además, hacer esto anulará la garantía.
Usa el monopatín de manera responsable y
respeta a los que están a tu alrededor. Tu manera
de conducir determinará la opinión de otras
personas sobre este nuevo modo de transporte.

16 Manual Boosted Mini
ES
GLOSARIO DEL MANDO
Rueda del acelerador
Indicadores
de batería
del monopatín
Gatillo
Indicador de conexión
y de modo
Indicador de batería
del mando
Botón multifunción

Boosted Mini SR/XR Manual 17Manual Boosted Mini 17
ES
GLOSARIO DEL MONOPATÍN
Elementos de sujeción
Eje delantero
Ruedas
delanteras
Botón de encendido
Carcasa de la batería
Tabla
Controlador del motor
Cubiertas
del motor
Ruedas
traseras
Pendiente de la cola
Gomas
Protector
Soportes
de los
motores
Motores sin
escobillas
Disipadores
de calor
Indicadores
de batería
del monopatín
Puerto de carga
Kingpin
Puerto
para accesorios
Placa base
Correas de transmisión

18 Manual Boosted Mini
ES
SEGURIDAD Y PROTECCIÓN
• Usa casco siempre.
• La primera vez que utilices el monopatín, busca
una zona abierta, llana y de superficie regular.
• Lee las advertencias sobre el monopatín al principio
de este manual. Para más información sobre
cómo usar el monopatín, consulta los tutoriales
en línea en boostedboards.com/support.
• Es muy recomendable usar otros elementos
de protección (rodilleras, ropa de manga larga,
muñequeras).
CONCEPTOS BÁSICOS
PARA IR EN MONOPATÍN
Algunas personas pueden montar en monopatín con
cualquiera de los pies adelantado, pero la mayoría
tiene un pie dominante. Para saber cuál es el tuyo,
ponte de pie sobre un terreno sólido con ambos pies
juntos e inclínate hacia delante hasta que pierdas el
equilibrio. Probablemente, el pie que uses primero para
no caerte será el dominante, esto es, el que llevarás
delante al patinar. Si tu pie dominante es el izquierdo,
eres «regular». Si es el derecho, eres «goofy».
Si no tienes claro qué pie escoger, quédate con
el que te permita circular de cara al tráfico.
Posición
Tu monopatín Boosted es muy potente. Para montar
en el de manera segura, sigue estos consejos:
• Pon un pie a la altura de cada eje.
• Mantén bajo tu centro de gravedad.
• Mueve la rueda del acelerador poco a poco.
• Inclínate hacia delante cuando aceleres.
• Inclínate hacia atrás cuando frenes.
A veces, los usuarios con más experiencia prefieren
poner el pie de atrás sobre la parte trasera de la tabla
(kicktail). Esta posición te permite aplicar presión en
el kicktail y levantar la parte delantera del monopatín
para pasar por encima de grietas. Nota: hacer presión
sobre el kicktail incrementa las probabilidades de caerte
hacia atrás o hacer un caballito cuando aceleres.
Regular
Goofy
Evita las cosas que puedan provocar pérdidas
de control o choques:
Grava
Agua
Ir cuesta abajo
Vías de tren
Lluvia
Obstáculos
Piedras
Grietas
Tráfico
Conducir de noche
Visibilidad limitada
Espacios estrechos
Terrenos resbaladizos
Terrenos desiguales
Cuesta pronunciadas
Rejillas y alcantarillas
Superficies húmedas

Boosted Mini SR/XR Manual 19Manual Boosted Mini 19
ES
CÓMO ENCENDER Y APAGAR EL MANDO
Pulsa el botón multifunción durante 2 segundos.
CÓMO ENCENDER Y APAGAR EL MONOPATÍN
Pulsa el botón de encendido durante 2 segundos.
2s
2s
CÓMO CARGAR EL MANDO
El mando tarda de 1 a 4 horas en cargarse desde el vacío,
según la capacidad de tu puerto USB. Si el mando se
carga cada vez que se carga el monopatín, el mando
debería terminar de cargarse antes del monopatín.
CÓMO CARGAR EL MONOPATÍN
Advertencia: nunca dejes el monopatín
cargando sin vigilancia.
1:15h (S)
1:45h (X)
USB
1-4h

20 Manual Boosted Mini
ES
Desde el monopatín
Con el monopatín encendido, presiona 1
vez el botón de encendido. Las luces de la
tabla te indicarán el nivel de batería.
toca 1 vez
Carga completa
Quedan 30-60
minutos
Quedan menos
de 30 minutos
(El mando se
puede apagar
en cualquier
momento)
Apreta el gatillo
para activar
el monopatín.
Sueltalo para
desactivarlo.
CÓMO COMPROBAR
LA BATERÍA DEL MONOPATÍN
Desde el mando
Con el monopatín encendido, pulsa el botón
multifunción 1 vez. Las luces de batería del
monopatín te indicarán el nivel de batería.
toca 1 vez
CÓMO MANEJAR
EL MONOPATÍN CON EL MANDO
Presiona el gatillo y manténlo apretado. Rueda el
acelerador hacia adelante para avanzar el monopatín.
Rueda el acelerador hacia atras para frenar y
andar en marcha atrás.
CÓMO COMPROBAR
LA BATERÍA DEL MANDO
Advertencia: no salgas con el monopatín
si queda poca batería en el mando.
This manual suits for next models
1
Table of contents
Languages:
Other Boosted Other manuals
