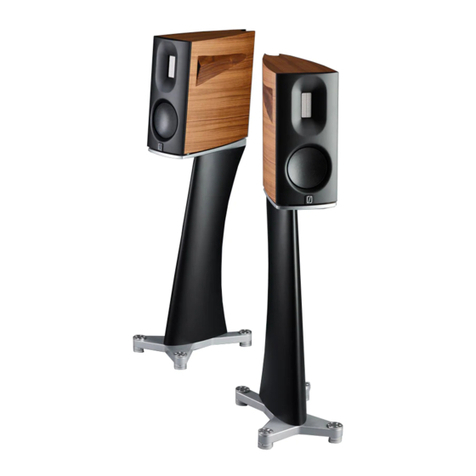
BORRESEN Z1 User manual

BØRRESEN
LOUDSPEAKER
User
Manual
Z5
BØRRESEN
Z1
BØRRESEN
Z2
BØRRESEN
Z3
BØRRESEN

Important
Check the serial number. You can nd the serial number on
the la¬bel placed above the connector box on the back of the
loud¬speakers. Also check that this serial number matches the
one on your invoice.
Please contact your dealer if there is no serial number on your
invoice, if the serial number on the invoice is wrong, or if there
is no serial number on the loudspeakers.
BØRRESEN Acoustics provides an extended 5-year warranty
against production defects on all BØRRESEN products accord-
ing to our policy:
http://www.borresen-acoustics.com/warranty
Content
Warranty information ................................................................ 2
Welcome, a word from the developer ....................................... 3
Assembling the Z1 stand .......................................................... 4
Positioning the loudspeakers in your home.............................. 6
Connecting the loudspeakers to your system........................... 7
Choice of speaker wire.............................................................. 8
Running in the new loudspeakers ............................................. 8
Maintenance.............................................................................. 9
The BØRRESEN Z-series loudspeakers................................... 10
2

Michael Børresen,
CVO and Co-founder of BØRRESEN Acoustics
3
Welcome
Congratulations on your new BØRRESEN loudspeakers.
Rest assured that these BØRRESEN loudspeakers will provide you with
a most outstanding musical experience and will let you truly enjoy the
music that you love, just as intimate and close as it was originally
performed by the artists themselves.
To achieve the best performance, carefully read this user manual prior
to setting up your new loudspeakers.
More information is available on www.borresen-acoustics.com

4
Assembling the Z1 stand 1. Start assembling the bottom cross Bby aligning the steel
part Fwith the holes in the composite part.
2. Fix the two parts together by mounting the feet E.
Make the feet lock in the holes, and tighten rmly.
3. Fit the long iron part Ginto the slot on the rear side of the
stand A. Slide the longer of the two threaded aluminum parts
into the slot of the column.
4. Place the cross with the longest sides to the back and position
the 2 bolts D.
5. Tighten them securely using a coin.
6. Place the stand on the oor and check that the long sides of
the bottom cross point in the tilt direction.
7. Slide the shortest threaded aluminum part Hinto the slot on
the rear of the stand.
8. Position the small cross Fon the top of the stand.
9. Use two bolts Dto attach the cross securely to the stand.
10. Tighten the bolts securely using a coin.
11. Insert a steel ball into each of the four countersinks.
12. Carefully place the Z1 monitor speaker, making certain the coun
tersinks in the bottom of the loudspeaker t and connect to the
four balls (this takes precession and patience).
13. Check very carefully that the loudspeaker is placed correctly in
the intended position.
14. Now you are ready to mount the loudspeaker securely to the
stand using one bolt D. Find the threaded hole below the top
cross Fand mount the bolt.
Use a coin to tighten the bolt tight and securely.
B
C
A
D
E
F
G
H

5
1 5 9 12
2
3
4
6
7
8
10
11
11
13
14

6
Positioning
The sound from loudspeakers depends very much on the room and on
the way they are set up. Please consult your dealer for advice on how
to set up your BØRRESEN loudspeakers in your home.
These are general guidelines that will give you a good starting point
for further experimenting to determine the ideal setup for your room.
A The distance from the side walls to the speakers N :
The BØRRESEN loudspeakers are not particularly sensitive to side
walls, so about 15 cm will be enough. Positioning the loudspeakers
too closely to the side walls, however, is likely to increase bass.
B The distance between the rear of the loudspeakers and the wall be-
hind them:
Begin with a distance of 50 cm. This distance should be exactly the
same for both loudspeakers. Test the loudspeakers out with music
you know to determine the distance that provides the best sound for
you.
Greater distance = less bass, more precise bass, better precision, and
bigger sound stage.
Shorter distance = more and softer bass, smaller sound stage.
C The distance between the loudspeakers:
The ideal distance between the loudspeakers should not be less than
3 meters.
D The distance between the loudspeakers and the listener O:
Place the loudspeakers at an angle so that the imaginary lines be-
tween the listener and the loudspeakers point towards the listener’s
shoulders. The lines should cross about one meter behind the listen-
er’s head. The loudspeakers are correctly angled when the listener is
just able to see the two inner sides of the loudspeakers.
A
B
C
D
D
N
O

R
AMP
SPEAKER OUT
L
7
SERIAL
P
Q
R
1. Connect a two-pole (+/-)
loudspeaker cable to the binding
posts, that are located at the
rear of the loudspeaker P.
The high quality binding posts
can accommodate only 4-mm-
plugs (“banana plugs”).
The pins can be put directly into
the binding posts without any
tightening necessary.
Special Notes:
• As with every connection system, ensure that the contact is tight
and has a proper contact area.
• Connectors with gold plating will typically offer the best results
and remain corrosion-free.
• Ensure that the positive and negative cables do not make contact
with each other.
• Check the connectors occasionally to make sure that nothing has
loosened.
2. . Turn off the power amp before connecting the other cable ends to the loudspeaker outputs Q.
Note: Make sure that both loudspeakers are connected properly R.
Connecting the loudspeakers
CAUTION
Distorted output signals from too weak, defective, or
overloaded ampliers may damage the loudspeakers.
Use high quality ampliers only and operate loudspeak-
ers and ampliers within specied power ratings.

8
Hours 100 200 300 400 500
Sound quality
Running in the new loudspeakers
All new, high quality loudspeakers need a certain period of running-in
time. As BØRRESEN loudspeakers use long-stroke bass drivers with
natural rubber surrounds, the loudspeakers need at least 50 - 100
hours of actual music playing, at a decent sound level. You will notice
the gradual improvement in sound quality. No particular precautions
need to be taken during those hours.
Choice of loudspeaker cables
The impact that high quality speaker wires have on sound quality can
be dramatic. However, the BØRRESEN loudspeakers are designed to
be neutral and not specically restricted to any particular type of ca-
bles - any high quality speaker wires will sound great.
BØRRESEN loudspeakers have been developed with a great deal of
high-standard technical know-how and experience gained from years
of developing Ansuz cables and accessories. So, sharing an almost
identical DNA, you may experience a positive synergy by connecting
Ansuz speaker wires to your BØRRESEN loudspeakers.
Please consult your BØRRESEN dealer for further information about
compatible loudspeaker cables that will suit both your music system
and the BØRRESEN loudspeakers.

9
However, you should implement these important
standard practices:
• Let the loudspeakers reach room temperature before plugging
them in.
Condensation may arise in the electronic circuitry when moving
the loudspeakers from cold to warm surroundings.
Such moisture may damage the loudspeakers’ components.
• Never use the product in damp settings.
• Never insert foreign bodies into the bass reex ports of the
loudspeakers.
• Avoid touching the loudspeakers’ elements.
Maintenance
• Clean the surface of the loudspeakers with a rmly wrung, damp
cloths.
• Do not use any detergent. It may discolor the nish.
• Do not use a vacuum cleaner to remove dust from the
loudspeakers’ elements.
Brush it away gently with a soft brush.
• Do not expose the cabinets to direct sunlight.

10
BØRRESEN Z1 BØRRESEN Z2
The BØRRESEN Z-series loudspeakers

11
BØRRESEN Z3 BØRRESEN Z5

http://www.borresen-acoustics.com
Adding more and better resonance control
Darkz is a series of ecient devices to ground all components in a
high-end audio system. They are mechanically tuned to allow vibra-
tions a path out of the component and to keep various components
individually isolated. Darkz provide a distinct sound improvement
over standard-mounted component feet.
BØRRESEN loudspeakers are designed for an easy upgrade by add-
ing Ansuz Darkz to the loudspeakers’ feet. The sonic improvement
caused by Darkz is undeniable and can almost be addictive.
Darkz are available in 4 quality levels; D·TC, D2, C and A. Darkz can
be easily installed under any of the BØRRESEN loudspeakers.
Ask your dealer for a demonstration.
This manual suits for next models
3
Table of contents
Other BORRESEN Speakers manuals
