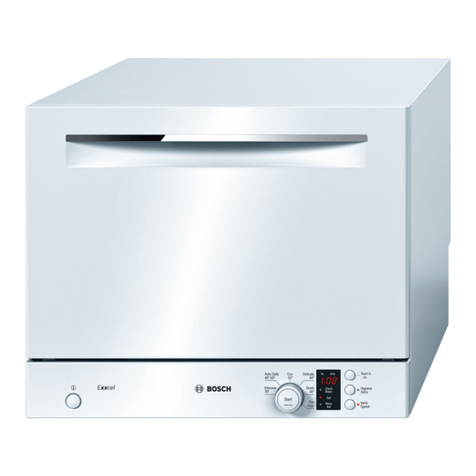
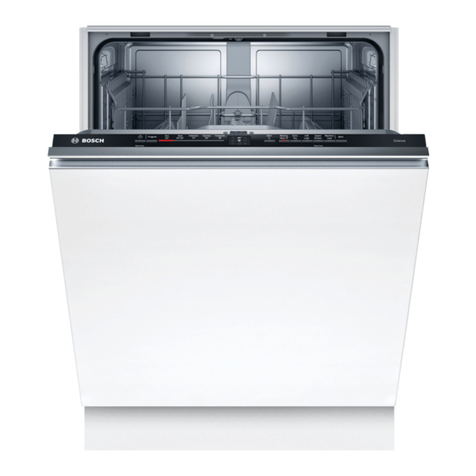
Bosch SMV6YCX00E User manual

NL
Refer to the Digital User's Guide for more
information.
Table of contents
1 Safety..................................... 4
1.1 General instructions ..................... 4
7 Additional functions ............................ 20
8 Equipment................................. 20
8.1 Upper crockery basket ............... 21
8.2 Etagere .................................... 21
8.3 Lower crockery basket ............... 22
8.4 Foldable plate supports ... 22
8.5 Cutlery tray.............................. 23
1.2 Destination of the
device .............................................. 4
1.3 Restriction of Users ..... 4
1.4 Secure Installation.............................. 4
1.5 Safe use..................................... 6
1.6 Damaged device................ 8
1.7 Dangers for children .............. 8 9 Before first use ..................... 23
2 Avoiding Property Damage ..... 10
2.1 Secure installation ..................... 10
2.2 Safe use......................................... 10
9.1 Commissioning for the first
time..................................................... 23
10 Softening system .............. 23
10.1 Overview of the water hardness
settings ..................... 23
3 Environmental protection and
ring..................................... 11 10.2 Setting water softening...... 24
10.3 Water softener salt ................... 24
3.1 Disposing of the packaging ... 11
3.2 Saving energy ..................... 11 10.4 Switching off water
softening.................................................. 25
3.3 Zeolite drying . . . . . . . . . . . . 11
3.4 Efficient Dry ............................. 12 10.5 Regenerating the softening
system .............................. 26
4 Set up and connection ..................... 12
4.1 Scope of delivery ..................... 12 11 Rinse system ..................... 26
11.1 Rinse aid................................. 26
4.2 Setting up and connecting the
device ................................... 12 11.2 Setting the amount of rinse
aid ..................... 27
4.3 Drain water connection .............. 13
4.4 Drinking water connection .............. 13
4.5 Electrical connection ..................... 13 11.3 Switching off the rinse aid
system .............................. 27
5 Getting to know your device........ 14
5.1 Device ....................................... 14
5.2 Controls ..................... 16
12 Detergent ................................ 27
12.1 Suitable dishwasher
detergents................................................. 27
12.2 Unsuitable detergent ... 29
6 Programs ................................ 18 12.3 Notes on
detergents .............................................. 29
6.1 Instructions for testing
institutes................................................ 19 12.4 Filling detergent ..................... 29
6.2 Favorite . . . . . . . . . . . . . . . . . . . . . . . . . . . . . 19
2

NL
13 Crockery.............................. 30 19.3 Transporting the device .............. 53
13.1 Damage to glass and
crockery ................................... 31 19.4 Disposal of your old
appliance ............................................... 53
13.2 Loading crockery ..................... 31
13.3 Unloading crockery .............. 32 20 After-sales service.......................... 54
20.1 Product number (E-Nr.), production
number (FD) and serial number (Z-
Nr.) ............... 54
14 Essentials of the Operation....................... 32
14.1 Switching on the device.............. 32
14.2 Set program ..................... 33
14.3 Setting additional function .............. 33
14.4 Make time setting ..................... 33
14.5 Start program................ 33
14.6 Interrupting program ...... 33
14.7 Canceling a program .............. 34
14.8 Switching off the device .............. 34
20.2 AQUA-STOP warranty ..................... 54
21 Technical data ..................... 55
21.1 Information on Free Software and
Open Source Software .... 55
22 Declaration of Conformity......... 56
15 Basic settings ..................... 35
15.1 Overview of the basic
settings ..................................... 35
15.2 Change basic settings...... 38
16 Home Connect ..................... 39
16.1 Quick start with Ho-
me Connect ............................ 39
16.2 Remote Start ..................... 40
16.3 Protection of personal
data ................................... 40
17 Cleaning and maintenance .............. 41
17.1 Cleaning the rinse aid container
gene ....................................... 41
17.2 Detergent................................ 41
17.3 Tips for device
maintenance .............................................. 41
17.4 Machine cleaning . . . . . . . . . . . . . . . 41
17.5 Screening system ..................... 43
17.6 Cleaning the spray arms......... 44
18 Troubleshooting ..................... 45
18.1 Cleaning the drain pump.............. 52
19 Transporting, storing and
disposal..................................... 52
19.1 Disassembling the device .............. 52
19.2 Making the appliance frost-
proof................................................ 53
3

NLSafety
1 Safety
Please observe the following safety instructions.
1.1 General instructions
¡Read this manual carefully.
¡Keep the operating instructions and product information for future reference
for use or for subsequent owners.
¡Do not connect the device in case of transport damage.
1.2 Destination of the device
Only use the device: ¡to wash
dishes.
¡for domestic use and in enclosed spaces within the home
sable environment.
¡up to an altitude of 2500 m above sea level.
1.3 Restriction of Users
This appliance can be operated by children aged from 8 years and
above and by persons with reduced physical, sensory or mental
capabilities or lack of experience and/or knowledge if they are
supervised or have been instructed in the safe use of the appliance
and understand the resulting hazards. understood. Children must
not play with the appliance.
Cleaning and user maintenance must not be made by children
unless they are supervised.
Make sure that children under the age of 8 cannot reach the device
or the connection cable.
1.4 Secure installation
WARNING ‒ Risk of injury! Improper installations
can cause injury.
▶When setting up and connecting the device, follow the
instructions in the operating and installation instructions.
4

SafetyNL
WARNING ‒ Risk of electric shock! Improper
installations are dangerous.
▶Only connect and operate the device in accordance with the
information on the rating plate.
▶Always use the power cord supplied with the new device.
▶Only connect the device to an alternating current mains via a
properly installed socket with earthing contact.
▶The protective earthing system of the domestic electrical installation
must be installed in accordance with the electrotechnical regulations.
▶Never power the device through an external switching device,
e.g. a time switch or remote control.
▶When the appliance is built-in, the mains plug of the mains
connection cable must be freely accessible, or if free access is not
possible, a disconnection device must be installed in the
permanently installed electrical installation in accordance with the
installation instructions.
▶When setting up the device, make sure that the mains cable is
not pinched or damaged.
Cutting the supply hose or immersing the AquaStop valve in
water is dangerous.
▶Never immerse the plastic housing in water. There is an electric
valve in the plastic housing on the inlet hose.
▶Never cut the inlet hose. There are electrical connection cables in
the supply hose.
WARNING ‒ Risk of fire!
Using an extended power cord and unauthorized adapters is
dangerous.
▶Do not use extension cords or multiple sockets.
▶Only use adapters and power cords approved by the
manufacturer.
▶If the power cord is too short and a longer power cord is not
available, contact an electrical retailer to adjust the home
installation.
5

NLSafety
Contact between the device and installation pipes can lead to
failure of the installation pipes, for example gas pipes and power
pipes. Gas from a corroded gas pipe can ignite. A damaged power
line can lead to a short circuit.
▶Make sure that there is a distance of at least 5 cm between the
device and the installation pipes.
WARNING ‒ Risk of injury!
The hinges move when opening and closing the appliance door
and can lead to injury.
▶If base or built-in appliances are not located in a niche and a side
wall is therefore accessible, the hinged area on the side must be
covered. The covers are available from specialist retailers or from
our after-sales service.
WARNING ‒ Danger of tipping over!
Improper installation can lead to the device tipping over.
▶Only install base or built-in appliances under a continuous
worktop that is firmly connected to the adjacent cabinets.
1.5 Safe use
WARNING ‒ Risk of serious health hazard!
Non-compliance with the safety instructions and instructions for
use on the packaging of dishwasher detergents and rinse aids
can lead to serious health damage.
▶Observe the safety instructions and instructions for use on the
detergent and rinse aid packaging.
WARNING ‒ Risk of explosion!
Solvents in the rinsing chamber of the device can lead to
explosions.
▶Never put solvents in the washing area of the appliance.
6

SafetyNL
Strongly corrosive alkaline or strongly acidic cleaning agents in
combination with aluminum objects in the washing area of the
appliance can lead to explosions.
▶Never use strongly corrosive alkaline or strongly acidic cleaning
agents, especially those for professional or industrial use, in
combination with aluminum objects (e.g. grease filters of
extractor hoods or aluminum pans) in the dishwasher, e.g. for
machine maintenance.
WARNING ‒ Risk of injury! An open appliance
door can lead to injuries.
▶Only open the appliance door to load and unload dishes in
order to avoid accidents such as tripping.
▶Do not sit or stand on the open appliance door. Knives and
objects with sharp points can cause injuries.
▶Place knives and objects with sharp points with the points down
in the cutlery basket, knife holder or cutlery drawer.
WARNING ‒ Risk of burns!
If the appliance door is opened while the program is running,
hot water may splash out of the appliance.
▶Only open the appliance door carefully during the program run.
WARNING ‒ Risk of electric shock! Penetrating moisture
can cause an electric shock.
▶Only use the device in closed rooms.
▶Never expose the device to excessive heat and humidity.
▶Do not use a steam cleaner or high-pressure cleaner to clean
the appliance.
Damaged insulation of the power cord is dangerous.
▶Never bring the power cord into contact with hot device parts or
heat sources.
▶Never bring the power cord into contact with sharp points or
edges.
▶Never kink, crush or modify the power cord.
7

NLSafety
WARNING ‒ Risk of burns!
The blowout of the zeolite reservoir becomes hot and can cause
burns.
▶Never touch the blow-out opening of the zeolite reservoir.
1.6 Damaged device
WARNING ‒ Risk of electric shock!
A damaged device or power cord is dangerous.
▶Never use a damaged device.
▶Never use a device with a cracked or broken surface.
▶Never pull on the power cord to disconnect the device from the
power supply. Always pull the plug on the power cord.
▶If the appliance or the power cord is damaged, immediately
unplug the power cord or switch off the fuse in the fuse box and
close the tap.
▶Contact the service department. →
Page 54
Improper
repairs are dangerous.
▶Only trained specialist personnel may carry out repairs on the
device.
▶Only original spare parts may be used for repairing the device.
▶If the power cord of this appliance becomes damaged, it must
be replaced with a special cord available from the manufacturer
or its service agent.
1.7 Dangers for children
WARNING ‒ Risk of suffocation!
Children can pull packaging material over their heads and become
entangled and suffocated.
▶Keep packaging material away from children.
▶Do not let children play with packaging material.
8

SafetyNL
Children can inhale or swallow small parts and suffocate.
▶Keep small parts away from children.
▶Do not let children play with small parts. Children can lock
themselves in the device and suffocate.
▶If present, use the child lock.
▶Never allow children to play with or operate the device.
WARNING ‒ Risk of health hazard! Children can lock
themselves in the appliance and endanger their lives.
▶In the case of discarded appliances, unplug the mains cable, then
cut the mains cable and damage the appliance door lock to such
an extent that the appliance door no longer closes.
WARNING ‒ Risk of crushing!
Children can become trapped between the appliance door and
the cabinet doors below with high-mounted appliances.
▶Watch out for children when opening and closing the appliance door.
WARNING ‒ Risk of chemical burns! Dishwasher and rinse
aids can cause burns to the mouth, throat and eyes.
▶Keep children away from detergents and rinse aids.
▶Keep children away from the opened device. The water in the
wash cabinet is not drinking water. Residues of detergent and
rinse aid may still be present in this.
WARNING ‒ Risk of injury!
Children can get their little fingers caught in the slots of the
tablet tray and injure themselves.
▶Keep children away from the opened device.
9

NLto avoid
v2 Material damage
to avoid
avoid Contact between the unit and water
pipes can lead to corrosion of the
water pipe and the water pipe may
leak.
▶Make sure there is a distance of at
least 5 cm between the appliance
and the water pipe. This
does not apply to the supplied
pipes for the drinking water
connections and the water drain
connection.
Modified or damaged water hoses can
lead to material damage and damage
to the device.
▶Never kink, pinch, alter or cut
water hoses.
▶Only use the supplied water hoses
or original spare hoses.
▶Reuse never used water hoses.
A water pressure that is too low or too high can
hinder the function of the device.
▶Make sure that the water pressure
at the water supply installation is at
least 50 kPa (0.5 bar) and at most
1000 kPa (10 bar).
▶If the water pressure exceeds the
specified maximum value, a
pressure reducing valve must be
installed between the drinking
water connection and the hose set
of the device.
to avoid
2.1 Secure Installation
NB!
Improper installation of the device
can lead to damage.
▶If the dishwasher is installed below
or above other household
appliances, the information on
installation in combination with the
dishwasher in the installation
instructions for the respective
household appliance must be
observed.
▶If no information is available or if
the installation instructions do not
contain any instructions on this
subject, check with the
manufacturer of these household
appliances whether the dishwasher
can be installed above or below
other household appliances.
▶If no information from the
manufacturer is available, the
dishwasher must not be installed
above or below these household
appliances.
▶To ensure safe operation of all
household appliances, you must
also follow the installation
instructions for the dishwasher.
▶Do not install the dishwasher
under a hob.
▶Do not install the dishwasher near
heat sources such as radiators,
water heaters, cookers or other
appliances that give off heat.
2.2 Safe use
NB!
Escaping water vapor can damage
built-in furniture.
▶After the program has ended, allow
the appliance to cool down briefly
before opening the appliance door.
The rinse aid container can be
corroded by softening salt for
dishwashers.
▶To ensure that any spilled softener
salt is flushed out of the rinse aid
container, the
10
Environmental protection and savingNL
the softening salt must be filled
into the softening salt container
immediately before the program
starts.
Dishwasher detergent can damage the
water softener.
▶Only fill the water softener tank
with softening salt for dishwashers.
Unsuitable detergents can damage
the appliance.
▶Do not use a steam cleaner.
▶To avoid scratches, do not use
sponges with a rough surface or
abrasive cleaners on the surface of
the device.
▶To prevent corrosion in dishwashers
with a stainless steel front, do not
use sponge cloths or rinse them
well several times before using for
the first time.
3.2 Saving energy
If you follow these instructions, your
appliance will use less electricity and
water.
Use the Eco 50° programme.
aThe Eco 50° program is ener-
energy-saving and environmentally friendly.
→
"Programs", page 18
If you only need to wash a few
dishes, you can use the additional
Half load function.1
aThe program is
lighter load is adjusted and the
consumption values are reduced.
→
"Additional functions", page 20
Zeolite drying automatically
contributes to energy savings.
a→
"Drying with zeolite ",
Page 11
3 Environmental protection and
savings 3.3 Zeolite drying
The device is equipped with a zeolite
reservoir. Energy can be saved by
means of zeolite drying.
Zeolite is a mineral that can store and
release moisture and heat energy.
During the washing phase, heat
energy is used to heat the washing
water and dry the mineral.
During the drying phase, moisture
from the rinse chamber is stored in
the mineral and heat energy is
released. The heat energy is blown out
into the wash chamber with dry air.
This enables rapid and improved
drying.
3.1 Disposal of the packaging
The packaging materials are
environmentally friendly and can be
reused.
▶Dispose of the individual
components separately by type.
1Depending on the device version
11

NLSet up and connect
Zeolite drying is therefore very
energy-saving. 4 Set up and connect
Tip:To ensure that the zeolite drying
works properly, do not place any
dishes directly in front of the suction
opening and outlet opening of the
zeolite reservoir.
Do not place temperature-sensitive
dishes directly in front of the blow-out
opening of the zeolite reservoir.
→
"Device", page 14
For correct use, connect the device to
electricity and water in a professional
manner. Observe the required criteria
and the installation instructions.
4.1 Scope of delivery
After unpacking, check all parts for
transport damage and the
completeness of the delivery.
For complaints, please contact the
store where you bought the device
or our customer service.
3.4 Efficient Dry
The appliance door opens
automatically during the drying phase.
As a result, a particularly economical
drying is achieved.
For optimum drying results, it is
advisable to wait for the end of the
program before removing the dishes.
The program is finished when
"0h:00m" is shown on the display.
If the automatic door opening is
deactivated, the energy consumption
increases and the drying phase is
usually shortened.
→
"Overview of basic settings",
page 35
Remark:The device has been checked
at the factory for correct operation.
This may leave water stains on the
device. The water stains disappear
after the first wash cycle.
The delivery consists of:
¡Dishwasher
¡Instructions
¡Assembly instructions
¡Other documents containing information
tie
¡Mounting material
¡Steam protection plate ¡Salt
filling aid funnel
¡Connection cord
¡Quick guide
4.2 Setting up and connecting
the device
You can install your substructure or
built-in appliance in the kitchen unit
between wooden and plastic walls. If
you subsequently set up the device as
a free-standing device, you must
secure the device against tipping over,
e.g. by screwing it to the wall or
installing it under
12

Set up and connectNL
a continuous worktop that is
permanently connected to the adjacent
cabinets.
1.Observe the safety instructions. →
Page 4
4.4 Drinking water connection
Connect the device to a drinking
water connection.
Install drinking water connection
2.Observe the instructions for the
electrical connection. Remark
¡If you replace the device
use a new water supply hose.
3.Check the contents of the package
and the condition of the device.
4.The required installation dimensions can be found
in the installation instructions.
1.You will find the necessary steps in
the supplied installation manual.
5.Level the appliance using the
adjustable feet. 2.Connect the device to the drinking
water connection using the
enclosed parts.
Pay attention to a firm stand.
6.Install the drain water connection.
→
Page 13
Observe the technical data.
7.Install the drinking water
connection. →
Page 13
3.Make sure that the drinking water
connection is not kinked, crushed
or entangled.
8.Connect the device to the
power. 4.5 Electrical connection
4.3 Drain water connection Connect the device electrically
Connect the appliance to a drain
water connection so that the dirty
washing water can be drained away.
Comments
¡Take the safety rules
→
Page 4
in mind.
¡Please note that the
protection system only works when
the device is supplied with power.
Install waste water connection
1.You will find the necessary steps in
the supplied installation manual.
1.Connect the appliance plug of the
connection cable to the
appliance.
2.Connect the drain hose to the
connection nipple of the siphon
using the parts supplied. 2.Insert the mains plug of the
appliance's connecting cable into
a socket in the vicinity of the
appliance.
3.Make sure that the drain hose is not
kinked, crushed or tangled.
4.Make sure that the water is not
prevented from flowing out by a
plug in the waste water connection.
The connection data of the device
can be found on the rating plate.
3.Check the mains plug for tightness.
13

Get to know your deviceNL
2Detergent dispenser Pour the detergent into the detergent
dispenser.
→
"Detergent", page 27
3Lower crockery basket Lower crockery basket →
Page 22
4Reservoir for softener
thing salt
Add softening salt to the water softener
salt reservoir.
→
"Softening system", page 23
5Lower spray arm The lower spray arm cleans the dishes in
the lower basket.
If the dishes are not cleaned optimally,
clean the spray arms.
→
"Clean the spray arms", page 44
6Tablet tray During the wash cycle, tabs automatically fall
from the detergent compartment into the
tablet compartment where the tabs can
dissolve optimally.
7Upper crockery basket
Cutlery tray
Etagere1
Upper spray arm
Upper basket →
Page 21
Cutlery drawer →
Page 23
Etagere →
Page 21
8
9
10 The upper spray arm cleans the dishes in
the upper basket.
If the dishes are not cleaned optimally,
clean the spray arms.
→
"Clean the spray arms", page 44
11 suction opening of the
zeolite reservoir
The suction opening is used for drying
with zeolite →
Page 11
.
12 Blow-out opening of the
zeolite reservoir
The outlet opening is used for drying
with zeolite →
Page 11
.
13 sieving system Sieve system →
Page 43
14 Reservoir for gloss
flushing agent
Pour rinse aid into the rinse aid
reservoir.
→
"Rinse system", page 26
1Depending on the device version
15

NLGet to know your device
5.2 Controls
You can use the control panel to set all the functions of your device and obtain
information about the operating status.
Some keys perform various functions.
1 2 3 4 5 6 7 8
13 12 11 10 9
1ON/OFF key
test
and Reset- Switch on device →
Page 32
Switch
off device →
Page 34
Cancel program
→
Page 34
2Program keys Programs →
Page 18
3Refill softener salt indicator Softening system
→
"Filling with softening salt",
page 24
4Top up rinse aid indicator Final rinse system
→
"Filling with rinse aid",
page 26
5WLAN indication
cation terto o
e
Home Connect →
Page 39
Ind ie r water supply
6India wa EV there icat voo
7pr
fu
gramma key
nctions
no n extra Program
→
"Program
additional function
→
"Additional fu
ash
MMAs", page 18
ies
nctions", page 20
8Start key Start program →
Page 33
1Depending on the device version
16

Get to know your deviceNL
9Test If you
button opens the basic settings.
→
"Change basic settings",
page 38
for approx. 3 seconds
10 Remote Start
Select start time
Door handle1
display
→
"Remote Start", page 40
Create time setting →
Page 33
Open the appliance door.
11
12
13 Information about the remaining time or
basic settings is shown in the display. You
can change the basic settings via the
display and the adjustment buttons.
→
"Change basic settings",
page 38
1Depending on the device version
17

NLPrograms
6 Programs
Here you will find an overview of the
adjustable programs. Depending on
the configuration, different programs
are offered on the machine's control
panel. The running time depends on
the selected program. In addition, the
running time depends on the water
temperature, amount of dishes,
degree of soiling and selected extra
function →
Page 20
. Also a
deactivated rinse system or lack of
rinse aid affects the running time.
The consumption values can be
found in the quick guide. The
consumption values apply to normal
conditions and a water hardness of 13
- 16 °dH. Various factors, such as
water temperature or pipe pressure,
can lead to deviations.
Program Usage Program run
China:
¡pots, pans, non-sensitive
crockery and cutlery
Degree of pollution:
¡very encrusted, burnt-in or
dried-on starch or protein-
containing food residues
Intensive:
¡Pre-rinse
¡Cleaning 70 °C ¡
Intermediate rinse
¡Rinse rinse
50°C
¡To dry
Intensive 70°
China:
¡mixed crockery and
cutting
Degree of pollution:
¡slightly dried, in the home
keep usual food scraps
Sensor Optimized
sed:
¡Become dependent
of the degree of
pollution of it
dishwater opti-
malized by it
sensor system.
Auto 45-65°
China:
¡mixed crockery and
cutting
Degree of pollution:
¡slightly dried, in the home
keep usual food scraps
Most economical program:
¡Pre-rinse
¡Cleaning 50 °C ¡
Intermediate rinse
¡Rinse rinse
35°C
¡To dry
Eco 50°
China:
¡mixed crockery and
cutting
Degree of pollution:
¡slightly dried, in the home
keep usual food scraps
sound-optimized
sed:
¡Pre-rinse
¡Cleaning 50 °C ¡
Intermediate rinse
¡Rinse rinse
35°C
¡To dry
Silent 50
18

ProgramsNL
Program Usage Program run
China:
¡mixed crockery and
cutting
Degree of pollution:
¡slightly dried, in the home
keep usual food scraps
Time-Optimized:
¡Cleaning 60 °C ¡
Intermediate rinse
¡Rinse rinse
50°C
¡To dry
Express 60°
Use only with empty device. Machine cleaning
70°C
Machine cleaning
-
→
"Favorite", page 19
-
favourite
Remark:The relatively longer running
time of the Eco 50° program is the
result of longer soaking and drying
times. These enable optimum
consumption values.
The Pre-rinse program is stored under
this button at the factory. Pre-rinse is
suitable for all types of crockery. The
dishes are pre-cleaned by cold rinsing.
6.1 Instructions for test
institutes Tip:You can download additional
programs via the Home Connect app
and store them under the button.1
Test institutes receive instructions for
comparison tests, e.g. according to
EN60436.
This concerns the conditions for
carrying out the tests, not the results
or the consumption values.
Inquiry by e-mail to: dishwasher@test-
appliances.com The product number (E-
Nr.) and the production number (FD) are
required, which you will find on the
rating plate on the appliance door.
Save favorite on the device.
1.Open the appliance door.
2.Press.
3.Press the program button.
4.Press the button for the desired
additional function.
5.press for 3 seconds.
aThe selected program and
the additional function flash.
aflashes.
6.2 Favourite aThe program and the additional function
have been saved.
Under the key
save the nation of a program and
additional function.
Save the program via the Home
Connect app or on the appliance.
can you combine Tip:To reset the program to the pre-
wash program saved at the factory,
you can use the Home Connect app1or
reset the device to factory settings.
1Depending on the device version
19

NLAdditional features
7 Additional functions
Here you will find an overview of the adjustable additional functions. Depending on
the configuration, various additional functions are offered on the machine's control
panel. Depending on the programme, you can select certain additional functions.
Symbol Additional function
Extra Dry
Usage
¡For an improved drying result
the final rinse temperature is increased and the
drying phase is extended.
¡Particularly suitable for drying
plastic parts.
¡The energy consumption is somewhat higher and
the running time increases.
Half load ¡Switch on when there are few dishes. ¡Less
detergent in the detergent
compartment than for a full load is
recommended.
¡The running time is shortened.
¡The water and energy consumption are reduced
low.
SpeedPerfect+ ¡The running time depends on the dishwashing
program with 15% to 75%1shortened. ¡The additional
function can be activated before the program
start or be activated at any time during the
program run.
¡Water consumption and energy consumption
are being increased.
If you select this additional function, the
automatic door opening is deactivated in the
setting "o02".
1Depending on the device version
8 Equipment
Here you get an overview of the
possible equipment of your device and
the way in which you use it. The
equipment depends on your device
variant.
20
Table of contents
Other Bosch Dishwasher manuals

Bosch
Bosch SMU4HCS48E User manual

Bosch
Bosch SMS8YCI01E User manual

Bosch
Bosch SPU2IKW02S User manual

Bosch
Bosch SHE42L User manual

Bosch
Bosch SMP4HCC78S Specification sheet

Bosch
Bosch SHX68R52UC/63 User manual

Bosch
Bosch SHP78CM4N User manual

Bosch
Bosch SBE69U11EU User manual

Bosch
Bosch SMS6ECI63E Specification sheet

Bosch
Bosch SMS6HCI01Z/36 Specification sheet

Bosch
Bosch SMV50C00GB User manual

Bosch
Bosch SGE78B55UC/18 User manual

Bosch
Bosch SHE99C User manual

Bosch
Bosch SMS4HTI45E User manual

Bosch
Bosch SRS 46T22 User manual

Bosch
Bosch SMV6ZCX01G User manual

Bosch
Bosch SRV 55T03 User manual

Bosch
Bosch Ascenta SHX3AR75UC User manual

Bosch
Bosch DISHWASHER User manual

Bosch
Bosch SRI4672/13 User manual