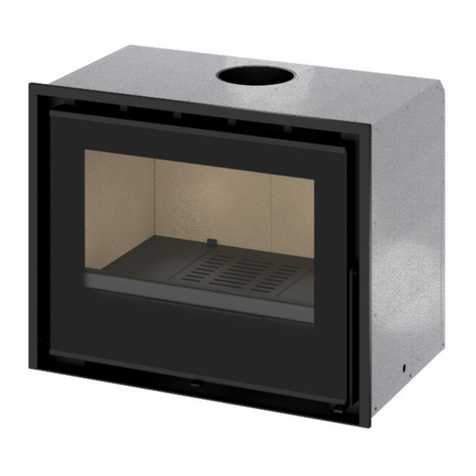
BOSQ Aere 70S Freestanding User manual

1
Instruction Manual
Aere 70/70S Freestanding
It is important that you read this manual carefully before installing
and using your appliance
V20200916AL

2
Index
Important Recommendations 3
1-Introduction
Wood – An ecological form of energy 5
Wood – Utilization 6
Appliance Layout 7
2- Installation Instructions
Technical Specifications 8
Warnings 10
Installation Instructions 12
Fan Installation (Optional Accessory) 15
Flue Installation 19
First Use 21
3- Instructions for Use
Lighting the fire – Daily Use 22
After Firing 22
Maintenance 23
Technical assistance 24
Warranty 25
Warranty Certificate 26
CE Marking label with serial number

3
Important Recommendations:
Important:
oThe compartment below the combustion chamber should not be used to store combustible materials.
oPlease read this manual thoroughly before installing and starting your free-standing appliance.
oInstallation must be carried out by a licenced and certified installer.
oKeep these instructions for future reference
Before installing your appliance, you should ensure the following:
1. When installing the appliance, all local regulations, including those relating to National and
European standards, must be observed.
2. The appliance must be installed on a non-combustible, non-flammable surface.
3. The base / ground for the appliance shall have adequate strength to support the load of the
appliance.
4. If the appliance is to be suspended from a wall, you must be sure that it is not combustible or
flammable, and that it can support the weight of the equipment with the pipe and load of
firewood. The installer is responsible for assessing the wall with adequate load capacity
5. If necessary, place insulating material between the appliance and other surface to be protected
(e.g. tile walls must be protected);
6. Particular attention should be paid to the installation of smoke ducts, as they reach high
temperatures - they should not be near or in contact with combustible or flammable materials.
7. The environment in which the appliance is to be installed must be well ventilated to ensure the
amount of air required for combustion.
8. Respect the safety distances to combustible and flammable materials indicated in this manual
page 13.
9. Your appliance must be non-permanently installed and easily accessible to ensure general
maintenance (chimney and appliance);
10. A disconnecting means must be provided in the fixed electrical installation, in accordance with
the electrical regulations. - Apply an all-pole cut-off switch in the fixed electrical installation.
11. For well insulated houses or forced air ventilation in the kitchen or bathrooms, it is advisable to
place a ventilation grid on an outside wall near the appliance. This safety mechanism is important
to prevent the air in the room from draining and to prevent smoke from the chimney. The
outdoor area of the grate must be at least 100cm2and always be open and unobstructed.
12. The appliance must be installed on a non-combustible non-flammable surface.
13. In freestanding appliances, the compartment below the combustion chamber should not be used
as a fuel or flammable material.
14. Freestanding heaters shall be laid on a non-combustible surface with adequate strength (in the
case of stone or other equivalent at least 6cm high) where the ends extend at least 80cm from
the front.
15. It is recommended to place grates ouside the walls surrounding the appliance to cool it (in the
upper and lower areas) with a minimum cross-section of 350cm2.
16. It is important that you use your appliance in a moderate manner; the first firings should be
made with a low amount of wood and with a not too intense flame, to favor the dissipation of
the metal tension and let the paint cure slowly, so it does not present imperfections later;
17. During the first use curing of the paint occurs - emanation of odors may occur. Avoid inhalation
and ventilate the surrounding space properly.
18. The first firing is very important, as it favors the longevity of the painting of the appliance. In this
way the ignition should be smooth and never abrupt, it should not exceed 200ºC in the first 60

4
minutes to allow the hardening of the paint without cracking. Violent burns can damage the
paintwork and, consequently, loss of warranty;
19. During normal use, small clicks are sometimes heard. This phenomenon results from the
expansion of the materials and may also occur upon completion of a normal combustion, that
is, upon cooling.
20. If the chimney draft exceeds 15 Pa, a control device must be installed in the chimney in an
accessible and visible place.
21. In case of adverse atmospheric conditions that disturb the drawing of smoke, it is advisable not
to use the appliance;
22. Check that the exhaust system is well dimensioned, ensuring proper drainage and that it
complies with the European standards in force, so that there is no undue smoke escape into the
surrounding space;
23. Even after frequent use, never make intense or prolonged burning. The performance will be
minimal and may damage the appliance and consequently loss of warranty;
24. The appliance was not designed to work with the door open. Do not open the door suddenly
because the combustion chamber may over pressurize, giving rise to smoke or even flame to
the outside space;
25. Exhaust fans in the same compartment as the appliance may cause the unit to malfunction;
26. You should be careful as the outside surfaces of the appliance are hot; wear suitable protective
gloves whenever you need to touch hot parts of the appliance and / or to carry loads of firewood
during operation;
27. The appliance should not be installed in shared chimneys with other fire burning appliances;
28. Do not use the appliance as your incinerator. The combustion of domestic waste can cause the
release of toxic fumes and cause early corrosion of the components of your appliance and loss
of warranty.
29. This appliance is not a toy! Keep children away;
30. This appliance may be used by children 8 years of age or over, as well as by persons with limited
physical, sensory, and mental capacities, or who lack experience or knowledge, provided that
they do so under supervision or are trained to operate the appliance in a safe way and ensuring
that they understand the hazards involved;
31. Cleaning and maintenance of your appliance should not be carried out by unsupervised
children.;
32. NEVER use liquid fuel;
33. If the power cable is damaged, it must be replaced by the manufacturer, its after-sales service
or similar qualification personnel to avoid a hazard.

5
1- Introduction
Congratulations on your purchase of your new BOSQ woodfire appliance!
Years of extensive research and dedication to innovation and quality, since 1976, has resulted in these
beautifully designed European appliances, constructed to strict Portuguese and European legislation, and tested
and Certified to the Australian Emissions, Efficiency and Safety standard requirements guaranteeing excellent
performance.
Please read this manual fully to ensure safe and efficient use of your heater and to comply with the warranty
guidelines
Solid Fuel – Ecological Energy
Through photosynthesis, plants capture energy from the sun and transform it into chemical energy. The trapped
energy, eg. in the form of wood, pellets, coal are called biomass fuels and can be converted into various forms:
electricity, fuel or heat. Biomass burning causes the release of carbon dioxide into the atmosphere, but since
this compound had previously been absorbed by the plants that originated the fuel, the CO2 emissions balance
is zero, not contributing to the greenhouse effect on the planet.
Firewood is the most environmentally friendly way of producing heat in your home, as it is a fully renewable
resource. The amount of CO2 that is released during the combustion of firewood is not higher than the amount
that would be released from its natural decomposition. Wood ash is a mineral fertilizer easily absorbed by the
environment in a totally ecological way.

6
Firewood – Use
Choosing your wood
All wood types have a different calorific value. You should choose only well-seasoned hard woods. Do not use
logs that are too large. Split round logs so they cannot roll and cause a hazard.
Drying your wood
Whichever firewood is chosen; it must be very dry and seasoned. Unseasoned or green firewood does not
heat as much, because a large part of the energy is consumed in the evaporation of the water and creosote
contained in the wood, which is highly corrosive and will damage the appliance and consequently it could void
your Warranty. In addition, moist firewood produces a large amount of smoke and little flame, which will foul
the appliance, the glass and the chimney. When raining the stored wood should be covered and well
ventilated. Generally, green wood should be left to “season” for two years.
Wood to Avoid
Softwoods and low-density wood: This kind of firewood release a lot of heat but burn too quickly and projects
embers and resin that foul the chimney and the interior of your woodstove. These should be used as Kindling
only, for starting your fire.
Do not use:
Wood with varnish, exotic wood, treated/painted timber, agglomerates that can produce toxic fumes which
will damage the appliance. Do not use driftwood or coastal wood with high salt content, it will quickly
damage the heater.
All BOSQ appliances are designed to burn firewood and firewood only, with less than 20% moisture contect.
The use of unseasoned firewood or firewood with moisture or other types of fuel not recommended will void
the warranty. See below, the drier the wood the better heat you get out of it.
0.0
1.0
2.0
3.0
4.0
5.0
6.0
010 20 30 40 50 60 70 80 90
(kWh/kg)
Moisture (%)
Moisture Vs Energy released by firewood

7
Appliance Layout
(Note Inbuilt version shown)
Flame Deflector Mounting position (a, b): always mount with the
lower dimension (y) in depth and always perfectly against each other to
the center – without any gaps
Pos.
Designation
Pos.
Designation
1
Door handle
8
Secondary Convection inlet
2
Air combustion control
9
Bottom grate
3
Refractory firebox panel
10
Ash drawer
4
Flue outlet
11
Serial number
5
Primary Convection outlet
12
Flame Deflector Set
6
Secondary Convection outlet
“a” and “b”
Flame deflector plates
7
Primary Convection inlet
“c” and “d”
Flame deflector support rails

8
2- Technical Specifications

9
TESTED IN ACCORDANCE WITH
AS/NZS 4012:2014 & AS/NZS 4013:2014
Burning Harwood
Unit AERE 70
Maximum Avearge Heat Output kW 9.5
Peak Averaga Heat Output kW 11.5
Overall Average Efficiency % 64
Particulate Emission Factor g/kg 1.1
Maximum recommended firewood load kg 3.0
Minimum clearance distances from combustible materials mm See page 14.
Flue Diameter mm 150
Recommended Fuel
Burn only Harwood
Moisture ≤ 20%
Electrical Specification
W
10
V
240
Hz
50
Fan Settings
Thermostat controlled
Dimensions mm (width x depth x Height) 690 x 450 x 555

10
WARNINGS:
A wood burning heater is, by its nature, an appliance that operates at high temperatures, so it is necessary
to take into account potential risk factors that should be avoided at all costs. Children must be kept away
from any combustion appliance and supervised in the room at all times.
Installation must be carried out by a licenced and certified installer.
The installation must meet the requirements of the manufacturers instructions, AS2918 and the Building
Code of Australia.
The appliance must be installed in such a way as to allow easy maintenance.
Incorrect installation may cause serious damage to the equipment and the safety of people and property.
Before installing your appliance, please ensure the following:
oThe appliance must be installed on a heat resistant surface to 600°C.
oThe floor must be structurally sound, to support the installation weight.
oThe compartment below the heater should not be used to store combustible materials (NM-RS
models).
oReplacement outside air must be supplied to the room with the heater, a minimum equivalent to half
the cross-sectional area of the flue, ie 160cm2 free air.
oFollow the clearances to combustible materials as shown on page 9. and 10.
oYour appliance must be non-permanently installed and easily accessible to ensure general
maintenance (chimney and equipment).
oThe equipment must not be cemented in its enclosure under any circumstances.
Keep these instructions for future reference
WARNINGS:
oREFER TO COMPLIANCE LABEL – DISREGARD ANY CONTRADICTORY FUEL TYPE INFORMATION IN
INSTRUCTION MANUAL
oWARNING: THE APPLIANCE & FLUE SYSTEM SHALL BE INSTALLED IN ACCORDANCE WITH AS/NZS
2918:2001 AND THE APPROPRIATE REQUIREMENTS OF THE RELEVANT BUILDING CODE OR CODES.
oWARNING: APPLIANCES INSTALLED IN ACCORDANCE WITH THIS STANDARD SHALL COMPLY WITH
THE REQUIREMENTS OF AS/NZS 4013:2014 WHERE REQUIRED BY THE REGULATORY AUTHORITY,
I.E. THE APPLIANCE SHALL BE IDENTIFIABLE BY A COMPLIANCE PLATE WITH THE MARKING “TESTED
TO AS/NZS 4013:2014”.
oANY MODIFICATION OF THE APPLIANCE THAT HAS NOT BEEN APPROVED IN WRITING BY THE
TESTING AUTHORITY IS CONSIDERED TO BE IN BREACH OF THE APPROVAL GRANTED FOR
COMPLIANCE WITH AS/NZS 4013:2014.

11
WARNINGS:
oCAUTION: MIXING OF APPLIANCE OR FLUE SYSTEM COMPONENTS FROM DIFFERENT SOURCES OR
MODIFYING THE DIMENSIONAL SPECIFICATION OF COMPONENETS MAY RESULT IN HAZARDOUS
CONDITIONS. WHERE SUCH ACTION IS CONSIDERED, THE MANUFACTURER SHOULD BE CONSULTED
IN THE FIRST INSTANCE.
oCAUTION: CRACKED AND BROKEN COMPONENTS, eg. GLASS PANELS OR CERAMIC TILES, MAY
RENDER THE INSTALLATION UNSAFE.
oWARNING: ANY MODIFICATION OF THE APPLICANCE THAT HAS NOT BEEN APPROVED IN WRITING
BY THE TESTING AUTHORITY IS CONSIDERED AS BREACHING AS/NZS 4013.
oWARNING: DO NOT USE FLAMMABLE LIQUIDS OR AEROSOLS TO START OR REKINDLE THE FIRE.
oWARNING: DO NOT USE FLAMMABLE LIQUIDS OR AEROSOLS IN THE VICINITY OF THIS APPLIANCE
WHEN IT IS OPERATING.
oWARNING: DO NOT STORE FUEL WITHIN THE HEATER INSTALLATION CLEARANCES.
oWARNING: WHEN OPERATING THIS APPLIANCE AS AN OPEN FIRE USE A FIRE SCREEN.
oWARNING: OPEN AIR CONTROL (AND DAMPER WHEN FITTED) BEFORE OPENING FIRING DOOR.
oCAUTION: THIS APPLIANCE SHOULD NOT BE OPERATED WITH A CRACKED GLASS.
oTHIS APPLIANCE SHOULD BE MAINTAINED AND OPERATED AT ALL TIMES IN ACCORDANCE WITH
THESE INSTRUCTIONS.
oTHE USE OF SOME TYPES OF PRESERVATIVE-TREATED WOOD AS A FUEL CAN BE HAZARDOUS.
oTHE APPLIANCE OR FLUE SYSTEM SHOULD NOT BE MODIFIED IN ANY WAY WITHOUT THE WRITTEN
APPROVAL OF THE MANUFACTURER.
oBURN ONLY HARDWOOD
oPrior to installation check with your state and local authorities regarding any specific regulations that
may apply.

12
2 -Installation
Keep these instructions for future reference
All local regulations, including those referring to national standards,
must be observed when installing the appliance.
The floor must be structurally sound.
Replacement room air from outside equivalent to 97cm2 must be supplied into the
room, as per AS/NZS2918:2018.
The heater must have its own dedicated flue. The active flue must be 150mm (6”)
for the entire length of the flue, and always less than 45 degrees from the vertical.
The Flue terminal must meet the minimum height and external clearances for the
flue, according to AS/NZ 2918:2001, see the diagram shown below on page 29.
The Heater has been tested for 4 different hearth options. In all cases the Hearth
must have a heat resistant top surface to 600°C. All versions were tested with a
solid decorative 8” casing flue shield (no perforations), from the top of the heater.
For position A and B, the heater was installed on a bench at 350mm off the hearth.
The hearth requirement is with an insulating thickness of non-combustible
material equivalent to 6mm of cement sheet with thermal resistivity of 0.026
m2.K/W per 6mm. eg 6mm compressed fibre cement sheet, or equivalent.
The minimum hearth requirement is 750mm x 920mm wide x 6mm should be used
under the applicance, and a minimum of 300mm deep in front of the applicance.
Reduced clearance for Position A - The rear clearance is 450mm, or by adding the
optional rear heatshield to the unit (See the Aere 70S Heatshield instructions)
and an extra Flue shield 900mm tall by 180 degrees between the 6” (150mm)
active flue and the 8” (200mm) heatshield, reduces the rear clarance to 250mm.

13
Fig 1.
Position B Corner clearance is 375mm, see Fig 2. Below.
Fig 2.

14
For Position C, if installing the heater into an existing hearth or an open
fireplaces, so the heater is down at floor level, the minimum hearth thickness is
30mm of compressed fibre cement sheet with Thermal resistivity of 0.13m2.K/W,
to 450mm in front of the appliance. Note the clearances to combustibles are as
per Position A unless the heater is in an alcove of double brick with an airgap
between them, ie built equivalent to an open fireplace. See Fig 3.
Fig 3.

15
Fan
Ventilation layout
(
Aere
)
Operating mode:
The fan operation is automatically activated by a thermostat located in
underside of the Firebox.
After lighting your heater, the fan will turn on when the thermostat reaches the
set temperature and will turn off below the same temperature (approximately 50 °
C).
The fan should not be switched off while the equipment is in use as it may
damage the fan. In case of power failure, reduce the combustion of the equipment
to a minimum.
WIRING DIAGRAM:

16
NOTES:
•Installation and wiring must be carried out by a qualified professional to ensure proper
operation and safety. It is recommended that all safety regulations in force be complied with.
•When installing the appliance, means must be provided for switching off the appliance
in accordance with the legislation in force. - Apply a cut-off switch on the fixed electrical
system.
•A minimum spacing of 3 mm between contacts must be observed in accordance with
current legislation
•If the power cord is damaged, it must be replaced by a qualified professional as the power
cord has special technical characteristics for high temperatures.
•Used cables should be insulated with silicone-insulated fiberglass sleeve for thermal
insulation.
•Disconnect the electrical power before starting any electrical work.
Fan Installation:
The fan access and installation is fast and easy:
1. Remove the screws of the fan access cover
below the firebox and remove the cover (hex
Allen key)
2. Now place the spring nut clips on the mounting brackets, as shown bellow
3. With the fan in front of the heater opening, feed the power cable through one of

17
the exit holes. For the Freestanding these are on the rearof the unit on either left or
right side of the unit, so use the hole which suits your 240V supply direction. Feed it
through – the cable will need to have the plug fitted by an electrician.Or hardwire
it with an isolation switch included for repairs.
4. Feed the cable until the cable locking reaches the exit hole.
Holding the cable keeper in place, adjust the power cable length such that there is
sufficient slack between the exit hole and the ventilation kit, as shown below.
5. Find where the Cable protecting grommet needs to
be, then tighten the the lock nut to the cable grommet.
(Wrenches nº 16 and 18).

18
6. Then feed the power cable through the exit hole and the secondary locking nut is
tightened on the outside, securing the power cable to the appliance, as seen bellow.
7. To install the thermostat, start by relieving the clips on the underside of the firebox, as
seen below, and placing the thermostat in position. Rotate it between the clips.
8. To finish off replace the fan cover on the appliance and fix with the 4 cover screws.

19
Flue Installation
Flue type: Triple skin flue, 150mm/200mm/250mm or 6”/8”/10”. The Active 150mm flue must be a tight fit
into the heater collar.
The heater must have its own dedicated flue. The active flue must be 8” for the entire length of the flue, and
always less than 45 degrees from the vertical.
Replacement room air from outside equivalent to 97cm2 must be supplied into the room.
Flue Outlet Positions
Minimum Flue Height as per AS/NZS 2918:2018
NOTE: Flue exit MUST also be as high as any nearby structure within a 6m Radius. ( AS 2918:2018 )

20
External Requirements
Refer to AS/NZS 2918:2018
Note: All external air vents & ceiling penetrations must be bird & rodent proofed with permanently fixed
screens
This manual suits for next models
2
Table of contents
Other BOSQ Indoor Fireplace manuals
Popular Indoor Fireplace manuals by other brands

FMI
FMI VDVC36 Owner's installation instructions

Dimplex
Dimplex STOCKBRIDGE SKG20BL user manual

Heat-N-Glo
Heat-N-Glo 7000XLS Installer's guide

barbas
barbas UNILUX-6 55 Instructions for use & maintenance manual

Empire
Empire DVX36DP31 Installation instructions and owner's manual

BONFEU
BONFEU BonFlame Linear Optiflame Assembly instructions