4. ADJUST SYSTEM MENU SETTING
EN - 5
AUTO STORE
Reconnection/Disconnection
Under the Tuner mode, press the button to access into the Auto Store mode. The six strongest stations of
the selected band are saved in preset channel automatically:FM1,FM2,FM3(1-6),AM1,AM2.
This feature allows to Reconnect or Disconnect to the paired mobile phone or Bluetooth device manually. To
Reconnect or Disconnect the Bluetooth, press the MENU button, “CONNECT ” or “DISCONN ” is
displays on the LCD, then press to start activating the selection.
AF ON/OFF (Alternate Frequencies)
PTY (Program Type)
Once into the PTY mode, you can be press get into program type item, and rotate Encode Volume Knob
to selected category.
User can rotate Encoder Volume Knob to turn On or Off the AF (Alternate Frequencies) function. When AF in
On mode, the unit will be searches for another station with stronger signal, but with the same program
identification as the current station automatically.
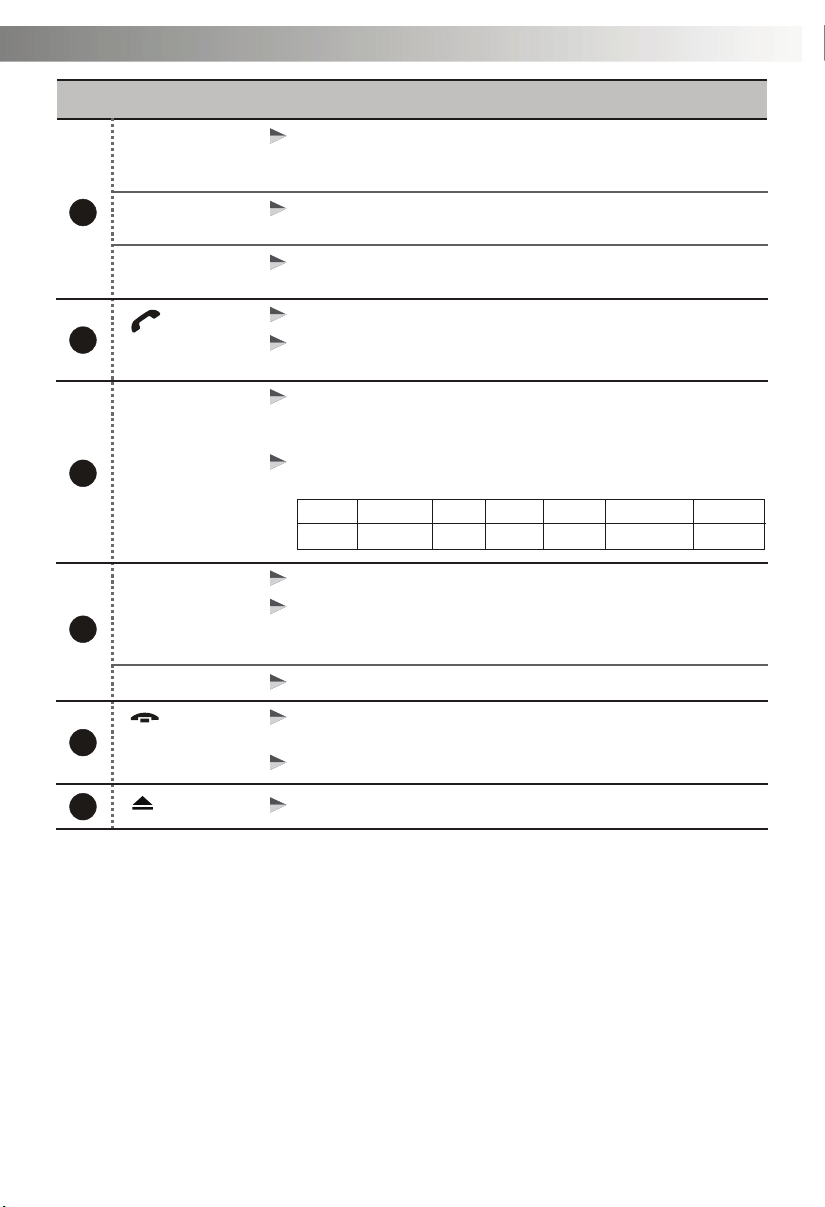
SPEECH GROUP
NEWS, AFFAIRS, INFO
CULTURE, SCIENCE, VARIED
SPORT, EDUCATE, DRAMA
SOCIAL, RELIGION, PHONE IN
TRAVEL, LEISURE, DOCUMENT
WEATHER,FINANCE, CHILDREN
MUSIC GROUP
POP M , ROCK M
CLASSIC S, OTHER M
JAZZ M, COUNTRY
EASY M, LIGHT M
NATION M, OLDIES M
FOLK M, A-TEST, ALARM
>
Press MENU to access into the System Menu. Press MENU repeatedly to select the item to be adjusted,
then roate Encoder Volume Knob to select a value / option.
>
LOCAL SEEK (Local/Distance Select)
This feature is used to designate the strength of the signals at which the radio will stop during automatic
tuning. "Distance" is the default, allowing the radio to stop at a broader range of signals. To set the unit to
select only strong local stations during automatic tuning, rotate the Encoder Volume Knob until
“LOC”appears in the display.
TA ON/OFF (Traffic Announcement)
User can rotate the Encoder Volume Knob to turn On or Off the TA(Traffic Announcement) function. Under TA
On mode, there is trafic announcement, the unit switches to the tuner mode(regardless of the current mode)
and begins to broadcast the announcement on traffic conditons. When the traffic announcement is over, it
return to the previous mode. When TA Off, the traffic announcement does not cut in.
CLOCK SET
CLOCK FORMAT
Program the current time by rotating the Encoder Volume Knob clockwise to adjust the minutes and hours.
User can rotating the Encoder Volume Knob to to selected the clcok format 12H or 24H.
BEEP ON/OFF (Beep Tone)
The beep tone feature allows the selection of an audible beep tone to be heard each time a button is pressed
on the face of the radio. "Beep On" is the default display. Rotate Encoder Volume Konb to select the “Beep Off”
option.
RDS ON/OFF
User can rotate the Encoder Volume Knob to turn On or Off the RDS function.
This option allows the selection of the frequency spacing appropriate for your area. Rotate the Encoder
Volume Konb to select the USA, LATIN, EUROPE, RUSSIA, ASIA (Asia Pacific), MID-EAST(Middle East) or
JAPAN options.
AREA (Tuner Frequency Spacing)
CLOCK PRIORTY
The unit default setting displays frequency on the screen. Select DISP CLK to show the clock as the priority
screen view. Turn right front knob either clockwise or counter-clockwise to select DISP CLK or DISP FREQ.