manuals.online logo
Brands
  1. Home
  2. •
  3. Brands
  4. •
  5. BOSSCO
  6. •
  7. Music Equipment
  8. •
  9. BOSSCO Dr. Beat DB-12 User manual

BOSSCO Dr. Beat DB-12 User manual

Thank you for purchasing the BOSS DB-12 Dr. Beat.
Before using this unit, carefully read the sections entitled:
“USING THE UNIT SAFELY” and “IMPORTANT NOTES.”
These sections provide important information concerning
the proper operation of the unit. Additionally, in order to
feel assured that you have gained a good grasp of every fea-
ture provided by your new unit, Owner‘s manual should be
read in its entirety. The manual should be saved and kept on
hand as a convenient reference.
Copyright © 1997 BOSS CORPORATION
All rights reserved. No part of this publication may be repro-
duced in any form without the written permission of BOSS
CORPORATION.
DB-12: Dr. Beat
Power Supply
DC 3V CR2032
lithium
battery
Current Draw
No Sound: 1.5 mA
Reference Tone Sounding: 4 mA
Expected battery life under continuous use: 100 hours
(Metronome, Tempo: = 120, Rhythm: , Beat: 4)
Metronome
Tempo Range: = 35–250 ±0.2 %
Rhythm:
Beat: 0–9, 2 + 3, 3 + 2, 3 + 4, 4 + 3, 4 + 5, 5 + 4, 5 + 6, 6 + 5,
6 + 7, 7 + 6, 7 + 8, 8 + 7, 8 + 9, 9 + 8 (Total of 24 types)
Tune
Reference Pitch: 438–445 Hz, in 1 Hz steps
Range of Reference Tone: C4–B4 ±1 cent
Timer
Setting Range: 1–60 minutes
Stopwatch
Timing Resolution: 1/10 second
Timing Duration (Max.): 10 hours (with Auto Power-Off disabled)
Display:Custom LCD (Liquid Christal Display)
Indicators:Tempo Indicator LED x 2
Buttons
POWER, MODE UP, MODE DOWN, VALUE UP, VALUE
DOWN, START/STOP, TAP/MUTE/SPLIT/RESET
Jacks
Headphones Jack (Monaural, Miniature Phone Type)
Dimensions
60 (W) x 90 (D) x 17 (H) mm
2-3/8 (W) x 3-9/16 (D) x 11/16 (H) inches
Weight
60 g / 3 oz (including battery)
Supplied Items
CR2032 Lithium Battery, Strap,
Owner’s Manual, Information
In the interest of product improvement, the specifications and/or
appearance of this unit are subject to change without prior notice.
,, , , ,
SPECIFICATIONS
SE000132
Power Supply: Use of Batteries
•A battery was installed in the unit before it left the
factory. The life of this battery may be limited,
however, since its primary purpose was to enable
testing.
•Before connecting this unit to other devices, turn
off the power to all units. This will help prevent
malfunctions and/or damage to speakers or other
devices.
Placement
•This device may interfere with radio and televi-
sion reception. Do not use this device in the vicini-
ty of such receivers.
•Do not expose the unit to direct sunlight, place it
near devices that radiate heat, leave it inside an
enclosed vehicle, or otherwise subject it to temper-
ature extremes. Excessive heat can deform or dis-
color the unit.
Maintenance
•For everyday cleaning wipe the unit with a soft,
dry cloth or one that has been slightly dampened
with water. To remove stubborn dirt, use a cloth
impregnated with a mild, non-abrasive detergent.
Afterwards, be sure to wipe the unit thoroughly
with a soft, dry cloth.
•Never use benzine, thinners, alcohol or solvents of
any kind, to avoid the possibility of discoloration
and/or deformation.
Additional Precautions
•Use a reasonable amount of care when using the
unit’s buttons, sliders, or other controls; and when
using its jacks and connectors. Rough handling
can lead to malfunctions.
•Never strike or apply strong pressure to the dis-
play.
IMPORTANT NOTES
In addition to the items listed under “USING THE UNIT SAFELY,”please read and observe the following:
Owner’s Manual
USING THE UNIT SAFELY
INSTRUCTIONS FOR THE PREVENTION OF FIRE, ELECTRIC SHOCK, OR INJURY TO PERSONS
ALWAYS OBSERVE THE FOLLOWING
Used for instructions intended
to alert the user to the risk of
injury or material damage
should the unit be used
improperly.
* Material damage refers to
damage or other adverse
effects caused with respect
to the home and all its
furnishings, as well to
domestic animals or pets.
Used for instructions intended
to alert the user to the risk of
death or severe injury should
the unit be used improperly.
The ●symbol alerts the user to things that
must be carried out. The specific thing that
must be done is indicated by the design
contained within the circle. In the case of the
symbol at left, it means that the power-cord
plug must be unplugged from the outlet.
About the SymbolsAbout WARNING and CAUTION Notices
WARNING
CAUTION
The symbol alerts the user to important
instructions or warnings.The specific meaning
of the symbol is determined by the design
contained within the triangle. In the case of the
symbol at left, it is used for general cautions,
warnings, or alerts to danger.
The symbol alerts the user to items that
must never be carried out (are forbidden). The
specific thing that must not be done is indicated
by the design contained within the circle. In the
case of the symbol at left, it means that the unit
must never be disassembled.
•Before using this unit, make sure to read
the instructions below, and the Owner's
Manual.
..........................................................................................
•Do not open or perform any internal
modifications on the unit.
..........................................................................................
•
Do not attempt to repair the unit, or
replace parts within it (except when this
manual provides specific instructions
directing you to do so). Refer all servicing
to your retailer, the nearest Roland
Service Center, or an authorized Roland
distributor, as listed on the "Information."
..........................................................................................
•Never use or store the unit in places that
are:
•Subject to temperature extremes
(e.g., direct sunlight in an enclosed
vehicle, near a heating duct, on top
of heat-generating equipment); or
are
•Damp (e.g., baths, washrooms, on
wet floors); or are
•Humid; or are
•Dusty; or are
•Subject to high levels of vibration.
..........................................................................................
•Do not allow any objects (e.g., flammable
material, coins, pins); or liquids of any
kind (water, soft drinks, etc.) to pene-
trate the unit.
..........................................................................................
•Immediately turn the power off, and
request servicing by your retailer, the
nearest Roland Service Center, or an
authorized Roland distributor, as listed
on the "Information" page when:
•Objects have fallen into, or liquid has
been spilled onto the unit; or
•The unit has been exposed to rain (or
otherwise has become wet); or
•The unit does not appear to operate
normally or exhibits a marked
change in performance.
..........................................................................................
•In households with small children, an
adult should provide supervision until
the child is capable of following all the
rules essential for the safe operation of
the unit.
..........................................................................................
•Protect the unit from strong impact.
(Do not drop it!)
..........................................................................................
•
Keep lithium batteries out of reach of small
children. If a child has accidentally swal-
lowed a battery, see a doctor immediately.
..........................................................................................
•
Lithium batteries must never be recharged,
heated, taken apart, or thrown into a fire
or
water
.
..........................................................................................
•Never climb on top of, nor place heavy
objects on the unit.
..........................................................................................
•
If used improperly, batteries may explode
or leak and cause damage or injury. In the
interest of safety, please read and observe
the following precautions.
•Remove the batteries whenever the
unit is to remain unused for an
extended period of time.
..........................................................................................
•Use only the specified type (model no.
CR2032) of lithium battery. Be sure to
insert it as directed (to ensure correct
polarity).
..........................................................................................
•
Used lithium batteries must be disposed
of in compliance with whatever regula-
tions for their safe disposal that may be
observed in the region in which you live.
..........................................................................................
For the USA
FEDERAL COMMUNICATIONS COMMISSION
RADIO FREQUENCY INTERFERENCE STATEMENT
This equipment has been tested and found to comply with the limits for a Class B digital device, pursuant to Part
15 of the FCC Rules. These limits are designed to provide reasonable protection against harmful interference in a
residential installation. This equipment generates, uses, and can radiate radio frequency energy and, if not
installed and used in accordance with the instructions, may cause harmful interference to radio communications.
However, there is no guarantee that interference will not occur in a particular installation. If this equipment does
cause harmful interference to radio or television reception, which can be determined by turning the equipment off
and on, the user is encouraged to try to correct the interference by one or more of the following measures:
– Reorient or relocate the receiving antenna.
– Increase the separation between the equipment and receiver.
– Connect the equipment into an outlet on a circuit different from that to which the receiver is connected.
– Consult the dealer or an experienced radio/TV technician for help.
Unauthorized changes or modification to this system can void the users authority to operate this equipment.
This equipment requires shielded interface cables in order to meet FCC class B Limit.
This product complies with the requirements of European Directive 89/336/EEC.
For EU Countries
For EU Countries
Apparatus containing
Lithium batteries
ADVARSEL!
Lithiumbatteri - Eksplosionsfare ved
fejlagtig håndtering.
Udskiftning må kun ske med batteri af
samme fabrikat og type.
Levér det brugte batteri tilbage til
leverandøren.
VARNING!
Explosionsfara vid felaktigt batteribyte.
Använd samma batterityp eller en
ekvivalent typ som rekommenderas av
apparattillverkaren.
Kassera använt batteri enligt
fabrikantens instruktion.
CAUTION
Danger of explosion if battery is
incorrectly replaced.
Replace only with the same or
equivalent type recommended by the
manufacturer.
Discard used batteries according to the
manufacturer’s instructions.
ADVARSEL!
Lithiumbatteri - Eksplosjonsfare.
Ved utskifting benyttes kun batteri som
anbefalt av apparatfabrikanten.
Brukt batteri returneres
apparatleverandøren.
VAROITUS!
Paristo voi räjähtää, jos se on
virheellisesti asennettu.
Vaihda paristo ainoastaan
laitevalmistajan suosittelemaan
tyyppiin. Hävitä käytetty paristo
valmistajan ohjeiden mukaisesti.
For Canada
This Class B digital apparatus meets all requirements of the Canadian Interference-Causing Equipment Regulations.
Cet appareil numérique de la classe B respecte toutes les exigences du Règlement sur le matériel brouilleur du Canada.
NOTICE
AVIS
PANEL DESCRIPTIONS
Headphones Jack (Monaural, Miniature phone)
For connecting earphone or monaural headphones
equipped with a miniature phone plug (3.5 mm in diame-
ter). Also serves as the output jack, for connecting to
external sound equipment.
✽Although you can connect stereo headphones, sound will be
output from one side only.
✽The DB-12’s speaker is disabled whenever a plug is inserted
into the Headphones jack.
✽Always turn OFF the unit before you connect any external
devices.
MODE UP/DOWN Buttons
Used for switching among the different modes. The cur-
rently selected mode is indicated by the arrow in the dis-
play.
Pen Hole
Hand Strap Mount
You can attach a commercially available strap here.
VALUE UP/DOWN Buttons
These adjust the value of the setting blinking in the dis-
play. When in “TEMPO,” “BEAT,” or “TIMER” mode,
pressing the UP button while pressing the DOWN button
(or the DOWN button while pressing the UP button)
causes the value of the setting to change more rapidly.
START/STOP Button
TAP/MUTE/SPLIT/RESET Button
POWER Button
Turns the unit on or off.
Display
Tempo Indicators
6
8
9
10
7
5
4
1
2
3
1
2
3
4
5
6
7
8
9
10
1. With the unit turned on, use the MODE
UP/DOWN buttons to set the mode to
“TEMPO.”
2. Use the VALUE UP/DOWN buttons to set
the tempo. Set the tempo in the range of
= 35–250.
✽To set a tempo that matches a particular song, press
the TAP button (TAP/MUTE/SPLIT/RESET button)
in time with the song. After you have tapped the but-
ton three or more times, the tempo will have been
detected, and should be indicated in the display.
✽When tapping in a tempo, if your tempo exceeds
= 250, “Hi” (High) will be shown in the display.
If the tempo is = 30–34, “Lo” (Low) is indicated.
If the tempo is slower than = 30, the display will
not respond.
3. Press the MODE DOWN button to switch
to “RHYTHM.”
4. Use the VALUE UP/DOWN buttons to set
the rhythm. There are six rhythm styles
from which to choose.
5. Press the MODE DOWN button to switch
to “BEAT.”
6. Use the VALUE UP/DOWN buttons to set
the beat. There are 24 beat values from
which to choose.
7
2
2,4,6
1,3,5
USING THE DB-12 AS A METRONOME
PLAYING A REFERENCE TONE
(TUNE)
1.
With the unit turned on, use the MODE UP/
DOWN buttons to set the mode to “NOTE.”
2.
Use the VALUE UP/DOWN buttons to set
the note. Any note name from C through
B can be selected.
3.
Press the MODE DOWN button to switch
to “PITCH.”
4.
Use the VALUE UP/DOWN buttons to set
the reference pitch Any value from 438 to
445 Hz can be set as the frequency of “A.”
5.
Press the START/STOP button to sound the
reference tone. Press the button again to
stop the tone from playing.
✽
While you can switch to a different mode while the ref-
erence tone is on, the reference tone cannot be turned off
if you go into the TIMER or STOPWATCH modes. To
stop the reference tone, return to the TUNE mode first.
1.
With the unit turned on, use the MODE UP/
DOWN buttons to set the mode to “STOP W.”
2. Press the START/STOP button to start the
stopwatch. Press the button once more
to stop it.
3. If you press the SPLIT (TAP/MUTE/SPLIT/
RESET) button while the stopwatch is
running, the split time (elapsed time up
to that point) is shown, and the time dis-
play stops with that indicated time.
Press the SPLIT button once more and
the regular stopwatch count resumes.
4. Pressing the RESET (TAP/MUTE/SPLIT/
RESET) button while the stopwatch is
stopped resets the stopwatch to zero.
✽The stopwatch continues to operate when you switch
to a different mode.
✽Although the stopwatch can measure up to a maxi-
mum of ten hours, if no buttons are pressed the Auto
Power-Off function will go into effect—so a maxi-
mum of only 70 minutes can be measured. If you
intend to measure time periods greater than 70 min-
utes, you need to disable the Auto Power-Off func-
tion first.
FEATURES
ATTACHING THE STRAP
Use the strap included with the DB-12 as shown in
the figure.
THE AUTO POWER-OFF FUNCTION
To preserve battery power, the DB-12 features an
Auto Power-Off function which automatically shuts
the unit off if no button has been pressed for a prede-
termined amount of time. With no function in use,
this period is about 10 minutes. When any of the
unit’s functions (except reference tone) are being
used, Auto Power-Off occurs after about 70 minutes.
The reference tone stops after about 10 minutes.
USING THE PEN HOLE
By inserting, as shown in the figure, a pencil, pen, or
other such item in the pen hole, you can stand the
DB-12 up for use in the upright position.
DISABLING THE AUTO POWER-OFF
FUNCTION
To disable the Auto Power-Off function, hold down
these four buttons: MODE DOWN, VALUE UP,
VALUE DOWN, and START/STOP—and at the
same time, press the POWER button. Since this sta-
tus is not retained, Auto Power-Off will be enabled
the next time you turn on the DB-12.
• Four independent functions are provided by the
DB-12: Metronome, Tune, Timer, and Stopwatch.
The versatile DB-12 can be conveniently used to
set tempos, tune instruments, measure perfor-
mance times, and more—with whatever kind of
music you play.
• In Metronome mode, the DB-12’s 6 rhythms and
24 different beats allow you to create complex
rhythm patterns. The tempo can be set within a
range of = 35–250 .
• The DB-12’s tap function allows you to easily
determine the tempo of a song simply by tapping
a button.
• Dr. Beat includes chromatic sound generation that
can produce reference tones over a one-octave
range. You can use this for tone practice with
winds and other instruments, as well as for tuning
acoustic instruments.
• The timer can be set to anything from one minute
to a full sixty minutes. An alarm can be set to
sound after the set time has elapsed.
• The Stopwatch feature allows you to easily time
the length of your performances. You can also
have the elapsed time displayed.
• Features an “Auto Power-Off” function which
automatically turns the unit off when unused for
ten minutes.
• Even when the power is turned off—whether
manually or as the result of Auto Power-Off—the
settings will be retained.
AS A STOPWATCH
7. Press the START/STOP button to start
the metronome. Press the button once
more to stop it.
✽Pressing the MUTE (TAP/MUTE/SPLIT/RESET)
button after the START button has been pressed
switches off the DB-12’s speaker. Pressing the
MUTE button once more cancels the mute. This
ability to mute the sound should come in handy
whenever you want to use the metronome, but don't
want it to be audible to others, such as when on
stage.
✽The TAP/MUTE/SPLIT/RESET button functions
as the TAP button when the metronome is off, and
as the MUTE button when the metronome is on.
✽While you can switch to a different mode while the
metronome is on, the metronome cannot be turned
off if you switch to the TIMER or STOPWATCH
modes. To stop the metronome, return to the
METRONOME mode first.
AS A TIMER
1.
With the unit turned on, use the MODE UP/
DOWN buttons to set the mode to “TIMER.”
2. Use the VALUE UP/DOWN buttons to
select a value from 1 through 60 for the
timer (in one-minute increments).
3. Press the START/STOP button to start the
timer. Pressing the button once more
stops the timer.
While the timer is functioning, the timer active
symbol ( ) will be blinking, and the time
decreases. When the timer reaches 0, an alarm
sounds for 20 seconds. The alarm stops sound-
ing when any button is pushed while the alarm
is sounding.
✽If you switch to another mode while the timer is in
operation, the timer still counts down and the alarm
still sounds (the metronome and reference tone stop).
✽If after starting the timer you want to reset the timer
from the beginning, then after pressing the
START/STOP button to stop the timer, press the
RESET (TAP/MUTE/SPLIT/RESET) button.
✽When you want to change the timer settings, after
first stopping the timer, use the VALUE UP/
DOWN buttons to change the countdown time.
✽The timer active symbol ( ) appears when the time
is set. One sector of the symbol showing the time
remaining goes blank each moment that another 1/4
of the set time has elapsed.
REPLACING THE BATTERY
As the battery becomes depleted, the display
becomes fainter and the speaker volume gets lower.
Promptly replace the battery as soon as you observe
these symptoms.
Replace with one 3-Volt CR2032-type lithium battery.
• Use only the specified type (model no.
CR2032) of lithium battery. Be sure to insert
it as directed (to ensure correct polarity).
1. Remove the screw from the battery cover,
then slide off the cover.
2. Using a narrow-blade screwdriver or simi-
lar, lift out the old battery.
3. With the “+”side facing out, place the
new battery in the unit.
4. Replace the battery cover and fasten the
screw.
✽After replacing the battery, the following settings will
be in effect.
Metronome Tempo: = 120
Rhythm:
Beat: 4
Tune Note: A
Pitch: 440 Hz
Timer Time: 60 Minutes

Other BOSSCO Music Equipment manuals

BOSSCO Dr. Beat DB-88 User manual

BOSSCO

BOSSCO Dr. Beat DB-88 User manual

BOSSCO DR-55 User manual

BOSSCO

BOSSCO DR-55 User manual

BOSSCO BE-5 User manual

BOSSCO

BOSSCO BE-5 User manual

BOSSCO ME-25 User manual

BOSSCO

BOSSCO ME-25 User manual

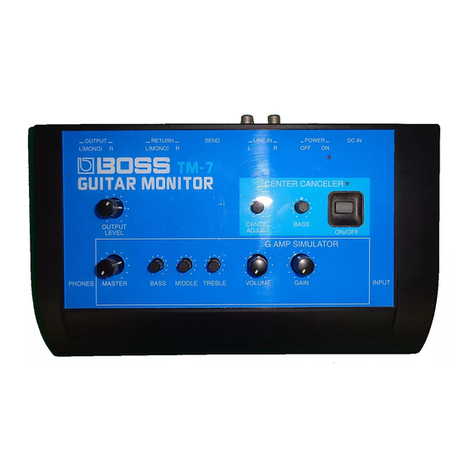
BOSSCO TM-7 User manual

BOSSCO

BOSSCO TM-7 User manual

BOSSCO NS-2 User manual

BOSSCO

BOSSCO NS-2 User manual

BOSSCO Giga Delay DD-20 User manual

BOSSCO

BOSSCO Giga Delay DD-20 User manual

BOSSCO ROD-10 User manual

BOSSCO

BOSSCO ROD-10 User manual

BOSSCO RC-50 User manual

BOSSCO

BOSSCO RC-50 User manual

BOSSCO DR-55 User manual

BOSSCO

BOSSCO DR-55 User manual

BOSSCO ROD-10 User manual

BOSSCO

BOSSCO ROD-10 User manual

BOSSCO DB-90 METRONOME Dr. Beat. User manual

BOSSCO

BOSSCO DB-90 METRONOME Dr. Beat. User manual

BOSSCO AC-3 User manual

BOSSCO

BOSSCO AC-3 User manual

BOSSCO DR. Beat DB-90 User manual

BOSSCO

BOSSCO DR. Beat DB-90 User manual

BOSSCO RSD-10 Operating and maintenance manual

BOSSCO

BOSSCO RSD-10 Operating and maintenance manual

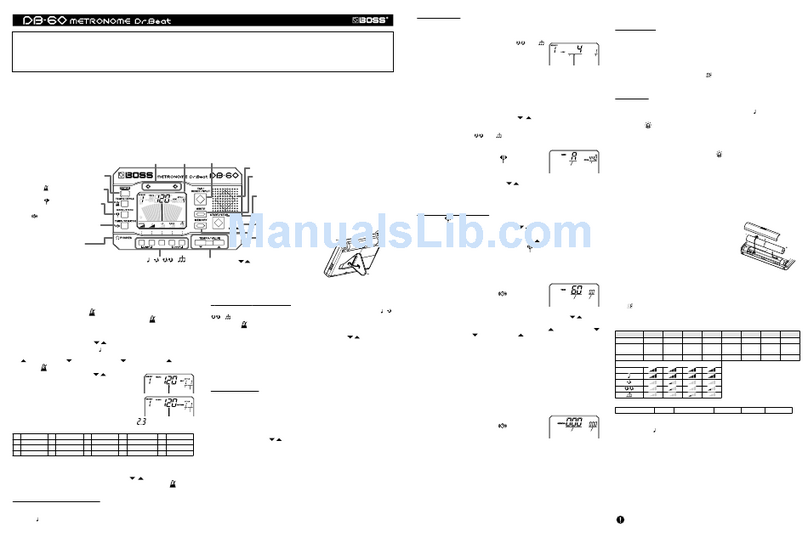
BOSSCO DB-60 User manual

BOSSCO

BOSSCO DB-60 User manual

BOSSCO GX-100 User manual

BOSSCO

BOSSCO GX-100 User manual

BOSSCO Dr. Rhythm Section DR-5 Operating and maintenance manual

BOSSCO

BOSSCO Dr. Rhythm Section DR-5 Operating and maintenance manual

BOSSCO GS-10 User manual

BOSSCO

BOSSCO GS-10 User manual

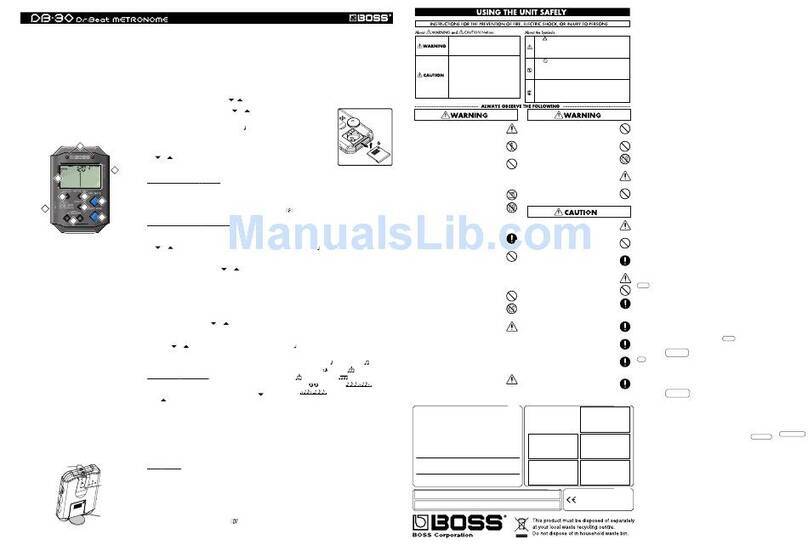
BOSSCO Dr. Beat DB-30 User manual

BOSSCO

BOSSCO Dr. Beat DB-30 User manual

BOSSCO DD-3 Digital Delay User manual

BOSSCO

BOSSCO DD-3 Digital Delay User manual

BOSSCO RC-50 User manual

BOSSCO

BOSSCO RC-50 User manual

BOSSCO LM-2B User manual

BOSSCO

BOSSCO LM-2B User manual

BOSSCO RC-50 User manual

BOSSCO

BOSSCO RC-50 User manual

Popular Music Equipment manuals by other brands

Tandy Orchestra-90 CC owner's manual

Tandy

Tandy Orchestra-90 CC owner's manual

Dolby Laboratories 737 user manual

Dolby Laboratories

Dolby Laboratories 737 user manual

JTS UR-816D instruction manual

JTS

JTS UR-816D instruction manual

Roli Lightpad Block Creator Manual

Roli

Roli Lightpad Block Creator Manual

BEYERTONE multiLAN installation guide

BEYERTONE

BEYERTONE multiLAN installation guide

Edirol P-1 Read me first

Edirol

Edirol P-1 Read me first

EMG EMG-B Installation information

EMG

EMG EMG-B Installation information

mxr MICRO AMP Operation manual

mxr

mxr MICRO AMP Operation manual

Moen GEC238 owner's manual

Moen

Moen GEC238 owner's manual

SOMA TERRA user manual

SOMA

SOMA TERRA user manual

Ibanez ZR TREMOLO user guide

Ibanez

Ibanez ZR TREMOLO user guide

Palmer PGA-04 ADIG-LB quick start guide

Palmer

Palmer PGA-04 ADIG-LB quick start guide

Fishman VTB - DRILLING Template manual

Fishman

Fishman VTB - DRILLING Template manual

Sonuscore TIME TEXTURES manual

Sonuscore

Sonuscore TIME TEXTURES manual

NANO PERFORMANCE MIXER quick guide

NANO

NANO PERFORMANCE MIXER quick guide

Paia 9720 Assembly and using manual

Paia

Paia 9720 Assembly and using manual

Art HeadTAP Specifications

Art

Art HeadTAP Specifications

Behringer ULTRADRIVE PRO DCX2496 quick start guide

Behringer

Behringer ULTRADRIVE PRO DCX2496 quick start guide

manuals.online logo
manuals.online logoBrands
  • About & Mission
  • Contact us
  • Privacy Policy
  • Terms and Conditions

Copyright 2025 Manuals.Online. All Rights Reserved.