BOSSTOP AMZHP230B User manual

Heat Press
User Manual
Mob: +86 17705053273
Whatapp(Wechat):+86 17705053273
Facebook:Bosstop
THANKS FOR CHOOSING BOSSTOP

21
Precautions Before Operation
Check the voltage before using it. The correct voltage is 110-120V/60Hz.
Turn off the machine when not in use, and remove the power plug from socket.
Keep children away from the machine.Do not touch the heating platen or platen cover
after pressing whilst in operation.
Test before you press: We encourage you to always do a test of your fabric and HTV or
transfer paper together using a small sample of the materials before you do volume
production. If possible your test can include actually washing and drying a pressed
garment to assure that the media has properly adhered to the garment using the heat
and pressure setting you have selected.
Bosstop heat press size equal to 9”x12”,carries a ground line by default, please make
sure the socket owns a ground line protector.
Don't use excessive force when pressing the handle.Please e-mail our support team
bosst[email protected]om when there is any problems.
1
2
3
4
5
6
Product Overview
Item Code: AMZHP230B
Item Style: Bosstop Swing Away Heat Press Machine
Size: 9”x12”
Controller: digital controller
ElectricData: 110V/60Hz,I=7A,P=900W
N.W.: 27lbs G.W.: 30lbs
PKG: 42.5*37*34.5cm,cardboard packaging.
Handle
Opens and closes top platen.(Don't use excessive force when pressing the handle.)
Pressure Knob
Adjusts the amount of pressure output from press, clockwise increases
pressure, counter clockwise decreases it.
Power Switch
Plugs power cord. Flip switch to power heat press.
Timing Button
When the machine beeps, you can press this
button to stop beeping.
Top platen
Heats to desired temperature/presses base material into
garment.Cast-in tubular heating element ensures even
temperature& presvsure.CAUTION HOT!
Silicone Pad
High temperature silicone pad.
Bottom Platen
Where to place and remove garments/base material.CAUTION HOT!
Base(including four suction cup)
Stabilizes the machine.
Smart Controller
Adjusts the temperature and time settings of heat press.
Specification
9”x12”(230x300mm) heat platen.
Its unique swing-away feature allows you to rotate the upper heat platen 360 degrees
around.
Handle:Carbon steel material,stable and durable.This pressure handle with insulation
protection.
Case-in tubular heating element ensures even temperature & pressure.
Easy to adjust the pressure according to the thickness of the item you’re printing.
With four suction cup design,can promote the machine firmly on clean table and floor.
CE certification.One year warranty on machine and life-time technical support.
Product Advantage
Mob: +86 17705053273
Email: [email protected]

43
How to Heat Transfer a T-shirt
We Will iron on a T-shirt in the following steps,and you can apply these instructions
to anything your heart desires.Such as purses,pillowcases,puzzles,phone case and soon.
Whatsapp(Wechat): +86 17705053273 Facebook: Bosstop
Trouble-shootings
1.Printing the image on heat transfer paper
by printer.
2.Outputting the image. 3.Adjusting the pressure knob.Clockwise
increase pressure.Counter clockwise
decrease it.
10.Removing the teflon sheet, set it aside as it
can be re-used. Peeling off the transfer paper.
Please make sure transfers are warm peel or
cold peel, and do it accordingly.
11.Finished. 12.This machine can transfer image on textile
fabric such as cotton, fiber, which is especially
suitable for promoted products.
4.Pressing the handle and testing pressure.
Pressing firmly.And adjust the suitable
pressure.
6.Pressing “OK” again and the screen shows
“P-2”,you need to set a working time by press
“▼””▲”.Press the “OK” button again,the
machine start heating up.
5.Connecting the power cord and turn on the
power switch. The display screen should
illuminate. Pressing the “OK” key, the screen
shows “P-1”, you need to set your work temp
by press “▼””▲”.
7.When the heat press reaches its setting
temperature,place your fabric on the bottom
platen.Laying a teflon sheet over the fabric,
pre-pressing the fabric for about 5 seconds
to make sure smooth.
9.It will beep at the end of countdown,
reminding you that it's done.Then press the
Timing Button to stop the beep.
8.Positioning heat transfer paper with image
facing down on fabric,and laying a teflon sheet.
Closing the handle and the machine start
heating transfer the fabric. Then press the
“Enter”Button,it will count down from setting
time.
Q:How to switch the temperature unit to Celsius?
A:Press and hold the “OK” key for 10 seconds,the display will show P-3,you can switch
between ℉ and ℃ outputs by press “▼””▲”.Press and hold again 10 seconds to exit
the setting page.
Q: What should I do if the screw at the handle is damaged?
A: Parts that are damaged within one year can be replaced free by us.
Q:Measuring temperature with a laser thermometer,the temperature on
the platen is not accurate!
A:If you encounter this situation,don't worry,pls contact our team mailbox,our technical
staffs will provide detailed operating instructions to help you handle this question.
Q:The timer does not work.
A:This machine has two countdown buttons,one is "Enter"button and the other is the
round red Timing button.Both can count down. If one button doesn't work, please try
another button.(Make sure to start pressing the timer button when the work
temperature is reached.)
Solve Your Problems

65
Hot Sale Product Overview
Warranty Statement
WHY CHOOSE US?
We can do whatever we can to ensure that the interests of consumers
If you are dissatisfied for any reason, please don’t be quick to leave
negative/neutral feedback. Contact us firstly by Amazon
We work hard to make sure EVERY CUSTOMER 100% SATISFIED
and resolve any problem for you and hope we can leave positive
feedback to all our customers.
Facebook: Bosstop
Email: [email protected]
Q.I turn on the power,but the heat press does not work.
A.Pls check the power plug connected well to the socket,then turn to support team if you
still couldn't solve.
Q.It is hard to peel off the transfer paper.
A.Please make sure transfers are warm peel or cold peel,and do it accordingly.
Any further help,please email our support team:bosstopf[email protected]
Popular Power Tools manuals by other brands
Arbortech
Arbortech POWER CHISEL Owner's instruction manual
BURT
BURT ZQJ4116Q instruction manual
Makita
Makita AN634H instruction manual

Metabo
Metabo SXA 18 LTX 125 BL Original instructions
Clarke
Clarke 6505512 Operation & maintenance instructions
RAMSET
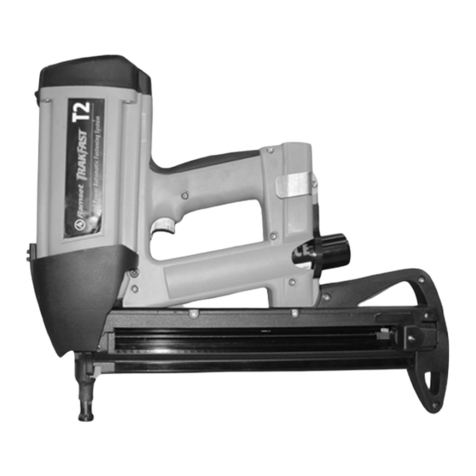
RAMSET T2 Operator's safety & operating instruction manual
