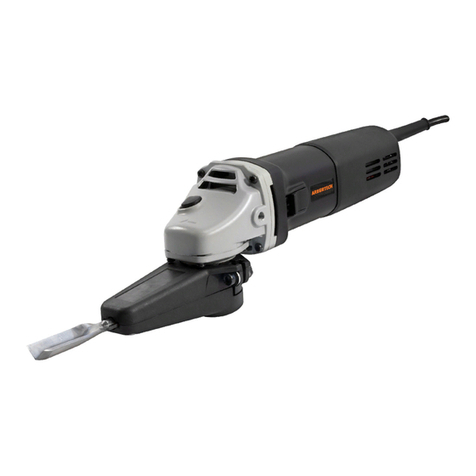
Arbortech POWER CHISEL Setup guide

Thank you for purchasing an Arbort ch Product.
Your Arbortech Power Chisel has been esigne & manufacture
to provi e you with the highest satisfaction in performance, ura-
bility an safe operation.
TM
Doubl
Insulat d
POWER CHISEL
OWNER’S INSTRUCTION MANUAL
READ THIS MANUAL
TO SAVE TIME AND MONEY
PCH.PK.BOOK 002

Pl as r ad this manual car fully to nsur corr ct op ration and car of
th machin . If you ar using th Pow r Chis l corr ctly, it will provid
you with y ars of r liabl s rvic and sav you tim and mon y.
TABLE OF CONTENTS
Pa e: 2. Rules for safe operation of electrical equipment
5. Knowin your tool
6. Unpackin and Assembly
7. Operation
10. Maintenance
12. Accessories & Spare Parts
13. Other Products
15. Technical Information
IMPORTANT
INCORRECT USE OF THE POWER CHISEL MAY LEAD TO PREMATURE
WEAR AND/OR DAMAGE. PLEASE READ THESE USER INSTRUCTIONS
CAREFULLY BEFORE USE TO ENSURE CORRECT OPERATION.
WARNING - READ ALL INSTRUCTIONS
Failure to follow all instructions liste below, may result in electric shock,
fire an /or personal injury. The term “power tool” in all the warnings liste
below refers to your mains operate (cor e ) power tool or battery-operat-
e (cor less) power tool.

1) WORK AREA SAFETY
• Keep work area clean an well lit. Cluttere or ark areas invite acci ents.
• Do not operate power tools in explosive atmospheres, such as in the presence
of flammable liqui s, gases or ust. Power tools create sparks which may ignite
the ust or fumes.
• Keep chil ren an bystan ers away while operating a power tool. Distractions
can cause you to loose control.
Rules for safe operation of electrical equipment 2
The Arbortech Power Chisel is esigne an built to meet an excee
Australian an International Safety Stan ar s.
Use only Arbortech approve or other qualifie service centres for the serv-
icing an /or repair of this tool. For further assistance contact Arbortech.
The Arbortech Power Chisel is ouble insulate to provi e the highest pos-
sible operator protection from electric shock. Please observe all necessary
safety precautions to avoi electric shock. Do not operate this tool until you
have rea an un erstoo all safety instructions an rules of operation.
Failure to comply with these instructions can result in serious acci ents
inclu ing fire, electric shock or serious personal injury.
IMPORTANT
INCORRECT USE OF THE POWER CHISEl MAY LEAD TO PREMATURE
WEAR AND/OR DAMAGE. PLEASE READ THESE USER INSTRUCTIONS
CAREFULLY BEFORE USE TO ENSURE CORRECT OPERATION.
WARNING - READ ALL SAFETY WARNINGS AND ALL INSTRUCTIONS
Failure to follow all instructions liste below, may result in electric shock,
fire an /or personal injury.
SAVE ALL WARNINGS AND INSTRUCTIONS FOR FUTURE REFERENCE.
The term “power tool” in the warnings refers to your mains-operate
(cor e ) power tool or battery-operate (cor less) power tool.

2) ELECTRICAL SAFETY
• Power tool plugs must match the outlet. Never mo ify the plug in any way. Do
not use any a apter plugs with earthe (groun e ) power tools. Unmo ifie
plugs an matching outlets will re uce risk of electric shock.
• Avoi bo y contact with earthe or groun e surfaces, such as pipes, ra iators,
ranges an refrigerators. There is an increase risk of electric shock if your bo y
is earthe or groun e .
• Do not expose power tools to rain or wet con itions. Water entering a power
tool will increase the risk of electric shock.
• Do not abuse the cor . Never use the cor for carrying, pulling, or unplugging
the power tool. Keep cor away from heat, oil, sharp e ges or moving parts.
Damage or entangle cor s increase the risk of electric shock.
• When operating a power tool out oors, use an extension cor suitable for
out oor use. Use of a cor suitable for out oor use re uces the risk of electric
shock.
• If operating a power tool in a amp location is unavoi able, use a resi ual
current evice (RCD) protecte supply. Use of an RCD re uces the risk of
electric shock. Note: The term “Resi ual Current Device (RCD)” may be replace
by the term “groun fault circuit interrupter (GFCI)” or “earth leakage circuit
breaker (ELCB)”
3) PERSONAL SAFETY
• Stay alert, watch what you are oing an use common sense when operating a
power tool. Do not use a power tool while you are tire or un er the influence
of rugs, alcohol or me ication. A moment of inattention while operating power
tools may result in serious personal injury.
• Use personal protective equipment. Always wear eye protection. Protective
equipment such as ust mask, non-ski safety shoes, har hat or hearing
protection use for appropriate con itions will re uce personal injuries.
• Prevent unintentional starting. Ensure the switch is in the off-position before
connecting to a power source an /or battery pack, picking up or carrying the
tool. Carrying power tools with your finger on the switch or energizing power
tools that have the switch on invites acci ents.
• Remove any a justing key or wrench before turning the power tool on. A wrench
or a key left attache to a rotating part of the power tool may result in personal
injury.


• Do not overreach. Keep proper footing an balance at all times. This enables
better control of the power tool in unexpecte situations
• Dress properly. Do not wear loose clothing or jewellery. Keep your hair, clothing
an gloves away from moving parts. Loose clothes, jewellery or long hair can
be caught in moving parts.
• If evices are provi e for the connection of ust extraction an collection
facilities, ensure these are connecte an properly use . Use of ust collection
can re uce ust-relate hazar s.
4) POWER TOOL USE AND CARE
• Do not force the power tool. Use the correct tool for your application. The
correct power tool will o the job better an safer at the rate for which it was
esigne .
• Do not use the tool if the switch oes not turn it on an off. Any power tool that
cannot be controlle with the switch is angerous an must be repaire .
• Disconnect the plug from the power source an /or the battery pack from the
power tool before making any a justments, changing accessories, or storing
power tools. Such preventative safety measures re uce the risk of starting the
power tool acci entally.
• Store i le power tools out of the reach of chil ren an o not allow persons
unfamiliar with the power tool or these instructions to operate the power tool.
Power tools are angerous in the han s of untraine users.
• Maintain power tools. Check for misalignment or bin ing of moving parts,
breakage of parts an any other con ition that may affect the power tools
operation. If amage , have the power tool repaire before use. Many acci ents
are cause by poorly maintaine power tools.
• Keep cutting tools sharp an clean. Properly maintaine cutting tools with sharp
e ges are less likely to bin an are easier to control.
• Use the power tool, accessories an tool bits etc. in accor ance with these
instructions, taking into account the working con itions an the work to be
performe . Use of the power tool for operations ifferent from those inten e
coul result in a hazar ous situation.
5) SERVICE
• Have your power tool service by a qualifie repair person using only i entical
replacement parts. This will ensure that the safety of the power tool is
maintaine .

Note: text, iagrams an ata are correct at time of printing. In the interests
of continuous improvement of our pro ucts, technical specifications are
subject to alteration without prior notice.
5 KNOWING YOUR TOOL
Chisel locking button
Cam
Button spring
Chisel hol ing
spring
Rear bush
Extension Arm
Lubrication port
Front bush
Cap screws
Felt pa
(oil reservoir)

1. Remove the Power Chisel from its box. Inspect
to ensure that no amage has occurre uring
shipping. If amage , report to the retailer imme-
iately.
2. The Power Chisel is package with two acces-
sory chisels. Remove a chisel from the box, wipe
off the sticky coating an insert into the exten-
sion arm as shown in fig:1. When the chisel is
inserte correctly it shoul snap firmly into place.
The bevel of the chisel shoul fall away from the
tool bo y.
3. Before plugging in, ensure that the on/off
switch is in the OFF position (Fig.2).
* Plac 2 to 3 drops of oil in th lubrication port
as shown in fig.3 using th 15ml oil bottl sup-
pli d.
* Wip off th sticky coating on th chis ls
b for using.
KNOWING YOUR TOOL (cont’d) 6
Fig.1
Fig.2
Unpackin and Assembly
Fig.3
Arm
Clamping groove
Chisel bevel
Tool bo y
Chisel
Mounting plate

7 OPERATION
•Always ensure that chisels are sharp! Blunt chis-
els will not cut an will wear the tool premature-
ly.
To remove chisels, press the chisel locking button
an remove chisel from the extension arm. (as
shown in fig.4 & 5)
WARNING: THE CHISEL SHAFT BECOMES VERY
HOT DURING PROLONGED USE. ONLY HANDLE
CHISELS BY THE CHISEL BLADE.
•Use Arbortech Machine Oil to r gularly lubri-
cate the cam. Squeeze a rop into the lubrication
port every 15 minutes of operation. Arbortech
Machine Oil is specifically esigne for high
pressure an temperature applications.
(as shown in fig.6)
Fig.6
Fig.5
Fig.4

Warning: Always wear correct safety clothing, inclu ing ear, eye an lung
protection.
•When removing bulk woo the Power Chisel shoul be use with two
han s, Arbortech recommen placing the left han hol ing the chisel arm
an the right han hol ing the tool bo y in control of the switch.
(as shown in fig.7 & 8)
OPERATION 8
• Ensure the machine is running
BEFORE contacting the material,
to be worke on.
•Use a maximum 25oangle
when removing woo .
(as shown in fig.7).
Fig.8
Fig.7
25o

9 OPERATION
For d tail d carving the Power Chisel can be hel as shown in fig. 9 & 10.
• Do not force the tool into the woo at steep angles.
• Do not use the chisels as a lever to break out woo .
Fig.9
For fast rebates hol the chisel upsi e own
as seen here in fig.10.
WARNING:
the chisel shaft becomes
very hot uring prolonge
use. Only han le by the
chisel bla e.
Fig.10
Use only me ium pressure. The stroke is elivere at constant power, spee
an length, an will not cut faster by forcing the tool.

MAINTENANCE 10
•Ch cking bush s & springs:
Unplug the Power Chisel. Remove the top
cover. Take care as the springs may fall out (as
shown in fig.11). Check the front an rear bush
are not worn.
(see knowing your tool). If worn, replace using
an Arbortech Power Chisel Service Kit. Replace
only worn components.
Also check that the chisel hol ing spring, an
button spring are in soun con ition.
•Ch cking th cam:
Unplug the Power Chisel. Remove top cover.
Check that the cam is not worn excessively.(as
shown in fig.12) If wear is greater than 2mm eep
replace using an Arbortech Replacement Cam.
•Exchanging th cam:
Follow the instructions inclu e in the
Arbortech Replacement Cam package.
•Ch cking adaptor plat
Ensure that the Power Chisel a aptor plate is
always mounte securely. If loose, tighten the
three a aptor plate screws as shown in fig.12a.
Note: The arm must be remove to be able to
tighten screws to a apter.
Fig.11
Fig.12
WARNING: Ensure that the Power Chisel extension arm is always mounte
securely. If loose, ensure that all screws are securely fitte .
W ar on Cam
Fig.12a

11 MAINTENANCE
Chis l sharp ning:
Unplug the Power Chisel.
Remove the chisel from the unit. Use normal
chisel sharpening metho s. Check the Arbortech
website for etaile sharpening instructions.
Visit our website at:
www.arbort ch.com.au
Cl aning:
• Unplug the Power Chisel.
• Remove the chisel.
• Then remove the top cover, take care as parts
may fall out (as shown in fig.14).
• To clean, gently remove all grit an ust insi e
the extension arm using a soft brush to remove
any accumulate ust.
NOTE: Wh n cl aning always w ar y prot c-
tion.
• Replace top cover using the original screws.
• Ensure that the Power Chisel extension arm is
always fitte securely to the mounting plate. If
loose, tighten the 4 screws that hol the Power
Chisel to the mounting plate on the tool bo y.
(as seen in fig.15)
Fig.14
Fig.15
Fig.13

MAINTENANCE 12
Cl aning th grills and switch
First, unplug the power chisel. Regularly check to
see if any ust or foreign matter has entere the
grills positione on the front an back of the
motor or un er the switch (as shown in fig.16).
To clean grills an switch use a soft brush to
remove any accumulate ust. Wear safety
glasses when oing this.
Accessories
Acc ssori s availabl for th Pow r Chis l
(PCH.FG.030) Starter PACK (pkt of 5).
(PCH.FG.032) Woo carver pack (pkt of 3)
Spare Parts
(PCH.FG.040) Cam M10 x 1.5 threa pitch with Oil
(PCH.FG.041) Cam M10 x 1.25 threa pitch with Oil
(PCH.FG.042) Cam M14 x 1.5 threa pitch with Oil
(PCH.FG.043) Cam 5/8 UNC threa pitch with Oil
(PCH.FG.050) Service Kit
(PCH.FG.055) Oil refill Pack
Fig.16

WOODCARVER PRO-4 KIT
Wherever waste woo nee s to be remove rap-
i ly or cut, shape , trimme or trenche , you
will fin the 100mm Woo carver an i eal an
versatile attachment for an angle grin er. This
Pro-Kit contains a 100mm Woo carver bla e
an Pro-Guar .
INDUSTRIAL PRO-KIT
The 100mm In ustrial Cutter with replaceable
Tungsten Carbi e teeth is the ultimate profes-
sional tool for all woo shaping in soft an har
woo s. You can now remove large areas of
woo quickly, easily with control an precision,
cutting in all irections regar less of grain to
pro uce a fine finish. This Pro-Kit contains a
100mm In ustrial Cutter, Pro-Guar an fixing
key.
13 OTHER PRODUCTS

Mini-Grind r Pow r Tool
Use by professional sculptors furniture makers
an woo turners aroun the worl , the Mini-
Grin er is the most effective tool in the business.
A precision carving, cutting an san ing tool,
which removes woo cleaner an faster. It has bril-
liant control ue to the right angle rive system. It
is i eal for ifficult grains an har woo s.
Features a 710 watt motor, 150mm extension
arm allows access into ifficult areas, an has a
range of accessories available.
TRADE BLADE
(Known as TUFF CUT in Europ and USA)
Set with tough Tungsten Carbi e teeth, the Tuff-
Cut features a 4mm cutting wi th, which makes it
i eal for trenching in melamine, laminate, plas-
tics, fibreglass, various non-ferrous materials an
all types of woo an woo base materials.
The Tuff-Cut bla e features excellent control an
han ling an is esigne to fit onto 125mm
angle grin ers.
Designe to be multi purpose cutting bla e,
which will work with power an control in a vari-
ety of materials. It is perfect for general purpose
cutting of woo , woo base materials, plastics,
plaster boar , laminates, sheet materials, alumini-
um & other soft, non ferous metals.
OTHER PRODUCTS 14

15 TECHNICAL INFORMATION
*Manufacturer reserves the right to change specifications without notice.
**Note: Specifications may iffer from country to country.
ARBORTECH PTY LTD • 67 WESTCHESTER ROAD • MALAGA • 6090
PERTH • WESTERN AUSTRALIA
TEL: 08 9249 1944 • FAX: 08 9249 2936
U.S.A. -Tollfr : 866-517-7869 U.S.A Offic : 978-466-7945
U.S.A Fax: 866-515-8104 EUROPE: T: +49 2724-288301
F: +49 2724-205515
W bsit : www.arbort ch.com.au
US W bsit : www.arbort chusa.com
Fac book: www.fac book.com/arbort chtools
Email: [email protected]
Max. SPM: 12,000 rpm @ spin le
Pow r: 5.8A ~ 700 Watt
Rating: 230-240V, AC, 50-60Hz (PCH.FG.300)
120V, AC, 60Hz (PCH.FG.300.20)
W ight: 1.83 Kg
CE-D claration of Conformity:
We eclare un er our sole responsibility that this pro uct is in conformity with the CE
stan ar s.
NOTE: Motor may iffer from that shown on box epen ing
on specifications require for your country.
Other manuals for POWER CHISEL
2
Other Arbortech Power Tools manuals

Arbortech
Arbortech MIN.FG.900.20 Setup guide

Arbortech
Arbortech POWER CHISEL Setup guide

Arbortech
Arbortech PCH.FG.900.20 User manual

Arbortech
Arbortech PCH.FG.900.00 User manual

Arbortech
Arbortech POWER CHISEL User manual

Arbortech
Arbortech MIN.FG.900.60 Setup guide

Arbortech
Arbortech PCH.FG.600.20 User manual

Arbortech
Arbortech MINI CARVER MIN.FG.600.60 Setup guide

Arbortech
Arbortech AS200X User manual