boytone BT6B User manual
IT IS IMPORTANT TO READ THIS USER MANUAL PRIOR TO USING YOUR NEW PRODUCT FOR THE
FIRST TIME.
BOYTONE®
_________________________________
Portable CD/MP3 Player with FM Radio
and USB & SD/MMC card reader
Model BT6B | BT6R
DS-180A
Manual

WARNING:
TO PREVENT FIRE OR
ELECTRICAL SHOCK HAZARD, DO NOT
EXPOSE THIS PRODUCT TO RAIN OR
MOISTURE
PLEASE READ
A
ND S
A
V
E FOR FUTURE REFERENCE
Some of the following information may not apply to your particular product; however, as with any
electronic product, precautions should be observed during handling and use.
• Read these instructions.
• Keep these instructions.
• Heed all warnings.
• Follow all instructions.
• Do not use this apparatus near water.
• Clean only with dry cloth.
• Do not block any ventilation openings. Install in accordance with the manufacturer’s instructions.
• Do not install near any heat sources such as radiators, heat registers, stoves, or other apparatus
(including amplifiers) that produce heat.
• Do not defeat the safety purpose of the polarized or grounding-type plug. A polarized plug has
two blades with one wider than the other.Agrounding type plug has two blades and a third
grounding prong. The wide blade or the third prong is provided for your safety. If the provided
plug does not fit into your outlet, consult an electrician for replacement of the obsolete outlet.
• Protect the power cord from being walked on or pinched particularly at plugs, convenience
receptacles, and the point where they exit from the apparatus.
• Only use attachments/accessories specified by the manufacturer.
• Use only with the cart, stand, tripod, bracket, or table specified by the
manufacturer, or sold with the apparatus. When a cart is used, use caution
when moving the cart/apparatus combination to avoid injury from tip-over.
]
Portable Cart Warning
• Unplug this apparatus during lightning storms or when unused for long periods of time.
• Refer all servicing to qualified service personnel. Servicing is required when the apparatus
has been damaged in any way, such as power-supply cord or plug is damaged, liquid has
been spilled or objects have fallen into the apparatus, the apparatus has been exposed to rain
or moisture, does not operate normally, or has been dropped.
ADDITIONAL SAFETY INFORM
A
TION
• Main plug is used as disconnect device and it should remain readily operable during intended
use. In order to disconnect the apparatus from the mains completely, the mains plug should be
disconnected from the mains socket outlet completely.
1
English
Important Safety Instructions

• Apparatus shall not be exposed to dripping or splashing and no objects filled with liquids, such as
vases, shall be placed on the apparatus.
• Always leave sufficient space around the product for ventilation. Do not place product in or on a
bed, rug, in a bookcase or cabinet that may prevent air flow through vent openings.
• Do not place lighted candles, cigarettes, cigars, etc. on the product.
• Connect power cord only to AC power source as marked on the product.
• Care should be taken so that objects do not fall into the product.
• Do not attempt to disassemble the cabinet. This product does not contain customer serviceable
components.
• The marking information is located at the bottom of apparatus.
• Caution marking is located at bottom of apparatus.
Important battery precautions
• Any battery may present a risk of fire, explosion, or chemical burn if abused. Do not try to charge
a battery that is not intended to be recharged, do not incinerate, and do not puncture.
• Non-rechargeable batteries, such as alkaline batteries, may leak if left in your product for a long
period of time. Remove the batteries from the product if you are not going to use it for a month or
more.
• If your product uses more than one battery, do not mix types and make sure they are inserted
correctly. Mixing types or inserting incorrectly may cause them to leak.
• Discard any leaky or deformed battery immediately. They may cause skin burns or other personal
injury.
• Please help to protect the environment by recycling or disposing of batteries according to federal,
state, and local regulations.
Ecolog
y
Help protect the environment - we recommend that you dispose of used batteries by putting them
into specially designed receptacles.
Headset safety
To use a headset safely, please keep the following in mind:
• Do not play your headset at a high volume. Hearing experts advise against continuous
extended play.
• If you experience ringing in your ears, turn down the volume or stop using the headset.
• Do not use a headset while driving a motorized vehicle or riding a bike. It may cause a traffic
hazard and is illegal in many areas.
• Even if your headset is an open-air type designed to let you hear outside sounds, don’t turn up
the volume so high that can’t hear sounds around you.
Plugging in for powe
r
AC /DC adapter power supply : 100 - 240 V ~ 60 / 50 Hz
Technical information
Model: RCD009PL
INPUT: DC IN 9V 1A
Power Consumption: 9 Watts
2
English

OVE
R
V
IEW OF THE PL
A
YER
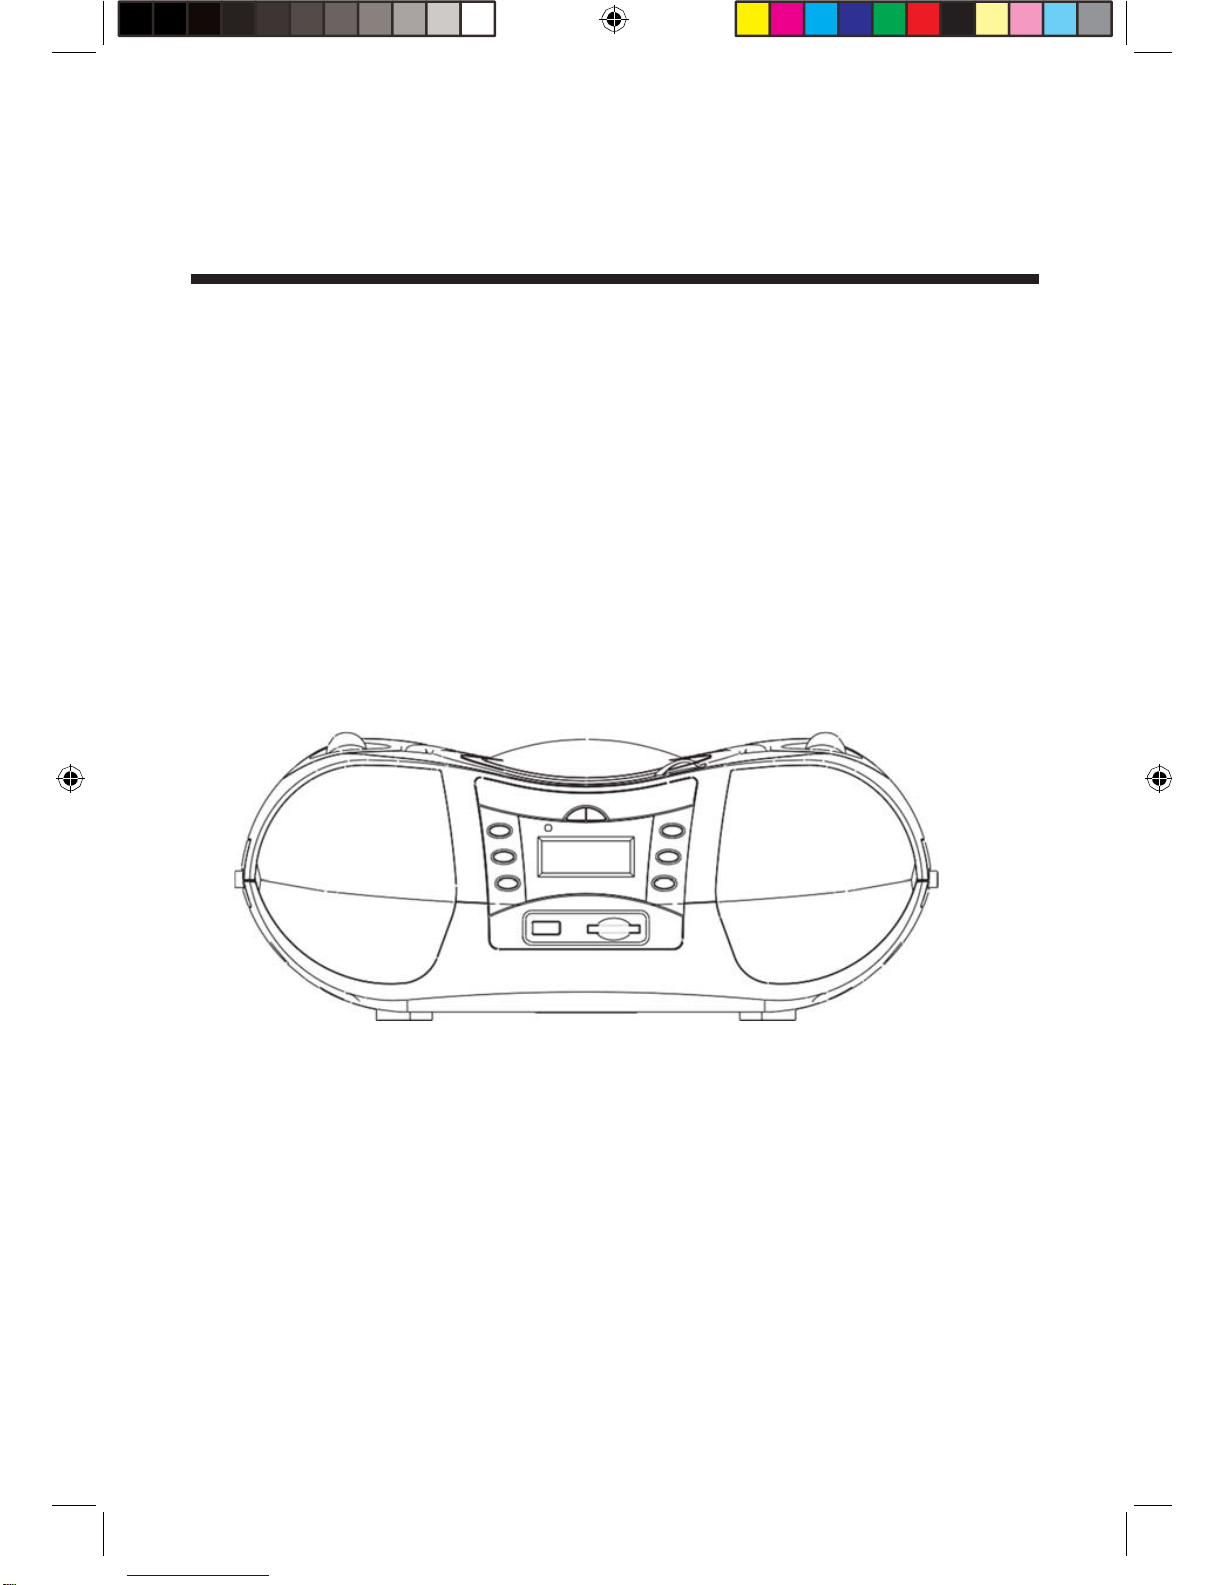
LOCATION OF CONTROLS
1. VOLUME CONTROL
2. SKIP DN/CH- BUTTON
3. SKIP UP/CH+ BUTTON
4. PLAY/PAUSE BUTTON
5. STANDBY INDICATOR
6. +10/ALBUM BUTTON
7. CD DOOR
8. PROG/MEM/MODEBUTTON
9. CD DOOR OPEN AREA
10. STOP BUTTON
11. SOURCE BUTTON
12. POWERBUTTON
13. TUNING CONTROL
14. SPEAKERS
15. USB PORT
16. LCD DISPLAY
17. SD/MMC CARD SLOT
18. PHONES JACK
19. AUX JACK
20. FOLDING HANDLE
21. BATTERYCOMPARTMENT
22. FM TELESCOPIC ANTENNA
23. DC IN JACK
3
English
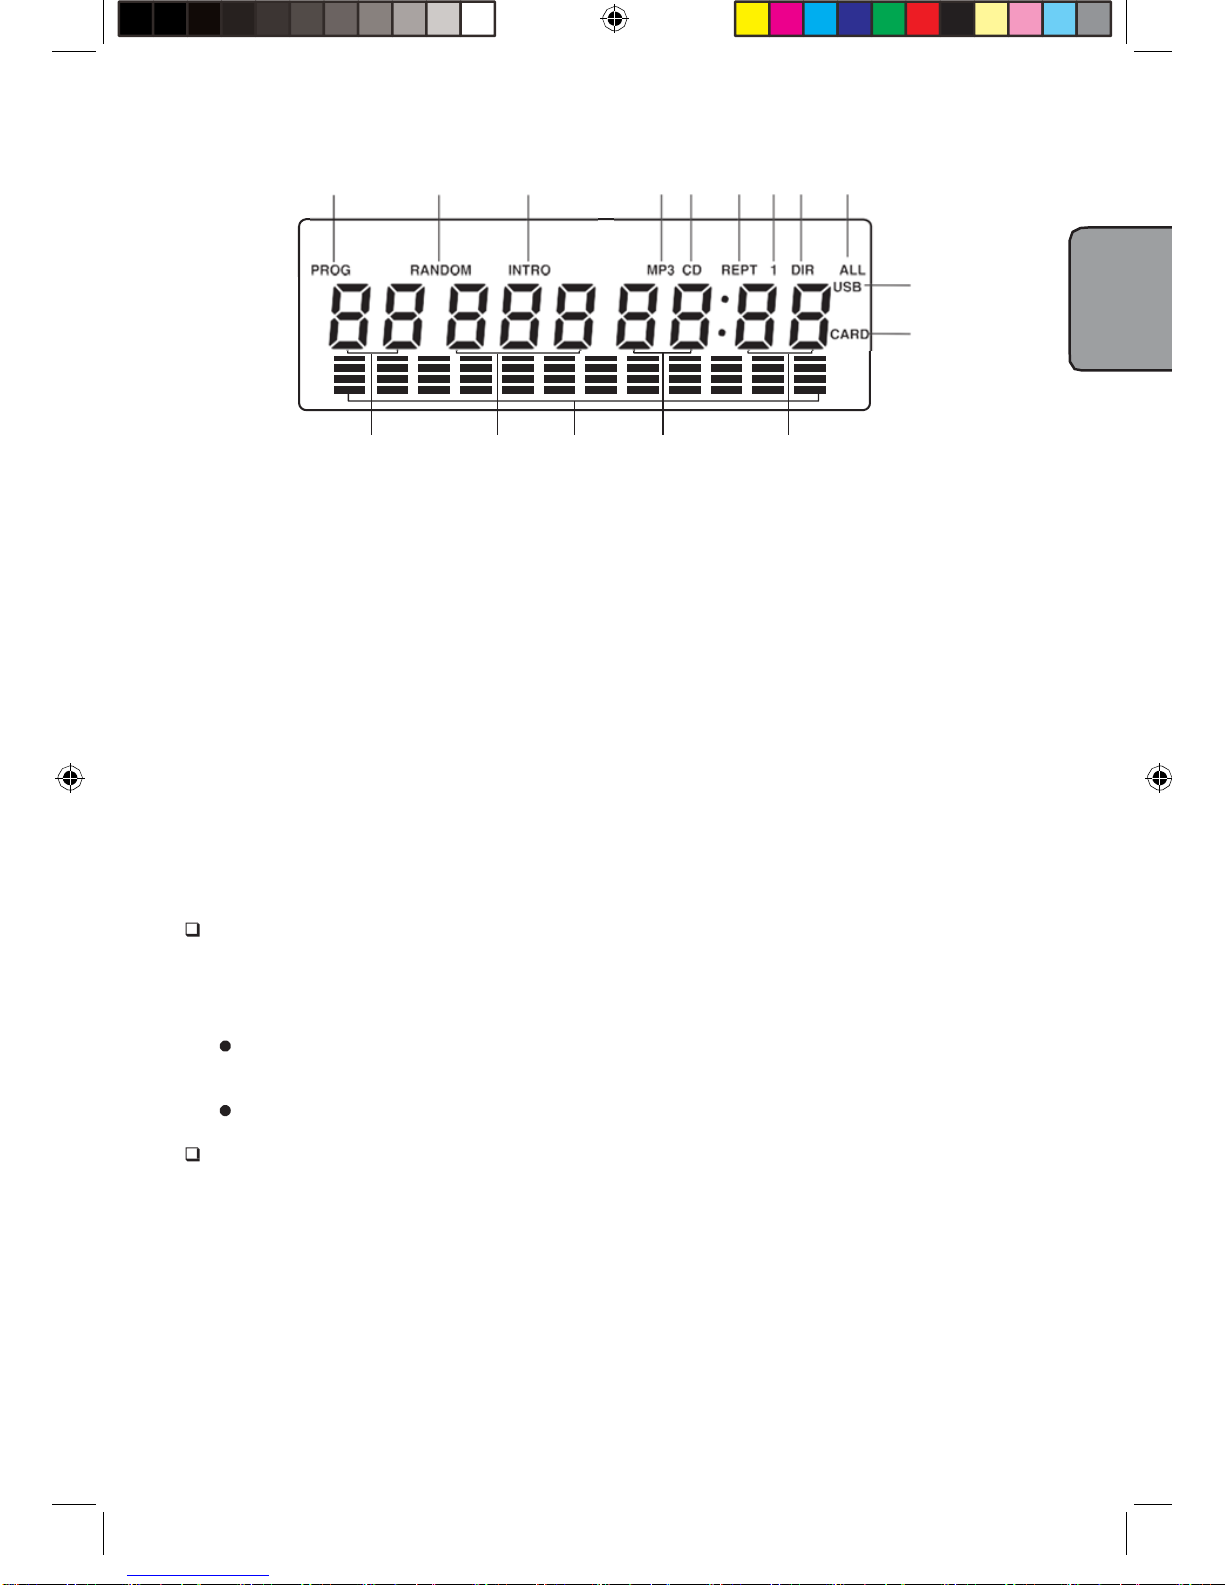
FAMILIARIZE WITH THE DISPL
A
YED CONTENTS IN THE LCD
12356
7 8 9 10
11
12
13 14 4 15 16
1.
"PROG" shows during Programming and in programmed play.
2.
"RANDOM" shows when in RANDOM playback.
3.
"INTRO" shows when in INTRO playback.
4.
English Text display. The information of the current track is displayed scrolling forward in MP3
playback.
5.
"MP3" shows when the disc played is an MP3-CD.
6.
"CD" shows when the disc played is a CD-DA.
7.
"REPT" shows when in various repeat modes.
8.
"1" shows together with "REPT" when in single track repeat mode.
9.
"DIR" shows together with "REPT" when in album repeat mode.
10.
"ALL" shows together with "REPT" when in all tracks repeat mode.
11.
This shows when the player reads data from USB data traveller.
12.
This shows when player reads data from SD/MMC card.
13.
This figure is the album number.
14.
This figure is track number of the current album on a MP3 disc or the current track number on
a CD disc.
15.
This figure is the elapsed minutes of the track played.
16.
This figure is the elapsed seconds of the track played.
POWER SUPP
L
Y
BATTERY OPERATION
1. Remove the battery compartment cover gently.
2. Install 8 x 'C' size batteries (UM-2 or equivalent) while observing the correct polarities.
3. Replace the battery compartment cover.
NOTE:
Leaking batteries may damage the battery cabinet and the player as a whole, so they
should be removed from the cabinet when becoming flat or when the player is not to be
played on batteries for some time.
The AC/DC adapter must be detached from the DC IN jack of the player for battery operation.
DC INPUT OPERATION
Plug the supplied adapter to the DC IN jack on the unit and to the main power.
TO PL
A
Y
THE RADIO
1. The standby indicator will light up once the unit is connected to the main power.Press the
STANDBY button to turn the unit on (the standby indicator will be off)
2. Press the SOURCE button repeatedly to switch the unit on the TUNER(FM radio) mode.
3. To launch the auto-searching, Rotate and hold the TUN+/- several seconds and for
shortly to tune the radio stations manually
4
English
4.
When you are receiving an FM broadcast, fully extend the TELESCOPIC ANTENNA
and rotate it for the best reception.
5.
Adjust the volume level to a comfortable listening level.
6.
Press the STANDBY button to turn off the unit.
STORE YOUR FAVORITE RADIO STATION:
1.
During listen to FM Radio, Press MODE/PROG/MEM button to store the currentstation as a
preset station. The Preset NO will flash on the LCD display.
2.
Press CH-/CH+ button repeatedly to select the corresponding memory NO fromP01 - P20
to
store it
3.
Press MODE/ PROG/MEM button to confirm your selection .
4.
Repeat above steps to store other stations .
5.
During listen to FM Radio, Repeatedly Press CH+ /CH- button to recall your preset station
STEREO PHONES JACK
A stereo phones jack has been provided on the side of the player so that you can listen without
disturbing others. To use this jack, plug in the headphones/ earphones (NOT INCLUDED) and adjust
theVOLUMEcontroltoapreferred level.
NOTE:Whenexternalheadphones/earphonesareconnected,thespeakerswillbemuted.
HANDLING AND MAINTENANCE OF
A
DISC
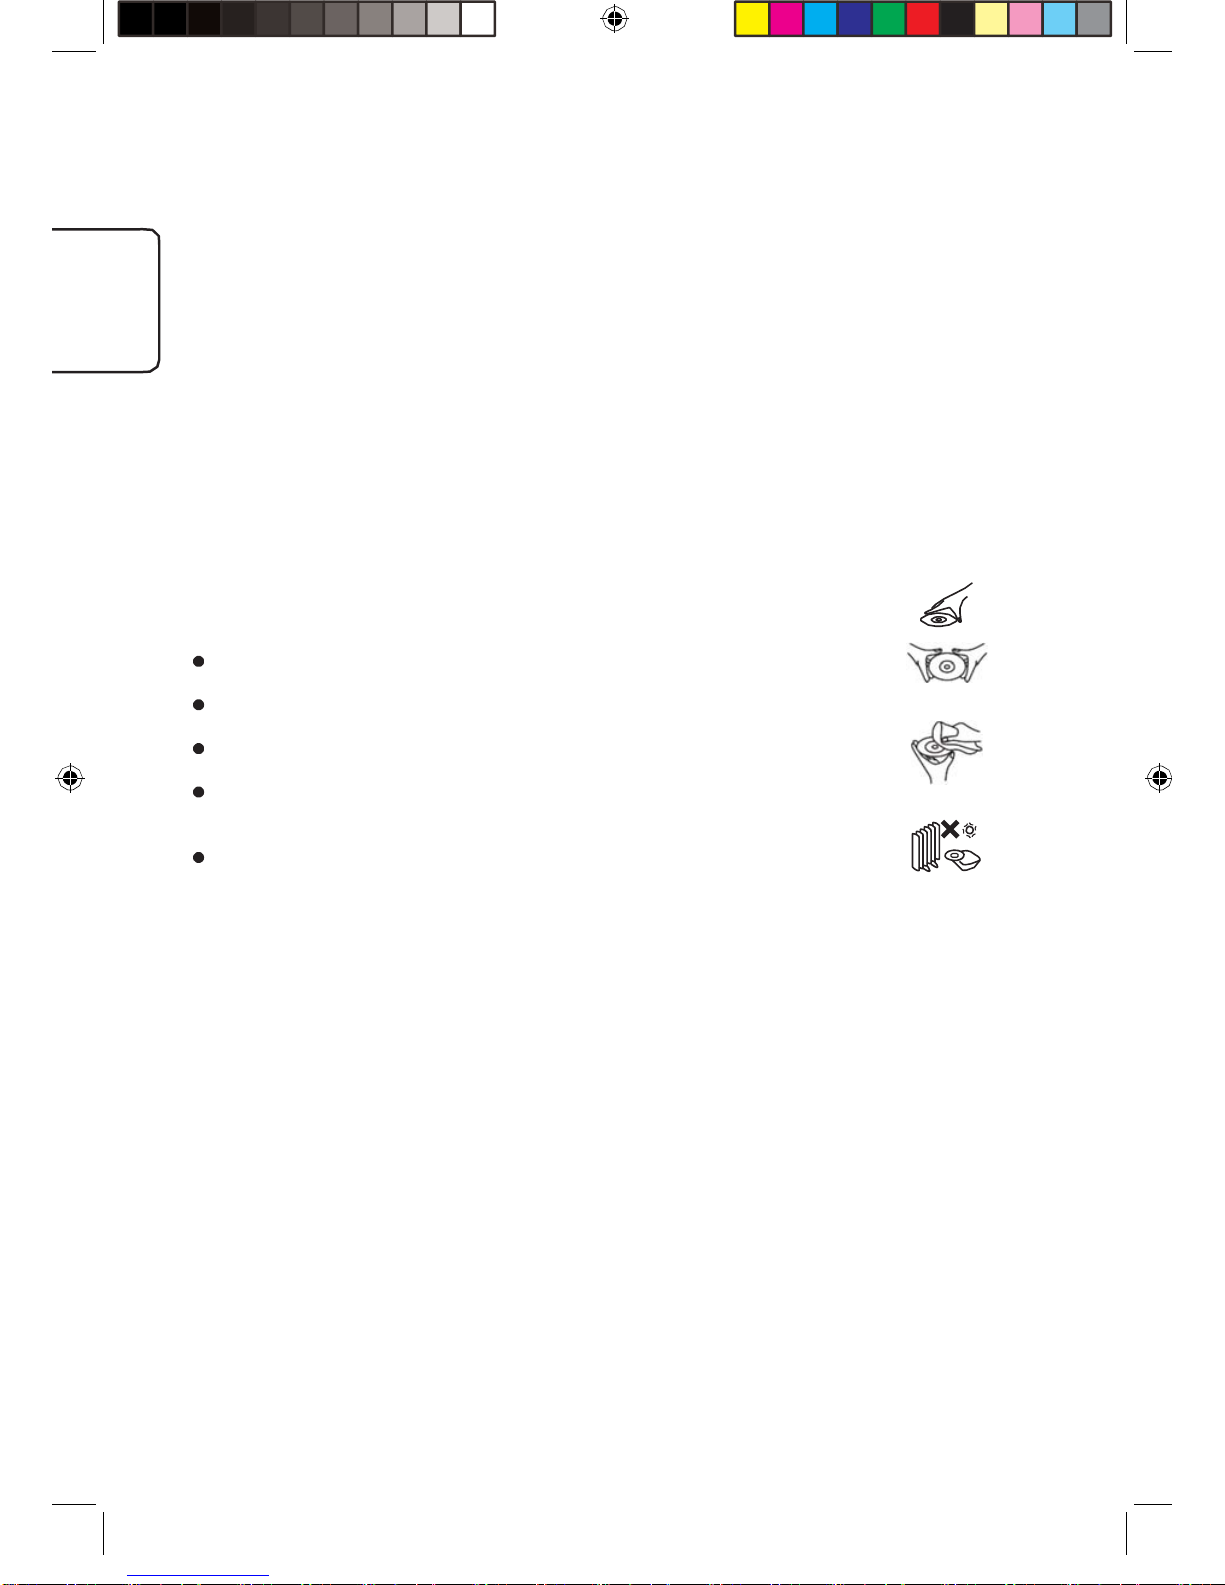
Follow the instructions below to handle and maintain your disc in order that
longtimeandtroublefreeperformancecanpossiblybeobtained:
Ensure not to caress the rain bow side of the disc; handle the disc by
the edge.
Long time exposure to sunshine, high temperatures and humidity will
damage the disc. And keep storage area clean.
Avoid sticking labels on both sides of a disc. Writing with pointed
articles on the disc should be strictly avoided.
Clean the disc wiping the centre and then working out to the edge with
a dry & soft cloth or a disc brush. Avoid any cleansing lotion or chemical
eradicator.
Store them in their cases when they are not to be used.
LOAD A DISC
HANDLE DISC ONLY AS SHOWN
CLEAN FROM CENTER TO EDGE
DO NOT STORE NEAR HEAT
1.
2.
3.
Open the CD door by the Door open area.
Load a disc on the disc tray with the label side facing up.
Close the CD doo
r
.
PL
A
Y
A
DISC
1.
2.
3.
4.
Press the STANDBY button to turn the unit on(the standby indicator will be off).
Press the SOURCE botton repeatedlly to switch to CD mode.
Follow the steps above toload a disc.
The player begins reading disc immediately the CD door is closed, "READING" shows in the
LCD.
When the disc is successfully read, TOC (total of contents) shows in the LCD and playback
follows with the first track.
Press Play/Pause button once to Pause music playback,the elapsed time of the current track
flashes and "PAUSE" appears on the bottom of the LCD to indicate the player in Pause mode;
Press PLAY/PAUSE button again to resume playback. press Stop button to Stop playback.
The LCD shows the TOC again.
5.
6.
SKIP TRACKS AND SEARCH FOR
A
SPECIFIC POINT
T
O PL
A
Y
1. Press once the SKIP/SEARCH up button in music play to skip to the next track. To skip to a
specific track ahead, press this button several times.
2. Press once the SKIP/SEARCH down button in music play to skip to the previous track. To skip
to a specific track at back, press this button several times.
5
English
3. Press and hold the SKIP/SEARCH up button in music play to search up at quick rate for a
specific point to play.
Press and hold the SKIP/SEARCH down button in music play to search down at quick rate for a
specific point to play.
Press +10 /ALBUM button once in play to skip to the track 10 tracks ahead, twice to skip to the
track 20 tracks ahead. You can reach the last track of the disc using this button.
4.
5.
REPE
A
T
A
SINGLE TRACK
To repeat a preferred track in playback, press MODE button once, the corresponding icon of
repeat single track shows in the LCD. Then select the preferred track using SKIP/SERCH buttons
o
r
+10/ALBUM button. The pla
y
er will repeat the chosen track until you press STOP button.
REPE
A
T ALL TRACKS
To repeat all tracks, press MODE button twice in play mode, the corresponding icon of repeat all
tracks shows in the LCD. The playe
r
will repeat all tracks until
y
ou press STOP button.
INTRODUCTION PL
A
Y
Introduction play is that the first ten seconds of each track are played in a sequential order. Press
MODE button three times to enter this mode during play, the icon of introduction play shows in the
LCD. Press MODE button to exit Introduction play mode and normal music play resumes. Press
SKIP/SEARCH up button in Introduction mode to begin Introduction play from the next track
immediately after the current track. Press SKIP/SEARCH down button in Introduction mode to
begin Introduction pla
y
from the current track.
RANDOM PL
A
Y
Random play is that tracks on the disc are played by the player at random. Press MODE button
four times to enter this mode during play, the icon of random play shows in the LCD. Tracks on
the disc will be selected at random for playback and the player stops automatically after all tracks
are played. You may press STOP button to exit random play mode and press PLAY/PAUSE button
to resume normal playback.
PROGRAMMED
PLAY
Programmed play is that tracks on the disc can be edited for playback in a preferred order with the
use of PROGRAM button.
In CD stop mode, press PROGRAM/EQ button once, "PROG" shows in the LCD with a flickering
track number and the program sequence indication "P-01", select the first track to be programmed
using SKIP/SEARCH buttons or +10/ALBUM button, and press PROGRAM button again to store
and advance to the next programming step. The program sequence indication changes to "P-02"
waiting for your next input.
Repeat the steps above to program more tracks. A maximum of 20 tracks can be programmed in
memory in a preferred order.
Press PLAY/PAUSE button to begin programmed play in the preferred order after you are done
with programming. The player stops automatically after all programmed tracks are played.
You may press STOP button to terminate programmed playback. In program stop mode, press
STOP button again to clear the programming; press PLAY/PAUSE button to begin the
MP3-CD
PLAYBACK
This player is capable of MP3-CDs. It takes longer time for this player to read an MP3-CD than it
does CD-DA. Wait patiently while it is reading.
After an MP3-CD is successfully read, the total number of albums and tracks shows in the LCD
together. And a second later, playback begins from the first track of the first album with the icon of
SKIP TRACKS AND SEARCH FOR
A
SPECIFIC POINT
T
OPL
A
Y
1. Press once the SKIP/SEARCH up button in music play to skip to the next track. To skip to a
specific track ahead, press this button several times.
6
English

2. Press once the SKIP/SEARCH down button in music play to skip to the previous track. To skip
to a specific track at back, press this button several times.
Press and hold the SKIP/SEARCH up button in music play to search up at quick rate for a
specific point to play.
Press and hold the SKIP/SEARCH down button in music play to search down at quick rate for
a specific point to play.
Press +10/ALBUM button once in play to skip to the track 10 tracks ahead, twice to skip to the
track 20 tracks ahead. You can reach the last track of the disc using this button.
Hold the +10/ALBUM button once during MP3 playback, the album number flashes; select
the desired album using the SKIP/SEARCH buttons or the +10/ALBUM button; confirm
this album selection by holding +10/ALBUM button again, the track number "000" flickers for
your input; select the desired track of the chosen album using the SKIP/SEARCH button or
+10/ALBUM button. Finally, press PLAY/PAUSE button again to begin playing this chosen track.
3.
4.
5.
6.
REPE
A
T
A
SINGLE TRACK
To repeat a preferred track in playback, press MODE button once, the corresponding icon of
repeat a single track shows in the LCD. Then select the preferred track using SKIP/SERCH
buttons or +10/ALBUM button. The player will repeat the chosen track until you press STOP button.
REPE
A
T ALL TRACKS
To repeat all tracks, press MODE button twice in play mode, the corresponding icon of repeat all
tracks shows in the LCD. The player will repeat all tracks until you press STOP button.
REPE
A
T AN ALBUM
To repeat a preferred album in playback, press MODE button thrice, the corresponding icon of
repeat a album shows in the LCD. Then select the preferred album using +10/ALBUM button and
SKIP/SERCH buttons. The player will repeat the chosen album until you press STOP button.
INTRODUCTION
PLAY
Introduction play is that the first ten seconds of each track are played in a sequential order. Press
MODE button four times to enter this mode during play, the icon of introduction play shows in the
LCD. Press SKIP/SEARCH up button in Introduction mode to begin Introduction play from the next
track immediately after the current track. Press SKIP/SEARCH down button in Introduction mode
to begin Introduction play from the current track. Press MODE button once more to exit introduction
RANDOM
PLAY
Random play is that tracks on the disc are played by the player at random. Press MODE button
five times to enter this mode during play, the icon of random play shows in the LCD. Tracks on the
disc will be selected at random for playback and the player stops automatically after all tracks are
played. You may press STOP button to exit random play mode and press PLAY/PAUSE button to
PROGRAMMED
PLAY
Programmed play is that tracks on the disc can be edited for playback in a preferred order with the
use of PROGRAM button. In MP3 stop mode, press PROGRAM button once, "PROG" shows in
the LCD with a flickering album number and the program sequence indication "P-01"; select the
album number to be programmed using SKIP/SEARCH buttons or +10/ALBUM button, and press
PROGRAM button again to store; the track number flickers waiting for your selection. Choose the
desired track with SKIP/SEARCH buttons or +10 /ALBUM button. Press PROGRAM button again
to confirm the first programmingand advance to the next programming step. The programsequence
indication changes to "P-02" waiting for your next input. Repeat the steps above to
program
more tracks. A maximum of 99 tracks can be programmed in memory in a preferred order.
Press
PLAY/PAUSE button to begin programmed play in the preferred order after you are done with
programming. The player stops automatically after all programmed tracks are played.
You may press STOP button to terminate programmed playback. In program stop mode, press
STOP button again to clear the programming; press PLAY/PAUSE button to begin the
7
English

EXTERNAL MEMO
R
Y
MEDI
A
OPER
A
TION (USB,MMC/SD)
Prepare the player for external memory media operation
Insert a USB data traveller into the USB port OR insert a MMC/SD card into the card slot;
Repeatedly press SOURCE button to select USB or CARD mode
IMPOR
T
ANT NOTE:
This product supports most common MP3 interface but we cannot guarantee 100%, because there
are too many formats that continue changing in the market.
V
ARIOUS PL
A
Y
MODES
SKIPPING TRACKS AND SEARCHING BETWEEN TRACKS
Press SKIP UP button once to skip the current track and play the next track, press this button
continuously to go to corresponding tracks ahead; Press SKIP DOWN button once to skip the
current track and go back to the previous track, press this button continuously to go back to
corresponding tracks at back. Press and hold SKIP buttons to initiate high-rate scanning between
tracks; release one of them to be
g
in pla
y
back of music at normal speed.
REPE
A
T
MODES
Press MODE button once in play mode to repeat the current track; the LCD shows the icon for
single track repeat. Press MODE button twice in play mode to repeat tracks on stored on this
storage media (USB/MMC card) as a whole; the LCD shows the icon for all tracks repeat.
Press MODE button thrice to re
p
eat tracks in the current folde
r
as a whole; the LCD shows the
INTROSCAN PL
A
Y
Press MODE button for the fourth time in play mode to activate introscan playback immediately;
the player will pick up tracks for playback of the first 10 seconds of each track in a sequential
order after PLAY/PAUSE button is pressed. You may press MODE button once again to exit
introscan play mode and return to normal playback from the track it's arrived at.
RANDOM PL
A
Y
Press MODE button for the fifth time in play to activate random playback immediately; the player
will pick up tracks in a random sequence for playback after PLAY/PAUSE button is pressed. You
may press STOP button to exit random play mode and press PLAY/PAUSE button to resume
normal playback.
AUXILIARY IN
Your player can be used as a power amplifier to playback the programs from portable radio, TV set
or MP3 player or whatever provided this appliance is so designed that audio signal may be
produced through a LINE-OUT jack or the like.
Observe the following steps to connect the playe
r
to anothe
r
appliance:
1.
2.
3.
4.
Press STANDBY button once to power on unit.
Repeatedly press SOURCE button to select AUX mode.
Connect the your device to the player's AUX in jack with an audio cable (not supplied).
Power on the your device and begin play.
8
English
11
EN
This manual suits for next models
1
Table of contents


