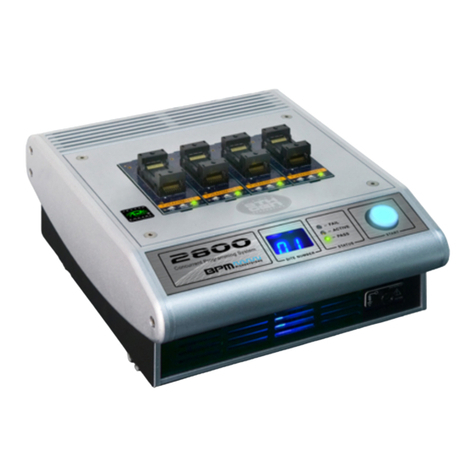
BPM Microsystems 1900 Series User manual

1900/2900 Series Device Programmer
QUICK START GUIDE
If any items are missing from this package, please contact a BPM Microsystems Customer Service Representative.
•Concurrent Programmer
•Power Supply
•Power Cord
•USB Cable (A to B)
•Software USB Stick
•Diagnostic Socket Card
•Vacuum Pen
•Quick Start Guide
•Product Registration Card
•Certificate of Conformance
•Customer Service
Representative Card
•USB Communications
Document
•Warranty Information Guide
1. Plug the included Software USB Stick into the PC USB port, or download from www.bpmmicro.com/software.
2. Right-click the BPWin installation “.exe” file and click “Run as Administrator”.
3. Follow the on-screen instructions to install BPWin software. (When prompted to “Choose the required BPWin
installation”, select the “BPWin” option to install the software for manual programmers.)
4. Restart the PC after installation is completed.
5. Directly connect the included power cord from the programmer to an electrical outlet.
6. Directly connect the included USB cable to a Type-A USB port on the PC (USB 2.0 port or later recommended).
7. Directly connect the other end of the included USB cable to the Type-B USB port on the back of the programmer.
8. Turn on the programmer and wait for the green pass LED to remain on.
9. Follow the on-screen instructions to install USB drivers for the programmer.
10. (This step is for Windows XP, Service Pack 2 users only, others proceed to next step.)
In the Found New Hardware Wizard Window, click on “No, not this time” selection and click “Next”.
11. Select “Install software automatically” and click “Next”.
12. Refer to the on-screen information to verify driver installation.
13. IMPORTANT! The Found New Hardware Wizard will launch for each individual programming site, and a
repeat USB driver installation must be done for each programming site. Once the USB drivers are installed, the
PC will recognize that the site(s) are connected later. If a different USB port on the PC is used, the Found New
Hardware Wizard will launch and install new USB drivers.
14. After Windows has completed the USB driver installation, click “Finish”.
15. Verify that all USB drivers are loaded correctly, recognized by Windows and attached. The programmer sites will
be listed in Windows Device Manager. The Device Manager in Windows can be accessed using the
Windows+Break keyboard combination. Click the Hardware selection. Expand the BPM Microsystems node.
There should be a BPM Microsystems programmer site for each programmer site attached and turned on.
16. Launch the BPWin software by double-clicking on the BPWin desktop icon or selecting BPWin from the Windows
Start menu/Programs list.
17. Follow the instructions on the included Product Registration Card to register the programmer and software.
18. Check the software screen to make sure the software recognizes the programmer and socket card (these appear
on the status bar of BPWin). Otherwise, perform the “Configure” operation to reinitialize the hardware detection.
A
-
IN ENTORY
B
-
INITIAL
SETUP

1900/2900 Series Device Programmer
QUICK START GUIDE
15000 Northwest Fwy, Houston, TX 77040 USA / www.bpmmi ro. om
T: 800.225.2102 / 713.688.4600 / F: 713.688.0920
© 2018 BPM Microsystems D07592DC .
Revision A .
1. Click the “Device” button.
2. Select the device to be programmed. Typing the device name will narrow the search results.
3. Insert the appropriate socket card(s) on the programmer. (On the menu bar, click Device > Socket Module Info
to find socket card(s) that will support the device selection.)
4. Click the “Data Pattern” button.
5. Click the “Open” button to retrieve the file to be loaded.
a. Click the “Browse” button to search for the file.
b. Select the file to be loaded.
c. Choose the appropriate settings, and then click “OK”. Repeat for the next window.
6. Click the “Device Config” button, and then click “Settings”.
a. Set the appropriate Device Settings as required. (Be aware that some devices may require ranges to be
set. Read the Device Notes carefully, or contact BPM Microsystems Customer Service with questions.)
b. Click “OK” when completed.
7. Under the Program tab, choose the appropriate settings for device operations.
8. Under the Quantity field, select the number of devices to be programmed.
9. Place the first device in the socket on Site Socket Location A. Use the included Vacuum Pen as needed.
10. Click the Program button.
11. Press the Start Pushbutton on the side of the programmer if the quantity field is set greater than one.
12. After the green Pass or red Fail LED lights up, place a device in either site, and then press the Start Pushbutton
on the programmer to continue to the next device.
1. Click the “Device” button, and then select BP Microsystems Diagnostics.
2. Insert socket card(s) on the programmer to test as follows:
a. To test hardware functionality of the programmer, insert the included Diagnostic Socket Card (with label
“FXASM9XDIAG”) on the programmer. The Diagnostic Socket Card enables additional tests on the
programmer for maximum test coverage.
b. To test hardware functionality of socket card(s), insert the desired socket card(s) on the programmer.
3. Press the “Execute” button, and then a Self-Test Configuration window will appear momentarily.
4. Select the programmer site(s) to test, then press the “OK” button.
5. Diagnostics will take a moment to test hardware functionality of the programmer and of the inserted socket
card(s). When testing is completed, the Output section will provide a Self-Test Summary displaying whether the
Unit(s) have Passed or Failed.
C
-
PROGRAMMING A DE ICE
D
-
SELF
-
TEST DIAGNOSTICS
This manual suits for next models
1
Table of contents
Other BPM Microsystems Motherboard manuals
