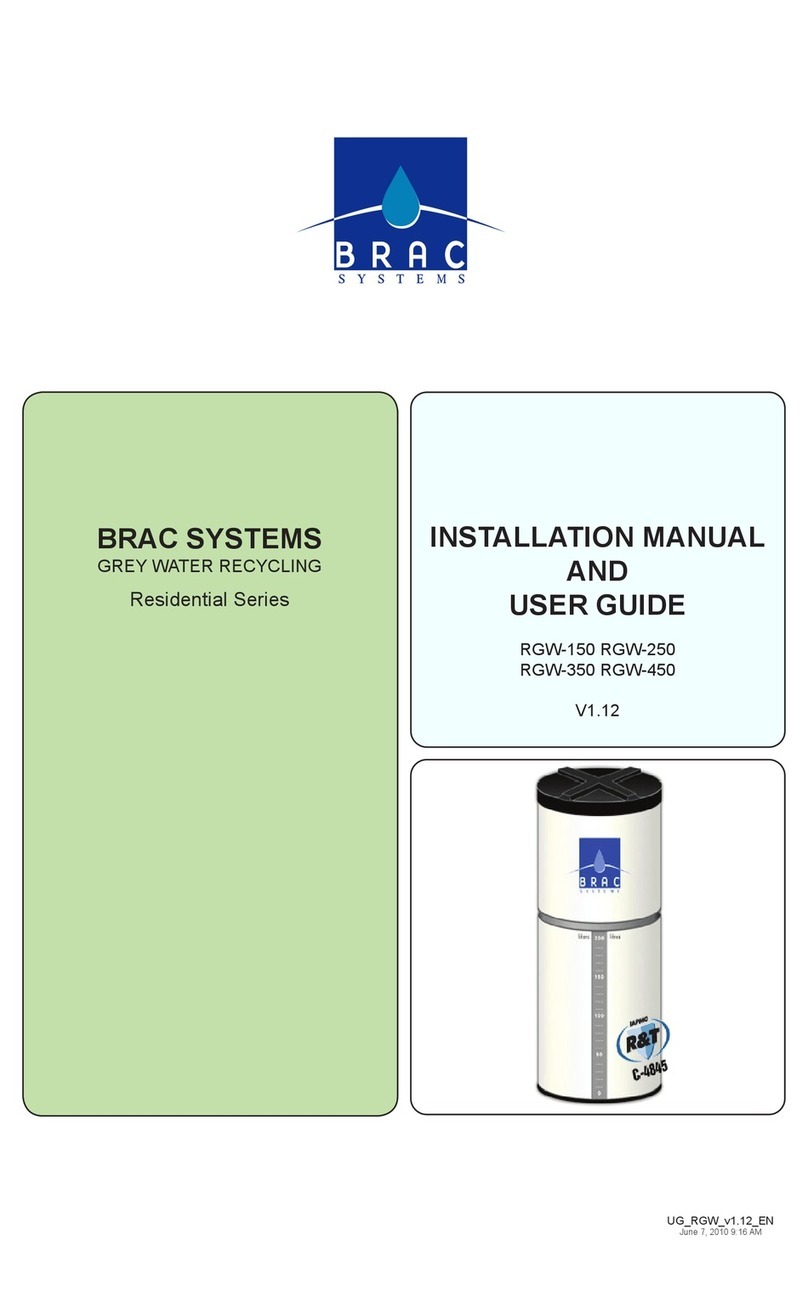
Bracco RESIDENTIAL Series Guide

Installation Manual
and User Guide
Systems
GREYWATER RECYCLING
RESIDENTIAL
Series
Model - LB-300
“LOWBOY”
S Y S T E M S
2009
v1.00

I. Table Of Contents
2
Section Page
Table of ContentsI. 2
General Safety RulesII. 3
IntroductionIII. 4
Technical DataIV. 5
Plumbing Diagram 1V. 6
Plumbing SchematicVI. 7
Installation OverviewVII. 8
Installation InstructionsVIII. 9
Priming and Start-UpIX. 10
Safety ComponentsX. 11
System ComponentsXI. 12
Plumbing Diagram 2XII. 13
Water Management Set-UpXIII. 14
Care and MaintenanceXIV. 16
Chlorinating System 16
Cleaning the Filter 17
Cleaning the Tank 18
Pump ManualXV. 19
Frequently Asked QuestionsXVI. 20
Troubleshooting GuideXVII. 23
Consumer WarrantyXVIII. 25
Consumer Warranty CardXIX. 26
We here at BRAC SYSTEMS INC. are very proud of our products and we are completely
committed to providing you with the best service possible. Your satisfaction is our #1
priority.
IMPORTANT: PLEASE COMPLETE AND MAIL IN THE PRODUCT
REGISTRATION CARD FOUND AT THE BACK OF THIS MANUAL.

3
II. General Safety Rules
Your BRAC SYSTEM requires connection to your home’s sanitary drain, and should
only be installed by a licensed plumber. This installation guide is intended for general
information purposes only.
WARNING: THIS GREYWATER SYSTEM IS FOR INDOOR USE ONLY. DO NOT USE
IN DAMP LOCATIONS OR EXPOSE ELECTRICAL CONNECTIONS TO RAIN.
WARNING! The greywater from this unit is not fit for human consumption.
Note: Before beginning installation, carefully read these instructions. This will simplify the
installation and ensure that the Brac greywater recycling system is installed correctly and
safely. Leave these instructions near the system after installation for future reference.
WARNING!!! Water that has been recycled through the BRAC SYSTEM is not intended for
drinking purposes! For this reason, do not install a permanent connection to the greywater
spout (faucet). This outlet is only provided so you can connect a garden hose temporarily
to water your garden, or to prime the system pump. Do not use a sprinkler or spray directly
onto your vegetables with greywater. Always clearly mark any greywater outlet. BRAC
SYSTEMS INC., and its Representatives or Distributors are absolved of any responsibility,
either real or intended, for the misuse of greywater by the consumer.
WARNING! To reduce the risk of fire, electric shock or personal injury, read all the instructions
before using this unit. This system is intended for household use only as described in this
manual. Any other use including but not limited to commercial, agricultural, or outdoor use,
is not recommended by the manufacturer and may cause fire, electric shock, injury and/
or damages.
WARNING: To avoid pump failure, double check that the pipe for the fresh water make-up
has been connected to the right port on the unit, and that the pump is properly primed.
WARNING: Changes or modifications made to this equipment, not expressly approved by
BRAC SYSTEMS INC., or parties authorized by BRAC SYSTEMS INC., could void the
user’s warranty.
NOTE: BRAC SYSTEMS INC. recommends that the NORWECO brand “Bio Sanitizer”
Calcium Hypo-Chlorite tablets be used for optimal results. The dissolve rate from these
140-gram (5oz.) tablets has met the performance requirements set forth by BRAC
SYSTEMS. The CHC tablets can be found at your local pool supply store.

III. Introduction
4
Congratulations on the purchase of your new BRAC SYSTEM. The BRAC SYSTEM can
help you save over 30% on your indoor water consumption, which will help to sustain our
most precious resource and provide for a better future for the generations to come.
When integrated into the plumbing of your home, the BRAC SYSTEM captures the water
used in your shower, bathtub and clothes washing machine, and recycles it to flush your
toilets.
(See figure 1)
The greywater from your shower, bath and laundry enters the BRAC SYSTEM through
the greywater inlet pipe where it passes through a 100-micron pleated cartridge filter and
collects in the lower portion of the BRAC SYSTEM tank. A 2” overflow pipe connected to
your sewer line prevents the tank from overfilling.
A potable water inlet pipe, controlled by an ultra-sonic level sensor and solenoid valve,
assures a minimum level of water in the tank, preventing the pump from running dry and
making sure there is always water to flush your toilets.
The collected water is drawn through a foot valve by a pump which provides greywater at
pressure to the greywater outlet and the irrigation/ priming faucet, supplying greywater to
your toilets and, if allowed, your garden.
An electronic chlorination system circulates the greywater through a separate chlorinator
at programmable intervals, allowing the greywater to be treated to a safe level without
becoming over-chlorinated. A built-in vacation mode assures that the greywater is not over-
chlorinated. The filter is easily accessed for cleaning, and a clean-out valve is provided for
flushing the tank.
Only a licensed plumber should install the BRAC SYSTEM. We recommend that your
plumber also install a fresh water bypass and shutoff valve to provide backup clean water
to your toilets in the event of a power failure, or should your system require removal for
servicing. We also recommend a greywater bypass to overflow be installed (Figure 1), so
that in the event of a filter obstruction, your bath and shower drains will not back up.
LAUNDRY OPTION: While laundry water is suitable for reuse, the presence of lint may
increase the frequency of filter cleanings required. If using laundry water as a grey water
source, Brac SystemsBRAC SYSTEMS INC. offers a pre-filter that will increase the duty
cycle of the primary filter. Contact your local dealer for more information. Research and
testing has shown that in the average household, with each member taking an average of
one shower per day, sufficient quantities of greywater are generated by bathing alone to
match the amount of average flushes per day in the same household. So you may choose
to omit capturing the laundry water when installing your system. You may also consider
installing both a traditional drain alongside a greywater drain to the BRAC SYSTEM behind
your washing machine. This will allow you to include or exclude your laundry water from
greywater collection simply by moving the hooked drain hose behind your washer from one
hole to the other. Just be sure to refasten the hose securely.

IV. Technical Data
5
Hydraulic Pe rformanc e c ur ve :
00
10
20
30
40
50
60
70
80
0 5 10 15 20 30 40 50 60 70 US GPM
20
40
60
80
100
120
140
160
180
H (ft)P(psi)
LB-300
1 HP
LB-300
60 Hz
Suction Lift Performance Table:
Capacity in US Gallons per Minute
Suction Lift in Feet
Model
Discharge
Pressure in
PSI
0
5
10
15
20
25
Max
Pump
Boost
Pressure
10
22.4
22.1
21.7
21.3
20.8
20.5
20
20.7
20.2
19.8
19.2
18.8
18.2
30
18.3
17.8
17.1
16.2
15.3
14.2
40
14.7
13.8
12.9
12.1
11.1
10.2
LB-300
50
10.5
9.3
8.1
6.9
5.6
4.3
67
Specifications:
Model
LB
Power
(H.P.)
Cycle
(Hz)
Phase
(O)
Voltage
(V)
Amp's
(A)
H max.
(ft.)
Q max.
(GPM)
300
1
60
1
115/230
11/5.5
154
23.8
Technical Data:
Capacity
Dimensions
(inches)
Weight
Estimated Annual Consumption in
Kw/h (by number of people)
Model
Litres
Gallons
L
W
H
kgs.
lbs.
Max
People
2
4
6
8
Power
(H.P.)
Start-up
(watts)
IAPMO
Approved
LB-300
300
80
48.0
35.00
27
45.5
100
6
41
82
123
164
1
2800
YES
26.75
.75”
18.25”
14.25”
19.25” 5.75”
35”
8.5”
23”
26.75”
48”
6.25 22.50
12.65
1.75
17.75
25.25 35.00
SECONDARY TANKS

V. Plumbing Diagram 1
6
Figure 1
I
BRAC
GREYWATER
Grey Water From Baths and Showers
Grey Water From Brac System
Black Water to Sewers
Potable Water Inlet
BRAC Systems Plumbing Network
Note: The bypass overow valve and its piping must
be installed by a certied plumber.
UPPER FLOOR
MAIN FLOOR
CRAWLSPACE

7
VI. Plumbing Schematic
** Shown with optional BDD-30 Blue Dye Dispenser and PT Series pressure tank
GREYWATER
PUMP
(INTERNAL)
DIRECTION OF FLOW
PT SERIES
PRESSURE
TANK**
BDD-30
BLUE DYE
DISPENSER
UNIT**
POTABLE MAKE-UP
WATER SUPPLY
BACKFLOW
PREVENTION
DEVICE
FRESH WATER
BYPASS
GREYWATER
INFLUENT
3” OVERFLOW DIRECTLY CONNECTED
TO SANITARY BUILDING DRAIN
BACKWATER VALVE
BY-PASS TO
OVERFLOW
OVERFLOW
PIPE
1 1/2” OVERFLOW
WATER
COUNTER
(OPTIONAL)
GREYWATER PIPE
TO FIXTURES
FRESH WATER
SUPPLY
VENT TO
OUTSIDE
CHECK VALVE
WATER
COUNTER
(OPTIONAL)
SEDIMENT DRAIN
FILTRATION
MAIN STORAGE
TANK
150 LITRES
40 USG
SECONDARY
STORAGE TANK
75 LITRES
20 USG
SECONDARY
STORAGE TANK
75 LITRES
20 USG
CONNECTING CIRCUIT
DIRECTION OF FLOW

8
VII. Installation Overview
Your BRAC SYSTEM requires connection to your home’s sanitary drain, and should
only be installed by a licensed plumber. This installation guide is intended for general
information purposes only. Further discussion and diagrams of plumbing particulars, such
as the bypass, cross connection contamination prevention, and backflow prevention, are
included in Section VIII – Installation Instructions. For a diagram of the system components,
see figure 4 on page 13.
Secondary Tanks: 2 - 75 litre (20 USG) saddle tanks. Positioned on either side of main
tank and connected together with supplied 2” pipe and fittings. (fittings are supplied for this
configuration only). See page 5 for dimenions.
Greywater inlet: 2“ ABS-DWV fitting. Water from your showers, bathtubs, and laundry
that is being recycled enters the BRAC SYSTEM here.
Ventilation Grates: These three 1-3/8” grates allow for air to circulate to and from the
sealed upper portion of the tank in order to help cool the pump’s motor.
Greywater outlet: A 3/4“ male threaded fitting. Greywater flows out of the BRAC SYSTEM
under pressure, to provide water to your toilets, or if allowed, your irrigation.
Fresh water inlet: A 3/4“ male threaded fitting. Fresh potable water enters the BRAC
SYSTEM here to provide a back-up volume of water, should your bathing and laundry
activities periodically fail to provide the minimum volume of water necessary to operate
the system.
The threads of the greywater outlet and fresh water inlet should be wrapped several times
with Teflon tape before connecting. DO NOT over-tighten these connections and always
use a back-up wrench on the fitting located inside the tank.
Priming and irrigation faucet: It is recommended that a standard hosebibb be installed
on the greywater outlet piping downstream of the shut-off valve. See Figure 3 on page 11.
This faucet will provide water at pressure for use in your garden and is also used to prime
the system pump, and to release system pressure prior to servicing the pump.
Overflow: 2“ ABS-DWV drainpipe fitting. Connects to sewer line. A bypass line and vent
pipe must be connected to the overflow pipe, see figure 5 on page 14.
Vent: 2“ ABS-DWV drainpipe fitting. The vent must terminate to open air, or be connected
to another vent that terminates to open air.
Cleanout valve: 1” PVC ball valve, female threaded. Used to drain the tank. Will also
connect to the sewer line (if required by local codes), or drains into an open trapped floor
drain. To prevent damage during shipping, the ball valve has been removed and placed
in the bag with the transformer and warning tape. It must be reinstalled prior to system
installation.

VIII. Installation Instructions
9
Plumbing codes vary by jurisdiction. Your certified plumber will know the codes for your
area. These notes are provided for informational purposes only, and as a general guide
for your plumber to follow. About Cross Connection Control Devices (CCCD). CCCD is a
generic term that refers to devices or methods that prevent potable water supplies from
being contaminated by non-potable water. A CCCD can be as simple as an air gap, or as
complex as a Reduced Pressure Back Flow Assembly (RPBA). Other common types of
CCCD’s include Double Check Valve Assemblies (DCVA), and simple check valves. Your
local plumbing official will determine which type of CCCD is required for your particular
installation.
Plumber’s Installation Instructions:
Position the1. BRAC SYSTEM in a location so that all connections will remain
accessible. The two secondary 75 Litre tanks will connect to the main tank through
2” threaded ports located on either side of the main tank, and located on the ends
of the secondary tanks. See page 5 for tank dimensions. All BRAC SYSTEMS
tanks must be installed on a solid level surface in a dry area and must be protected
from freezing.
Apply Teflon tape or liquid Teflon to the supplied 2” threaded adapters and install2.
them into the connection ports of each tank. Each connection will have it’s own
shut-off valve and union connection which are also supplied. Install the shut-off
valves so that the handles are in an upright position and can operate freely.
After all threaded connections are made, tighten each union connection as the3.
final step in linking the tanks together.
Calculate the fixture units for the tubs & showers that will drain into the4. BRAC
SYSTEM, then size the inlet, vent and overflow pipes accordingly. Maximum size
of inlet piping can be no larger than 2” in diameter. This would be a maximum of 4
showers connected to the Brac System.
Following local plumbing codes, connect the drain lines from the fixtures to the5.
greywater inlet port of the BRAC SYSTEM. (See figure 1)., Install a bypass and
vent pipe to the overflow drain. For bypass piping, install a Tee “standing up”,
upstream of the greywater ball valve with a minimum of 6” horizontally between
the bypass and vent Tee’s, and then connect to the overflow piping upstream of
the backwater valve. The 6” horizontal length will prevent the loss of greywater
through the bypass during normal operation. (See figure 5).
Install a backwater valve (such as a swing check valve) down stream of the overflow6.
port, and connect the overflow pipe directly to the building drain. (See figure 2).
The vent must terminate to open air, or be connected to another vent that terminates7.
to open air. Check your local codes for venting requirements. (See figure 5).
Install a cross-connection control device (CCCD) on the potable water pipe to the8.
“fresh water in” port of the BRAC SYSTEM. (See figure 3).
For reasons such as power failure, it is recommended that a bypass line with9.
shut-off valves be installed between the “potable water in” and the “greywater
out” lines, downstream of the CCCD. This will ensure that the toilets are supplied
with pressurized water for normal operations at all times. (See figure 3).

10
IX. Priming and Start-Up
b. Fill water in chamber
Water
c. Replace the filling plug
a. Remove the filling plug
Figure A
After the BRAC SYSTEM has been completely installed, follow these steps to prime
and power up the system.
Open the ball valve on the freshwater IN pipe to allow the line to pressurize.•
Plug in the transformer cord to a wall outlet. The fresh water solenoid valve should•
open and the tank should begin to fill with clean water. When the water level reaches
the minimum amount required for the pump to operate safely, approximately 38
litres (10 USG), the valve will automatically close and shut-off the fresh water
supply. Make sure to have filled the suction pipe with water prior to installing.
Remove the small red cap from the top of the pump housing. Fill the small•
compartment revealed under the red cap with water then replace the cap. See
Figure A. TIP: If a freshwater bypass line has been installed, open the bypass
shut-off valve to allow the lines to pressurize. Place a bucket under, or connect a
short hose to, the external irrigation/priming faucet and open faucet to expel any
remaining air in the lines. Close the bypass shut-off valve.
Plug in the pump’s power cord. The pump should begin drawing water and•
pressurizing the service lines. Once the pump is primed and the greywater OUT
line is pressurized, it will take 8 seconds before the pump shuts off. If the pump
fails to prime, unplug the pump, and repeat the three previous steps. Do not let the
pump continuously run when not primed. It may take multiple repeats of this step
to get the pump primed. Use the above TIP if possible.
Place a bucket under, or connect a short hose to, the external irrigation faucet•
and open the faucet to test for adequate flow and proper pump function. This will
also release any additional air trapped in the system. Flush the toilets to test their
function, and to release any additional air trapped in the service lines.
If the pump fails to start or stop, the factory set pressure switch may need to be•
adjusted. The instructions for the location and adjustments of the pressure switch
can be found in Section XV – Pump Manual.
IF YOU ARE STILL EXPERIENCING PROBLEMS WITH THE START-UP
PPROCEDURES AND HAVE FOLLOWED ALL INSTRUCTIONS THOROUGHLY,
CALL YOUR LOCAL BRAC SYSTEMS DEALER OR OUR TOLL-FREE SUPPORT LINE
AT 1.866.494.2722

X. Safety Components
11
Figure 3
Figure 2

XI. System Components
12
Figure 4
Filter Access
Grey Water Inlet
Grey Water Outlet
Fresh Water Inlet
Grey Water Overflow
Clean Out Valve
Water Level Detection
Unit
Support Plate
Electronic Fresh
Water Valve
Fresh Water
Supply Circuit
Grey Water
Supply Pump
System Controller
System Cover
Grey Water Suction Pipe
Air Gap
FreshWater
Chlorinator
www.bracsystems.com
BracGrey Water Controller
BC-100
Enabled
Integrated Water
Processing
System Vent

XII. Plumbing Diagram 2
13
The cross connection device prevents contamination of the potable water system. The bypass valve provides
water to toilets incase of power failure. The greywater bypass prevents the drains from backing-up incase of
inlet pipe (maximum 3”).
OPEN GRID
AIR VENT
PRIMING/
IRRIGATION
FAUCET
Figure 5

XIII. Water Management Set-Up
14
Brac Controller BC-100
Your BRAC SYSTEM is equipped with the BC-100 Water Management Controller.
The Water Management Controller in your system has been factory pre-set to manage
the greywater throughout the day for optimal disinfection with minimal free chlorine levels.
There are 16 possible settings ranging from twice per day chlorination (0 setting), to
maximum chlorination (15 setting). The default setting is level 6 chlorination which will
keep optimal levels of free chlorine in the greywater based on daily flow volumes of 250
litres (66 USG). If more or less daily flow volumes are expected, then the setting should
be adjusted accordingly. Each setting will increase or decrease the free chlorine level by
0.5 ppm.
The Water Management Controller will process the greywater at a minimum twice per day
every 12 hours based on the quantity of water in the main holding tank. If the switch setting
is set to 1 or more, the system will monitor in real time the greywater entering the system
and will process on an ongoing basis to insure proper water quality. If the system is unused
for more than 12 hours, the system will enter “holiday mode” and will process the greywater
to optimize the resources such as electricity, water and chlorine.
Please take note that regardless of the switch settings, the system will process the water
at a minimum of every 12 hours. The system clock starts at 0 hour when powered on. To
avoid pump starts during the night, we recommend that the unit be powered ON between
6-10 AM or 6-10 PM. This way, the system will go through its water processing cycles at
more convenient times for the household.
The Enabled LED should be green to show that the system is operational. If the LED flashes
from green to red, this indicates that there is a problem with the water level sensor.

XIII. Water Management Set-Up
15
The chlorination cycle can also be manually operated by pressing the blue “Chlorinator”
button on the BC-100 controller. The chlorination valve will operate only while the
“Chlorinator” button is pressed. Once you release the button, the chlorination valve will
close.
The fresh water make-up circuit is automatically managed by the BC-100 controller. It
too can be manually operated by pressing the blue “Fresh Water” button on the BC-100
controller. The fresh water make-up valve will operate only while the “Fresh Water” button
is pressed. Once you release the button, the fresh water make-up valve will close.
Warning: Do not depress the blue buttons on the BC-100 controller for an extended period
of time. This could cause damage to the controller. Either the “Fresh Water” button or the
“Chlorinator” button should not need to be pressed for more than one minute at a time.
0
1
2
3
4
5
6
7
No Extra Chlorination
Minimal Chlorination
Level 2 Chlorination
Level 3 Chlorination
Level 4 Chlorination
Level 5 Chlorination
Level 6 Chlorination
8
9
10
11
12
13
14
15 Maximum Chlorination
Level 8 Chlorination
Level 9 Chlorination
Level 10 Chlorination
Level 11 Chlorination
Level 12 Chlorination
Level 13 Chlorination
Level 14 Chlorination
Level 7 Chlorination

XIV. Care and Maintenance
16
There are three main areas of routine maintenance that must be attended to:
Maintenance of the chlorinating system•
Filter cleaning•
Tank cleaning•
Chlorinating system
When left untreated, greywater can quickly turn to black water within 72 hours. The BRAC
SYSTEM features an electronic chlorination system that circulates the greywater through
a separate chlorinator at programmable intervals, allowing the greywater to be treated
to a safe level without becoming over-chlorinated. A built-in vacation mode assures that
the greywater is never over-chlorinated. While the timer controlling this system is preset
at the factory, proper chlorinating requires the user to visually inspect the chlorine tablets
and add new ones when necessary. Visual checks of the chlorine tablets should be done
during the filter cleaning procedure. (See next section – “Cleaning the filter”).
BRAC SYSTEMS INC. recommends that the NORWECO brand “Bio Sanitizer” Calcium
Hypo-Chlorite tablets be used for optimal results. The dissolve rate from these 140-gram
(5oz.) tablets has met the performance requirements set forth by BRAC SYSTEMS. The
CHC tablets can be found at your local pool supply store. The CHC tablets are stacked
one on top of the other in a separate chlorinator providing a continuous use that should
last approximately 3 months, depending on usage.
Directions: Remove lid of chlorinator by turning lid counter-clockwise. Warning: Be
careful of chlorine gas when opening lid. Do not put nose directly over open chlorinator as
serious injury may occur!
Following the manufacturers CHC handling instructions, refill the BRAC SYSTEMS
chlorinator. The chlorinator will hold eight (8) 140-gram (5oz.) tablets. Replace the
chlorinator lid and tighten securely.
Some jurisdictions require that greywater be dyed blue or green before being served to
Toilets or urinals. In this case, please refer to the products page on the BRAC SYSTEMS
website, then click on the BDD-30 Blue Dye Dispenser for more information.
The CHC tablets can be found at your local pool supply store. If your local pool supply store
does not carry the NORWECO brand CHC tablets, contact your local BRAC SYSTEMS
dealer or representative for further assistance.

17
XIV. Care and Maintenance
Cleaning the filter
As we are unable to determine the number of family members in each particular household,
we recommend that you inspect and clean the filter every week. If you realize that the build
up of residue in the filter does not warrant cleaning the filter every week, we recommend
that you decrease the frequency of inspecting and cleaning of the filter by three days at
a time, (every ten days, every thirteen days, every sixteen days, and so on…), until you
determine the proper time interval for your particular situation. To reduce the frequency
of required filter cleanings, it is recommended that users install an inexpensive hair filter
in the bath and shower drains or a “Y” Strainer on the grey water line before the BRAC
Systems filter housing. Also bear in mind that the capture of laundry water will cause the
filter to clog more frequently, due to laundry lint.
Procedure:
If the potable water bypass is installed, open the bypass valve to allow the toilets1.
to operate on potable water during this procedure.
If the greywater bypass is installed, close the bypass valve to divert any bath2.
drainage to the sewer during this procedure.
Unplug both the pump power cord and the transformer from the power source to3.
secure the system.
Remove the tank lid and the screw cap from the filter housing.4.
Carefully remove filter from housing.5.
Rinse the cartridge filter in the sink or outside with a garden hose. If necessary,6.
soak filter in 50% water and 50% cartridge filter cleaning solution for 12 hours and
then rinse with water. Use the replacement filter while filter is soaking.
Return the filter to the housing, replace filter housing cap and tank’s lid. Apply7.
a thin layer of petroleum jelly to the rubber o-ring on the screw cap to ensure a
proper seal.
Close potable bypass valve, and greywater bypass valve, if applicable.8.
Plug in the transformer and pump’s power cord.9.
If the filter is damaged, or has to be replaced, please use the extra filter, which has been
supplied by BRAC SYSTEMS. We recommend that you purchase new filters from your
local BRAC SYSTEMS dealer or representative so that you always have an extra filter
on hand. Tip: Some users have found it convenient to alternate the use of the factory-
installed filter and the extra filter provided at each cleaning procedure.

18
XIV. Care and Maintenance
Cleaning the tank
Note: It has been our experience that with a properly chlorinated system there will be no
sludge build-up in the bottom of the tank and this procedure is unnecessary. However, we
leave the procedure in place in the event that a user does find it necessary to clean the
tank.
The same principal used for determining the time interval of cleaning the filter holds true
for the cleaning of the tank. Under normal circumstances, it should be sufficient to clean
the tank once a year. Initially, we recommend that you inspect and clean the tank every
three months until you have determined the proper cleaning interval.
Procedure:
Unplug the pump power cable and the transformer from the power source.1.
If a greywater bypass is installed, close the bypass valve to direct any bath drainage2.
to the sewer during this procedure. IMPORTANT: If a greywater bypass has not
been installed, do not use the bath, shower or laundry while cleaning the tank.
If a potable water bypass is installed, open the bypass valve to provide potable3.
water service to the toilets during this procedure.
Make sure that the clean-out valve is connected to your sewer pipe, or drains into4.
an open trapped drain.
Open clean-out valve and empty tank.5.
Close clean-out valve.6.
Remove the screw cap for the filter housing and remove the filter.7.
Pour a minimum of five litres of household vinegar through the filter housing, and8.
allow to stand in the tank for fifteen to twenty minutes.
Return the filter to the housing, replace filter-housing cap. Apply a thin layer of9.
petroleum jelly to the rubber o-ring on the screw cap to ensure a proper seal.
Plug in the transformer to the power source, but do not plug in the pump cable yet.10.
Potable water should start flowing into the tank.
Open the clean-out valve to allow the vinegar to drain as fresh water is added to11.
the tank. Allow the tank to self-flush with potable water for five minutes.
Close clean-out valve, and with the fresh water supply still running, allow the tank12.
to fill until the float valve turns off the fresh water.
Close the fresh water bypass valve, and open the greywater bypass valve, if13.
applicable.
Plug in the pump power cable.14.
Replace the tank lid.15.
After cleaning the tank, flush each toilet once to ensure proper function. During the
cleaning process of the tank, do a visual inspection of all fittings, connections and the tank
to ensure there are no leaks anywhere.
The overall time required for this procedure is approximately 30 minutes.

XV. Pump Manual
19
Operating conditions:
1. Ambient temp: Max. + 40oC (104oF)
2. Liquid Temp: + 4oC (39oF) ~ + 40oC
(104oF) Max.
3. System pressure: Max. 120 psi
4. Relative humidity: Max. 85% (RH)
Electrical connection:
Ensure the mains voltage is the same as
the value shown on the motor plate and that
the pump is safely connected to ground.
Precautions:
1. The pump should be shut down and the
trouble corrected if the pump is running
at speed and found to have any of the
following problems: - No liquid discharged
- not enough liquid discharged – Excessive
vibration – Motor runs hot.
2. Do not allow pump to continually start/
stop (cycling). This will reduce motor life.
3. Cycling can occur on pressure units when
pressure tank pre-charge drops, or when
there is a leak in the discharge plumbing.
4. Pressure tank pre-charge should be
checked at regular intervals of every 3
months and after the pump has not been
used for a prolonged period. To check the
pressure tank air pressure, turn off power,
open a tap on the discharge line to release
pressure from the pump, unscrew the
black plastic cover and apply an accurate
pressure gauge to the valve. Pressure
should be adjusted to the original pre-
charge as follows: TQ400: 21 psi - TQ800:
28 psi
Maintenance:
Under normal operating conditions, the
pump does not require any maintenance as
long as the following points are observed:
1. Periodically check the condition of
the check valve located under the red
fill cap. Remove the prime cover to
check the condition of the check valve.
2. Periodically check the condition of the
pump strainer located on the inlet of the
pump. Remove the two flange bolts from the
suction pipe assembly to access the strainer.
3. If the pump sticks after periods of inactivity,
a screwdriver slot is provided on the motor
shaft end to free up the pump/motor. To
do so, insert a screwdriver in the slot in
the motor shaft and turn to free the rotor.
Adjusting pressure switch
A hole has been provided in the plastic cover
corresponding with the pressure switch
bolt location. Insert a small screwdriver
into the hole to adjust the pressure switch.
Make sure the system is primed. The pump
is supplied with a preset pressure in the
pressure switch. In some cases a different
pressure may be required. This can be done
by following the instructions below.
1. If pump does not start when priming faucet
is open, adjust clockwise (“+”) until it starts.
2. If pump does not stop when priming faucet
is closed, adjust counter-clockwise (“-”) until
it stops.
3. After adjustment is made, open and close
priming faucet several times to make sure
the pump operates normally.
TQ 400/800
Open the cover to adjust the pressure
+
-

XVI. Frequently Asked Questions
20
-What is greywater?
Greywater is the water generated from the use of the shower, bathtub, hand sink, laundry, kitchen
sink, and dishwasher.
-Is greywater different from wastewater?
Yes. Household wastewater, also known as sewage, is composed of two distinct sources:
- “Black water” is wastewater contaminated by feces or urine, and includes wastewater arising
from toilet, urinal, or bidet.
- “Greywater” is the remaining wastewater coming from the laundry, bathroom and kitchen.
-Is it safe to reuse greywater?
Yes, if used in an appropriate way. Greywater can contain disease-causing micro-organisms such
as bacteria, protozoa, viruses and parasites. It may also contain fats, oils, detergents, soaps, salt,
nutrients, food and hair derived from household and personal cleaning activities. These constituents
can pose both health and environmental risks. However, the public health risks associated with
onsite reuse of domestic greywater are considered low, as the source of the contamination would
be from the immediate family. Other sources of transfer of pathogens around the immediate family
are considered a higher risk, such as direct contact or sharing of food and utensils. Similarly, the
risk of environmental damage from the careful use of greywater is low.
-How can I reduce the risks associated with greywater reuse?
The following measures will reduce the health and environmental risks associated with the use of
greywater:
Do not use sprinklers to distribute greywater;•
Use subsurface irrigation systems;•
Do not spray greywater directly onto food plants;•
Do not put greywater on lawns where children are likely to play;•
Do not irrigate with greywater during periods of wet weather;•
Do not allow greywater to enter the storm water system;•
Make sure greywater does not create a nuisance, for example through odors or ponding.•
-Can greywater from all parts of the house be reused?
Kitchen: Kitchen wastewater could be heavily polluted with food particles, oils, fats, and other wastes.
It can also contain high concentrations of micro-organisms. It is often polluted with detergents and
cleaning agents, particularly those from dishwashers, which are very alkaline and may be harmful
to soils and plants by altering their characteristics in the long term. For these reasons kitchen
greywater is not recommended for use.
Bathroom: Chemical constituents of bathroom greywater include soap, shampoo, hair dyes,
toothpaste and cleaning chemicals. Greywater from hand basins is more polluted than bath or
shower greywater, but is much lower in volume.
Some of these contaminants act as plant nutrients and can be beneficial in the garden, but others
can adversely affect plants or soil structure. Concern is often expressed about people urinating in
showers and baths and the associated health aspects of using greywater in the garden. However,
urine in a healthy person is sterile. While some bladder infections may pass micro-organisms
in urine, the potential for these organisms to survive and cause infection is considered remote.
Greywater from the bathroom is suitable for reuse.
Laundry: Greywater from the laundry improves in quality from wash water to first rinse water to
second rinse water. Bacterial loads in laundry greywater are not usually high, except when diapers
are washed. Chemical contaminants of the wash cycle water are soap, salt, sediment and organic
material. If used for garden watering, the wash cycle water can damage plants and soils and create
bad odors.
This manual suits for next models
1
Table of contents
Other Bracco Water System manuals
Popular Water System manuals by other brands

evenes
evenes EASYFLOW 4I installation manual

Klaro
Klaro LA-28B operating manual

Spectra Watermakers
Spectra Watermakers Ventura 150T MPC Installation and operating manual

Beko
Beko QWIK-PURE 10 Installation and operation manual

Canature
Canature 785 HIMTLC PLUS Series owner's manual

PREMIER TECH
PREMIER TECH Rewatec NEO Installation and assembly guide