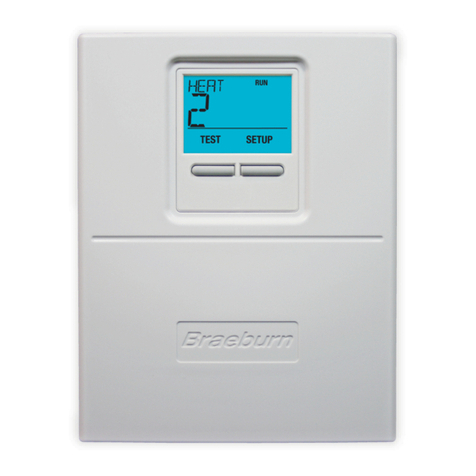
Braeburn Economy Series Assembly instructions

3 Zone Control Panel
Installer Guide
Panel de 3 zonas
Guía de instalación
Panneau 3 zones
Guide de l’installateur
English, 2-12
Español, 13-23
Français, 24-34
ECONOMY SERIES
SÉRIE ÉCONOMIE
SERIE ECONOMICA
model/modelo/modèle
140303
140303-100-04

CONTENTS
1 Specifications 4 Configuration
2 Suitable Mounting Locations 5 System Checkout
3 Wiring Diagrams 6 Operation
Warning
• Read all of the instructions before proceeding.
• Always turn off power to the heating/air conditioning system prior to installing or adjusting the
3 Zone Control Panel. Wire the entire panel before applying transformer power.
• This controller should only be installed and configured as described in this manual. Any other use is
not recommended and will void the warranty.
1Specifications
• Storage temperature: -40º–150ºF
(-40º–65º C)
• Operating temperature: -20º–125ºF
(-30º–50ºC)
• Operating humidity: 5–95% RH
• Voltage: 24 VAC, 60Hz
• Max. damper power: 35 VA @ 24 VAC
• Dimensions: See Figure 1
8.00”
1.25”
8.00”
Figure 1
2

2Suitable Mounting Locations
Mount the 3 Zone Control Panel near the HVAC equipment (see Figure 2). The panel can be mounted in any
orientation on a wall, stud, roof truss, or the return-air plenum. For appearance, mount the panel level.
Remove the panel cover and use the base as a template to drill mounting holes 6.5” apart (see Figure 3).
Attach the panel with appropriate screws (not included). Use mounting anchors as needed for drywall or
plaster installations.
return air
ducts
return air
plenum
bypass
duct coil
supply air
sensor
zone dampers
electric or
barometric
bypass damper
filtration
system
furnace
typical mounting location
6.50”
Figure 3
Figure 2
3

3 Wiring the Panel
Always turn off power to the heating/air conditioning system prior to installing
or adjusting the 3 Zone Control Panel. Wire the entire panel before applying
transformer power.
Use the following general wiring instructions for all systems. Specific wiring will vary depending on the
equipment and type of system (conventional or heat pump).
3.1 Damper Wiring
Install the system dampers using the instructions
provided by the manufacturer.
Connect the dampers to the zone panel as shown for
either a 2-wire or 3-wire damper.
The sum of all dampers powered by the zone panel
should not exceed 35 VA at 24 VAC. Use a slave relay if
additional damper power is required.
Max. damper VA per panel 35 VA @ 24 VAC
M
M
PO
COM
PC
Zone Panel 2-Wire Damper
PO
C
PC
PO
COM
PC
Zone Panel 3-Wire Damper
4

3.2 Thermostat Wiring
Install the system thermostats using the instructions provided
by the manufacturer.
Connect the thermostats to the zone panel as shown.
Notes:
• Use only single stage conventional thermostats.
• Wiring to the C terminal is required only for
thermostat power.
• E terminal at thermostat 1 is for connecting an external
emergency heat switch (heat pump systems only).
3.3 External Emergency Heat Switch
For heat pump systems requiring an external emergency
heat switch, connect as shown.
Note: Equipment and zone panel transformers should
be on the same phase.
E
R
Y
G
W
C
Rh
Rc
Y
G
W
C
Thermostat Zone Panel
5
Switch
(2A min.)
RH
RC
Y1
Y2
G
G2
W1
AUX
W2
O/B
C
EQUIPMENT
THERMOSTAT 1
E
R
Y
G
W
C
Zone Panel

3.4 Supply Air Sensor Wiring
Install the supply air sensor in the supply air plenum at least
2-3 feet after the heat exchanger and coil. Make sure there
are no zone dampers before the supply air sensor.
Connect the supply air sensor to the zone panel as shown.
3.5 Transformer Wiring
Install the transformer using the instructions provided
by the manufacturer. Size the transformer to the damper
requirements. The zone panel has a built-in, self-resetting
fuse. The maximum damper power per panel is 35 VA at
24 VAC.
Connect the transformer to the zone panel as shown.
Note: Additional dampers or dampers with a higher current draw will require the use of a separate
slave relay.
3.6 Conventional System Wiring
Note: For a heat pump system, see Section 3.7.
Connect a conventional heating
system to the zone panel as shown.
For a single stage heating and cooling
system, the 2nd stage connections are
not used.
For a system using a dual transformer,
open jumper J1 (see Configuration
section, Figure 4). Make sure the the
neutrals (common) are connected.
SA1
SA2
24V
24C
CC
HOT
Dedicated
Zoning Transformer
Zone
Panel
RH
RC
Y1
Y2
G
G2
W1
AUX
W2
O/B
C
C
HOT
1st stage
compressor
control
2nd stage
fan
control
1st stage
fan
control
1st stage
heat
control
2nd stage
compressor
control
2nd stage
heat
control
24 VAC
6
Plenum

7
3.7 Heat Pump System Wiring
Connect a single or multi-stage
heat pump system to the zone panel
as shown.
Conventional thermostats must be used
with a heat pump system, however,
emergency heat will be controlled by
the panel emergency heat switch or the
optional remote emergency heat switch.
For a single-stage system, the auxiliary
heat control is not used.
• Use DIP switch 1 to select between conventional and heat pump system.
• Use DIP switch 3 for heat pump reversing valve control. Setting 0 means that the O/B terminal is
active in a cooling call. Setting B means that the O/B terminal is active in a heating call.
RH
RC
Y1
Y2
G
G2
W1
AUX
W2
O/B
C
C
HOT
1st stage
compressor
control
2nd stage
fan
control
1st stage
fan
control
aux heat /
E-heat
control
2nd stage
compressor
control
reversing
valve
24 VAC

4Configuration
Use the following instructions to configure the 3 Zone Control Panel.
1. Open J1 jumper for dual transformer installations.
2. Open J2 short cycle protection jumper for system test.
Note: Replace J2 when system testing is completed or leave J2 open if compressor has built in
short cycle protection.
3. Press ▲ and then press ▲ to raise or ▼to lower the Hi Temp cutout.
4. Press ▼ and then press ▲ to raise or ▼ to lower the Low Temp cutout.
5. Press ▲ and ▼ at the same time to adjust purge time. Press ▲ to raise or ▼
to lower the purge time.
Figure 4
8
▲
▲
RH
RC
Y1
Y2
G
G2
W1
AUX
W2
O/B
C
HI/LOW LIMIT
CUTOUT ADJUST
J2-SHORT CYCLE
PROTECTION
EQUIPMENT
Braeburn
3-Zone
JI REMOVE TO SEPARATE
RH AND RC TERMINAL
SUPPLY TEMP HI TEMP
LO TEMP
PURGE
DELAY
J2 jumper
J1 jumper
HI/LOW
temp cutout
adjustment

9
6. Set the DIP switches to meet system requirements.
Switch Label Function
1 Non-HP / Heat Pump Set to NON-HP for conventional equipment. Set to HEAT PUMP for
heat pump equipment.
2 Normal / Dual Fuel Heat pump 1st stage lockout when 2nd stage calls
3 Rev Valve B/O O/B terminal active in heating (B position) or cooling (O position)
4 Fan Gas / Elec & HP Fan controlled by HVAC system or panel
5 Opp Call 20 / 15 Opposite call answer time in minutes
6 Lockout None / Active 2nd stage lockout without 2 zones calling
7 Priority All / Zone 1 Changeover priority zone 1 or first call
8 G2 W/2-Zones / 2 Stages 2nd stage fan activation requires 2 zones or 2 stages
5System Checkout
After the wiring and configuration is complete, use the following checklist to verify the panel operation
is correct.
[ ] Make sure the Emergency Heat Switch is in the Off (right) position.
[ ] Open jumper J2 by moving cap from both pins to only one pin.
[ ] Use table and diagram in section 4 of this installer guide or inside the zone panel cover to
verify DIP switches are set properly.
[ ] Make sure the supply temp sensor is wired to terminals SA1 and SA2. The zone dampers
will not close if the supply sensor is missing.
[ ] Make sure no zones are calling by turning off all thermostats.
[ ] Apply 24 VAC power to the panel.
HEAT PUMP
DUAL FUEL
O
ELEC/HP
15
ACTIVE
ZONE1
2-STAGES
NON HP
NORMAL
REV VALVE B
FAN GAS
OPP CALL 20
LOCKOUT NONE
PRIORITY ALL
G2 W/2-ZONES

10
[ ] Verify green power LED near 24 VAC terminals is lit.
[ ] Verify green heartbeat LED in middle of panel is pulsing.
[ ] Verify all 3 zone LEDs near damper terminals are green.
[ ] Verify supply temp display shows current plenum temperature.
[ ] Switch zone 1 thermostat to heat mode, and call for heat in zone 1 by raising set
temperature above room temperature.
[ ] Verify zone 1 damper LED stays green (open) and zone 2 and 3 damper LEDs change
to red (closed).
[ ] Verify heating system is operating, air is moving out zone 1 vents, and zone 2 and 3
vents have minimal airflow.
[ ] Verify supply temp display on zone panel shows a heat change in supply air.
[ ] Switch zone 2 thermostat to heat mode, and call for heat in zone 2 by raising set
temperature above room temperature.
[ ] Verify zone 1 damper LED stays green (open) and zone 2 damper LED changes to
green (open).
[ ] Verify heating system is operating and air is moving out into zone 1 and zone 2.
[ ] If installed, switch zone 3 thermostat to heat mode, and call for heat in zone 3 by raising
set temperature above room temperature. Verify air is now flowing to zone 3.
[ ] If installed, verify emergency heat remote and panel switch. Return E-Heat switches to
normal position when test is complete.
[ ] Return zone 1 thermostat to the off position. Verify zone 1 damper LED turns red and
zone 2 and 3 damper LEDs stay green.
[ ] Verify heating system is operating, air is moving out zone 2 and 3 vents, and zone 1
vents have minimal airflow.
[ ] Return zone 2 and 3 thermostats to the off position. Verify system fan shuts off at the end
of purge cycle.
[ ] Verify all zone LEDs near damper terminals are green.
[ ] If the outside temperature is acceptable, repeat the above steps in cooling mode.
Cooling will not work if E-Heat is on.
[ ] Restore thermostats and replace J2 jumper if short cycle protection at zone panel
is required.

11
6Operation
The 3 Zone Control Panel has LEDs and a built-in display to tell the installer and homeowner the current
operating mode of the panel. Refer to Figure 5 and the following descriptions of the panel LEDs for
operation information.
LED Display Panel
Supply Temp Shows the current air supply temp. Use to set Hi/Lo temp limit. If flashing, check
supply air sensor connection.
Hi Temp Press ▲to display Hi temp cutout setting. Press ▲ to raise or ▼to lower
Hi temp setting.
Lo Temp Press ▼to display Lo temp cutout setting. Press ▲ to raise or ▼to lower
Lo temp setting.
Purge System uses intelligent purge to maximize comfort and energy savings. Press
▼ and ▲ to display purge time. Press ▲ to increase or ▼ to decrease
purge time.
Delay Supply air temperature is outside the Hi/Lo temp cutout. System has turned off
the equipment except the fan.
Callout LED Description
1 Thermostats Shows what calls the thermostats are making to the zone panel. Lights
when thermostat terminal is active.
2 24V Power Lights when the panel is receiving power from the zoning transformer.
3 RH and RC Lights when the HVAC equipment transformer(s) are receiving power.
Available only when C equipment terminal is wired.
4 Equipment Lights when the zone panel is calling to the equipment. Zone panel
controls the equipment LEDs in response to thermostat calls and DIP
switch settings.
5 Emergency Heat Lights when emergency heat is active (cooling is disabled).
6 Damper Lights red when the zone damper is closed, green when the zone
damper is open.
7 Heartbeat Flashes once per second when the panel is normal.

12
RH
RC
Y1
Y2
G
G2
W1
AUX
W2
O/B
C
SA1
SA2
Z1-PO
COM
Z1-PC
Z2-PO
COM
Z2-PC
Z3-PO
COM
Z3-PC
24V
24C
R
Y
G
W
C
R
Y
G
W
C
EMERGENCY
HEAT
ON OFF
HI/LOW LIMIT
CUTOUT ADJUST J2-SHORT CYCLE
PROTECTION
HEAT PUMP
DUAL FUEL
O
ELEC/HP
15
ACTIVE
ZONE1
2-STAGES
NON HP
NORMAL
REV VALVE B
FAN GAS
OPP CALL 20
LOCKOUT NONE
PRIORITY ALL
G2 W/2-ZONES
EQUIPMENT SUPPLY TEMP DAMPER 1 DAMPER 2 DAMPER 3
FLASHING WHEN NORMAL
Braeburn
3-Zone
JI REMOVE TO SEPARATE
RH AND RC TERMINAL
SUPPLY TEMP HI TEMP
LO TEMP
PURGE
DELAY
THERMOSTAT2 THERMOSTAT3 PWR
E
R
Y
G
W
C
THERMOSTAT1
▲
▲
Figure 5
LED display panel
Notes:
• When no zones are calling, the panel will command all dampers to open.
• For maximum energy conservation, an adjustable purge will occur at the end of each call. No calls
will be answered until the purge is complete.
• Equipment staging is automatic based on time and plenum temperature.
• Dampers will not close and staging will not occur if the plenum temperature sensor is not connected
and functioning properly.
• No cooling calls will be answered if emergency heat is switched on.
• Supply air sensor is required.
1
1
6
1
2
3
7
5
6
6
4

CONTENIDO
1 Especificaciones 4 Configuración
2 Ubicaciones idóneas del montaje 5 Verificación del sistema
3 Diagramas de cableado 6 Operación
Advertencia
• Lea todas las instrucciones antes de continuar.
• Apague siempre la energía que alimenta el sistema de calefacción/aire acondicionado antes de
instalar o ajustar el controlador de 3 zonas premier. Conecte el cableado de todo el panel antes de
aplicar energía al transformador.
• Este controlador solamente se debe instalar y configurar como se describe en este manual. No se
recomienda otro uso e invalidará la garantía.
1Especificaciones
• Temperatura de almacenamiento:
-40 a 65ºC (-40ºF a 150ºF)
• Temperatura de operación:
-30 a 50ºC (-20ºF a 125ºF)
• Humedad de operación: 5 a 95% HR
• Voltaje: 24 VCA, 60Hz
• Energía máxima de regulación: 35 VA
a 24 VCA
• Dimensiones: vea la Figura 1
20,3 cm
3,2 cm
20,3 cm
Figura 1
13

2Ubicaciones idóneas del montaje
Monte el panel del controlador de 3 zonas premier cerca del equipo de Calefacción, ventilación y aire
acondicionado (HVAC, por sus siglas en inglés). (Vea la Figura 2). El panel se puede colocar en cualquier
dirección sobre una pared, un montante, una viga de techo o el difusor de aire de retorno. Por presentación,
monte el nivel del panel.
Retire la tapa del panel y utilice la base como plantilla para perforar los agujeros de montaje, separados a
16,5 cm. (Vea la Figura 3). Sujete el panel con los tornillos correspondientes (no se incluyen). Use los anclajes
que sean necesarios en el caso de instalaciones en láminas de yeso o de masilla.
16,5 cm
Figura 3
Figura 2
14
ductos del aire
de retorno
difusor de aire
de retorno
ducto de
desviación bobina
sensor de aire
de suministro
reguladores de zona
regulador de
desviación
eléctrico o
barométrico
sistema de
filtración
horno
ubicación típica de montaje

3 Cableado del panel
Apague siempre la energía que alimenta el sistema de calefacción/aire
acondicionado antes de instalar o ajustar el controlador de 3 zonas premier.
Conecte el cableado de todo el panel antes de aplicar energía al transformador.
Use las siguientes instrucciones generales de cableado para todos los sistemas. El cableado específico
variará dependiendo del equipo y del tipo de sistema (convencional o bomba de calor).
3.1 Cableado del regulador
Instale los reguladores del sistema siguiendo las
instrucciones suministradas por el fabricante.
Conecte los reguladores al panel de zona como se
muestra para un regulador de 2 alambres o de 3
alambres.
La suma de todos los reguladores energizados por el
panel de zona no debe ser mayor de 35 VA a 24 VCA.
Utilice un relé esclavo si se requiere energía de regulación
adicional.
VA máximos de regulación
por panel:
35 VA a 24 VCA
M
M
PO
COM
PC
Panel de zona Regulador de
2 alambres
PO
C
PC
PO
COM
PC
Panel de zona Regulador de
3 alambres
15

3.2 Cableado del termostato
Instale los termostatos del sistema siguiendo las
instrucciones suministradas por el fabricante.
Conecte los termostatos al panel de zona como se muestra.
Notas:
• Use únicamente termostatos convencionales de
una etapa.
• El cableado a la terminal C sólo se requiere para
energizar el termostato.
• Terminal E en el termostato 1 es para conectar un
switch externo de calefacción de emergencia (solo
para sistemas con bomba térmica).
3.3 Switch externo de calefacción de emergencia
Para sistemas con bomba térmica que requieren de un
switch externo de calefacción de emergencia, conecte
como se muestra.
Nota: Equipo y transformador de panel de zona deben de
estar en la misma fase.
E
R
Y
G
W
C
Rh
Rc
Y
G
W
C
Termostato Panel de zona
16
Switch
(2A mínimo)
RH
RC
Y1
Y2
G
G2
W1
AUX
W2
O/B
C
EQUIPO
TERMOSTATO 1
E
R
Y
G
W
C
Panel de zona

3.4 Cableado del sensor de suministro de aire
Instale el sensor de suministro de aire en el difusor de suministro
de aire al menos 61 a 91 cm después del intercambiador de
calor y el serpentín. Asegúrese de que no haya reguladores de
zona antes del sensor de suministro de aire.
Conecte el sensor de suministro de aire al panel de zona como
se muestra.
3.5 Cableado del transformador
Instale el transformador siguiendo las instrucciones
suministradas por el fabricante. Ajuste el tamaño del
transformador de acuerdo con los requisitos del regulador.
El panel de zona tiene incorporado un fusible de reinicio
automático. La energía máxima de regulación por panel es
de 35 VA a 24 VCA.
Conecte el transformador al panel de zona como se muestra.
Nota: para reguladores adicionales o con una mayor demanda de energía, se requerirá el uso de un relé
esclavo aparte.
SA1
SA2
24V
24C
CC
LÍNEA
VIVA
Transformador de
zonificación dedicado
Panel de
zona
17
Difusor

3.6 Cableado de un sistema convencional
Nota: para un sistema de bomba de calor, vea la Sección 3.7.
Conecte un sistema de calefacción
convencional al panel de zona como se
muestra.
Para un sistema de calefacción y
refrigeración de una sola etapa, las
conexiones de 2da etapa no se utilizan.
Para un sistema que utiliza un transformador
doble, abra el puente J1 (vea la sección
de configuración, Figura 4). Asegúrese de
que las líneas neutras (comunes) estén
conectadas.
3.7 Cableado de un sistema de bomba de calor
Conecte un sistema de una sola etapa
o multietapa al panel de zona como se
muestra.
Termostatos convencionales deben de ser
usados con un sistema de bomba térmica.
Sin embargo, la calefacción de emergencia
será controlada por el interruptor de
calefacción de emergencia del panel o por
el interruptor de calefacción de emergencia
remoto opcional.
Para un sistema de una sola etapa, el control
de calefacción auxiliar no se utiliza. Para un sistema multietapa, los controles del compresor no se utilizan.
• Utilice el interruptor DIP 1 para seleccionar entre sistema convencional y bomba de calor.
• Utilice el interruptor DIP 3 para el control de la válvula inversora de la bomba de calor. La configuración
0 significa que la terminal O/B está activa en una demanda de aire acondicionado. La configuración B
significa que la terminal O/B está activa en una demanda de calefacción.
RH
RC
Y1
Y2
G
G2
W1
AUX
W2
O/B
C
C
LÍNEA
VIVA
Control del
compresor de
1ra etapa
Control del
ventilador de
2da etapa
Control del
ventilador de
1ra etapa
Control de
calefacción de
1ra etapa
Control del
compresor de
2da etapa
Control de
calefacción de
2da etapa
24 VCA
RH
RC
Y1
Y2
G
G2
W1
AUX
W2
O/B
C
C
LÍNEA
VIVA
Control del
compresor de
1ra etapa
Control del
ventilador de
2da etapa
Control del
ventilador de
1ra etapa
el control de
calefacción
auxiliar
Control del
compresor de
2da etapa
Válvula
inversora
24 VCA
18

4Configuración
Use las siguientes instrucciones para configurar el controlador de 3 zonas premier.
1. Abra el puente J1 para el caso de instalaciones de transformador doble.
2. Abra el puente de protección de ciclo corto J2 para probar el sistema.
Nota: cierre el puente J2 cuando termine la prueba del sistema o déjelo abierto si el compresor
tiene incorporada una protección de ciclo corto.
3. Presione ▲ y luego presione ▲para aumentar o ▼ disminuir el corte de temperatura alta.
4. Presione ▼ y luego presione ▲ para aumentar o ▼ disminuir el limite de temperatura baja.
5. Presione ▲ y ▼ al simultaneamente para ajustar el tiempo de purga. ▲ para subirlo, ▼
para bajarlo.
▲
▲
RH
RC
Y1
Y2
G
G2
W1
AUX
W2
O/B
C
LÍMITE MÁX./MÍN.
AJUSTE DE CORTE
J2-PROTECCIÓN
DE CICLO CORTO
EQUIPO
Braeburn
3 Zonas
JI - RETIRE PARA SEPARAR
TERMINAL RH Y RC
TEMP. DE SUMINISTRO TEMP. MÁX.
TEMP. MÍN.
PURGA
RETARDO
Puente J2
Puente J1
Ajuste de
corte de
temperatura
ALTA/BAJA
Figura 4
19

6. Ajuste los interruptores DIP a los requisitos
del sistema.
Etiqueta de interruptor Función
1 Non-HP/Heat Pump
(No B de C/Bomba de calor) Póngalo en NON-HP para equipo convencional. Póngalo en HEAT
PUMP para equipo con bomba térmica.
2 Normal/Dual Fuel
(Doble combustible) 1ra fase en Bomba térmica bloqueada cuando entre en 2da fase.
3 Rev Valve B/O (Válvula inversora) Terminal O/B activo en calefacción (posición B) o en aire acondicionado
(posición O)
4 Fan Gas/Elec & HP (Gas de
ventilador / Elect. y B de C) Ventilador controlado por sistema o panel de HVAC
5 Opp Call 20/15 (Demanda opuesta) Tiempo de respuesta a demanda opuesta en minutos
6 Lockout None/Active
(Ningún bloqueo/Activo) Bloqueo de 2da etapa sin demanda de 2 zonas
7 Priority All/Zone 1
(Prioridad todo/Zona 1) Conversión de prioridad de zona 1 o 1ra demanda
8 G2 W/2-Zones/2 Stages
(G2 W/2-Zonas/2 Etapas) La activación del ventilador de 2da etapa requiere 2 zonas o 2 etapas
5Verificación del sistema
Después de completar el cableado y la configuración, utilice la siguiente lista de verificación para comprobar
que la operación del panel esté correcta.
[ ] Asegúrese de que el interruptor de calefacción de emergencia esté en la posición de apagado Off (derecha).
[ ] Abra el puente J2 moviendo la tapa desde ambos pasadores a un solo pasador.
[ ] Utilice la tabla y el diagrama de la sección 4 de esta guía del instalador o el que está dentro de la tapa del panel
de zona para verificar que los interruptores DIP estén configurados correctamente.
[ ] Asegúrese de que el sensor de temperatura de suministro esté conectado a las terminales SA1 y SA2. Los
reguladores de zona no cerrarán si falta el sensor de suministro.
[ ] Asegúrese de que no haya demanda de ninguna zona, apagando todos los termostatos.
[ ] Aplique energía de 24 VCA al panel.
20
BOMBA DE CALOR
DOBLE COMBUSTIBLE
O
ELECT./BOMBA DE CALOR
15
ACTIVO
ZONA1
2-ETAPAS
NO BOMBA DE CALOR (HP)
NORMAL
VÁLVULA DE INVERSIÓN B
GAS DE VENTILADOR
DEMANDA OPUESTA 20
NINGÚN BLOQUEO
PRIORIDAD TODO
G2 W/2-ZONAS
Other manuals for Economy Series
3
This manual suits for next models
1
Table of contents
Languages:
Other Braeburn Control Panel manuals
