brainchip Akida x86 User manual

Akida x86 Evaluation Kit - User Guide
Page | 1
Akida x86 Evaluation Kit
User Guide

Akida x86 Evaluation Kit - User Guide
Page | 2
Table of contents
1 INTRODUCTION ................................................................................................................................................... 3
2 SYSTEM INFORMATION ...................................................................................................................................... 3
3 SYSTEM SETUP FOR RUNNING DEMOS & THE AKIDA BOARD EVALUATION ................................................. 3
4 INITIAL SYSTEM CHECK AND SETUP .................................................................................................................. 4
5 AKIDA DEMOS ..................................................................................................................................................... 5
5.1 RUN THE AKIDA DEMOS ................................................................................................................................... 5
5.2 AKIDA KWS DEMO .......................................................................................................................................... 5
5.3 AKIDA CLASSIFICATION DEMO ........................................................................................................................... 6
5.4 AKIDA EDGE LEARNING DEMO ............................................................................................................................ 6
5.5 EDGE FACE RECOGNITION DEMO ......................................................................................................................... 7
5.6 DETECTION DEMO ............................................................................................................................................ 8
6 APPLICATION SETTINGS ..................................................................................................................................... 9
6.1 SWITCH FROM HARDWARE TO SOFTWARE BACKEND ............................................................................................. 9
6.2 TURN ON DISPLAY ABOUT PERFORMANCE ......................................................................................................... 10
6.3 AKIDA DEMO (FLASK) .................................................................................................................................... 10
7 THE AKIDA METATF ML TOOLS ......................................................................................................................... 11
8 SHUTTLE PC RE-INSTALLATION ......................................................................................................................... 12
9 TROUBLESHOOT ................................................................................................................................................ 13
9.1 RUNNING ISSUE .............................................................................................................................................. 13
9.2 ERROR WHEN CHECKING PCI BUS ...................................................................................................................... 13
9.3 FLASK CANNOT START THE CAMERA ................................................................................................................... 13
Version 1.6.6, document revision: a

Akida x86 Evaluation Kit - User Guide
Page | 3
1 INTRODUCTION
This PC-based system is setup for Akida NSoC ADK1000 testing and evaluation.
The Akida evaluation board is already installed and tested on the Shuttle PC. The Miniconda
virtual environment
1
is installed along with several demo applications. All demos can run on
the Software backend or the Akida hardware seamlessly.
2 SYSTEM INFORMATION
Evaluation environment description:
• Platform: Shuttle PC, CPU Core i5, i7 or i9 SSD 2.5, and 16GB RAM
• OS: Ubuntu 20.04
• Virtual environment: Miniconda
• Brainchip Mini PCI Express AKD1000 Reference Board
Figure 1: Akida MiniPCIe card
3 SYSTEM SETUP FOR RUNNING DEMOS & THE AKIDA BOARD EVALUATION
To setup the system:
1. Plug in power supply.
2. Plug in keyboard and mouse in the USB ports.
3. Plug camera into USB port.
4. Connect monitor to HDMI or VGA port.
5. Optional: Plug speaker in the audio jack. This is for KWS demo.
1
See https://doc.brainchipinc.com/installation.html

Akida x86 Evaluation Kit - User Guide
Page | 4
4 INITIAL SYSTEM CHECK AND SETUP
‘Out of the box’ procedure:
1. Power up the Shuttle PC
Username: bcdemo
Password: Demo123
2. Check if the Linux OS has enumerated the Akida board.
From a terminal window enter the command:
lspci
The output for Ubuntu 20.04 should include the following for the Akida board.
Co-processor: Device 1e7c:bca1 (rev 01)
3. Verify the PCIe driver is installed and running.
In conda Akida environment, running akida devices command should display the
available backend as shown on the screen shot below.
Open a Terminal window.
Enter:
conda activate akida
And then, enter:
akida devices
The following messages should appear in your terminal window:
Figure 2: Terminal window showing Akida device name
Once your system is up and running you can
- Have a look at the demos installed on your machine (see paragraph 5)
- Run some of the Akida Examples coming from our online Akida documentation
(https://doc.brainchipinc.com/examples/) but already installed on your machine (see
paragraph 7)
- Code your own python program in our conda environment or creating another one,
including your favorite libraries
And don’t forget you can get support from Brainchip using Akida customer support portal:
https://support.brainchip.com/portal/en/signin

Akida x86 Evaluation Kit - User Guide
Page | 5
5 AKIDA DEMOS
5.1 RUN THE AKIDA DEMOS
1. Open a terminal window, navigate to /home/bcdemo/akida_demo
2. Enter: conda activate akida
The system is now ready to run the demos.
5.2 AKIDA KWS DEMO
This application uses a MobileNet-like model for "Keyword Spotting" example from akida-
models. The model will take sounds as inputs and will classify them. You will need to plug in
a microphone and speaker on the Shuttle PC front panel. If you have a monitor with
speakers that will work as your sound output. Make sure the settings for input and output
match your microphone and speakers > setting > sound > input & output.
Enter
python kws_demo.py
Hover your cursor over Record input audio. This will display a list of words that you can
pronounce to be identified by the KWS model. Click Record and pronounce one of the
words.
Wait for the recording to finish then click on Run. You will hear the word and the word
prediction will be displayed.
Figure 3: KWS demonstration window

Akida x86 Evaluation Kit - User Guide
Page | 6
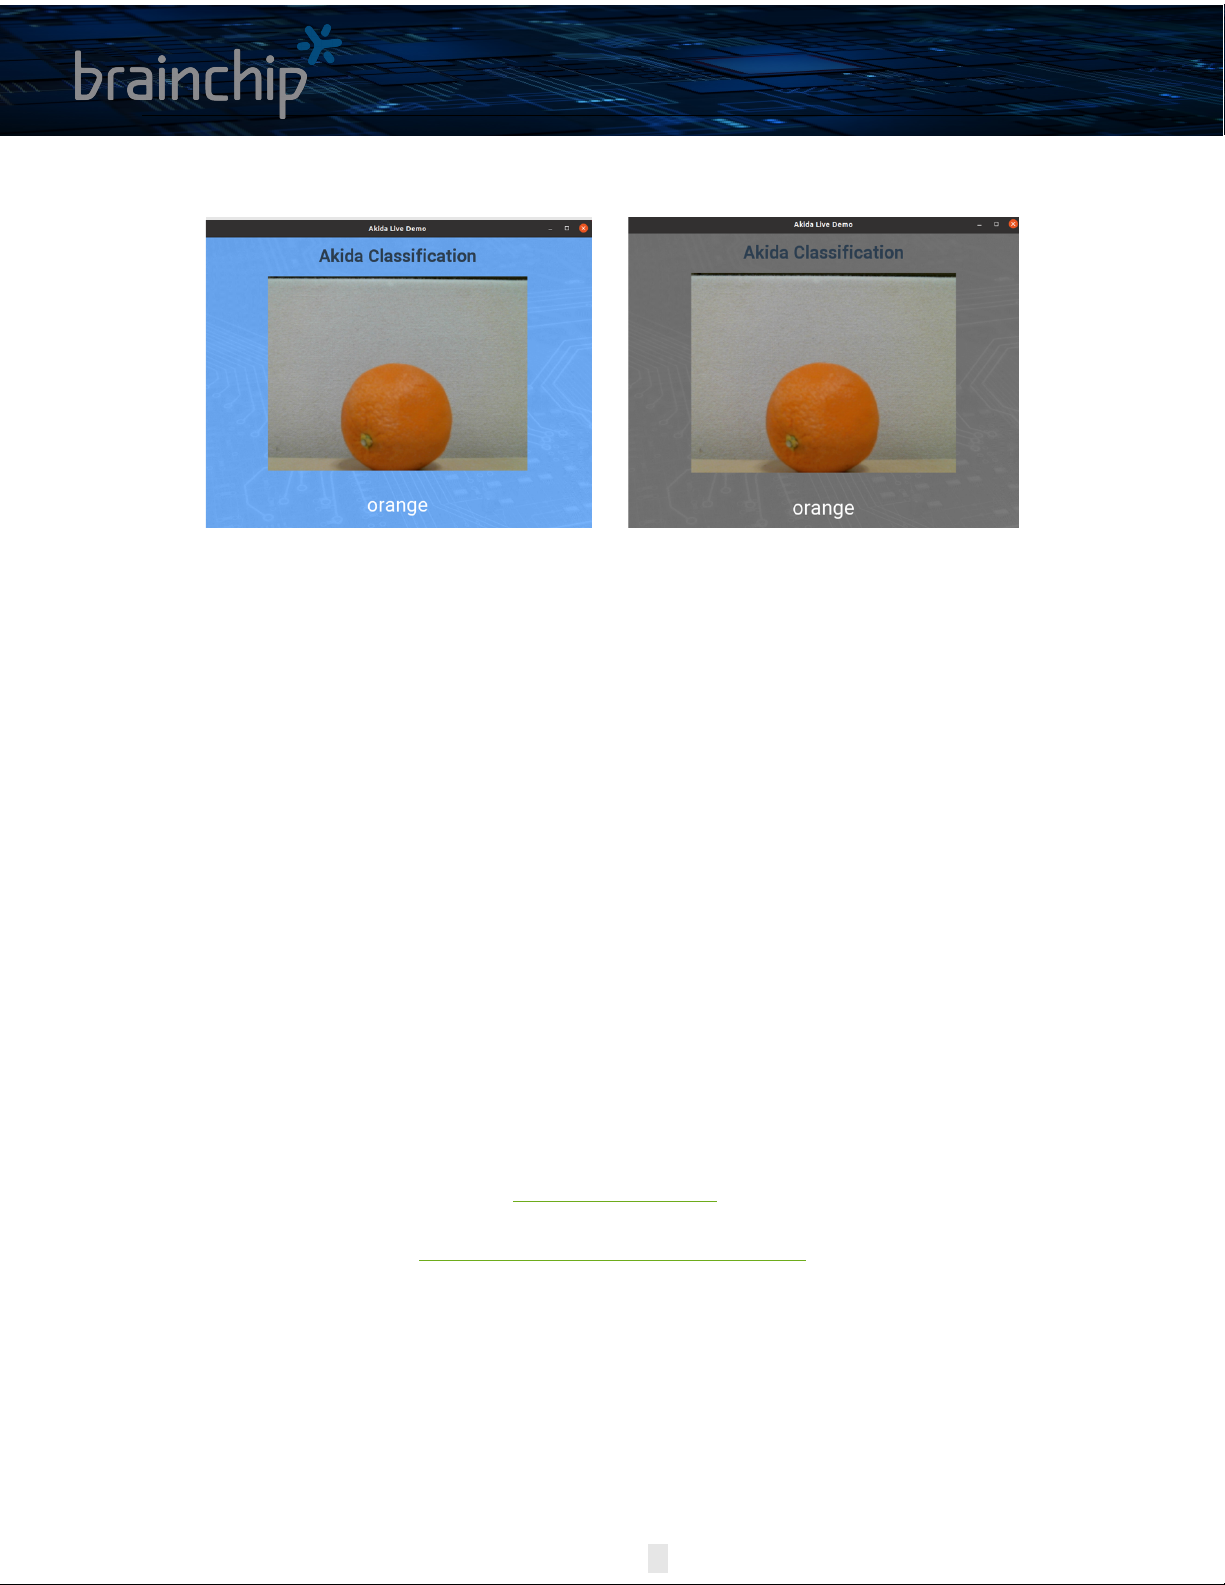
5.3 AKIDA CLASSIFICATION DEMO
This application uses the MobileNet/ImageNet model from akida-models to classify Webcam
frames. This demo requires a USB camera.
Enter
python classification_demo.py
Place objects in front of the camera for prediction.
Figure 4: Classification demonstration window
5.4 AKIDA EDGE LEARNING DEMO
This application uses MobileNet models replacing the last layer to learn new classes from the
Webcam frames. This demo requires a USB camera.
Enter
python edge_demo.py
Enter class name in the label field and click Learn new class for each new class. Start with
background as the first class. Next choose other objects the same or similar to images in the
ImageNet dataset for best results. For testing, place learned object in the field of view.

Akida x86 Evaluation Kit - User Guide
Page | 7
Figure 5: Edge learning demonstration window
5.5 EDGE FACE RECOGNITION DEMO
This application uses MobileNet models replacing the last layer to learn new classes from the
Webcam frames. This demo requires a USB camera.
Enter
python edge_face_recognition_demo.py
Enter person’s name in the label field and click Learn for each new person.
When the person reenters the field of view his face will be recognized, surrounded with a
bounding box and his name will be displayed.
Figure 6: Edge face recognition demonstration window

Akida x86 Evaluation Kit - User Guide
Page | 8
5.6 DETECTION DEMO
This application uses a YOLO model from akida-models to detect objects or faces into webcam
frames. This demo requires a USB camera.
Enter
python detection_demo.py
Face, person, or object detection should occur with bounding boxes as well as scores. Two
modes available: Car/person and Face.
Figure 7: Person and object detection demonstration window

Akida x86 Evaluation Kit - User Guide
Page | 9
6 APPLICATION SETTINGS
Press F1, a menu will display > Application Settings.
Figure 8: General settings window
6.1 SWITCH FROM HARDWARE TO SOFTWARE BACKEND
Switch HW / SW: Select “HW device” for Akida HW backend, then > Close.
Figure 9: Application settings window
Background changes with the selected backend: blue for SW, grey for HW.
Akida x86 Evaluation Kit - User Guide
Page | 10
Figure 10: Application window background changes depending on chosen backend
The screen background color is blue when Akida demo is running with the software backend while
it’s grey when running with the hardware backend.
6.2 TURN ON DISPLAY ABOUT PERFORMANCE
There is a setting switch used to enable or disable Akida HW power, see figure 9.
6.3 AKIDA DEMO (FLASK)
Execute `akida_demo_flask.py` with Demo name in argument:
python akida_demo_flask.py "Classification Demo"
Available demos are:
* Classification Demo
* Detection Demo
* Edge Demo
After a few seconds, from your shuttle PC, start a browser and go to
http://127.0.0.1:5000
Or, from any machine in your local network, start a browser and go to
http://<YOUR-SHUTTLE-PC-IP@>:5000

Akida x86 Evaluation Kit - User Guide
Page | 11
7 THE AKIDA METATF ML TOOLS
MetaTF is installed with the examples in the following directory.
- Open a terminal window navigate to /home/bcdemo/MetaTF
- Activate environment entering:
conda activate akida_env
- Run examples with Jupyter notebook or python.
- For Jupyter notebook enter:
jupyter notebook
- For python, enter:
python filename.py
For more information on MetaTF see: https://doc.brainchipinc.com/index.html

Akida x86 Evaluation Kit - User Guide
Page | 12
8 SHUTTLE PC RE-INSTALLATION
If a complete Shuttle PC re-installation is required, please follow the procedure given below.
1 – Install Ubuntu
First, install Ubuntu 20.04.3 LTS on your machine.
See https://ubuntu.com/tutorials/install-ubuntu-desktop#1-overview for details.
2 – Install Brainchip board driver
In order to install Akida board PCIe Driver:
• Get the driver from Brainchip GIT: https://github.com/Brainchip-Inc/akida_dw_edma
• Follow the instructions you will find in the README.md file.
3 – Install MetaTF
Please refer to Akida online documentation (https://doc.brainchipinc.com/installation.html)
to install MetaTF.
4 – Akida demos
To include Akida Demonstrations in this reinstall, please contact Brainchip to get the latest
release.

Akida x86 Evaluation Kit - User Guide
Page | 13
9 TROUBLESHOOT
9.1 RUNNING ISSUE
If the system is stuck or if the demos do not run after performing the required steps in this
user guide, try soft reboot
sudo reboot
If the above doesn’t work do a full hard power down reset the system and start over.
9.2 ERROR WHEN CHECKING PCI BUS
If you experience this error, while following steps in section 4, step 3 of this manual:
RuntimeError: unexpected transfer len: 1 expected: 4.
Run the resetpcie.sh script in a separate terminal and retry the section 4 step 3.
This is a temporary work around.
9.3 FLASK CANNOT START THE CAMERA
When starting any Flask demo as described in section 6.3, if you get this error message:
RuntimeError: Could not start camera.
You have to add the user to the ‘video’ group. This can be done using the following command:
sudo adduser bcdemo video
For your group change to be taken into account you have to logout and log back in.
And please note that to check your groups, you can use the command groups .
Table of contents


