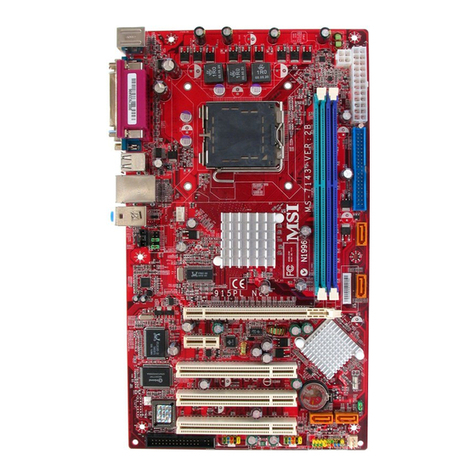
MSI MS-7270 User manual

i
FCC-B RadioFrequencyInterference Statement
This equipmenthasbeentested and found tocomplywiththelimitsfor aclassBdigitaldevice,pursuant
topart15oftheFCC rules.Theselimitsaredesignedtoprovide reasonableprotectionagainstharmful
interferenceinaresidentialinstallation.This equipmentgenerates, usesandcan radiateradiofrequency
energyand,ifnotinstalledand used inaccordancewiththeinstruction manual, maycauseharmful
interferencetoradiocommunications. However,there is no guarantee thatinterferencewill occurina
particular installation.If thisequipmentdoescauseharmfulinterferencetoradioortelevision reception,
whichcanbedeterminedbyturning the equipmentoffandon,theuserisencouragedtotrytocorrect the
interferencebyoneormoreofthemeasures listed below.
4Reorient orrelocatethereceivingantenna.
4Increasethe separationbetweenthe equipmentandreceiver.
4Connecttheequipmentintoanoutletonacircuit differentfromthattowhichthereceiveris
connected.
4Consult the dealeroranexperiencedradio/ televisiontechnicianfor help.
Notice 1
The changesormodificationsnotexpresslyapprovedbythe partyresponsiblefor compliancecouldvoid
the user sauthoritytooperatethe equipment.
Notice 2
Shielded interfacecablesand A.C. power cord, if any,must be usedinorderto complywiththe emission
limits.
VOIR LANOTICED NSTALLATION AVANTDERACCORDERAU RESEAU.
Micro-StarInternational
MS-7270
This devicecomplies withPart 15of theFCC Rules. Operationis subject tothefollowingtwoconditions:
(1)this devicemay not causeharmful interference,and
(2) this devicemustacceptanyinterferencereceived,including interferencethatmaycauseundesired
operation
G52-72701X1

ii
CopyrightNotice
The material inthis document is theintellectualpropertyofMICRO-STARINTERNATIONAL.Wetake
everycareinthe preparationof this document, but noguaranteeis givenas to thecorrectness of its
contents. Ourproducts are undercontinualimprovement and wereservethe right tomakechanges
without notice.
Trademarks
All trademarks arethepropertiesoftheirrespectiveowners.
AMD, Athlon™Athlon™XP,Thoroughbred™andDuron™areregistered trademarksofAMDCorporation.
Intel®andPentium®areregisteredtrademarks ofIntel Corporation.
PS/2and OS®2areregistered trademarks ofInternational Business MachinesCorporation.
Microsoft®is aregistered trademarkofMicrosoft Corporation.Windows®98/2000/NT/XP areregistered
trademarks ofMicrosoft Corporation.
NVIDIA, the NVIDIAlogo,DualNet,and nForceareregisteredtrademarks or trademarks of NVIDIA
CorporationintheUnitedStates and/orother countries.
Netware®is aregisteredtrademarkofNovell, Inc.
Award®is aregisteredtrademarkof PhoenixTechnologiesLtd.
AMI®is aregistered trademarkofAmerican Megatrends Inc.
Kensingtonand MicroSaverare registeredtrademarks oftheKensingtonTechnologyGroup.
PCMCIAand CardBusareregisteredtrademarks of thePersonal Computer MemoryCardInternational
Association.
RevisionHistory
RevisionRevision HistoryDate
V1.0FirstreleaseMay.2006

iii
SafetyInstructions
1.Always readthe safetyinstructionscarefully.
2.Keep this UserManualforfuturereference.
3.Keep this equipmentawayfromhumidity.
4.Laythis equipment onareliableflat surfacebeforesetting itup.
5.The openings ontheenclosure arefor airconvectionhenceprotects theequipment fromoverheating.
Donot coverthe openings.
6.Makesurethevoltage of thepowersourceandadjustproperly110/220Vbeforeconnectingthe
equipmenttothepowerinlet.
7.Placethepower cordsuchawaythat peoplecannot step onit. Donot placeanything over the power
cord.
8.Always Unplugthe PowerCordbefore insertinganyadd-oncardormodule.
9.All cautionsandwarnings onthe equipment shouldbenoted.
10.Neverpouranyliquidintotheopeningthat coulddamageorcauseelectricalshock.
11.Ifanyof thefollowing situations arises, gettheequipment checkedbyaservicepersonnel:
-The power cordor plugis damaged.
-Liquidhas penetratedintotheequipment.
-The equipment hasbeen exposedtomoisture.
-The equipment doesnotworkwell or youcannot get it workaccordingtoUser Manual.
-The equipment hasdroppedanddamaged.
-The equipment hasobvioussignofbreakage.
12.Donot leavethis equipment inanenvironment unconditioned,storage temperature above60°C
(140°F),it maydamage theequipment.
CAUTION: Dangerofexplosionifbatteryisincorrectlyreplaced.Replace onlywiththe
sameorequivalenttyperecommendedbythemanufacturer.

iv
WEEE Statement
English
Toprotect theglobalenvironmentandas anenvironmentalist, MSImustremind youthat...
Underthe European Union("EU")DirectiveonWasteElectricaland Electronic Equipment, Directive
2002/96/EC, whichtakeseffect on August 13,2005,products of"electricaland electronic equipment"
cannotbediscardedasmunicipalwasteanymoreandmanufacturers ofcoveredelectronicequipmentwill
be obligatedtotakebacksuchproducts atthe end oftheirusefullife.MSIwill complywiththe product
takebackrequirements attheend oflifeofMSI-brandedproductsthataresoldintothe EU.Youcan
returntheseproducts tolocalcollection points.
Deutsch
Hinweis vonMSIzurErhaltungund Schutzunserer Umwelt
Gemäß derRichtlinie2002/96/EG überElektro-undElektronik-AltgerätedürfenElektro-und
Elektronik-AltgerätenichtmehralskommunaleAbfälleentsorgtwerden.MSIhateuropaweit
verschiedene Sammel-und Recyclingunternehmenbeauftragt, dieindieEuropäischeUnion inVerkehr
gebrachtenProdukte,amEndeseinesLebenszykluszurückzunehmen.BitteentsorgenSiedieses
Produkt zumgegebenenZeitpunkt ausschliesslichan einer lokalen AltgerätesammelstelleinIhrer Nähe.
Fran ais
Entantqu écologisteetafindeprotégerl environnement,MSI tient àrappeler ceci...
Ausujetde ladirectiveeuropéenne(EU)relativeauxdéchets des équipement électriqueset
électroniques, directive2002/96/EC, prenanteffetle13 août2005,quelesproduits électriqueset
électroniquesnepeuvent êtredéposésdanslesdéchargesoutoutsimplementmis àlapoubelle.Les
fabricants deces équipements serontobligésderécupérercertainsproduitsen findevie.MSIprendra en
comptecetteexigencerelativeau retourdesproduitsenfindevieauseindelacommunautéeuropéenne.
Par conséquent vouspouvez retournerlocalement ces matériels dans lespoints de collecte.
Русский
Компания MSI предпринимает активные действия по защите окружающей среды, поэтому
напоминаем вам, что....
Всоответствии сдирективой Европейского Союза (ЕС) по предотвращению загрязнения
окружающей среды использованным электрическим иэлектронным оборудованием (директива
WEEE 2002/96/EC), вступающей всилу 13 августа 2005 года, изделия, относящиеся к
электрическому иэлектронному оборудованию, не могут рассматриваться как бытовой мусор,
поэтому производители вышеперечисленного электронного оборудования обязаны принимать его
для переработки по окончании срока службы.MSI обязуется соблюдать требования по приему
продукции, проданной под маркой MSI на территории EC, впереработку по окончании срока
службы. Вы можете вернуть эти изделия вспециализированные пункты приема.
Español
MSIcomoempresacomprometidaconlaproteccióndel medioambiente,recomienda:
Bajola directiva2002/96/ECde la Unión Europea enmateria dedesechosy/oequiposelectrónicos,con
fechaderigordesdeel13deagosto de2005,losproductosclasificadoscomo"eléctricosyequipos
electrónicos"nopueden ser depositadosen loscontenedoreshabitualesdesumunicipio,losfabricantes
de equiposelectrónicos, estánobligadosahacersecargo de dichosproductosaltermino de superíodo
de vida.MSIestarácomprometidocon lostérminosderecogida de susproductosvendidosenlaUnión
Europeaalfinaldesuperiododevida.Usteddebedepositarestosproductosenelpuntolimpio
establecido por elayuntamientode sulocalidad oentregaraunaempresaautorizada paralarecogidade
estosresiduos.
Nederlands
Omhet milieutebeschermen,wilMSIueraanherinneren dat….
DerichtlijnvandeEuropeseUnie(EU)metbetrekking totVervuilingvan ElectrischeenElectronische
producten (2002/96/EC),dieop13 Augustus2005 inzalgaan kunnennietmeer beschouwdworden als
vervuiling.
Fabrikanten vandit soort producten wordenverplicht omproductenretour tenemen aan het eind vanhun
levenscyclus. MSIzalovereenkomstigderichtlijnhandelenvoorde producten diedemerknaamMSI
dragenenverkochtzijnindeEU. Dezegoederenkunnengeretourneerdwordenoplokale
inzamelingspunten.

v
Srpski
Dabizaštitiliprirodnusredinu, ikaopreduzećekojevodiračunaookolini iprirodnojsredini, MSI morada
vas podesti da…
PoDirektivi Evropskeunije("EU")oodbačenojekektronskojielektričnojopremi, Direktiva2002/96/EC,
kojastupanasnaguod 13.Avgusta2005,proizvodikoji spadajupod"elektronskuielektričnuopremu"ne
mogu višebitiodbačenikao običanotpadiproizvođačioveopremebićeprinuđenidauzmunatragove
proizvode na krajunjihovog uobičajenog vekatrajanja.MSI ćepoštovatizahtevopreuzimanjuovakvih
proizvoda kojimajeistekao vektrajanja,koji imajuMSIoznakuikoji suprodati uEU.Oveproizvode
možetevratiti na lokalnimmestimazaprikupljanje.
Polski
Abychronićnasze środowiskonaturalneorazjakofirmadbającaoekologię,MSIprzypomina, że...
ZgodniezDyrektywąUnii Europejskiej("UE")dotyczącąodpadówproduktówelektrycznychi
elektronicznych(Dyrektywa2002/96/EC),która wchodziw życie13 sierpnia2005,tzw. “produktyoraz
wyposażenieelektryczne ielektroniczne "niemogąbyćtraktowanejako śmieci komunalne,takwięc
producencitychproduktówbędązobowiązanido odbieraniaichwmomenciegdyproduktjest
wycofywanyzużycia.MSIwypełniwymaganiaUE,przyjmującprodukty(sprzedawane naterenieUnii
Europejskiej)wycofywanezużycia.ProduktyMSIbędziemożnazwracaćwwyznaczonychpunktach
zbiorczych.
TÜRKÇE
Çevreci özelliğiylebilinenMSI dünyada çevreyi korumakiçinhatırlatır:
AvrupaBirliği (AB)Kararnamesi ElektrikveElektronikMalzemeAtığı, 2002/96/ECKararnamesi altında13
Ağustos2005tarihindenitibaren geçerliolmak üzere,elektrikli veelektronikmalzemelerdiğeratıklar gibi
çöpeatılamayacakvebuelektonikcihazların üreticileri,cihazlarınkullanımsüreleribittiktensonra ürünleri
geritoplamaklayükümlüolacaktır.AvrupaBirliğine satılan MSImarkalıürünlerinkullanımsüreleri
bittiğindeMSI ürünleringerialınmasıisteğiileişbirliğiiçerisinde olacaktır. Ürünleriniziyereltoplama
noktalarınabırakabilirsiniz.
ČESKY
Záleží námnaochraněživotníhoprostředí-společnost MSIupozorňuje...
PodlesměrniceEvropskéunie("EU")o likvidaci elektrickýchaelektronickýchvýrobk 2002/96/ECplatné
od 13.srpna2005jezakázánolikvidovat"elektrickéaelektronickévýrobky"vběžnémkomunálním
odpaduavýrobci elektronickýchvýrobk ,na kterésetatosměrnicevztahuje,budou povinniodebírat
takovévýrobkyzpětposkončeníjejich životnosti.Společnost MSIsplnípožadavkynaodebírání
výrobk značkyMSI, prodávanýchvzemíchEU, po skončeníjejich životnosti. Tytovýrobkym žete
odevzdat v místníchsběrnách.
MAGYAR
Annak érdekében,hogykörnyezetünketmegvédjük,illetvekörnyezetvédőkéntfellépveazMSI
emlékezteti Önt,hogy...
AzEurópaiUnió(„EU")2005.augusztus13-ánhatálybalépő,azelektromos éselektronikus
berendezésekhulladékairólszóló2002/96/EK irányelveszerintazelektromos éselektronikus
berendezésektöbbénemkezelhetőeklakosságihulladékként, ésazilyenelektronikusberendezések
gyártóikötelesséválnakazilyentermékekvisszavételéreazokhasznos élettartamavégén.AzMSI
betartjaatermékvisszavétellelkapcsolatoskövetelményeketazMSImárkanévalattazEU-nbelül
értékesítetttermékekesetében,azok élettartamánakvégén.Azilyentermékeketalegközelebbi
gyűjtőhelyreviheti.
Italiano
Per proteggere l ambiente, MSI, dasempre amicadellanatura, tiricordache….
InbaseallaDirettivadell UnioneEuropea(EU)sulloSmaltimentodeiMateriali Elettricied Elettronici,
Direttiva2002/96/ECinvigoredal13Agosto2005,prodottiappartenentiallacategoriadeiMateriali
Elettrici ed Elettronici nonpossono piùessere eliminati comerifiuti municipali: iproduttoridi detti materiali
sarannoobbligati aritirareogniprodottoallafinedelsuociclodivita.MSIsiadegueràataleDirettiva
ritirandotuttiiprodottimarchiatiMSIche sonostati vendutiall internodell UnioneEuropeaallafinedel
loro ciclodi vita. Èpossibileportarei prodotti nel piùvicino puntodiraccolta.
vi
TableofContent
English...........................................................................1
Fran ais.........................................................................13
Deutsch..........................................................................25
Русском .........................................................................37
体中文..........................................................................49
體中文..........................................................................61
日本語 .............................................................................73

1
Introduction
Thank you for choosing the (MS-7270 v1.0) ATXmainboard.TheK9NU Neo Seriesis based on
NvidiaM1697 chipsetsfor optimalsystemefficiency.Designed tofitthe advanced AMD
Sempron /Athlon 64 /Athlon 64X2processorsfor SocketAM2,the K9NU Neo Series delivers a
high performanceand professionaldesktopplatformsolution.
Layout

2
Specifications
Processor Support*
lSocketAM2forAMD Sempron/Athlon 64/Athlon64 X2processor
lSupportsAthlon64 X2, up to5000+
SupportedFSB
l1GHz FSB
Chipset
lNvidiaM1697
MemorySupport**
lDDR II 400/533 /667 / 800 (DDRII 800is only for Athlon 64 X2) SDRAM(8GB Max)
lDDR II 800SDRAM(Onlyfor DualCore)
l4DIMMs DDR II (240-pin/ 1.8V)
lDualChannel
LAN
lSupports 10/100 LANbyRealtekRTL8201CLPHY
lSupports PCI-E 10/100/1000 LANbyRealtekRTL8111Bcontroller(optional)
Audio
lChipintegrated byRealtek ALC883
l7.1ChannelAzaliaS/WCodec
IDE
l2IDEports.
lSupports Ultra DMA66/100/133 mode
SATA
l4SATAIIports
lSupports SATAandSATAII device
lSpeed storage and datatransfersat up to300MB/s
Floppy
l1floppyport
lSupports 1FDD with360K,720K, 1.2M, 1.44Mand 2.88Mbytes

3
Connectors
Backpannel
l1PS/2mouseport
l1PS/2keyboard port.
l2serialports.
l1parallelportsupportingSPP/EPP/ECPmode
l4USB2.0Ports.
l1LANjack.
l6flexibleaudiojacks.
On-Board Pinheaders
l1CD-Inpinheader
l1FrontAudiopinheader
l4USB2.0ports (pinheader)
Slots
l1PCIExpress x1slot
l1PCIExpress x16 slot
l3PCIslots.
FormFactor
lATX(30.5cmX20.0cm)
Mounting
l6mountingholes
*For the latestinformation aboutCPU, pleasevisit
http://www.msi.com.tw/program/products/mainboard/mbd/pro_mbd_cpu_support.php
** For the updated supporting memory modules, pleasevisit
http://www.msi.com.tw/program/products/mainboard/mbd/pro_mbd_trp_list.php

4
RearPanel
The rear panelprovidesthe following connectors:
LAN
USBportsCOM1 COM2
Parallelport
Mouse
Keyboard
Line-In
Line-Out
Mic-In
Rear Out
CenterOut
SideOut
HardwareSetup
Thischaptertellsyou howtoinstallthe CPU, memory modules, andexpansion cards, as well as
howtosetup the jumperson themainboard. Italsoprovidesthe instructions onconnectingthe
peripheraldevices, suchasthe mouse,keyboard, etc.Whiledoing the installation, be carefulin
holding the components andfollow the installationprocedures.
Central Processing Unit: CPU
The mainboard supportsAMD Athlon64 X2/ Athlon64 /Sempron processors.The mainboard
usesaCPUsocketcalledSocketAM2(940-pin) for easyCPUinstallation.
MSIRemindsYou...
Overheating
Overheating willseriouslydamage the CPUand system; alwaysmakesure the cooling fan can
workproperlytoprotecttheCPUfromoverheating.
Overclocking
Thismotherboard is designed tosupport overclocking.However, pleasemakesure your
components are abletotoleratesuchabnormalsetting,whiledoing overclocking.Any attemptto
operatebeyond productspecifications is not recommended.Wedo not guarantee the damages
or riskscaused by inadequateoperation or beyondproductspecifications.
CPU and CoolerInstallation
When you are installing the CPU,makesure the CPUhasacooler attached onthe top toprevent
overheating.If you do nothavethe cooler,contact your dealer topurchaseand install them
before turning on the computer.Meanwhile,do notforgettoapplysomesilicon heattransfer
compound on CPUbeforeinstallingthe cooler for better heat dispersion.
Followthe stepsbelowtoinstallthe CPU&coolercorrectly.Wronginstallation will causethe
damageof your CPU& mainboard.
1.Positionthecooling setontotheretention mechanism.
Hook one end ofthe cliptohookfirst.

5
2.Then pressdownthe other end ofthe cliptofasten the
coolingsetonthetopoftheretentionmechanism.
Locatethe FixLever and lift upit.
3.Fastendownthe lever.
4.Attachthe CPUFancabletothe CPUfanconnector on
the mainboard.
MSIRemindsYou...
1. Confirmifyour CPUcooler isfirmly installedbefore turning on your system.
2. Checkthe information inPCHealthStatusof H/WMonitor inBIOSfor the CPUtemperature.
3.Pleasenotethatthe mating/unmating durabilityof theCPUis 20cycles. Thereforewesuggest
you do not plug/unplug theCPUtoooften.
Memory
The mainboard providesfour 240-pinDIMM slotsfor unbuffered DDRII400 /533 / 667 / 800
SDRAM(DDR II800 isonlyforAthlon 64 X2), and supports thememory sizeupto8GB.To
operateproperly, at leastone DIMMslot mustbe installed.
Install at leastone Memory moduleon one oftheslots. Memory modulescan be installed onthe
slotsinanyorder.You can install either single- or double-sided modulestomeetyour ownneeds.
InstallingDDR IIModules
1.The DDR II DIMM has only one notchonthe centerofslot. The memory modulewill only fitin
the rightorientation.
2.Insertthememory moduleverticallyintotheDIMM slot. Thenpushit inuntilthe goldenfinger
on the memory moduleisdeeplyinserted inthe socket.
3.The plasticclipat eachside ofthe DIMM slot will automaticallyclose.
Notch
Volt

6
1
7
PowerSupply
The mainboard supportsATXpower supplyforthe power system.Before inserting thepower
supplyconnector,alwaysmakesure that all components areinstalledproperlytoensure thatno
damagewill be caused.A300Worabovepower supplyissuggested.
ATX24-PinPowerConnector:ATX1
Thisconnector allows you toconnecttoanATXpower supply.To
connecttotheATXpowersupply,makesure the plug ofthe power
supplyis inserted intheproper orientation and the pins are aligned.
Then pushdownthe power supplyfirmlyintotheconnector.
ATX12VPowerConnector:JPW1
This12V power connector is used toprovide power tothe CPU.
FloppyDisk Drive Connector:FDD1
The mainboard providesastandard floppydiskdriveconnectorthat
supports 360K,720K, 1.2M, 1.44Mand 2.88Mfloppydisktypes.
IDEConnectors:IDE1/IDE2
The mainboard has a32-bitEnhanced PCIIDEand UltraDMA66/100 controllerthat
provides PIOmode0~4,Bus Master, and Ultra DMA66/100 function. Youcanconnect
up tofour hard diskdrives,CD-ROM, 120MB Floppyand other devices.
The firsthard driveshouldalways be connected toIDE1.IDE1can connect aMaster
and aSlavedrive.You must configure secondhard drivetoSlavemode bysetting the
jumper accordingly.IDE2canalsoconnect aMasterand aSlavedrive.
MSIRemindsYou...
If you install twohard diskson cable,you mustconfigure the seconddrivetoSlavemode by
setting its jumper.Refertothe harddiskdocumentation supplied byhard disk vendorsforjumper
setting instructions.
Serial ATAII Connectors:SATA1,SATA2, SATA3, SATA4
SATA1,2,3,4are dualhigh-speedSerialATAinterfaceports.Eachsupports 2nd
generation serialATAdataratesof300 MB/s.Allconnectors are fully compliant with
SerialATA2.0specifications.EachSerialATAII connectorcan connectto1hard disk
device.
1
12
24
13
+3.3V
+3.3V
-12V
+3.3V
GND GND
PS-ON#
+5V
GND GND
GND +5V
GND GND
Res
PWR OK
+5V 5VSB
+5V +12V
+5V +12V
GND NC
1
3
4
2
GND
12V
GND
12V

7
MSIRemindsYou...
Pleasedo notfoldtheserialATAcableina90-degree angle, whichwillcausethe loss of data
during transmission.
CD-InConnector:CD1
The connector isfor CD-ROMaudioconnector.
FanPowerConnectors:CPUFAN1/SYSFAN1
The CPUFAN1(processor fan) andSYSFAN1(systemfan) support system
cooling fan with+12V.When connectingthe wire totheconnectors,alwaystakenotethatthe red
wire isthe positiveand shouldbe connectedtothe +12V,theblack wire isGround and shouldbe
connectedtoGND.IfthemainboardhasaSystemHardware Monitor chipseton-board,you must
useaspeciallydesigned fanwithspeed sensor totakeadvantage ofthe CPUfancontrol.
MSIRemindsYou...
Alwaysconsultthe vendorsfor proper CPUcooling fan.
Chassis Intrusion SwitchConnector:JCI1
Thisconnector connects toa2-pinchassisswitch.Ifthechassisis opened,
the switchwill be short.The systemwill record thisstatus and showawarning
message on the screen.Toclear the warning, you mustenter the BIOS utilityand clear the
record.
Front PanelConnectors:JFP1/JFP2
The mainboard providestwofrontpanelconnectorsfor electrical
connection tothe frontpanelswitchesand LEDs. JFP1iscompliant
withIntelFrontPanelI/OConnectivityDesign Guide.
Front Panel AudioConnector:JAUD1
The frontpanelaudioconnector allows you to
connecttothefrontpanelaudioand is
compliant withIntel FrontPanelI/O
ConnectivityDesign Guide.
Front USB Connector:USB1/USB2
The mainboard providestwostandard USB2.0pinheaders
USB1&USB2. USB2.0technology increases datatransfer
rateup toamaximumthroughputof 480Mbps, whichis40
(2)VCC
USB1- GND
GND
USB0-
USB0+
USB1+
USB0C(10)
(1)VCC Key(9)
L
R
GND
GND
+12V
NC
JFP1
Power
LED
HDD
LED
Reset
Switch
Power
Switch
1
9
2
10
JFP2
Power
LED
Speaker
1
7
2
8
(2)GND
PRESENCE#
SENSE1_RETURN
Key
SENSE2_RETURN(10)
(1)PORT1L
PORT 1R
PORT2R
SENSE_SEND
PORT 2L(9)
CINTRU
GND

8
timesfaster than USB 1.1,and isidealfor connecting high-speed USBinterfaceperipheralssuch
as USB HDD,digitalcameras, MP3players, printers,modemsand the like.
MSIRemindsYou...
Pleasenotethatthe pinsofVCC & GND must beconnected correctly,or it maycausesome
damage.
ClearCMOSJumper:JBAT1
There is aCMOS RAMonboard thathas apower supplyfrom
externalbattery tokeep the dataofsystemconfiguration.With
the CMOS RAM,the systemcan automaticallyboot OS everytimeitisturned on.If you want to
clear thesystemconfiguration, usethe JBAT1(Clear CMOSJumper)toclear data.Followthe
instructions intheimagetoclear the data.
MSIRemindsYou...
You canclear CMOSbyshorting 2-3 pinwhilethe systemisoff. Thenreturn to1-2 pinposition.
Avoidclearing theCMOSwhilethesystemis on;itwilldamage the mainboard.
PCI ExpressSlots
The PCIExpressslots, as a
high-bandwidth, lowpincount, serial,
interconnecttechnology.
PCIExpress architecture providesa
high performanceI/Oinfrastructurefor
Desktop Platformswithtransfer rates
startingat2.5Giga transfers per second over aPCIExpress x1lane for GigabitEthernet,TV
Tuners,1394 controllers, andgeneralpurposeI/O.Also,desktopplatforms withPCIExpress
Architecture will be designed todeliver highestperformanceinvideo,graphics,multimediaand
other sophisticated applications.Moreover, PCI Expressarchitecture provides ahigh
performancegraphicsinfrastructurefor Desktop Platformsdoubling the capabilityofexisting
AGP8xdesignswithtransfer rates of 4.0GB/s over aPCIExpress x16 lane for graphics
controllers.
You can insertthe expansion cardstomeet your needs.Whenaddingor removing expansion
cards, makesure that you unplugthe power supplyfirst.
PCI (PeripheralComponent Interconnect) Slots
The PCIslots allowyou toinserttheexpansion cardsto
meet your needs.Whenadding or removing expansion
cards, makesure that you unplugthe power supplyfirst.Meanwhile, read the documentation for
the expansion card tomakeanynecessary hardware or software settings forthe expansion card,
suchasjumpers,switches orBIOSconfiguration.
3
3
3
1
1
1
2
2
2
KeepData
ClearData
PCIExpress X16 Slot
PCIExpress X1Slot

9
PCI Interrupt RequestRouting
The IRQ, abbreviation of interruptrequest lineand pronounced I-R-Q, are hardware lines over
whichdevicescan send interruptsignalstothe microprocessor.ThePCIIRQpins aretypically
connectedtothe PCIbusINTA#~INTD# pins asfollows:
Order1 Order2 Order3 Order4
PCISlot1
INTB# INTC# INTD# INTA#
PCISlot2
INTC# INTD# INTA# INTB#
PCISlot3
INTD# INTE# INTB# INTC#

10
BIOS Setup
Power on the computer and the systemwill startPOST(Power OnSelfTest)process.When the
message belowappears on the screen, press<DEL>keytoenter Setup.
DEL:SetupF10:SaveF6: Load Optimized Defaults
If the message disappears before you respond and you stillwishtoenter Setup, restartthe
systemby turning itOFF and Onorpressing the RESETbutton.You may alsorestart the system
bysimultaneouslypressing <Ctrl>,<Alt>,and <Delete>keys.
MainPage
StandardCMOS Features
Usethis menu for basic systemconfigurations,suchastime,dateetc.
AdvancedBIOSFeatures
Usethis menu tosetupthe items ofAMIspecialenhanced features.
AdvancedChipset Features
Usethis menu tochange thevalues inthe chipsetregisters andoptimizeyour system
performance.
IntegratedPeripherals
Usethis menu tospecifyyour settings forintegratedperipherals.
PowerManagementSetup
Usethis menu tospecifyyour settings forpower management.
PNP/PCIConfigurations
Thisentryappearsif your systemsupports PnP/PCI.
H/WMonitor
Thisentryshows your hardware & PChealthstatus.
Frequency/VoltageControl
Usethis menu tospecifyyour settings forfrequency/voltage control.
LoadOptimizedDefaults
Usethis menu toloadthe optimized defaultsettingsintothe BIOSforthe bestsystem
performanceoperations.
BIOSSettingPassword
Usethis menu tosetthepassword.
Save &ExitSetup
SavechangestoCMOS and exitsetup.
ExitWithoutSaving
Abandon all changesand exit setup.

11
Frequency/Voltage Control
CurrentCPUClock
It shows thecurrentclock of CPU.Read-only.
Cool nQuiet
Thisitemenablesor disablesthe Cool’n’QuietFunction.Cool’n’Quiet is aspecialfeature
designed onlyforAMDAthlon64processor, and withCool’n’Quiet,thesystemwill be capableof
detecting thesystemworking status.When thesystemisidlefor acertaintime,theCPUclock
will decreaseautomatically,and oncethesystemis waken up,theCPUclock will return toits
previous status. Notethatfor the purposeof ensuring the stability ofCool nQuiet function,itis
alwaysrecommended tohavethememories plugged inDIMM1.
Adjust CPURatio&Voltage/ Adjust DDR2 MemoryFrequency
Adjusttheseitems tobe [Manual],you will be abletosee andadjust moreitemsfor overclocking.
CPURatio/Adjust CPUFSBFrequency/ DDR2 MemoryFrequency/Adjust PCI Express
Frequency
Theseitemsletyou toadjust CPUratio,CPUFSB frequency,memoryfrequency,or PCIExpress
frequency.You can overclockthe processor,memory, and PCI-E card byadjusting theseitems.
CPUVoltage/DDR2 MemoryVoltage/ ChipsetVoltage
Adjusting the CPU/ DDR voltagecan increasetheCPU/DDR speed. The chipset voltage can
alsobe adjusted foroverclocking.Anychangesmadetothesesettingsmaycauseastability
issue,sochanging the DDR and chipsetvoltage forlong-termpurposeis NOTrecommended.
HTLinkSpeed
Thissettingspecifiesthe maximumoperating frequencyofthelink’stransmitter clock.
AutoDisablePCI Clock
Thisitemis used toautodetectthePCIslots.When setto[Enabled], thesystemwill remove
(turn off)clocks fromempty PCIslotstominimizetheelectromagnetic interference(EMI).
SpreadSpectrum
When the motherboard’sclock generator pulses, the extremevalues(spikes)ofthe pulses
createsEMI(ElectromagneticInterference).The Spread SpectrumfunctionreducestheEMI
generated bymodulatingthepulses sothat thespikes of thepulses are reducedtoflattercurves.
If you donothaveanyEMI problem,leavethe setting at[Disabled]for optimalsystemstability
and performance.Butif you areplagued byEMI,selectthedesired range for EMIreduction.
Remember todisableSpread Spectrumfunctionifyou are overclocking, becauseeven aslight
jittercanintroduceatemporaryboostinclockspeedwhichmayjust causeyour overclocked
processor tolock up.

12
LoadOptimizedDefault
You can load the BIOS defaultvalues provided bythemainboard manufacturer for thestable
performance.

13
Introduction
Flicitationvous venezd’acheter less riesK9NU Neo (MS-7270v1.0), une cartemère
excellentede MSI.less riesK9NUNeo sontbas es sur leschipsets NvidiaM1697 pour obtenir
un systèmeperformant.Destin aux processeursAMD®Sempron /Athlon 64 /Athlon 64 X2pour
leSocketAM2.Less riesK9NU Neo offrentde hautes perforrmances tant auxparticuliers
qu’auxprofessionnels.
Layout

14
Sp cificit s
Support*deprocesseur
lSocketAM2pour lesProcesseursAMD®Sempron/Athlon 64/Athlon64 X2
lSupporteAthlon 64 X2, jusqu’à 5000+
FSBsupport
lFSB1GHz
Chipset
lNvidiaM1697
Support** deM moire
lDDR II 400/533 /667 / 800 (DDRII 800n’est quepour Athlon64 X2)SDRAM(8GBMax)
lDDR II 800SDRAM(seulement pour DualCore)
l4DIMMs DDR II (240-pin/ 1.8V)
lCanaldouble
LAN
lSupporteLAN10/100 par Realtek RTL8201CLPHY
lSupporteLANPCI-E 10/100/1000 par lecontrôleur Realtek RTL8111B (optionnel)
Audio
lChipInt gr par Realtek®ALC883
l7.1CanalAzaliaS/WCodec
IDE
l2ports IDE.
lSupportelemode Ultra DMA66/100/133
SATA
l4ports SATAII
lSupportelesmat riauxSATAetSATAII
lStockagede vitesseettransfertdedonn es jusqu’à 300MB/s
Disquette
l1port de disquette
lSupporte1FDD avce360K,720K, 1.2M,1.44Met2.88Mbytes
Table of contents
Languages:
Other MSI Motherboard manuals

MSI
MSI ms 7529 Quick start guide

MSI
MSI A68HM-P33 Series User manual

MSI
MSI H55M-E32 User manual

MSI
MSI X99A GAMING 7 User manual

MSI
MSI H61MA-E35 (B3) User manual

MSI
MSI K9N Neo V3 Series User manual

MSI
MSI 970A-G43 PLUS User manual

MSI
MSI Z170A KRAIT GAMING User manual

MSI
MSI 848P NEO-V - Motherboard - ATX User manual

MSI
MSI 970A GAMING PRO CARBON User manual

MSI
MSI X299 XPOWER GAMING AC User manual

MSI
MSI MS-7358 User manual

MSI
MSI 848P NEO-V - Motherboard - ATX User manual

MSI
MSI Z270 GAMING M6 AC User manual

MSI
MSI PRO A620M-B User manual

MSI
MSI MS-6195 User manual

MSI
MSI PH61A-P35 (B3) User manual

MSI
MSI RS350 User manual

MSI
MSI Z270 gaming M3 Operator's manual

MSI
MSI H170M PRO-VDH User manual