6
Laden und Reinigen des Rasierers
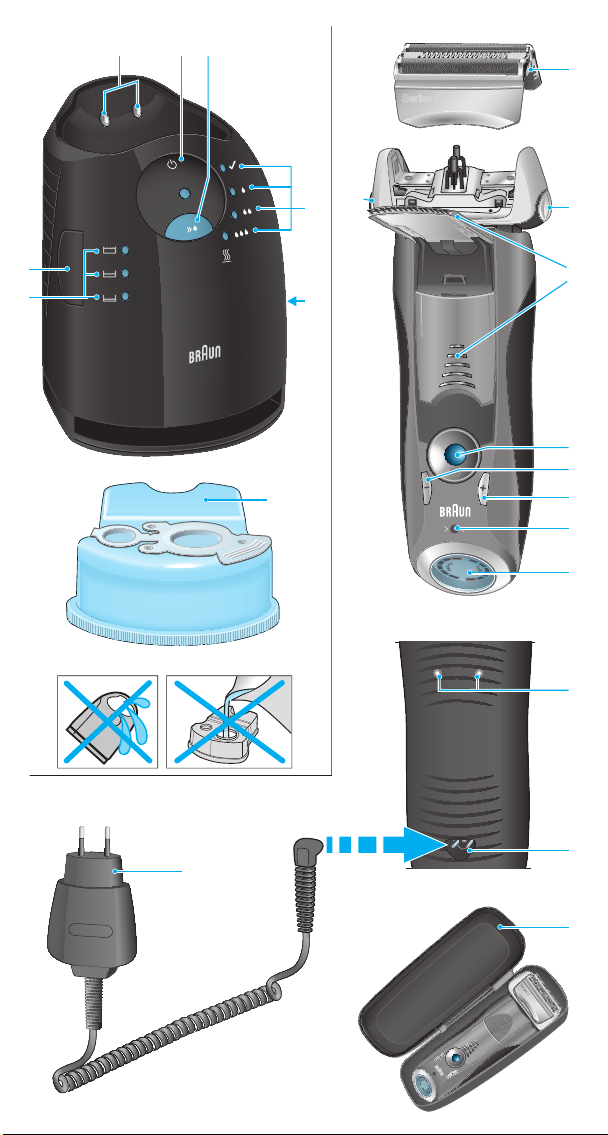
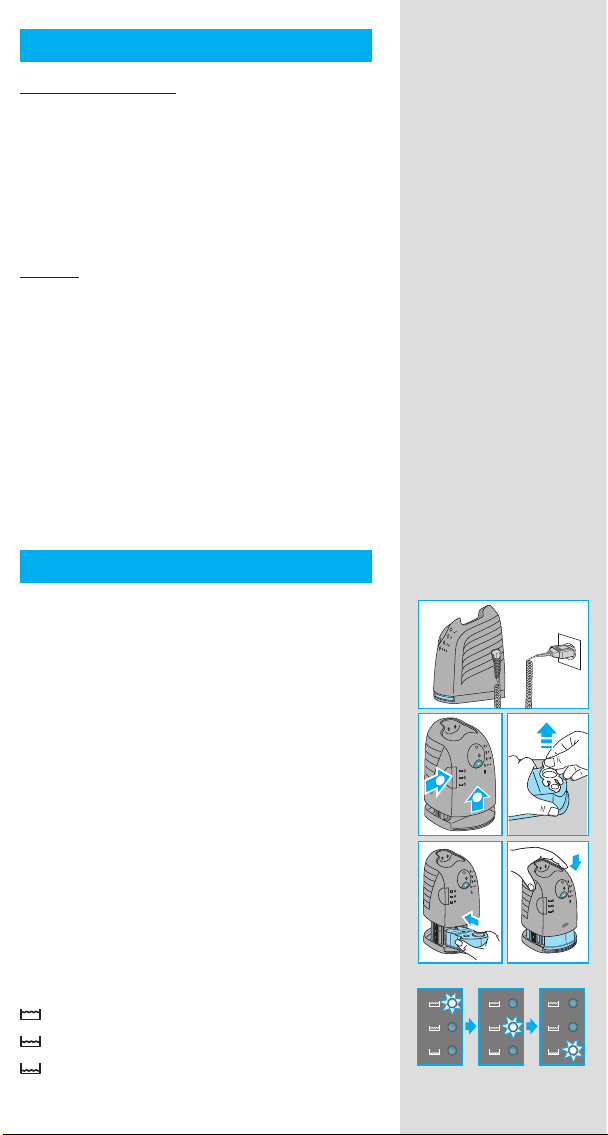
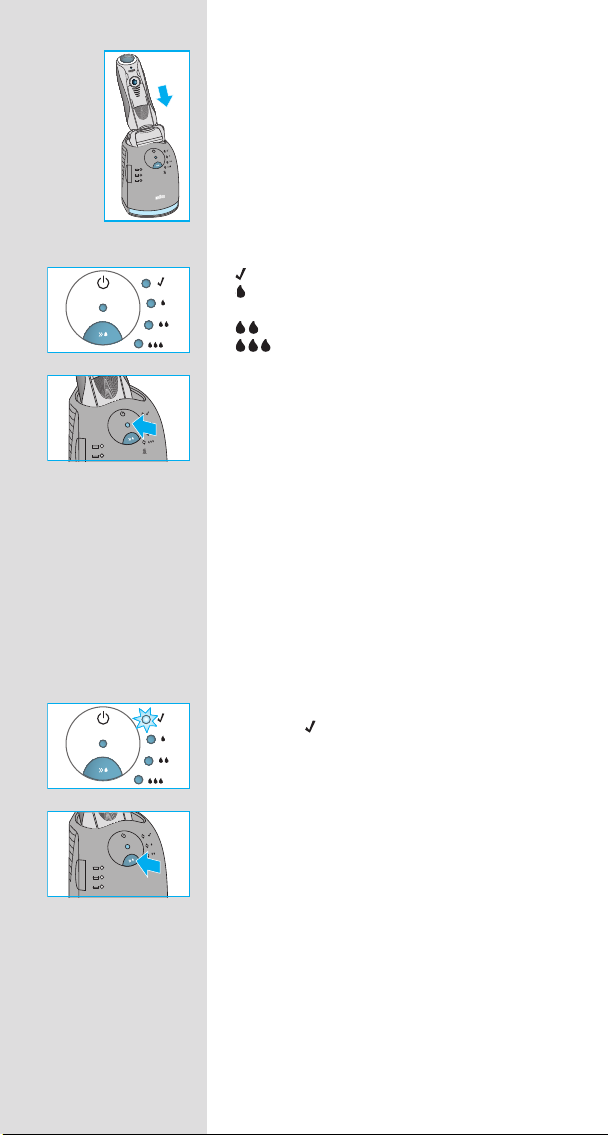
Stellen Sie den Rasierer mit dem Kopf nach
unten in die Station, die Kontakte uauf der
Rasierer-Rückseite berühren dann die Kontakte
3in der Station. Wichtig: Der Rasierer muss
trocken und frei von jeglichen Schaum- oder
Seifenrückständen sein.
Wenn erforderlich, wird der Rasierer jetzt
aufgeladen. Zudem wird der Reinigungsstatus
überprüft und eine der vier Leuchtdioden der
Reinigungsprogramme 5leuchtet auf:
der Rasierer ist sauber
Sparprogramm – nur kurze Reinigung
erforderlich
normale Reinigung erforderlich
intensive Reinigung erforderlich
Hat die Station eines der drei Reinigungs-
programme gewählt, wird sie erst beginnen,
wenn Sie die Start-Taste 4drücken. Für beste
Rasur-Ergebnisse empfehlen wir, nach jeder
Rasur zu reinigen.
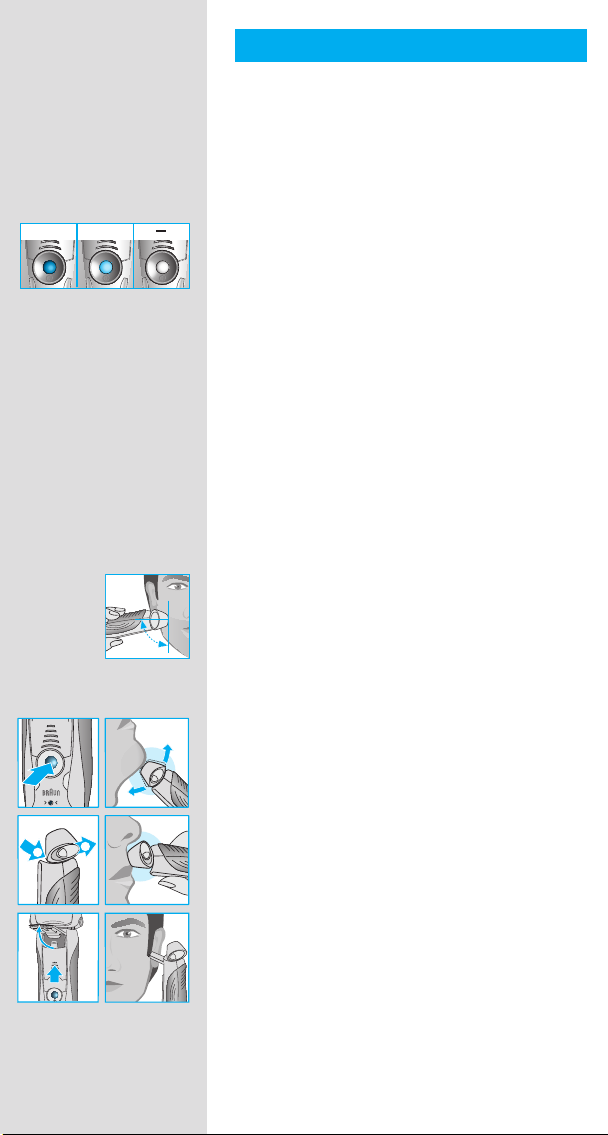
Während das Reinigungsprogramm läuft,
blinkt die entsprechende Leuchtdiode. Jedes
Reinigungsprogramm besteht aus mehreren
Zyklen (in denen die Reinigungsflüssigkeit
durch den Rasiererkopf gespült wird) und
einer Trocknungsphase (durch Erwärmung).
Die Gesamt-Reinigungszeit beträgt je nach
Programm zwischen 32 und 43 Minuten.
Die Reinigungsprogramme sollten nicht unter-
brochen werden. Beachten Sie, dass das Scher-
system während des Trocknens heiß und nass
sein kann.
Ist das Reinigungsprogramm beendet, leuchtet
die blaue -Diode. Ihr Rasierer ist jetzt sauber
und bereit zur Benutzung.
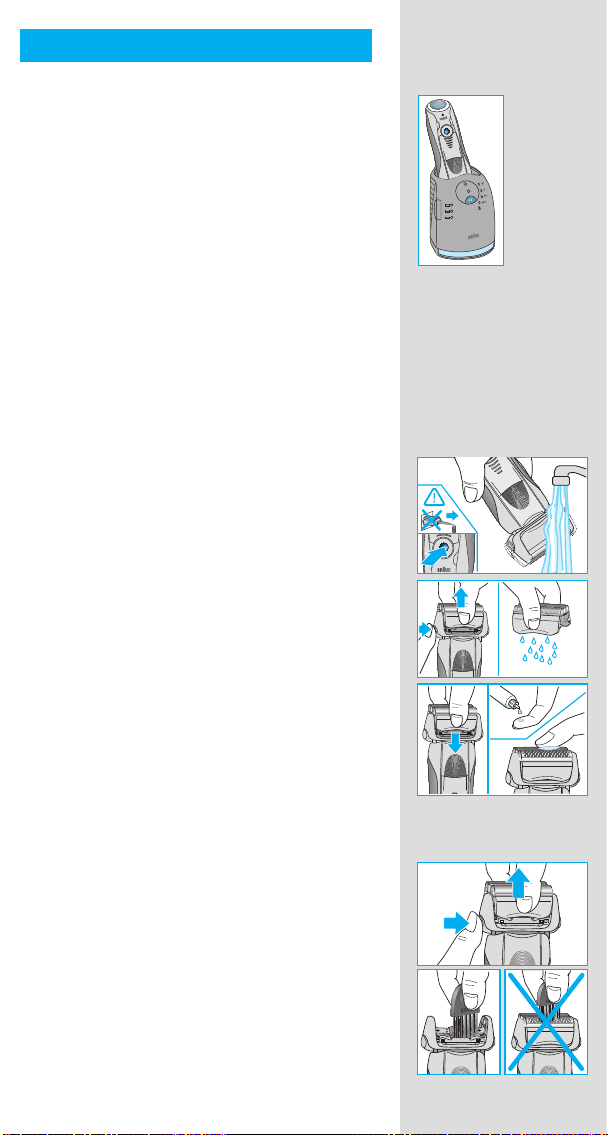
Schnellreinigung
Wenn Sie die Schnellreinigungs-Taste Ddrücken,
wird ein Reinigungsvorgang ohne Trocknungs-
phase gestartet. Dieses Programm dauert nur
ca. 25 Sekunden und wird empfohlen, wenn Sie
keine Zeit für eines der Komplettprogramme
haben. Sollten Sie den Rasierer sofort nach
Ablauf dieses Programms entnehmen, wischen
Sie den Scherkopf mit einem Tuch ab, da er
noch tropfen kann.
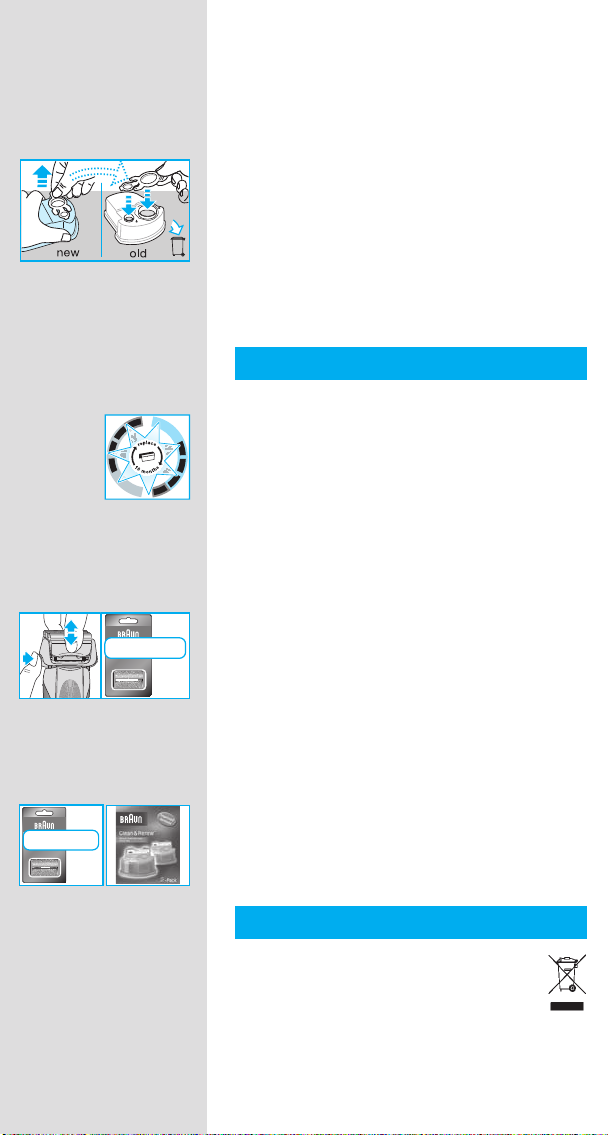
Stand-by Betrieb
10 Minuten nach Beendigung des Lade- oder
Reinigungsvorgangs schaltet die Station in den
Stand-by Betrieb: Die Leuchtdioden an der
Station werden ausgeschaltet.