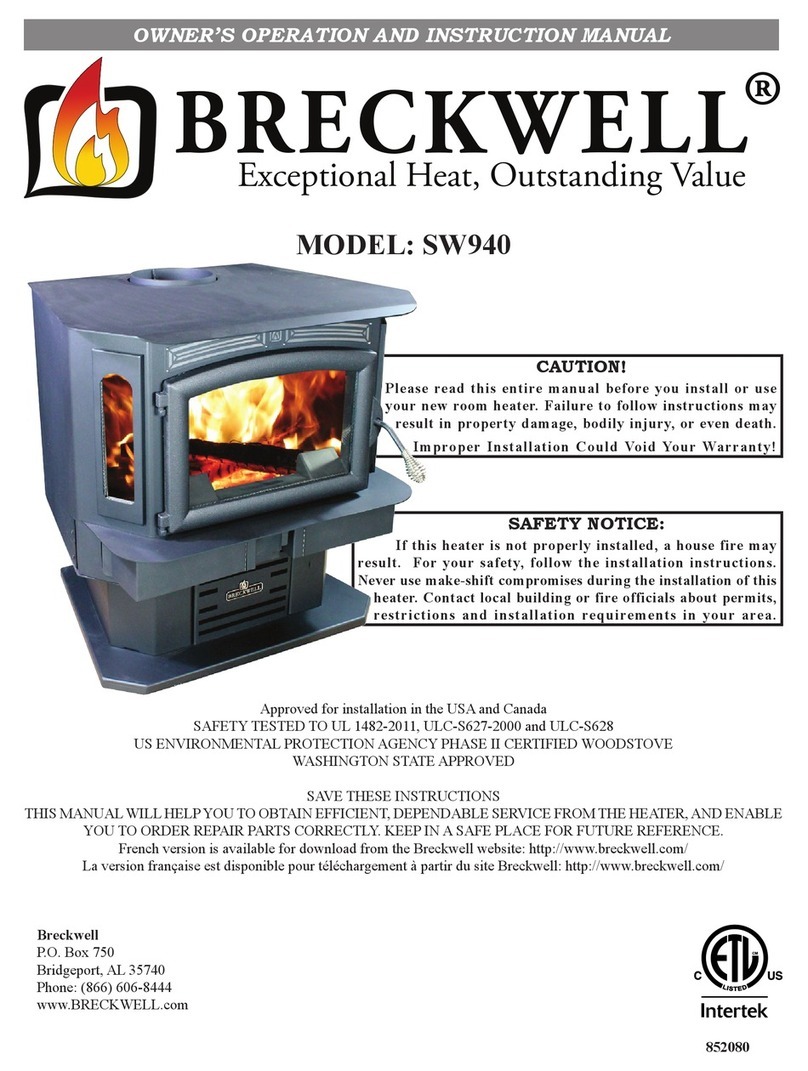
Breckwell BH6113LFP User manual

853788-2401J
Report #:
INSTALLER: Leave this manual with the appliance.
CONSUMER: Retain this manual for future reference.
Please read this manual BEFORE installing and
operating this replace.
CALIFORNIA PROPOSITION 65 WARNING:
This product can expose you to chemicals including carbon monoxide, which
is known to the State of California to cause cancer, birth defects and/or other
reproductive harm. For more information, go to www.P65warnings.ca.gov
Ce produit peut vous exposer à des agents chimiques, y compris au monoxyde de
carbone, lesquels sont reconnus dans l’État de la Californie comme causant le cancer et
des malformations congénitales ou autres dommages au fœtus. Pour obtenir plus de
renseignements, veuillez consulter le site www.P65warnings.ca.gov
• Do not store or use gasoline or other ammable vapors and liquids in the vicinity of this or any other appliance.
• WHAT TO DO IF YOU SMELL GAS
• Do not try to light any appliance.
• Do not touch any electrical switch; do not use any phone in your building.
• Leave the building immediately.
• Immediately call your gas supplier from a neighbor’s phone. Follow the gas supplier’s instructions.
• If you cannot reach your gas supplier, call the re department.
• Installation and service must be performed by a qualied installer, service agency or the gas supplier.
WARNING:
FIRE OR EXPLOSION HAZARD
Failure to follow safety warnings exactly could result in serious injury, death, or property damage.
Modèle: BH6113LFP
227 Industrial Park Rd. • South Pittsburg, TN 37380 •
Phone: 800-750-2723 • Web: www.breckwell.com

-2-
This appliance may be installed in an after market permanently located, manufactured home (USA only) or
mobile home, where not prohibited by local codes. It is only for use with the type of gas indicated on the rating
plate, and is not convertible for use with other gassed, unless a certied kit is used.
• After-market: Completion of sale, not for purpose of resale, from the manufacturer.
Laboratory:
PFS-TECO Laboratories
Standards:
• ANSI Z21.88-2017/CSA 2.33-2017, Vented Gas Fireplace Heaters
• CSA 2.17-2017, Gas-Fired Appliances for Use at High Altitudes
• CSA P.4.1-2015, Testing Method for Measuring Annual Fireplace Efciency
This installation must conform with local codes, or in the absence of local codes, with the National Fuel Gas Code,
ANSI Z223.1/NFPA 54, or the Natural Gas and Propane Installation Code, CSA B149.1.
852502B
!
www.ncertied.org
We recommend that our gas
hearth products be installed
and serviced by profes-
sionals who are certied in
the U.S. by the National
Fireplace Institute® (NFI) as
NFI Gas Specialists.

-3-
Dimensions
Physical Dimensions
inches mm
A Depth 19-1/4 489
B Width 70-3/4 1798
C Height 34-3/4 883
DBottom To
Electrical Access 2-3/4 70
EBack To Electrical
Access 16-1/32 408
FBack To Gas Line
Access 17-3/32 435
GBottom To Gas
Line Access 3-1/4 83
HFloor To Top Heat
Shield Stand Off 49-9/16 1259
C
D
Electrical
Access
E
F
G
H
Gas Line
Access
B
A
Safety Label
Hot while in operation. Do not touch. Severe burns may result. Keep children, clothing, furniture,
gasoline, and other liquids having flammable vapors away. Keep burner and control compartment
clean. See installation and operating instructions accompanying appliance.
Do not operate the appliance with glass removed, cracked, or broken. Replacement of the
panel(s) should be done by a licensed or qualified service person.
CAUTION:
853069B
ON
OFF
ON/OFF
CAUTION:
FOR YOUR SAFETY READ BEFORE LIGHTING
WARNING: If you do not follow these instructions exactly, a fire or explosion may result causing
property damage, personal injury, or loss of life.
A. This appliance is equipped with an ignition device that automatically lights the
pilot. Do not try to light the pilot by hand.
B. BEFORE OPERATING, smell around the appliance area for gas. Be sure to
smell next to the floor because some gas is heavier than air and will settle on
the floor.
WHAT TO DO IF YOU SMELL GAS
•
Do not try to light any appliance.
•
Do not touch any electric switch; do not use any phone in your building.
•
Immediately call your gas supplier from a neighbor's phone. Follow the gas
supplier's instructions.
•
If you cannot reach your gas supplier, call the fire department.
C. Use only your hand to turn the gas control manual valve. Never use tools. If the
valve will not turn by hand, do not try to repair it; call a qualified service
technician. Force or attempted repair may result in a fire or explosion.
D. Do not use this appliance if any part has been under water. Immediately call a
qualified service technician inspect the appliance and to replace any part of the
control system and any gas control that has been under water.
OPERATING INSTRUCTIONS
1. STOP! Read the safety information above on this label.
2. Press the wireless remote "OFF" button.
3. Turn off all electric power to the appliance.
4. This appliance is equipped with an ignition device which automatically lights the pilot. Do not try to
light the pilot by hand.
5. Locate the manual valve installed by your qualified service technician. Turn the manual valve
clockwise to the "OFF" position.
6. Wait five (5) minutes to clear out any gas. Then smell for gas, including near the floor. If you smell
gas, STOP! Follow "B" in the safety information above on this label. If you do not smell gas, go to
the next step.
7. Turn the manual valve counterclockwise to the "ON" position.
8. Turn on all electric power to the appliance.
9. Press the wireless remote ON button.
10. If the appliance will not operate, follow the instructions, "To Turn Off Gas To Appliance" and call
your service technician or gas supplier.
TO TURN OFF GAS TO APPLIANCE
1. Press the wireless remote "OFF" button.
2. Turn off all electric power to the appliance if service is to be performed.
3. Locate the manual valve installed by your qualified service technician.
4. Turn the manual valve clockwise to the "OFF" position.
NOTE: This image is only an example. The label on the actual unit will vary slightly.
NOTE: When initially lit, condensation will appear on the glass. This is normal and will disappear after several
minutes. A paint smell will occur during the rst few hours of burning. It is recommended to leave the fan off during
this period to help speed the paint curing process. It may produce noises of varying degree as it heats and cools
due to metal expansion and contraction. This is normal, and does not affect the performance or longevity. See
“Curing Instructions” section of this manual.

-4-
The following requirements reference various
Massachusetts and national codes not contained in
this manual. For all sidewall horizontally vented gas
fueled equipment installed in every dwelling, building
or structure used in whole or in part for residential
purposes, including those owned or operated by the
Commonwealth and where the side wall exhaust vent
termination is less than (7) feet above nished grade
in the area of the venting, including but not limited to
decks and porches, the following requirements shall be
satised:
INSTALLATION OF CARBON MONOXIDE
DETECTORS
At time of installation of side wall horizontally vented
gas fueled equipment, the installing plumber or gas-
tter shall observe that a hard wired carbon monoxide
detector with an alarm and battery back-up is installed
on the oor level where the gas equipment is to be
installed. In addition, the installing plumber or gas-
tter shall observe that a battery operated or hard
wired carbon monoxide detector is installed on each
additional level of the dwelling, building or structure
served by the side wall horizontal vented gas fueled
equipment. It shall be the responsibility of the property
owner to secure the services of qualied licensed
professionals for the installation of hard wired carbon
monoxide detectors. In the event that the side wall
horizontally vented gas fueled equipment is installed
in a crawl space or attic, the hard wired carbon
monoxide detector with alarm and battery back-up
may be installed on the next adjacent oor level. In the
event that the requirements of this subdivision can not
be met at the time of completion of installation, the
owner shall have a period of thirty (30) days to comply
with the above requirements; provided, however, that
during said thirty (30) day period, a battery operated
carbon monoxide detector with an alarm shall be
installed.
APPROVED CARBON MONOXIDE DETECTORS
Each carbon monoxide detector as required in
accordance with the above provisions shall comply
with NFPA 720 and be ANSI/UL 2034 listed and IAS
certied.
SIGNAGE
A metal or plastic identication plate shall be
permanently mounted to the exterior of the building at
a minimum of eight (8) feet above grade directly in line
with the exhaust vent terminal for the horizontally vented
gas fueled heating the appliance or equipment. The
sign shall read, in print no less the one-half inch (1/2) in
size, “GAS VENT DIRECTLY BELOW. KEEP CLEAR OF ALL
OBSTRUCTIONS”.
INSPECTION
The state or local gas inspector of the side wall
horizontally vented gas fueled equipment shall not
approve the installation unless, upon inspection, the
inspector observes carbon monoxide detectors and
signage installed in accordance with the provisions of
248 CMR 5.08 (2) (a) 1 through 4.
EXEMPTIONS
The following equipment is exempt from 248 CMR 5.08
(2) (a) 1 through 4: The equipment listed in Chapter 10
entitled “Equipment Not Required To Be Vented” in the
mostcurrenteditionofNFPA54asadoptedbytheBoard;
and Product Approved side wall horizontally vented
gas fueled equipment installed in a room or structure
separate from the dwelling, building or structure used
in whole or in part for residential purposes.
MANUFACTURER REQUIREMENTS
Gas Equipment Venting System Provided: When
the manufacturer of Product Approved side wall
horizontally vented gas equipment provides a venting
system design or venting system components with
the equipment, the instructions provided by the
manufacturer for installation of the equipment and the
venting system shall include:
• Detailed instructions for the installation of the venting
system design or the venting system components;
and
• A complete parts list for the venting system design or
venting system.
GAS EQUIPMENT VENTING SYSTEM NOT PROVIDED
When the manufacturer of Product Approved side wall
horizontally vented gas equipment does not provide
the parts for venting the ue gases, but identies
“special venting systems”, the following requirements
shall be satised by the manufacturer:
• The referenced “special venting systems” instructions
shall be included with the appliance or equipment
installation instructions and;
• The “special venting systems” shall be Product
Approved by the Board, and the instructions for
that system shall include a parts list and detailed
installation instructions.
A copy of all installation instructions for all Product
Approved side wall horizontally vented gas fueled
equipment, all venting instructions, all parts lists for
ventinginstructions,and/orallventingdesigninstructions
shall remain with the appliance or equipment at the
completion of the installation.
Requirements For The Commonwealth Of Massachusetts

-5-
This is a vented product. It must be properly installed by a qualied service person. The glass door must be properly
seated and sealed. If this appliance is not properly installed by a qualied service person with glass door properly
seated and sealed, combustion leakage can occur. CARBON MONOXIDE POISONING: Early signs of carbon
monoxide poisoning are similar to the u with headaches, dizziness and/or nausea. If you have these signs, it may
not have been installed properly. Get fresh air at once! Have it inspected and serviced by a qualied service person.
Some people are more affected by carbon monoxide than others. These include pregnant women, people with
heart or lung disease or anemia, those under the inuence of alcohol, and those at high altitudes. Propane/LP gas
and natural gas are both odorless. An odor-making agent is added to each of these gases. The odor helps you
detect a gas leak. However, the odor added to these gases can fade. Gas may be present even though no odor
exists. Make certain you read and understand all warnings. Keep this manual for reference. It is your guide to safe
and proper operation.
1. Installation and repair should be done by a qualied
service person. The appliance should be inspected
before use and at least annually by a professional
service person. More frequent cleaning may be
required due to excessive lint from carpeting,
bedding material, etc. It is imperative that control
compartments, burners, and circulating air
passageways of the appliance be kept clean.
2. Only use the type of gas indicated on the rating
plate. This appliance is not convertible for use with
other gases unless a certied kit is used.
3. Do not place propane/LP supply tank(s) inside
any structure. Locate propane/LP supply tank(s)
outdoors. To prevent performance problems, do
not use propane/LP fuel tank of less than 100 lbs.
capacity.
4. If you smell gas:
• Shut off gas supply.
• Do not try to light any appliance.
• Do not touch any electrical switch; do not use any
phone in your building.
• Immediately call your gas supplier from a neighbor’s
phone. Follow the gas supplier’s instructions.
5. Never install:
• In a recreational vehicle
• Where curtains, furniture, clothing, or other
ammable objects are less than 36” from the front,
top, or sides of it
• In high trafc areas
• In windy or drafty areas
6. This appliance reaches high temperatures. Children
and adults should be alerted to the hazards of high
surface temperature and should stay away to
avoid burns or clothing ignition. It will remain hot
for a time after shutdown. Allow surfaces to cool
before touching.
7. Young children should be carefully supervised
when they are in the same room as the appliance.
Toddlers, young children and others may be
susceptible to accidental contact burns. A
physical barrier is recommended if there are at-
risk individuals in the house. To restrict access to a
replace or stove, install an adjustable safety gate
to keep toddlers, young children and other at-risk
individuals out of the room and away from hot
surfaces.
8. Due to high temperatures, the appliance should be
located out of trafc and away from furniture and
draperies. Clothing or other ammable material
should not be placed on or near the appliance.
9. When the appliance is installed directly on
carpeting, tile or other combustible material other
than wood ooring, you must use a metal or wood
panel or hearth pad extending the full width and
depth of the appliance.
10. Do not modify the appliance under any
circumstances. Any parts removed for servicing
must be replaced prior to operating.
11. Turn off and let cool before servicing, installing, or
repairing. Only a qualied service person should
install, service, or repair it. Have burner system
inspected annually by a qualied service person.
12. You must keep control compartments, burners,
and circulating air passages clean. More frequent
cleaning may be needed due to excessive lint and
dust. Turn off the gas valve and pilot light before
cleaning.
13. Have venting system inspected annually by a
qualied service person. If needed, have venting
system cleaned or repaired.
14. Keep the surrounding area clear of combustible
materials, gasoline, and other ammable vapor and
liquids. Do not run the appliance where these are
used or stored. Do not place items such as clothing
or decorations on or around the appliance.
15. Do not use to cook food or burn paper or other
objects.
Before You Start
WARNING: Read this owner’s manual carefully and completely before trying to assemble, operate, or service.
Any change to this appliance or its controls can be dangerous. Improper installation or use can cause serious
injury or death from re, burns, explosions, electrical shock and carbon monoxide poisoning.

-6-
16. Never place anything on top of the appliance.
17. Do not use any solid fuels (wood, coal, paper,
cardboard, etc.) in this appliance. Use only the gas
type indicated on rating plate.
18. This appliance, when installed, must be electrically
grounded in accordance with local codes or in the
absence of local codes, with the National Electrical
Code, ANSI/NFPA 70, or the Canadian Electrical
Code, CSA C22.1.
19. Do not obstruct the ow of combustion and
ventilation air in any way. Provide adequate
clearancesaround air openings into thecombustion
chamber along with adequate accessibility
clearance for servicing and proper operation.
20. Do not use if any part has been under water.
Immediately call a qualied service technician
to inspect and if needed replace any part of the
control system and any gas control which as been
under water.
21. Do not operate if any log is broken.
22. Do not use a blower insert, heat exchanger insert,
or any other accessory not approved for use with
this appliance.
23. Do not operate with the glass front removed,
cracked, or broken. Replacement of the glass
should be done by a licensed qualied service
person.
PRODUCT SPECIFICATIONS
This appliance:
• has been certied for use with either natural or propane gas. See appropriate data plates.
• is not for use with solid fuels.
• is approved for bedroom or bed sitting room installations.
• must be installed in accordance with local codes if any. If none exist use the current installation code. ANSI
Z223.1/NFPA 54 in the USA, CSA B149.1 in Canada.
• is mobile home approved.
• must be properly connected to a venting system.
• is not approved for closet installations.
• is approved to be vented using DuraVent, BDM, and Olympia components.
The classication “noncombustible material” includes, but is not limited to stone, brick and mortar. Noncombustibles
are safe to overlay the black-painted metal face (including radiant plates) and do not pose a re hazard. Do not
allow any noncombustible nish material to extend past or interfere with opening.
The classication “combustible material” includes, but is not limited to plywood, drywall and particle board.
Combustible materials may contact the sides, bottom or back of rebox. Do not overlay the black painted face
with combustible materials.
CONTROLS
Product Features
Valve Regulator Master On/Off Switch
Air Shutter Adjustment
WARNING: Never connect this appliance to private (non-utility) gas wells. This gas is commonly known as
wellhead gas.
CAUTION: PLEASE READ THE FOLLOWING CAREFULLY It is not unusual to have some odor during the rst burn.
This is due to the manufacturing process. Please ensure that your room is well ventilated during burn off — open
all windows. It is recommended that you burn your replace for at least ten (10) hours the rst time you use it.
Place the fan switch in the “OFF” position during this time.

-7-
Gas Pressures (Inches WC)
Natural Propane (LP)
Inlet Minimum 5.0 11.0
Inlet Maximum 10.0 14.0
Manifold Pressure 1.6 to 3.5 6.4 to 10
Gas Specications & Orice Size
Fuel Max. Input
BTU/h
Min. Input
BTU/h
Orice
Size
Nat. 43,500 28,500 #30 DMS
LP 40,500 30,500 #48 DMS Natural Gas & LP Gas
HIGH ELEVATIONS
Input ratings are shown in BTU per hour and are certied without derating for elevations up to 4,500 feet (1,370
m) above sea level. For elevations above 2,000 feet (50.8 m) in USA, installations must be in accordance with the
current ANSI Z223.1/NFPA 54 and/or local codes having jurisdiction. In Canada, please consult provincial and/
or local authorities having jurisdiction for installations at elevations above 4,500 feet (1,370 m). Natural Gas and
Propane Installation Code, CSA B149.1 NOTE: If you live in a cold climate, seal all cracks around your appliance,
and wherever cold air could enter the room, with noncombustible material. It is especially important to insulate
the outside chase cavity between the studs and under the oor on which the appliance rests, if the oor is above
ground level. NOTE: Failure to follow these instructions will void the warranty.
Part Overview
Read this homeowner manual thoroughly and follow all instructions carefully. Inspect all contents for shipping
damage and immediately inform your authorized dealer if any damage is found. Do not install any damaged,
incomplete, or substitute parts. Check your packing list to verify that all listed parts have been received.
AA BATTERIES
(4 PACK) REMOTE
9V BATTERY
BOX
AAA BATTERIES
(3 PACK)
WARNING: Do not pack the open air spaces with insulation or other materials. This could cause high temperatures
and may present a re hazard and serious injury, property damage or loss of life. Operation of improperly
installed and maintained venting system could result in serious injury, property damage or loss of life.
WARNING: This appliance must be vented to the outside. The venting system must NEVER be attached to
a chimney serving a separate solid fuel burning appliance. Each gas appliance must use a separate vent
system. Do not use common vent systems.
WARNING: Read all instructions completely and thoroughly before attempting installation. Failure to do so
could result in serious injury, property damage or loss of life. Operation of improperly installed and maintained
venting system could result in serious injury, property damage or loss of life.
Venting
APPROVED VENT SYSTEMS
DuraVent, ICC, BDM, and Olympia components.
VENTING REQUIREMENTS
Consult the local and national installation codes to assure adequate combustion and ventilation air is available.
Venting requirements apply to both natural gas and LP gas.
• Flame height and appearance will vary depending upon venting conguration and the type of fuel used.
• Refer to the vent manufacturer’s installation manual for complete installation instructions. Vent installation
must conform with venting requirements and restrictions as outlined in this manual.
• Provide a means for visually checking the vent connection to the appliance after it is installed.
VENT SECTION CLEARANCES
NOTE: Wall thimble products that comply with the required 1 in (25 mm) clearance to combustibles must be
installed for all horizontal vent runs that pass through interior or exterior walls. These wall thimble products may be
insulated using unfaced insulation products listed as noncombustible per ASTM E 136.

-8-
Vertical Pipe Section Clearances
Surface Sides
All Approved Venting 1 in (25 mm)
Horizontal Pipe Section Clearances
Surface Top Bottom Sides
All Approved Venting 2 in (51 mm) 1 in (25 mm) 1 in (25 mm)
NOTE: Attic insulation shields may be insulated using unfaced insulation products listed as noncombustible per
ASTM E 136.
• This unit requires a solid platform to support it. The
solid platform can be made of a combustible
material. When the appliance is installed directly on
carpeting, tile or other combustible material other
than wood ooring, the appliance shall be installed
on a metal or wood panel extending the full width
and recessed depth of the appliance.
• 1/2” to 3/8” thick non-combustible material such as
Mill-board or Hardy board ect. is required above,
below, and on each side (NOT supplied).
Solid Platform
76-3/32”
(1933 mm)
21-13/16”
(555 mm)
49-9/16”
(1259 mm)
Min. 5”
(127 mm)
Minimum coverage area of non-combustible material.
Any wall dinish applied to shaded area must be non-combustible.
Flush with bott
om of unit;
add extra cement board
if overlapping framing.
Non
-combustible
material required
such as Mill-board
or Hardy board etc.
with a thickness
of 1/2” (13mm) to
3/8” (10mm)
Joints preferred at c
orners
to prevent cracking
Min. 5”
(127 mm)
Framing
1. Attach the two stand-off assembles to the top of
the unit using four 10-32 X 1/2 screws.
2. Slide the stand-off support brackets into place.
3. Attach the top shield to the two stand-off assembles
using 10-32 X 1/2 screws. NOTE: The stand-offs
are located in the rebox. The eight10-32 X 1/2
screws and the two stand-off support brackets are
provided in the parts bag.
WALL ENCLOSURE ROUGH OPENING
WARNING: Provide adequate clearances around
air openings into the combustion chamber. Provide
adequate clearance in front of the appliance
for barrier removal, component access, gas line
installation, service access, etc.
WARNING: The top stand-offs provide the minimum clearance to the header. Use only non-combustible material
in this area for the entire width of the appliance. DO NOT use wood, sheet-rock, etcetera, in this zone. Top stand-
off brackets must be formed and attached prior to positioning into framed opening.
USE OF ELBOWS
• MAXIMUM NUMBER OF 90° ELBOWS: 4
• For each additional 90° elbow used after the rst 90° elbow, 3 ft (91.4 cm) must be subtracted from maximum
venting allowed.
• For each 45° elbow used, 1-1/2 ft (457 mm) must be subtracted from maximum venting allowed.
• (2) 45° degree elbows may be used in place of (1) 90° elbow.

-9-
TYPICAL CORNER INSTALLATION
120-7/16”
(3060mm)
76” (1933mm)
85-3/16”
(2164mm)
31”
(788mm)
60-1/4”
(1531mm)
4-5/16”
(110mm)
Minimum Clearances to Combustible Material
inches mm
Top Stand-Offs to Combustible Material 0 0
Left And Right Side Stand-Off to
Combustible Material 0 0
Back Stand-Off to Combustible Material 0 0
Corners to Combustible Material 4-5/16 110
Front to Combustible Material 36 915
Top To Ceiling to Combustible Material 28 711
Sides To Adjacent Sidewall 3 76
From Appliance Top To Ceiling 28” (711 mm)
**DIMENSION SHOWN WITH LISTED DURAVENT ELBOW.
76” (1933mm)
3” (77mm)
21-3/16”
(539mm)
TYPICAL VERTICAL INSTALLATION
76” (1933mm)
3” (77mm)
TYPICAL HORIZONTAL INSTALLATION
21-3/16”
(539mm)
CAUTION: Apply a generous amount of high temperature sealant around the ue
outlet.
NOTE: Approved vent system elbows vary in vertical
length. Consult vent manufacturer’s instructions to
determine the elbow dimension used for your installation.
Adjust as necessary to maintain the required 1” (25mm)
clearance from the vent pipe to combustible material.
VENTING CONSIDERATIONS—VERTICAL TAKEOFF
NOTE: ALL venting considerations.
• Dimensions of venting are based on using Dura Vent
elbows. Elbow curve radius dimensions may vary
when using other brands. In general, other brands
have slightly bigger radius.
• Minimum 24 inches vertical pipe section required
at unit. Refer to the “Venting Chart” section of this
manual for allowable horizontal runs.
• 2 inches clearance to combustibles required above
horizontal pipe. Slope horizontal pipe upwards 1/4
inch per foot. 1 inch clearance required around sides
and bottom of horizontal pipe and around vertical
pipe.
• When calculating effective pipe lengths subtract
approximately 1-1/2 inch for pipe joint - for example,
a 12 inches pipe section will add approximately 10 -
1/2 inches overall.
Min 1”
(25.4 mm)
Required
clearance
to vertical
pipe is
within
stand-o
space
Minimum 24” pipe
section between
elbows
14-9/16”
(370 mm)
Stand-o
36-7/8” (938 mm)
9”
(230 mm)
28”
(712 mm)

-10-
TOP OUTLET ONLY
This unit is supplied with a top vent outlet and should NOT be eld-converted
to a rear vent outlet (see vent chart in this manual).
VENT SEALING
Seal all outer coaxial pipe and elbow joints, including sectioned elbow joints,
using high quality, high temperature 2 inch wide self-adhesive aluminum foil
tape (Nashua-322-2 brand or similar). Wrap the tape completely around
all joints and press rmly to seal. A high temperature black silicone sealant
may be used in the outer joints as a substitute to foil tape. Ensure all the pipe
joints have a minimum of -1/4” overlap.
WALL THICKNESS
The appliance vent is suitable for penetrating a combustible wall assembly
up to 8 inches in thickness. A non-combustible wall can be of any thickness
up to the maximum horizontal run of vent pipe allowed for the particular
installation.
FRAMING VENT IN COMBUSTIBLE WALLS & CEILINGS
When penetrating through combustible walls and ceilings, frame a minimum
of 10 in x 10 in opening and ensure that the insulation is kept clear of the
vent pipe using either a wall thimble or an attic insulation shield. Follow the
installation instructions supplied with the individual venting components.
WEATHER SEALING & VAPOR BARRIERS
It is the installer’s responsibility to ensure that vent installations through
exterior walls are caulked and weatherproofed in such a manner as to:
• Prevent rain water from entering the wall from the weather side by adequately caulking the outer vent plate
to the exterior wall surface.
• Prevent moisture inside the home from penetrating into the wall structure by ensuring the inside wall plate is
adequately sealed to the inside vapor barrier.
• Prevent rain water and moisture from entering the walls by sealing the joints between the outer vent tube and
the inner and outer wall plates. We recommend the use of a high quality polyurethane sealant.
All horizontal pipe runs must be graded 1/4” per foot upwards in the direction of the exhaust ow. The nal pipe
length, when terminating through the wall may be graded downwards slightly to prevent water migration.
MOUNTING BRACKET
ATTACH THE FOUR MOUNTING BRACKETS TO THE UNIT USING TWO #10A X 1/2” SCREWS PER BRACKET.
10” (254 mm)
10” (254 mm)
Align the vent
center to the
center of the frame
T
ape all joints
(including all
elbow joints)

-11-
Mantel And Finishing Requirements
Bottom of Unit
Face of 1/2” thick
non-combustible
cement board
From Face of Cement Board
Any Mantle Depth
28” (711 mm)
Door Opening to Mantle
Fireplace
Opening
4”minimum to
non-combustible
hearth
9” (230 mm)
Do not put furniture
or objects within
36” (915 mm) of
the appliance front
Min. 1”
(25.4 mm)
clearance to
combustibles
around
vertical
vent pipe
Approx. 10-3/4”(274 mm)
from back surface of
wall nish to front surface
of appliance case w/no
vent oset
17-1/8”
(436 mm)
Fireplace
Opening
1/2”thick
non-combustible
Cement Board
teltuOpoT—flehSlaitraPhtiwgnimarF
14-9/16”
(370 mm)
9”
(230 mm)
28”
(712 mm)
Gas Line Connection
GAS CONVERSION (SOLD SEPARATELY)
This appliance is manufactured for use with natural gas. Follow the instructions included with the conversion kit if
converting to LP gas. The conversion kit shall be installed by a qualied service agency.
GAS LINE INSTALLATION
Inlet Gas Supply Pressures
Fuel Minimum Pressure Maximum Pressure
Natural Gas 5” WC (1.25 kPa) 10” WC (2.49 kPa)
LP Gas 11” WC (2.74 kPa) 14” WC (3.49 kPa)
CAUTION: Installation of the gas line must only be done by a qualied person in accordance with local building
codes, if any. If not, follow ANSI 223.1. Commonwealth of Massachusetts installations must be done by a
licensed plumber or gas tter.
CAUTION: The conversion shall be carried out in accordance with the requirements of the provincial authorities
having jurisdiction and in accordance with the requirements of the ANSI Z223.1 installation code.
NOTE: The appliance and its individual shutoff valve must be disconnected from the gas supply piping system
during any pressure testing of that system at pressures in excess of 1/2 psi (3.5 kPa). For test pressures equal to
or less than 1/2 psi (3.5 kPa), the appliance must be isolated from the gas supply piping system by closing its
individual manual shut-off valve. A listed (and Commonwealth of Massachusetts approved) 1/2” (13 mm) tee
handle manual shut-off valve and exible gas connector are to be connected to the 1/2” (13 mm) control valve
inlet. If substituting for these components, please consult local codes for compliance.
• This appliance is equipped with a 3/8” (10 mm) x 18” (457 mm) long exible gas connector and manual shut-
off valve.
• Run gas line into appliance. The gas line should be run to the point of connection where the shut-off valve and
exible gas line will connect.
• Do not run gas line in a manner that would obstruct fan operation.
• For high altitude installations, consult the local gas distributor or the authority having jurisdiction for proper
rating methods.

-12-
12
x
H
LOWEST
DISCHARGE
OPENING
APPROVED CAP
APPROVED
VENT PIPE
ROOF PITCH = x/12
MINIMUM
12” (.30m)
Vertical Vent Cap Clearance
H - MINIMUM HEIGHT FROM ROOF
TO LOWEST DISCHARGE OPENING
Minimum Height (H) From Roof
Roof Pitch Feet Meters
Flat to 6/12 1.0 0.30
Over 6/12 to 7/12 1.25 0.38
Over 7/12 to 8/12 1.5 0.46
Over 8/12 to 9/12 2.0 0.61
Over 9/12 to 10/12 2.5 0.76
Over 10/12 to 11/12 3.25 0.99
Over 11/12 to 12/12 4.0 1.22
Over 12/12 to 14/12 5.0 1.52
Over 14/12 to 16/12 6.0 1.83
Over 16/12 to 18/12 7.0 2.13
Over 18/12 to 20/12 7.5 2.27
Over 20/12 to 21/12 8.0 2.44
Termination Locations
VERTICAL VENT CAP TERMINATION
WARNING: This appliance must not share or be connected to a chimney ue serving any other appliance.

-13-
MINIMUM TERMINATION CLEARANCES
Canadian installations US installations
AClearance above grade, veranda, porch, deck, or balcony 12 in (30 cm) 12 in (30 cm)
BClearance to window or door that may be opened 12 in (30 cm) 9 in (23 cm)
CClearance to permanently closed window (recommended to prevent condensation
on window)
12 in (30 cm)* 12 in (30 cm)*
DVertical clearance to ventilated sot located above the terminal within a horizontal
distance of 2 feet (61 cm) from the cent line of the terminal
24 in (61 cm)* 24 in (61 cm)*
EClearance to unventilated sot 12 in (30 cm)* 12 in (30 cm)*
FClearance to outside corner 0 in (0 cm)* 0 in (0 cm)*
GClearance to inside corner** 12 in (30 cm)* 12 in (30 cm)
HClearance to each side of center line extended above meter/regulator assembly 3 ft (91 cm) within a height
15 ft (4.5 m) above the meter/
regulator assembly
*
IClearance to service regulator vent outlet 3 ft (91 cm) *
JClearance to non mechanical air supply inlet to building or the combustion air inlet
to any other appliance
12 in (30 cm) 9 in (23 cm)
KClearance to mechanical air supply inlet 6 ft (1.83 m) 3 ft (91 cm) above if within
10 ft (3 m) horizontally
Massachusetts: 10 ft (3 m)
LClearance above paved sidewalk or paved driveway located on public property 7 ft (2.13 m)† *
MClearance under veranda, porch deck, or balcony 12 in (30 cm)‡ 12 in (30 cm)
NClearance between two horizontal terminations 12 in (30 cm) 12 in (30 cm)
OClearance between two vertical terminations (may be same height) 12 in (30 cm) 12 in (30 cm)
PAbove furnace exhaust or inlet 12 in (30 cm) 12 in (30 cm)
* Clearance in accordance with local installation codes and the requirements of the gas supplier.
** LISTED SNORKEL TERMINATION CAPS REQUIRE 24 in (61cm) CLEARANCE TO AN INSIDE CORNER
† A vent shall not terminate directly above a sidewalk or paved driveway that is located between two single family dwellings and serves both dwellings.
‡ Permitted only if veranda, porch, deck, or balcony is fully open on a minimum of two sides beneath the floor.
VINYL SOFFIT, VINYL CEILING, AND VINYL OVERHANG DISCLAIMER: Clearances to heat resistant material (i.e. wood, metal). This does not
include vinyl. Hussong Manufacturing Co., Inc. will not be held responsible for heat damage caused from terminating under vinyl overhangs,
vinyl ceilings, or vinyl ventilated/unventilated sots.
AREA WHERE TERMINAL
IS NOT PERMITTED
Vent Cap Locations
P
BB
L
J
K
C
G
H
I
D
E
A
N
F
M
O

-14-
RESTRICTOR ADJUSTMENT
Adjust the restrictor to achieve the desired ame appearance on any top venting conguration with 6 ft (1.83 m)
of vertical pipe or more. Vertical terminations may display an active, compact ame. If this appearance is not
desirable, the restrictor may need to be adjusted. Allow 15 minutes of burn time before making any adjustments.
Adjust the restrictor as shown in this manual.
Restrictor Adjustment Guidelines
Flame Appearance Draft Problem Solution
Short, ickering Excessive draft or not enough
restriction Adjust restrictor plate to close more
Lifting or ghosting* Insufcient draft Adjust restrictor plate to open more
*If ames continue to lift or ghost after opening the restrictor and verifying correct vent installation, shut off the gas supply
and call a qualied service technician.
Top Vent (Vertical Only)
1. Reach in through the rebox and remove both
bafes.
2. Remove the two screws that are securing the relief
bafe weldment to the top of the rebox (one
screw on each side).
3. To remove the relief bafe weldment push up and
back, then lower front-rst and remove.
4. Slide the restrictor forward and backward to adjust.
Relief Bafe Weldment
Remove one screw
on each side
WARNING: To avoid property damage or personal injury, allow ample time to cool before making any
adjustments.
WARNING: Improper vent installation may cause the burner ames to lift or “ghost.” Perform a visual check on
ame appearance after restrictor adjustment to ensure proper performance.

-15-
Co-Axial Venting
TYPICAL CO-AXIAL VENTING COMPONENTS—TOP OUTLET ONLY
Pipe Length
Pipe Length
Ceiling
Firestop
Attic
Firestop
Attic
Insulation
Shield
Flashing
Storm
Collar
Vertical
Termination
Pipe Length
90° Elbow
Pipe Length
2-Piece Wall
Thimble
Horizontal
Termination

-16-
READING THE VENTING CHART
The chart below applies to co-axial roof or wall termination.
1. Minimum 24-inch vertical pipe section required right at unit.
2. The total length of the vent pipe cannot exceed 40 feet.
3. The minimum vertical height with roof termination is 6 feet.
4. Any combination of rise and run can be used as long as they are within the allowable limits shown on the
chart below.
5. A maximum of 4 x 90° elbows—or equivalent (2 x 45° = 90°)—can be used. Excludes the 45° take-off elbow
shipped with the appliance.
6. Each 90° elbow installed on the horizontal plane is equivalent to a 3 feet horizontal pipe; therefore, 3 feet must
be subtracted from allowable horizontal run (45° elbow is equivalent to 18” horizontal pipe).
7. All horizontal pipe runs must be graded 1/4 inch per foot upwards in the direction of the exhaust ow. The
nal pipe length, when terminating through the wall may be graded downwards slightly to prevent water
migration.
8. A restrictor adjustment is required for most installations having a vertical rise—see next section. NOTE: The
restrictor is shipped installed at the exhaust exit of the rebox.
VENTING CHART
2 4 6 8 10 12 14 16 18
20
VERTICAL RISE (ft)
HORIZONTAL RUN (ft)
40
38
36
34
32
30
28
26
24
22
20
18
16
14
12
10
8
6
4
2
0
Position #0
Example 1
NO INSTALLATION
Position #3
Position #8
No Restrictor
Allowable Co-Axial Vent Configurations
snoitisoprotcirtserhtiw
NO INSTALLATION
24” minimum
vent pipe rise
4 x 90º ELBOWS MAXIMUM
(or equivalent)
V2
V1
V3
H1
Minimum 24” vertical
pipe rise required
supplied with unit.
1”min.
all around
vertical pipe
3”min.
above top of
horizontal pipe
1”min. around
bottom & sides
of horizontal pipe
DO NOT CONVERT
TO REAR OUTLET!
Example 1
V Value = V1 (4’) + V2 (3’) + V3 (2’)= 9’
H Value = H1 (2’) = 2’
Restrictor position # 1 required
Restrictor positions

-17-
Setup
GLASS FRAME ASSEMBLY
REMOVE GLASS FRAME ASSEMBLY
1. Remove the two #8 X 0.375 screws that secure the control cover tray to the unit. Once the two #8 screws are
removed lift the control cover unit up and out of the unit.
Log and liner Installation
• If converting to LP (propane) gas, complete the conversion before installing the log set. Follow the conversion
instructions included with the kit.
• Refer to the instruction sheets provided with your log and liner set for proper installation.
Only log and liner sets certied with the appliance shall be used. NOTE: This replace should not be burned
without the approved logs, surrounds, and liners properly installed. Use without the logs, surrounds, and liners
properly installed could cause damage to the appliance.
Certied Log/Media Certied Liner Sets
WARNING: Do not remove the glass assembly when hot.
WARNING: Use only authorized parts and materials when replacing defective or damaged glass.
WARNING: Do not operate with the glass removed, cracked, or broken. Replacement of the glass assembly
should be done by a licensed or qualied service person.
CAUTION: Do not place logs directly over burner port holes. Improper log placement may affect ame
appearance and cause excessive soot to build upon the logs and glass.
2. Locate (2) spring-loaded latches securing the glass assembly at the top of the glass frame.

-18-
Safety Barrier Information
Do not operate this appliance without a safety barriers. Only safety barriers certied
with the appliance shall be used.
Certied Safety Barriers
Control Board
Electrical Information
ELECTRICAL SPECIFICATIONS
This appliance, when installed, must be electrically grounded in accordance with local codes, or in the absence
of local codes, with the National Electrical Code, ANSI/NFPA 70, or the Canadian Electrical Code, CSA C22.1.
WIRING REQUIREMENTS
• The Ignition Module requires 120V of electricity and/or batteries to operate.
• Using the battery back-up will operate the burner only.
• Optional fan and light components will not function on battery back up power.
WARNING: Electrical Grounding Instructions: This appliance is equipped with a three-prong (grounding) plug
for your protection against shock hazard and should be plugged directly into a properly grounded three-prong
receptacle. Do not cut or remove the grounding prong from this plug.
WARNING: Do not use this replace if any part has been under water. Immediately call a qualied service
technician to inspect this appliance and to replace any part of the control system and any gas control which
has been under water.
WARNING: A barrier designed to reduce the risk of burns from the hot viewing glass is provided with this
appliance and shall be installed for the protection of children and other at-risk individuals. If the barrier becomes
damaged, the barrier shall be replaced with the manufacturer’s barrier for this appliance. Only doors certied
with the appliance shall be used.
WARNING: If burner and/or pilot have been burning, use appropriate protection to avoid burns or damage
to personal property before removing any components. DO NOT OPERATE THIS APPLIANCE WITHOUT THE HEAT
SHIELDS (LOCATED OVER THE CONTROL BOARD AND VALVE) IN PLACE. IF GASKETING IS DAMAGED, IT MUST BE
REPLACED.
CAUTION: Consider the height of hearth nish material when building a platform. Proper installation of safety
barriers with an overlap t design require the bottom of the appliance to be level with nished hearth. For
installation instructions refer to “Safety Barrier Installations”.
CAUTION: Check all connections for leaks with soapy water, whether eld or factory made.
3. Using your nger, pull the lever towards you and
unhook it from the window frame bracket.
4. Gently pull the top of the window outward. Lift
the window out of its bottom railing and set it
aside in a safe place to avoid damage.

-19-
MALE END
(OPTIONAL)
VARIABLE
SPEED FANS
VARIABLE
LIGHTS
APPLIANCE
GROUND STAR
BATTERY
PACK
885 PROFLAME
MAIN ON/OFF
SWITCH
PILOT
PILOT
BURNER
FLAME
SENSOR
IGNITER
SW1 BUTTON (RED)

-20-
Replacement Parts And Service
OVER FIRING OF BURNER
Never "over re" adjusting gas pressure or drilling out the orice to increase Btu/hr above nameplate specications.
Over ring can cause permanent damage to rebox and deterioration of parts and void warranty.
MAINTAINING CORRECT PILOT-FLAME
The pilot ame must be checked during initial installation and annually by a qualied technician. This appliance
uses ame rectication technology. If the pilot ame is turned down too low, the ame sensor may not detect the
pilot ame and the pilot may not stay lit. Do not turn down the pilot ame. The ame sensor rod may be coated
with debris after a few months of use. It is important to clean the ame sensor rod using emery cloth if ame
rectication problems are encountered after use for a few months. Environmental factors beyond the control of
Breckwell can cause ame rectication concerns.
Part No. Description Qty.
610963 Rear Tray Assembly 1
610964 Front Tray Assembly 1
28909 Pass Through Cover 2
80775 High Temp Light Assembly 2
80766 G9 Base Bulb 2
28832 Burner Plate 1
88307 Light Gasket 2
88309 Pass Through Gasket 4
610708 Glass Frame Assembly 1
29197 Control Cover Tray 1
80709 Blower (Optional) 2
28815 Valve Mounting Bracket 1
88323 Shielding Gasket 1
81289 Sit Ignition Control Module (IFC) 1
80850 IFC On/Off Switch Harness, 8” 1
80649 Ground Wire 1
80773 IFC Fan/Light Harness, 11.50” 1
C42373 Rocker Switch 1
610686 Junction Box Assembly 1
610563 Burner Assembly 1
81297 Gas Pilot 1
80762 Sit Transmitter (Remote) (Sit #0.584.042 or .040) 1
80763 IFC Wire Harness No CPI SW SIT 0.584.924 1
Table of contents
Other Breckwell Indoor Fireplace manuals
Popular Indoor Fireplace manuals by other brands

Westfire
Westfire WF 37 Installation manual and operating instructions

Bionaire
Bionaire BFH5000 instruction manual

Regency
Regency Excalibur P90 Brochure & specs

kozy heat
kozy heat 911-XXL Installation & operating manual

Dungs
Dungs MPA22 operating instructions

Travis Industries
Travis Industries 864 HO NB installation manual