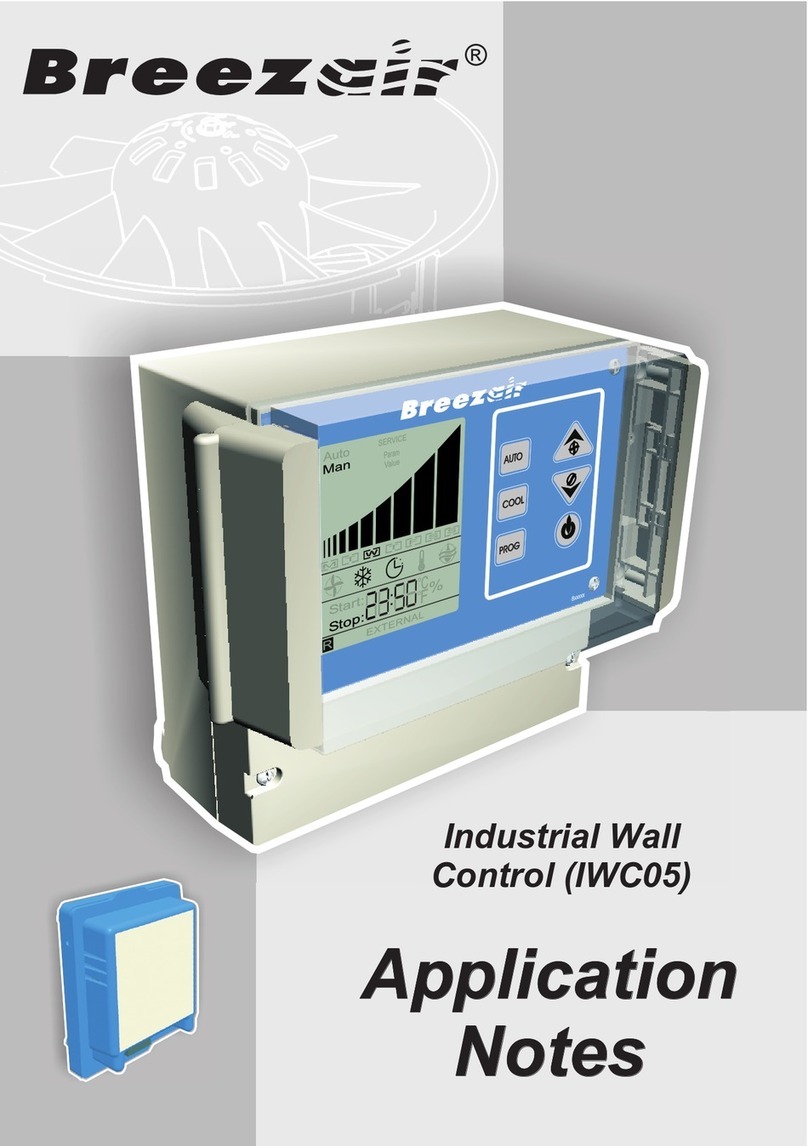
Breezair IWC 10 User manual

I n s t a l l a t i o n & O p e r a t i o n M a n u a l
®
I n d u s t r i a l W a l l C o n t r o l - I W C 1 0
( i n c o r p o r a t i n g S m a r t H u b a n d F a u l t I n d i c a t i n g f e a t u r e s )

SAFETY
Please read this manual carefully. Your failure to do so could result in injury to you or damage to the cooler and
property.
Disconnect electrical power at the fuse or circuit breaker box and turn OFF the isolating switch located inside the cooler
on the Electronics Module before you begin to install the cooler.
Always comply with your local laws and safety regulations.
This appliance is not intended for use by persons (including children) with reduced physical, sensory or mental
capabilities, or lack of experience and knowledge, unless they have been given supervision or instruction concerning use
of the appliance by a person responsible for their safety.
Children should be supervised to ensure that they do not play with the appliance.
KIT COMPONENTS
1
Safety / Kit Components
1
ILL1344-A
ITEM
1
2
3
4
5
6
7
8
9
SEELEY
PART #
833880
833897
828527
828534
802329
114064
833873
805306
804644
VENDOR
PART #
-
-
-
614-047
-
-
-
-
-
QTY
1
1
1
1
2
1
1
1
1
DESCRIPTION
SENSOR CABLE ASSY 20M 6 PIN BOTH ENDS
DATA CABLE ASSY 40M 4PIN BOTH ENDS
INSTRUCTIONS - INSTALLATION & OPERATION
INSTRUCTIONS - APPLICATION NOTES
CABLE GLAND M16*1.5
INDUSTRIAL WALL CONTROL “IWC10”
SENSOR TEMP & HUMIDITY INDUSTRIAL
SCREW PAN PHIL 6ABX1” ZNP
WALL PLUG YELLOW 5MM
10 Bush 303-0740
Bush 802336 1
CABLE GLAND
ITEM 10
Locknut 303-0775
Locknut 802343
1

REMOTE SENSOR LOCATION
avoid
Mount the remote sensor in a central
location within the room or area where you
want the temperature to be controlled.
When selecting a position for the remote
sensor the following locations:
Direct sunlight
Outside walls
Direct heat sources
Direct cool air sources.
Mounting the sensor in a position near any
heat source or cool air source will affect its
ability to control temperature.
1
Locating the Sensor & Wall Control
2
3
ILL1331-A
INSTALLING THE WALL CONTROL
Install the Wall Control about 1.5 metres
above the floor in a place that is easily
accessible.
WARNING! -
WARNING! -
WARNING! -
DO NOT USE EXTERNAL
INPUTS FOR FIRE ISOLATION FOR THE
COOLER.
ALL CONNECTIONS TO BE
HIGH QUALITY INTEGRITY
CONNECTIONS
DO NOT RUN
COMMUNICATION CABLES WITH HIGH
VOLTAGE POWER CABLES.
2
ILL1337-A
4
ILL1336-A
To mount the Wall Control, follow template
and dimensions on the under-side of the
Wall Control box. Fix securely to the wall
(Fig 4 & 5).
Connect the cables to the Wall Control
through the glands supplied
5
ILL1338-A

1
Installing the Wall Control
3
Connect cables, plugs and glands as indicated in the wiring
diagram (Fig 6 & 7).
Cables are to be a maximum of 1.5mm insulated for use
with the input and output control signals.
2
The Breezair communications cable (4 way plug) and the
Breezair sensor cable (6 way plug) will pass through
one gland. See Fig 6 for recommended cable entry
utilisation.
both
SYSTEM INPUTS:
SYSTEM OUTPUTS (each up to 40 mA, 40Vdc):
J4 - 1 Safety OFF Turns cooler OFF regardless of other external or internal commands.
- 2 F1 Selects fan speeds 1 or 2 or 3 using binary code from external source.
- 3 F2 As above.
- 4 Pump Turns pump ON and OFF from external source.
- 5 Com Common, negative.
J5 - 1 H.E. Enables humidity sensing to over-ride external commands and control pump.
- 2 Spd Cont Speed Control. 0-10Vdc, Off - Speed 10.
- 3 HD Disables humidity control of pump in Auto mode when inside T low and H low.
- 4 ON/OFF Remote location system ON/OFF switch (eg: Exit doorway, office or similar).
- 5 Com Common, negative.
J6 - 1 On System ON or OFF.
- 2 Fan Fan ON or OFF.
- 3 Pump Pump ON or OFF.
- 4 Ext External control active or in-active.
- 5 Com Common, negative.
J7 - 1 Fault Fault or No fault in system.
- 2 S.Hum Serial humidity % signal.
- 3 S.Temp Serial temperature signal.
- 4 Drain Signal appears after drain valve open and time delay expired.
0C
Terminals Legend
6
7
ILL1333-C
Sensor Cable
(6 Wire Flat)
Comm. Cable
(4 Wire Flat)
LOGIC INPUT
CONNECTION
All Commons connected
to Negative
4-32VDC
<=12mAmps D2
R1
Input
Common
D1
OUTPUT
CONNECTION
All Commons connected
to Negative
Common
Output
R3
D3
Q1
R2
Q2
NPN
RES-NTC
1.4-32VDC
<=40mAmp
(C) SEELEY INTERNATIONAL
AUSTRALIA 2004
J6
J4
J7
J5
J3
J2
RJ11 RJ12
CPMD
COMMS
REMOTE
SENSOR
OUT
OUT
IN
IN
1
2
3
4
5
1
2
3
4
5
Com
Com
In1
In2
In3
In4
Com
In5
In6
In7
In8
Com
Out1
Out2
Out3
Out4
Out5
Out6
Out7
Out8
Safety Off
F1
F2
Pump
H.E
HD
Spd Cont
ON/OFF
On
Fan
Pump
Ext
Fault
S.Hum
S.Temp
Drain
1
2
3
4
5
1
2
3
4
5
1
2
3
4
5
858746-A
ANALOGUE
INPUT
Common
20k
Spd Cont
Speed Control
Analogue Input
0 - 10Vdc
Off - Speed 10

DRYING TIME ENABLE
Parameter B6 allows the choice of enabling or disabling the Pad Drying Cycle.
Access to the B6 parameter is achieved in the usual way for accessing all parameters; i.e. within 4
minutes of mains power being switched on, the Parameter programming mode must be entered
by pressing and holding the Auto button for at least 4 seconds; then while still holding the
Auto button, press and release the Down arrow and release the Auto button.
The display will show and (fig 10). Pressing the Down arrow again repeatedly
will cycle through the parameters until you reach and . Press Auto to accept
this screen and it will now show and . The value of 00 shows the Dry Cycle is
disabled - this is the factory default setting. Press the Up arrow to change the value to
to enable the Drying Cycle.
When enabled, the Drying Cycle will commence every time the clock stops the cooling system, in
Auto mode only. In the Drying Cycle the fan continues to run on speed 1 for 60 minutes to dry the
cooling pads, and the pump does not run.
Param A1.00
Param B6.00
Value B6:00
B6:01
1
Getting Started
4
Example of a 2 Hub
project that contains
Hub 0 & Hub 1.
PROG
AT POWER UP
1.
SERVICE
SERVICE
2.a
2.b
3.
When power is first applied to the Wall Control there are 3 possible responses depending on what
is connected to the Wall Control.
When the Wall Control is connected directly to an ICON cooler without any Hubs,
either on a single cooler installation or during individual cooler commissioning on a
multiple cooler installation, the Wall Control will display (Fig. 8).
Press and hold the button until the word disappears from the
display. This will take approximately 7 seconds. This transfers ICON specific
operating requirements to the Wall Control. To complete this transfer see
“CHANGING SPEED TABLE FOR COOLERS” below.
When one TBA cooler is connected the Wall Control will display the OFF state.
When a Hub (Kit #105949) is connected the Wall Control will display the OFF
state.
When one or more Smart Hubs (Kit #111070) are connected the Wall Control will
display the identity of every Smart Hub as it is detected by the Wall Control during
initialization (Fig. 9). The Wall Control starts at Hub 0 and can count up to
Hub 9, ie. a total of 10 hubs.
When the Wall Control has completed it's initialising function and the last Hub is displayed, press
the button to accept. The Wall Control now enters the OFF state and will display just the day
and the time.
Upon restoration of the power following subsequent power failures, the Wall Control will initialise
each time, but will automatically revert to the "OFF" state no changes have occurred
to the number of Smart Hubs.
ICON
provided that
CHANGING SPEED TABLE FOR COOLERSICON
When the Wall Control is connected to an ICON evaporative cooler a different speed table must
be selected. If this speed table is not selected the cooler will not operate at its optimum
performance. To select the correct speed table follow these steps:
1/
2/
3/ Value A2:00
4/ A2:01
5/
Within 4 minutes of mains power being switched on at the Electronics Module
must be entered by pressing and holding the button for at least 4
seconds, and then while still pressing the button press and release the button.
Press the button until the display shows and Fig. 11).
Press the button. The display will now show and (Fig. 12).
Press the button until the display shows and (Fig. 13).
Press the button to accept this new value, then after a delay of a few seconds press the
button
Parameter
Programming Mode
The
display will show and (Fig. 10).
(
Param A1:02
Param A2:00
Value
.
AUTO
AUTO
AUTO
AUTO
AUTO
AUTO
SERVICE
8
9
Param
Param
Value
Value
10
11
12
13

1
Getting Started
5
TURNING THE COOLER ON
PREPARING TO START
The Wall Control can be switched ON and OFF by pressing the button. The Wall Control will
remember the setting from when the cooler was last used.
Whenever you select AUTO mode or COOL in MANUAL mode, the cooler will take a few minutes
to start as it fills with water and saturates the cooling pads. This time will be decreased if the tank is
full or the cooler has only recently been turned OFF. During this time the and symbols
will flash on the display (Fig 16).
Start:
SETTING THE CLOCK
!
1/
2/
3/
Note:
IMPORTANT Please read the application notes before programming this controller.
When the Wall Control is first installed, it will show four flashing clock digits. Set the clock on the
Wall Control before proceeding with any other programming. Programming can only be done with
the Wall Control switched OFF.
Hold the button down for over 3 seconds, until the symbol flashes.
Press the button to accept. Four digits will show with the first digit flashing (Fig 14).
Use the and buttons to change the first digit and the button to enter. Repeat this
for each digit to set the 24-hour time. The (Monday) symbol will then start flashing (Fig 15).
After replacing the battery reset the clock time.
4/ Use the and buttons to change the day of the week and press the button again to
enter the OFF mode. While the cooler is OFF it will display the current time and day.
PROG
AUTO
AUTO
M
AUTO
MANUAL MODE
Man
AUTO MODE
Auto
With the Wall Control switched ON, press the button until is shown on the display
(Fig 17).
You may then press the button to switch between COOL and VENT (where fresh air is
being delivered but not cooled).
To increase or decrease the fan speed, press either the or button.
To select the AUTO mode press the button until is shown on the display (Fig 18).
In AUTO mode the cooler will remember the last setting used and try to achieve this setting.
Operation may vary depending on ambient conditions. Pressing the and buttons will have
no effect when the cooler is in AUTO mode. (See Temperature Control Program on the following
page).
When COOL or VENT has been selected, the Wall Control will maintain a constant fan speed as
shown by the bar graph on the display.
AUTO
COOL
AUTO
Man
Auto
Start:
Man
M
14
15
16
17
18

16
Programming Wall Control
PROGRAMMING THE WALL CONTROL
The Wall Control can only be programmed in the OFF mode. If the control is ON, press the
button to enter OFF mode.
To enter the PROGRAM mode hold the button down for over 3 seconds. The symbol will
start flashing. Use the and buttons to scroll through the clock, temperature, humidity,
time and drain signal delay programs and press the button to select any one.
24 HOUR CLOCK PROGRAM
To program the clock press the button when the symbol is flashing (Fig 19).
Refer to page 5 for instructions on setting the current time and day.
PROG
AUTO
AUTO
TEMPERATURE CONTROL PROGRAM
The Wall Control can monitor the room temperature and adjust the operation of the cooler to hold
a set temperature. To do this, hold down the button for over 3 seconds to enter PROGRAM
mode. Press the or button until the symbol is flashing, then press the button.
or will flash. Select the desired temperature scale using the and buttons and press
.
The current temperature setting will flash (Fig 20).
Adjust the setting to the desired temperature level by pressing or holding down the and
buttons.
Press the button to accept the temperature setting and return to the OFF mode.
When the cooler is in AUTO mode, it will adjust the fan speed and cooling to achieve the new
temperature setting. The MANUAL mode ignores any temperature settings.
PROG
AUTO
AUTO
AUTO
C
0
F
0
HUMIDITY CONTROL PROGRAM
Humidity Control has 2 modes.
:
1/
A1:02 Param
2/ B6:0X Param
B5:00 Param B4:00
Param
3/ B4:00 Value
B4:01 Value B4:01 Param
4/
MODE 1:
MODE 2:
Humidity Mode 1 and Mode 2
The default mode provides a maximum Humidity Limit per the set point within the Wall
Control. In this mode the AUTO control function will respond to the temperature sensor to achieve
comfort conditions in the building according to the temperature set point in the Wall Control. However
the pump will stop (and therefore no moisture is added) when the room humidity rises to the humidity
set point in the Wall Control.
The alternative mode allows the cooler to attempt to satisfy both temperature and humidity,
with humidity over-riding temperature when the temperature is satisfied but the humidity is not.
The choice of which mode to use is made by changing parameter B4. See instructions below. In the
MANUAL mode no humidity control is enabled.
Disconnect power to the cooler, then reconnect power. Then, while the IWC10 is in the OFF state,
press and hold the button for 3 seconds and continue to hold whilst you press the button.
Display will now show and .
Press the button. Display will now show and . Press the button again.
Display will now show and . Press the button again. Display will now show
and .
Press . Display will now show and . Press the button. Display will now show
and . Press to set the value. Display will show and .
Press the button to enter the OFF state. Full humidity control is now enabled according to Mode
2 above.
To change between
AUTO
AUTO
AUTO
19
0
C
20

17
Programming Wall Control
When full temperature and humidity control is selected via parameter B4, the cooler will
function as follows in AUTO: When the room temperature falls below the temperature
set point the fan and pump will normally stop. But if the room humidity is below the
humidity set point, they will remain ON to add moisture to the room to satisfy the
humidity requirement. The function of the fan and pump under this condition is shown in
Fig. 22.
The external humidity and temperature sensor requires air moving freely through
the sensor housing to maintain accurate readings of the temperature and humidity. The
sensor should be periodically checked to ensure that the air inlets are not clogged up by
dust. If they are, try to clear the dust away but do open the sensor housing.
NOTE:
PLEASE ALSO REFER TO APPLICATION NOTES PAGE 2 FOR COMPLETELY
DISABLING HUMIDITY CONTROL.
not
22
PUMP
STATUS
FAN
STATUS
Room Humidity
minus Set
Humidity (%RH)
-20% or less
-10% to -20%
0% to -10%
+10% to 0%
ON
OFF OFF
ON
ON
Speed 3
Speed 2
Speed 1
PROG
7-DAY TIMER PROGRAM
1/
2/
3/
4/
5/
6/
7/
8/
In order for the cooler to run according to the global settings on any day, the day must be
programmed ON, and the start and stop times must be set to 00.00.
The cooler can be programmed to operate at specific times throughout the week.
The cooler must be in the OFF mode to be programmed. If the cooler is ON, press the button to
enter OFF mode. Hold down the button for over 3 seconds to enter PROGRAM mode.
Press the or buttons until the display shows and is flashing (Fig 23).
Press the button to select the TIMER mode. (Monday) will flash. Select the day you
want to program, using the and buttons and press .
Use the and buttons to select or and press the button (Fig 24).
If you select you can either select another day to program, or exit PROGRAM mode by
pressing the button. If you select , will show with the first digit flashing. Refer to
page 5 for instructions on how to set the time for the cooler to start operating.
Repeat this process when shows to set the time for the cooler to stop operating.
After setting the time, or will flash. Refer to page 6 for instructions on how to set the
temperature and humidity settings for the cooler operation.
Once you have set the humidity, either select another day using the , and buttons or
press the button to exit PROGRAM mode.
When the cooler is on, the display will show a rectangle around all days which have a TIMER
program (Fig 25).
On days in which no settings are programmed, the cooler may run according to the global settings
programmed into the IWC10. In order for the cooler to be run in AUTO on any day, the day must be
programmed ON.
When any day is programmed to OFF, the cooler will run in AUTO. The cooler can be run in
MANUAL at any time, regardless of the programs set.
not
AUTO
AUTO
Start:
M
AUTO
Start:
Stop:
AUTO
C
0
F
0
Start:
F
23
24
%
21
HUMIDITY CONTROL PROGRAM (continued)
:
1/
2/
3/
4/
To change the Humidity Set Point
Hold down the button for over 3 seconds to enter PROGRAM mode.
Press the or button until the symbol is flashing, then press the button. The
current humidity setting will flash as two digits on the clock (Fig 21).
Adjust the setting to the desired humidity level by pressing or holding down the and
buttons. Press the button to accept the humidity setting.
Press the button to return to the OFF state.
AUTO
AUTO
PROG
F
Auto
25

DRAIN SIGNAL DELAY PROGRAM
The cooler will periodically drain itself of water in order to ensure clean operating conditions.
When it does, it sends a signal allowing a scavenger pump or other control to begin operating
(terminal J7-4). The drain delay feature allows time for the drained water to travel from the cooler
to the scavenger pump before the scavenger pump begins to operate.
To set a delayed drain mode, enter the PROGRAM mode and press the or button until
flashes on the clock display (Fig 26).
Press the button to confirm.The current time delay will flash as four digits on the clock.
Adjust the time delay using the and buttons up to a maximum of ten minutes. Press the
button to lock the time delay and return the cooler to the OFF mode. Disconnect and
reconnect the power for this change to take effect.
AUTO
AUTO
18
Programming Wall Control
LOW BATTERY WARNING
The "Battery Low" message will appear on the Wall Control screen when power resumes
after a very long power OFF period in which the battery voltage has fallen below a functional
level. (Fig. 29). In this event, Then start the plant. The plant will not re-start
until the clock has been reset. It may not be necessary to change the batteries at this time.
Should the "Battery Low" message appear repeatedly after short duration power failures, then
replace the battery.
first reset the clock.
The battery:
IT IS NOT A POWER FAILURE BACK-UP
BATTERY AND IS NOT ON TRICKLE CHARGE.
The lithium battery in the Wall Control is a long life device that powers the real-time
clock only, during prolonged power "Off" periods.
Under normal conditions the battery should
have a life of about 10 years.
EXTERNAL CONTROL
Some of the functions of the Wall Control can be controlled by an external device, such as a PLC
or Building Management System. In this case will show on the display (Fig 27). In
EXTERNAL mode, all temperature and timer settings will be ignored. Humidity settings will be
ignored unless the external system enables humidity control. External systems may also control
the fan speed of the cooler. The bar chart on the Wall Control will show the equivalent speed
setting.
External systems may remotely switch the cooler OFF. If the cooler is in the Safety Off mode,
then, the symbol will be displayed (Fig 28). When the symbol is displayed, the IWC will
not respond to any other control input.
SAFETY OFF
EXTERNAL
R
EXTERNAL
26
27
28
29
7-DAY TIMER PROGRAM (continued)
Any day that has start and stop times set and the day switched ON will show brackets for the
day. Any day that has start and stop times set and the day switched OFF will show no brackets.
Any day that has start and stop times set to 00.00 will show no brackets.
These programs will be ignored if the cooler is in MANUAL or EXTERNAL mode during the
programmed times. This feature allows different settings for every day - start/stop, temperature &
humidity.
REMOTE ON/OFF
This input is used to turn the cooling system ON or OFF from a remote location.
The input must be in the form of a momentary pulse (provided by the installer) for both ON and
OFF functions. Any repeated pulses received within 2 seconds of the first pulse will be ignored.
When a pulse is received during cooling system operation (whether AUTO or MANUAL) the
control will save the current state of the system and the system will enter a stand-by state and
shut down.
When the next pulse is received at Input 8, the cooling system will start up again in the same
mode in which it was last shut down.
In the event that the cooling system is re-started manually during the standby state, the next
pulse received at input 8 will shut down the system into standby mode.

SERVICE MODE - SINGLE COOLER INSTALLATION
SERVICE
SERVICE
SERVICE
When a fault has been recognised by the Wall Control the word appears on the screen
(Fig 30). When is displayed it may be necessary for you to phone your Service Agent.
However, before doing so, turn the Wall Control OFF. You will notice a number flashing at the
bottom of the screen (Fig 31). This number indicates the cause of the fault. See “Service Guide
CMPD” for fault codes.
Please write this number down, then push the button to turn the cooler back on. If after a short
time is again shown on the display, turn the Wall Control OFF and check if the flashing
number is the same. If so check the following possible problems. However, we do suggest that any
checks be carried out by an authorised dealer or service agent.
Check that the water supply tap to the cooler is turned on.
Check that your local water supply is on.
If your cooler is fitted with a drain valve, check that the drain is not blocked.
Check to ensure that the temperature and humidity sensor is plugged in.
Check the interconnecting cable for faults.
If the problem continues contact your Dealer or Service Agent. You will need to quote the flashing
number that you wrote down.
If ‘02’ is displayed
If ‘04’ is displayed
If ‘09’ is displayed
19
Programming Wall Control
SERVICE MODE - MULTIPLE COOLER INSTALLATION
This section ONLY applies to any new installations commissioned since January 2006, in
which IWC05’s (part no. 111087) and Smart-Hubs (part no. 111070) are installed. Installations
prior to that date do NOT have any fault indicating features when multiple Breezair coolers
are connected to original hubs.
Identification labels “IWC05” and “Smart-Hub” are attached to the new devices.
SERVICE
!
When a fault occurs in any cooler, the word appears on the Wall Control display (Fig.
32). The system will continue normal operation.
In cases where Smart-Hub kits are installed (and only in such cases) the fault location can be
viewed by either pressing the button or switching the wall control OFF (Fig. 33). The fault
location display shows the Hub number (0 - 9) and the cooler number (1 - 5) on that hub.
If more than one fault exists, pressing the or buttons shows other fault locations.
Fault codes that identify the nature of the fault will not be shown; however the nature of the
fault can be found at the faulty cooler(s) on their CPMD Electronic Module(s).
Note
DRAIN MODE
Pressing the and buttons at the same time will open the drain valve and empty the water
in the tank. The Wall Control will display on the screen. Draining the water will leave the tank
clean and dry until it is next used. The drain valve will remain open until the cooler is re-started.
POWER FAILURES
Momentary power failures (less than 1
second) may restart automatically when power is restored.
Any power failure of any duration will shut down the air cooling system and will require manual re-
start. Power failure means a complete loss of mains power to the air cooling system. It may be
caused by external factors over which you have no control, or it may be caused during the
commissioning procedure by the deliberate action of the technician.
Whatever caused the power failure, and whatever mode the cooling system is set to (MANUAL or
AUTO), the system will require manual restarting.
EXTERNAL control mode will
resume automatically after power has been restored if the external commands are present. The
lithium battery will maintain the clock during prolonged power OFF periods.
REFER TO COOLER MANUAL FOR TROUBLE SHOOTING GUIDE.
PROG
SERVICE
SERVICE
F
Auto
SERVICE
SERVICE
Man
33
32
31
30

1
Exploded View of the Wall Control
10
34
ILL1342-B
8
No. Description Seeley Part no.
1
2
3
4
5
6
7
PCBB Terminal
Ribbon Cable ASM
PCBA Control
LCD Assembly
Plate Facia
Window Facia Screen
Decal Facia
670164
833941
670157
841328
822327
859029
841311
8Battery +3V CR 2032
(stamped on battery)
(replacements not
supplied by Seeley)
60m.
CPMD
HUB 1
HUB 2
SENSOR
Industrial Wall
Industrial Wall
Control
Control SENSOR
CPMD
CPMD
CPMD
20m.Any length
OK up to combined
length of 140m from
IWC to CPMD.
Any length
OK up to combined
length of 200m from
IWC to CPMD.
60m.
CPMD
CPMD
CPMD
CPMD
CPMD
max 40m !
max 40m !
max 40m !
max 40m !
max 40m ! max 40m !
max 40m !
max 120m !
max 120m !
max 140m !
!
!
!
!
!
!
!
!
!
!
!
!
!
!
Coolers are supplied with 20m data cable in
accessories kit
Hubs are supplied with 20m data cable in kit.
Industrial Wall Controls (IWC) are supplied with 20m
Sensor cable in kit
60m Sensor cable on reel available
20m data cable in re-sealable bag available
40m data cable on reel available
60m data cable on reel available
80m data cable on reel available
100m data cable on reel available
4-way in-line joiners available to extend data cable to
maximum lengths shown on diagram
Data cables may be shortened or lengthened (to
maximums shown), using ONLY correct RJ
connectors and crimping tools
Cables supplied by Breezair are 26AWG, 7/016, 4
core & 6 core flat
ALWAYS route cables at least 300mm away from
regular power cables and high power machines.
Cross over power cables at right angles.
Where maximum data cable and sensor cable lengths
are exceeded, or cables are not routed in accordance
with our recommendations Seeley technical support is
not available and the product warranty may be voided.
Breezair Control System
Cable Lengths
Industrial Wall Control
824130-A 0703
MASTER
MASTER
MASTER
SLAVE 1
SLAVE 1 SLAVE 2
SLAVE 3
SLAVE 3
SLAVE 2
Any length
OK up to combined
length of 200m from
IWC to CPMD.

828527-J AU 1011
ILL1331-A
S
E
E
L
E
Y
S
E
R
V
I
C
E
Evaporative Cooling Control Manual. Seeley International Pty Ltd, Adelaide, South Australia. ACN 054 687 035.
As the policy of the company is one of continuous product improvement, all specifications are subject to change without notice.
Table of contents
Other Breezair Controllers manuals
Popular Controllers manuals by other brands
Duff-Norton
Duff-Norton TracMaster 6415 Series manual
YASKAWA
YASKAWA MP2000 Series troubleshooting manual
Alpha Group
Alpha Group OutBack Power FLEXmax Series owner's manual
Delta Electronics
Delta Electronics Programmable Logic Controller DVP-EH2-L instruction sheet
Cypress
Cypress F2MC-8FX Series Setup guide
Bollfilter
Bollfilter 2200 Operating and installation instructions
