Breville Cli-Mate CLI-AH300 User manual

Ultrasonic Humidification System
Instruction Book – CLI-AH300
by

2
CLI-MATE
RECOMMENDS
SAFETY FIRST
At Cli-Mate we are very
safety conscious. We design
and manufacture consumer
products with the safety of you,
our valued customer, foremost
in mind. In addition we ask
that you exercise a degree of
care when using any electrical
appliance and adhere to the
following precautions.
IMPORTANT
SAFEGUARDS
READ ALL
INSTRUCTIONS BEFORE
USE AND SAVE FOR
FUTURE REFERENCE
•All components need to
be installed in accordance
with the user manual
instructions for correct
performance of unit.
•This appliance should be
used in conjunction with
a safety switch.
•This appliance is not
intended for use by
persons (including
children) with reduced
physical, sensory or
mental capabilities,
or lack of experience
and knowledge, unless
they have been given
supervision or instruction
concerning use of the
appliance by a person
responsible for their safety.
2 Cli-Mate Recommends
Safety First
6 Components
7 Functions
11 Care & Cleaning
12 Troubleshooting
Contents

3
•Do not operate any
appliance with a damaged
cord or plug or after the
appliance malfunctions, or
has been damaged in any
manner.
•If the supply cord
is damaged, it must
be replaced by the
manufacturer, its service
agent or similarly
qualified persons in order
to avoid a hazard.
•Children should be
supervised to ensure that
they do not play with the
appliance.
•Do not use appliance for
other than intended use.
•Do not disassemble, repair
or re-form the unit, it may
cause injury, fire or other
malfunctions. A qualified
service agent must make
all service adjustments.
Unauthorised
disassembling of the
product will void
the warranty.
•Unplug from outlet when
not in use and before
cleaning. Never plug in
or unplug unit with wet
hands.
•Do not use unit outdoors
or expose to greasy
or damp environments.
•Keep the rear air inlet
and outlet free from air
blocking materials such
as clothing, plastic bags
or papers. Air flow
is required for the unit
to operate effectively.
•Place unit on a flat
location at least 30cm
from wall or other
appliances.
•When the unit is in
operation, keep all body
parts, jewellery, hair and
loose clothing away from
the openings
•Unit must be placed
on a stable flat surface to
reduce possible excessive
vibration and noise.

4
•Keep the unit away
from fire, flammable gas,
combustible products
or vapours, and corrosive
substances.
•Do not operate the unit
without filters.
•When transporting the
air purifier, always hold
the handles on the side
of the unit.
•To protect against
fire, electric shock and
personal injury, do not
immerse cord, plugs,
or appliance in water
or other liquid.
•Do not place on or near
a hot gas, electric burner
or heating appliance.
•Check voltage to be sure
that the voltage indicated
on the nameplate agrees
with your voltage.
IMPORTANT
SAFEGUARDS
FOR ALL
ELECTRICAL
APPLIANCES
•Unwind the power cord
fully before use.
• Do not let the power
cord hang over the edge
of a bench or table, touch
hot surfaces, or become
knotted.
• To protect against electric
shock do not immerse
power cord, power plug
or appliance in water
or any other substance.
• This appliance is not
intended for use by
persons (including
children) with reduced
physical, sensory or mental
capabilities, or lack of
experience or knowledge,
unless they have been
given supervision or
instruction concerning
use of the appliance
by a person responsible
for their safety.

5
•Children should be
supervised to ensure
they do not play with
the appliance.
•It is recommended
to regularly inspect the
appliance. Do not use the
appliance if power cord,
power plug or appliance
becomes damaged in
anyway. Return the
entire appliance to
the nearest authorised
Cli-Mate Service Centre
for examination and/
or repair.
•Any maintenance other
than cleaning should
be performed at an
authorised Cli-Mate
Service Centre.
•This appliance is
recommended for
household use only.
Do not use this appliance
for anything other than
its intended use. Do not
use in moving vehicles
or boats. Do not use
outdoors. Misuse may
cause injury.
•The installation of
a residual current
device (safety switch)
is recommended to
provide additional safety
protection when using
electrical appliances.
It is advisable that
a safety switch with
a rated residual operating
current not exceeding
30mA be installed in the
electrical circuit supplying
the appliance. See your
electrician for professional
advice.
WARNING
Fully unwind the cord
before use.
FOR HOUSEHOLD USE ONLY
SAVE THESE INSTRUCTIONS
6
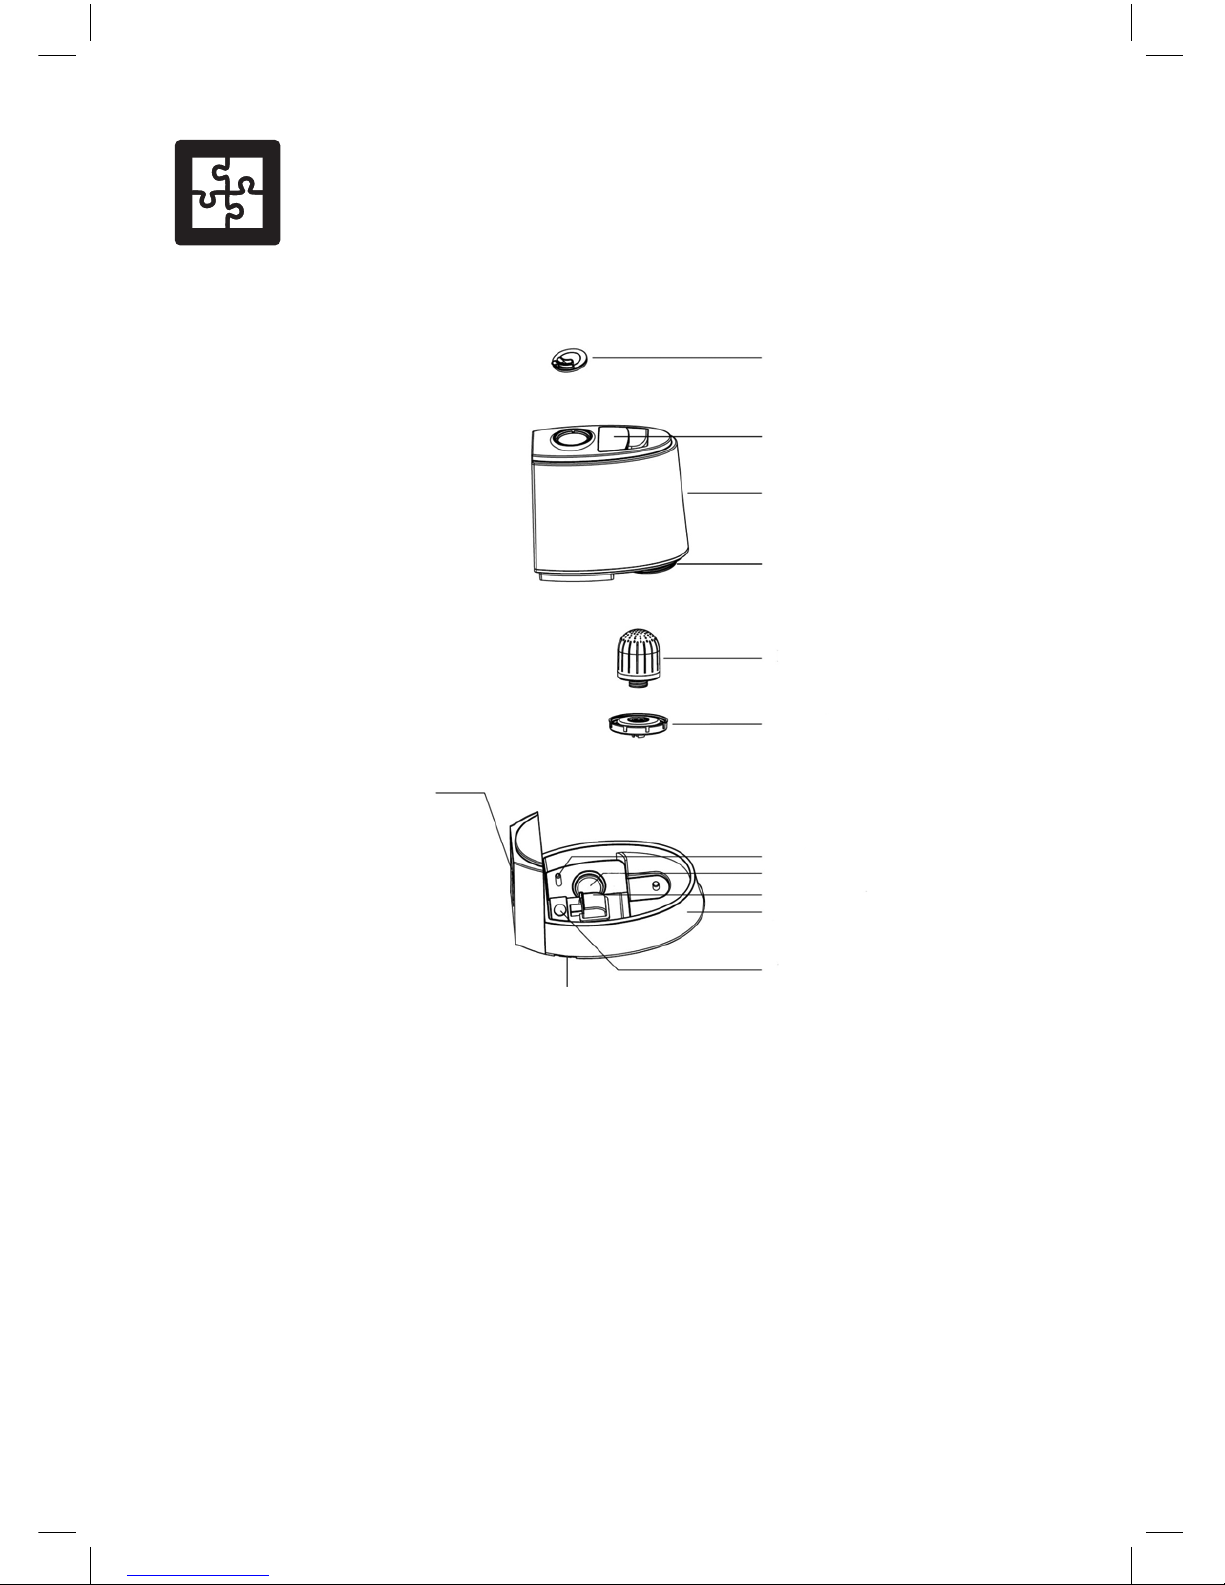
Components
A
B
C
D
E
F
H
I
J
K
L
A. Mist Nozzle
B. Carry Handle
C. Water Tank
D. Water Inlet
E. Conditioning Cartridge
F. Water Tank Cover
G. Control Panel
H. Reed Switch
I. Transducer
J. Air Outlet
K. Base
L. Indicator Light
M. Scent Pad Tray
Electrical Requirements:
Australia / New Zealand 240V / 230V 50Hz
Due to manufacturing alterations product may vary slightly from the pictured.
M
G

7
Functions
LCD DISPLAY PANEL
A. Mist Level
B. Timer (hour/s)
C. Current Humidity Level (%)
D. Humidity Level Set
E. Refill Water
F. Anion Function
G. On/Off
H. Current Room Temperature (Celsius)
REMOTE CONTROL
A. Power On/Off
B. Mist Level
C. Humidity Level
D. Anion
E. Timer
A
D
B
E
C
HB
C
D
EFG
A
WARNING - KEEP BATTERIES
OUT OF REACH OF CHILDREN
Swallowing may lead to serious injury in as little
as 2 hours or death, due to chemical burns and
potential perforation of the oesophagus.
If you suspect your child has swallowed or
inserted a button battery immediately call the
24-hour Poisons Information Centre on
13 11 26 for fast, expert advice.
Examine devices and make sure the battery
compartment is correctly secured, e.g. that the
screw or other mechanical fastener is tightened.
Do not use if compartment is not secure.
Dispose of used button batteries immediately
and safely. Flat batteries can still be dangerous.
Tell others about the risk associated with button
batteries and how to keep their
children safe.

8
Functions
USING THE REMOTE CONTROL
Before using the remote control,
remove the battery isolating slip by
pulling the slip away from the remote
control. The remote control buttons
operate in the same way as those on
the tower heater control panel. Your
remote control includes 1 x CR2032 3V
Lithium battery.
To replace the battery open up the
battery compartment at the back of
the remote by forming a good grip of
the remote, pushing the small arched
groove to the right and simultaneously
pushing out the battery compartment
cover by pushing the rectangular
groove outwards (See Fig. 1a).
Insert the battery paying attention
to the polarity (+ and -). Reinsert the
battery compartment into the remote
control ensuring that the + symbol is
facing upwards when inserted (See Fig.1b).
Fig. 1a
Fig. 1b
9
OPERATION INSTRUCTIONS
1. Locate a flat stable location and plug the
power cord into the appropriate electrical
outlet.
2. Take off the mist nozzle and remove the
water tank from the base and turn water
tank upside down.
3. Unscrew the water tank cover and fill water
tank with clean water. Important: Temperature
of the water should not exceed 40°C.
4. Replace the water tank cover and position
the water tank back onto the base.
5. Place the mist nozzle back into place.
6. Switch on the machine by pressing the
“ON/OFF” button. The LED display will
illuminate and display current temperature
and humidity and begin to work on default
setting (Mist Output Level 2).
Settings
7. To set MIST LEVEL: Press the MAX/MIN
button to adjust the mist level from level
1, level 2 or level 3.
8. ANION function: Press the ANION button
to turn on the Anion function.
The Anion function will begin to generate
and send negative ions into the air which
helps to purify the air.
NOTE
1st press: Anion ON and LED light ON
2nd press: Anion OFF and LED light ON
3rd press: Anion ON and LED light OFF
4th press: Anion OFF and LED light OFF
The default setting is Anion On and LED light
ON, the unit will return to default setting after
the 4th press.
9. To Set HUMIDITY LEVEL: The LED
display shows the current humidity level (%)
To set desired humidity, press ‘HUMIDITY’
button once and ‘Co’ will flash on the
LCD screen indicating Humidity has not
yet been set. Press again to set the desired
humidity level from 45% RH to 75% RH,
increasing by 5% RH increments with each
press. After desired humidity level has been
selected the unit will return to showing
current humidity and the humidity icon
will flash on the LCD screen.
NOTE
If the desired humidity is less than the current
humidity, the machine will enter sleep mode.
10.To Set TIMER: To set automatic off timer,
press TIMER button. Press to select the
desired running time – 1 hour to 12 hours.
Unit will automatically switch off once
selected off time duration has lapsed.
The screen will display remaining running
time by the hour.
11. When the water levels in the water tank
is low, the unit will sound an alarm for
3 seconds and then stop operation. The
indicator light in the water tank will
illuminate red and display the refill water
symbol before displaying the Power Off
symbol. Follow steps 2–5 to continue.
10
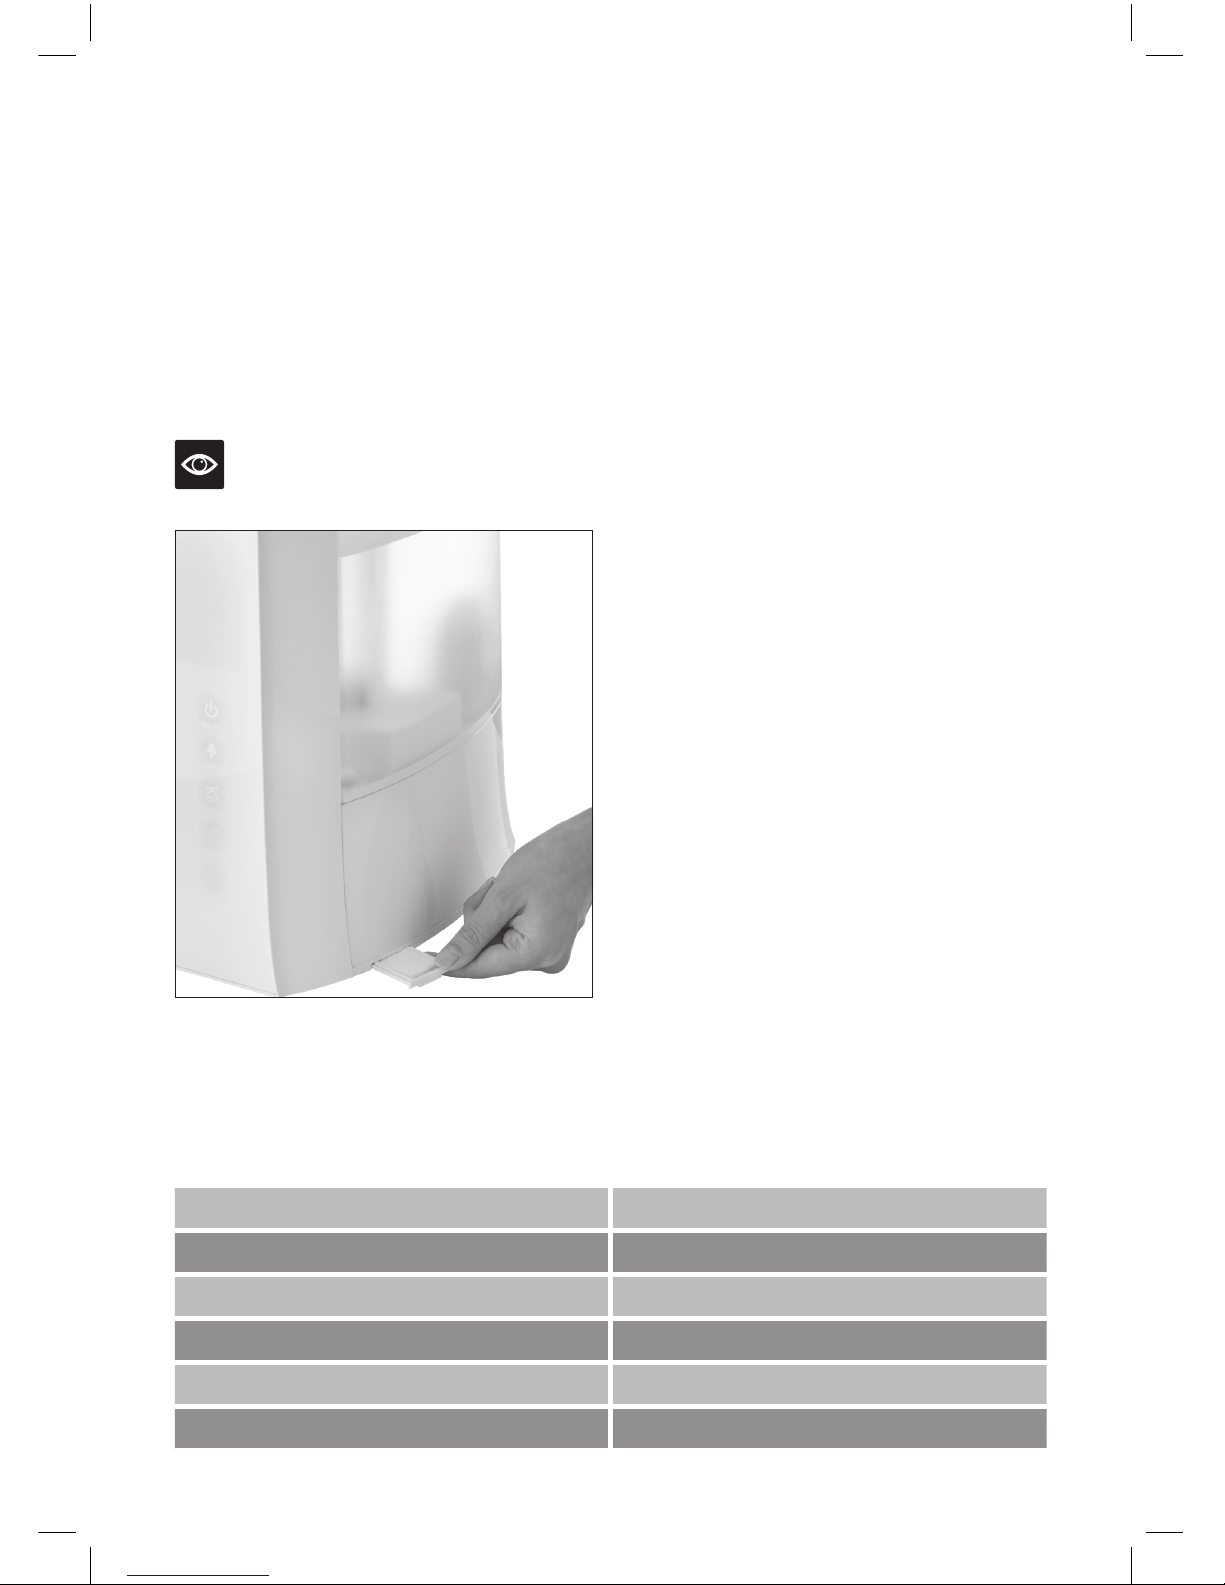
SCENT PAD
The unit includes a scent pad, which can
be used to send light aroma into the air.
To use pull out the scent tray located near
the base on the right hand side of the unit
(see Fig 2.)
Add a few drops of aroma essential/oils on the
pad. Place the pad back into the tray and close.
NOTE
Aroma/essential oils not included.
Fig. 2
PRODUCT SPECIFICATIONS ULTRASONIC HUMIDIFICATION SYSTEM
MODEL CODE CLI-AH300
POWER SUPPLY 220-240V 50/60Hz
POWER CONSUMPTION Mximum 0W
WATER TANK CAPACITY 5 Litres
EVAPORATION RATE 300ml/h (on level 3)
NOISE LEVEL 35dB
11
Care & Cleaning
• Do not rinse the unit or immerse the unit
in water.
• Do not use detergent to clean any water-
containing parts of the humidifier.
• Do not use abrasive cleaners or brushes
to clean.
• Clean the surface of the device with
a soft cloth.
SCALE
To reduce the possibility of scale (white mineral
deposits) build-up on the surface of the water
basins, inner surface of the water tank and
transducer, the following is recommended:
• Change the water daily.
• If possible, use distilled or demineralised
water.
• Drain, clean and thoroughly dry all parts
of the unit before putting it into storage.
CLEANING THE TRANSDUCER
If mineral deposits are evident on the
transducer, clean the surface with a soft, clean
cloth and a small amount of undiluted white
vinegar. To remove mineral deposits, put 5–10
drops of undiluted white vinegar on the surface
of the transducer. Leave to soak for 2–5 minutes.
Use a cotton swab to gently loosen up the scale
of the surface. Rinse the transducer with clean
water and wipe clean.
IMPORTANT
Be careful not to damage the Transducer
during cleaning. Do not use any metal to scrape
it or touch with bare fingers.
CAUTION: Before carrying out cleaning or maintenance of the product, always turn off and unplug
the cord from the power socket.
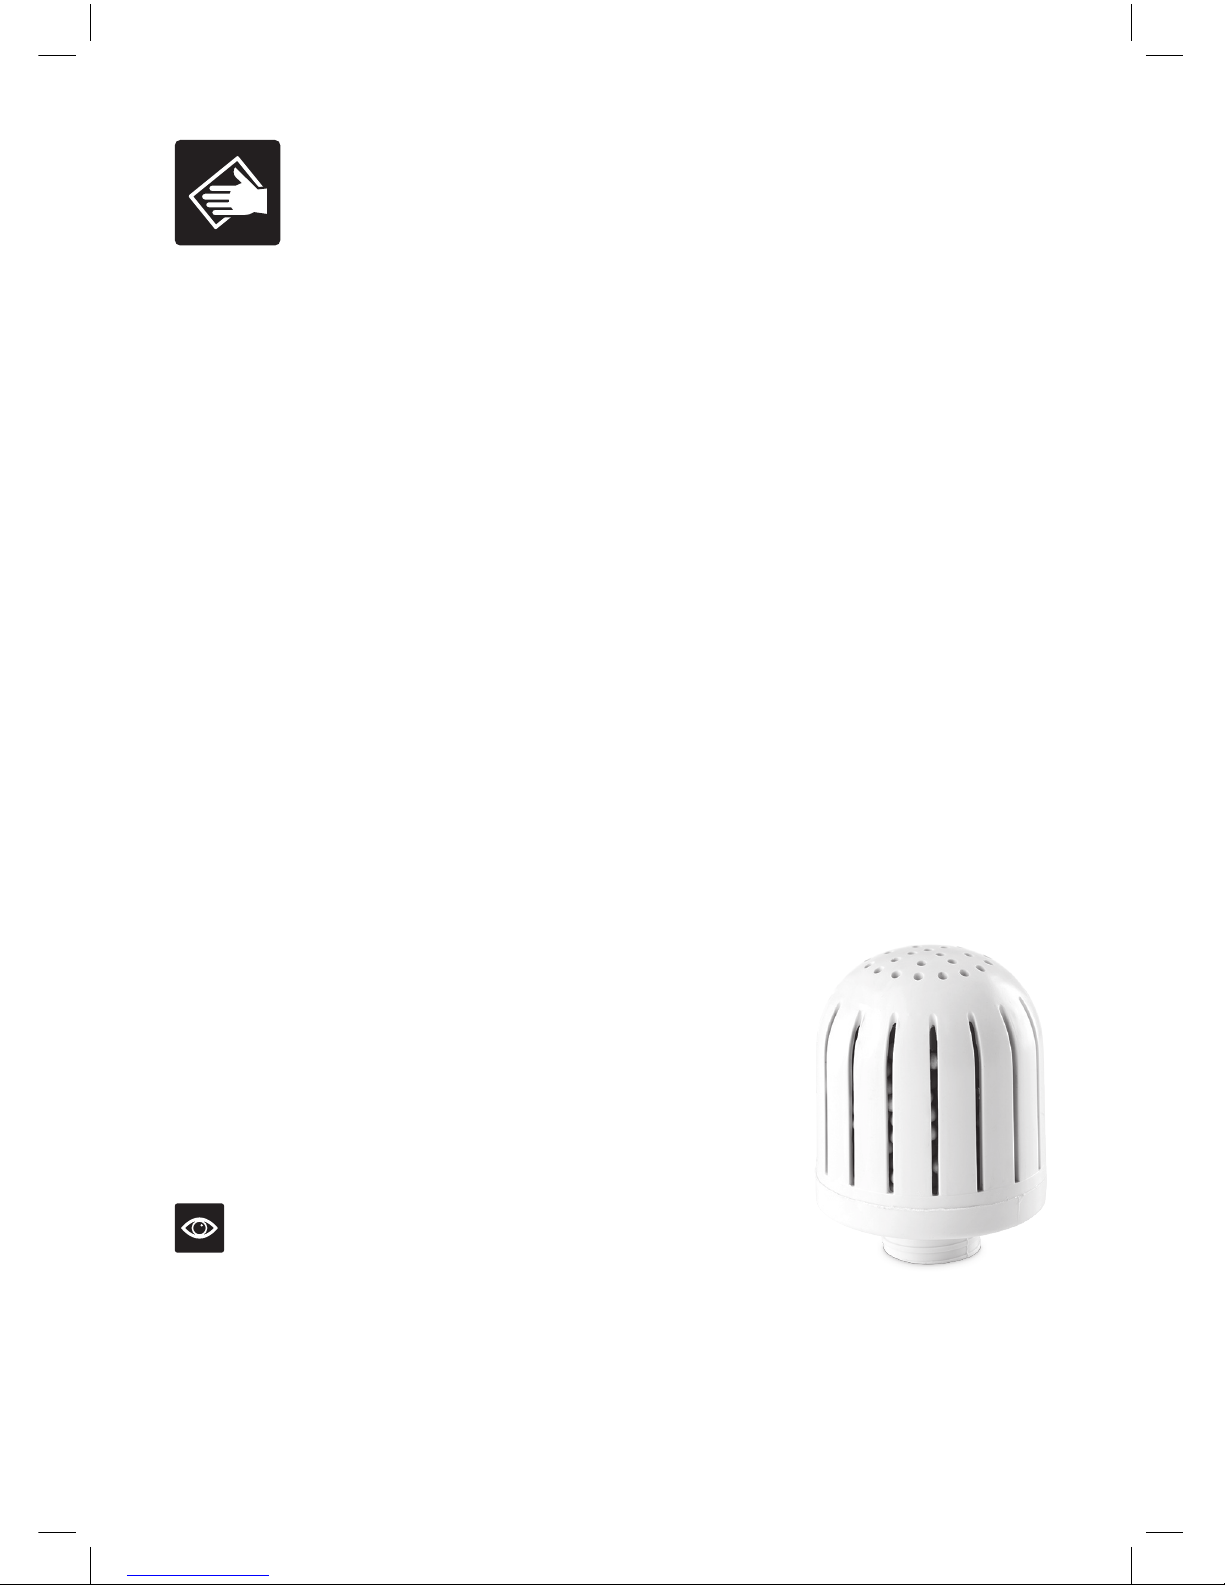
CHANGING THE CONDITIONING
CARTRIDGE
It is advisable to change the conditioning
cartridge every 1000L, or every 12 months.
To change:
1. Take off the mist nozzle and remove the
water tank from the base and turn water
tank upside down.
2. Unscrew the water tank cover.
3. Unscrew the water tank cover from
the conditioning cartridge and dispose
of the old cartridge.
4. Screw the new cartridge onto the water
tank cover.
5. Replace the water tank cover with the
cartridge attached and position the water
tank back onto the base. Re-instate the
mist nozzle.
Replacement cartridge code:
CLI-AH300-RF

12
PROBLEM POSSIBLE CAUSES EASY SOLUTION
No Power. • Unit is not plugged into
wall socket. • Check connection to wall socket.
Little or no mist
is produced. • No water in water tank. • Fill water tank.
• Scale build up on transducer. • Clean scale build up as per
instructions.
• Water is too dirty or kept for
too long in the tank. • Clean water tank and refill with
fresh clean water.
Abnormal noise. • Very low water levels
in water tank. • Refill water tank.
• Unit is on an uneven surface. • Reposition the unit to a stable
flat surface.
White dust accumulation. • Hard water used. • Follow instructions on page 5.
• Ensure that no foreign objects have
fallen into the unit via the air outlet.
• Filter needs cleaning.
Troubleshooting

13
Notes

14
Notes

15
Notes

Breville is a registered trademark of Breville Pty. Ltd. A.B.N. 98 000 092 928.
Copyright Breville Pty. Ltd. 2018.
Due to continued product improvement, the products illustrated/photographed
in this brochure may vary slightly from the actual product.
CLI-AH300 ANZ – A18
Web: www.breville.co.nzWeb: www.breville.com.au
Australian Customers
Phone: 1300 139 798
New Zealand Customers
Phone: 0800 273 845
Breville Customer Service Centre
Table of contents
Other Breville Humidifier manuals


Popular Humidifier manuals by other brands


Wine Guardian
Wine Guardian Humidifier Installation, operation and maintenance guide

Venta
Venta LW60T WiFi user manual

Neptronic
Neptronic SK300 series Installation instructions and user manual

Vitek
Vitek VT-2338 Manual instruction

Hunter
Hunter 31011 owner's guide

Timberk
Timberk THU UL 11 instruction manual