BrewTek ES18A User manual

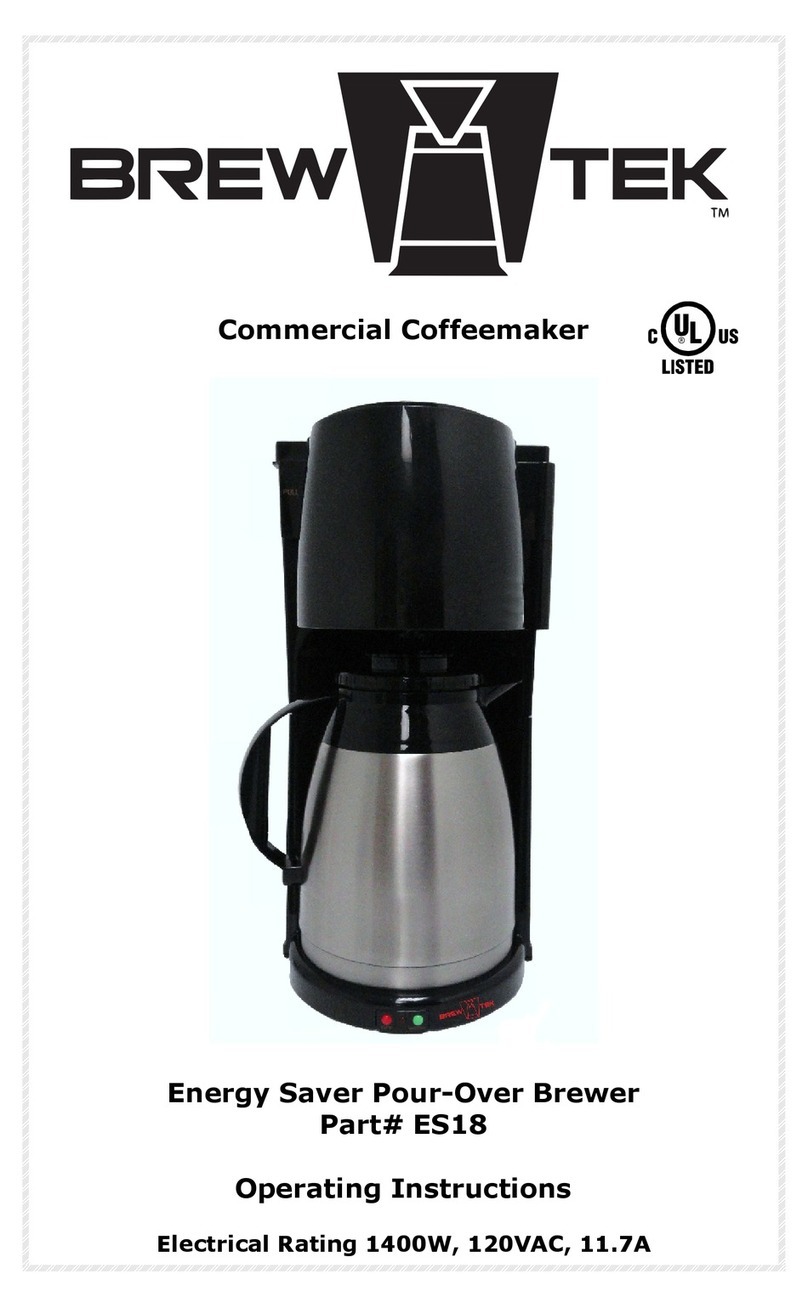
Commercial Coffeemaker
Energy Saver Automatic Brewer
Part# ES18A
Operating Instructions
Electrical Rating 1400W, 120VAC, 11.7A

IMPORTANT SAFEGUARDS
When using electrical appliances, basic safety precautions should always be
followed to reduce the risk of fire, electric shock and/or injury to persons, including
the following:
1. Read all instructions before operating or using the appliance.
2. Do not touch hot surfaces. Use handles and knobs.
3. To protect against electrical shock, do not place cord, plugs or
appliance in water or other liquid.
4. Close supervision is necessary when any appliance is used by or
near children.
5. Unplug from outlet when brewer is not in use and before cleaning. Allow to
cool before putting on or taking off parts and before cleaning the appliance.
6. Do not operate any appliance with a damaged cord or plug or after the
appliance malfunctions or has been damaged in any manner.
7. Do not let cord hang over edge of table or counter, or touch hot
surfaces.
8. Do not place on or near a hot gas or electric burner or in a heated oven.
9. Do not move entire unit when appliance is on or when thermal carafe
contains hot liquids.
10. Do not use appliance for other than intended use.
11. WARNING: To reduce the risk of fire or electric shock, do not remove bottom
cover. No user-serviceable parts are inside. Repair should be done by
authorized personnel only.
12. Use on a hard flat level surface only to avoid interruption of airflow
underneath appliance.
13. Special instructions for the thermal carafe:
A. The thermal carafe is designed for use with this appliance only. It must
never be used in any other drip-type brewer, on range top or in a
microwave oven.
B. Do not set a hot thermal carafe on a wet or cold surface. Do not put
thermal carafe in water. Do not place on hot surface. Do not place in
dishwasher.
C. Do not use a cracked thermal carafe or a thermal carafe having a loose
or weakened handle.
D. Do not clean thermal carafe with cleaners, steel wool pads or abrasive
material. Do not place sharp or hard objects in the thermal carafe.
SAVE THESE INSTRUCTIONS
2

SPECIAL CORD SET INSTRUCTIONS
A 5 foot power-supply cord is provided to reduce the risks of becoming entangled
in or tripping over a longer cord. Extension cords are available and may be used if
care is exercised in their use. If an extension cord is used, the marked electrical
rating of the extension cord should be at least as great as the electrical rating of
the appliance, and the cord should be arranged so it will not drape over the counter
top or table top where it can be pulled on by children or tripped over.
This appliance has a grounded plug (3 prong). It is not polarized and can fit into an
outlet only one way. If it will not fit your outlet contact a qualified electrician. Do
not modify the plug in any way.
PRECAUTIONS
1. Do not place a cloth or otherwise restrict airflow beneath the brewer.
2. To avoid accidents, make sure thermal carafe lid is in “CLOSED” position during
brewing and while pouring; do not pour in the direction of people.
3. When pouring, hold thermal carafe by the handle only.
4. CAUTION: Burns may result from spilled, hot liquid and/or contact with hot
parts.
THERMAL CARAFE PRECAUTIONS
Your thermal carafe contains a vacuum-sealed stainless steel liner. Improper use
will damage the liner. Please follow these instructions:
1. Clean inside of carafe with lukewarm water. Turn carafe upside down and allow
to dry.
2. Never clean inside of carafe with a hard implement, scouring pad or other
abrasive cleaners; rinse only with water.
3. Never insert your hand into carafe for cleaning.
4. Never stir inside of carafe with a spoon or other utensils.
5. Never fill carafe to the rim. Fill to a maximum of one inch from the top of liner.
6. Before adding very hot or very cold liquid to carafe, first rinse with warm or cold
water, depending upon what is being prepared.
7. Never use ice cubes in carafe.
8. Never fill carafe with carbonated beverages.
9. Never drink directly from carafe.
IF SERVICE IS REQUIRED
Contact your distributor. To assist in serving you, please have the model number
(ES-18A), date of purchase, and serial number (if available) prior to calling.
3

INTRODUCTION
Your thermal carafe brewer brews fresh, filtered coffee in minutes. It can also
easily heat water for instant beverages. The thermal carafe contains a stainless
steel vacuum liner which delivers the best heat retention of all containers used with
drip brewers and allows the full flavor of the coffee to be retained.
PLUMBING CONNECTION
1. Place brewer on a solid flat surface near a water supply line. Plumb brewer in
to water supply using 1/4 inch copper or plastic tubing. Brewer should be
connected to COLD WATER LINE for best operation.
2. Water pressure should be at least 20 lbs. Flush water line before installing
brewer to remove any sediment from line.
3. The inlet water fitting is located on the right side of the brewer.
4. Check for leaks.
PREPARATION FOR USE
Before the first use, clean the thermal carafe and brewer by completing a brew
cycle as described below without using coffee or a coffee filter.
COFFEE PREPARATION
1. Plug into 120V outlet.
2. Before thermal carafe is placed on brew platform, pre-warm carafe by running
warm water through carafe. Open thermal carafe lid by turning it in the
direction of “OPEN” arrow and lifting off. In addition to preventing damage to
the liner, pre-warming the carafe will also help keep the coffee warmer longer.
3. Return lid to thermal carafe. To close lid, turn lid in direction of “CLOSE” arrow
until lid fits tightly on carafe. Return empty thermal carafe to brewing
platform. Be certain thermal carafe lid is in “CLOSED” position and is securely
in place during brew cycle.
4. Open filter basket by grasping basket handle and swinging outward. Insert a
filter into filter basket; assure filter fits snugly in basket. Use a fresh filter for
each carafe of coffee.
5. After placing ground coffee or tea into filter, return basket to closed position.
To assure safe operation, make sure basket is closed securely. The magnetic
latch will insure basket is in closed position.
6. With thermal carafe and basket securely in place, press green “BREW” button;
red LED will light. CAUTION: Brewer becomes very hot during brew cycle;
handle with extreme care as hot parts and escaping steam may cause burns.
7. The brew-through lid allows coffee to drip from brewer through closed lid.
When coffee has completely stopped dripping into thermal carafe and water
level indicator is empty, brew cycle is complete.
8. An audible “beep” tone (5 times) will signal when the brew cycle is complete.
Brewer will switch off automatically.
4

9. After coffee grounds have cooled, carefully open filter basket and discard used
coffee filter and grounds. To remove filter basket from brewer, grasp basket
handle and pull basket outward, and with basket in far right position, lift
basket up and remove from hinge.
10. The personal carafe has a brew-through lid which allows coffee to be poured
with the lid in the “CLOSED” position so coffee freshness and temperature can
be preserved. NEVER POUR LIQUID FROM THERMAL CARAFE UNLESS LID IS IN
“CLOSED” POSITION.
FOR MANUAL BREWING
When the normal water supply is not available: Open thermal carafe lid by turning
it in the direction of “OPEN” arrow and lifting off. Fill the thermal carafe with cold,
fresh water to within 1 inch of the rim. Open hinged water reservoir cover; pour
water into reservoir opening. Markings on water level indicator show amount of
water needed to make the desired number of cups of coffee. DO NOT EXCEED
THE 12-CUP LEVEL ON THE WATER LEVEL INDICATOR. Close reservoir cover.
Proceed with steps 2-10 as outlined above.
PAUSE & SERVE
This feature allows a cup of coffee to be poured before the brew cycle has finished.
Carefully remove thermal carafe, and the Pause & Serve feature will be
automatically activated, temporarily stopping the flow of coffee into the thermal
carafe. Return thermal carafe to platform immediately after pouring coffee, and the
brewing process will resume.
IMPORTANT: Carafe must be returned to its brewing position within 30 seconds to
prevent the filter basket from overflowing.
NOTE: Strength of coffee poured mid-cycle may vary from the finished brew.
CAUTION: During brew cycle, basket must be closed securely as basket in
improper position may cause hot water or coffee to overflow.
CLEANING AND MAINTENANCE
Daily
Always unplug brewer and allow to cool before cleaning or transporting. Wash filter
basket and carafe lid in hot, sudsy water. Rinse inside of thermal carafe with
lukewarm water. Wipe brewer and outside of thermal carafe with damp cloth and
dry. Never put brewer or thermal carafe in water or in the dishwasher. For hard to
remove stains, use a plastic mesh pad or a cloth dampened in vinegar. Do not use
metal cleaning pad or abrasive cleaners.
Monthly
Minerals found in water can clog brewer or reduce its efficiency. To prevent this use
Urnex Dezcal. Fill carafe with cold water, add Urnex Dezcal and stir. Pour mixture
info reservoir opening. Place empty thermal carafe (with lid securely closed) on
platform and press “BREW” button. After mixture has been cycled through, press
“OFF” button. Rinse by running 2 or 3 more brew cycles of plain water. Do not pour
any liquid other than cold tap water or Urnex Dezcal mixture into reservoir opening
when cleaning.
5

6
TROUBLESHOOTING:
Problem #1: Brewer takes long time to finish brew cycle (more than 9 minutes
and less than 20 minutes).
Possible Cause: Scale build-up in sprayhead and heater assembly.
Remedy: Follow monthly cleaning procedure on page 5.
Problem #2: Brewer takes more than 20 minutes to brew and some water
remains in the water reservoir.
Possible Cause: Scale build-up in sprayhead and heater assembly.
Remedy: Repeat monthly cleaning procedure twice or more until brewing
cycle time is less than 9 minutes.
Problem #3: After initiating brewing cycle, incoming water shuts down before
reaching upper level probes and brewing does not
commence. Possible Cause: Incoming water line problem.
Remedy: Check for restriction in incoming water, restriction in inlet valve,
or restriction in waterline.
FEATURES:
1. Maximum heater on time is 20 minutes. Heater will shut down after 20
minutes, thus preventing possible fire hazard.
2. Maximum fill time is only two minutes. Inlet valve only stays open for a
maximum of two minutes and shuts down, thus preventing excessive
flood condition.
3. Brew time of 90 seconds is provided. Brew time is the time it takes for coffee to
drain from the brew basket after brewing cycle is complete. The beeper will
beep after brewing cycle time and the rew time is expired, thus preventing user
being burned by hot coffee dripping from brew basket.
4. Auto shut-off feature always insures that the brewer shuts down after
brew cycle is complete and the brewer has beeped five times.
5. Visible red indicator light remains on during the complete brew cycle. In
addition, audible 5 beeps indicate the end of the brewing cycle. The user can
now safely remove the thermal carafe to serve coffee.
6. “Manual Brewing” can be used in the event water supply is not available.
Simply pour desired amount of water from 4 cups to 12 cups (level can be
monitored in sight gauge tube, located on left side of the brewer) and
press BREW button.
COFFEE AND TEA BREWING METHOD:
TO BREW COFFEE:
Please use 2 level tablespoons of ground coffee for each 5 oz cup of coffee. For
example use 24 level tablespoons of ground coffee to brew 12 cups of coffee.
TO BREW TEA:
Please use 1 level tablespoon of loose tea for each 5 oz cup of tea. For example
use 12 level tablespoons of loose tea to brew 12 cups of tea.

WARRANTY
BrewTek ES18A Brewers are warranted against defects in workmanship or
materials, under normal use, for 90 days from the date of purchase. Liability in all
events is limited to the purchase price paid and liability under the aforesaid
warranty is limited to replacing or repairing any part or parts which are defective in
material or workmanship, and returned to our factory, shipping cost prepaid. No
warranty expressed or implied, other than the aforesaid is made or authorized by
BrewTek. Prompt disposition will be made if item proves to be defective, within
warranty. Before returning any item, write or call the dealer, from whom the
product was purchased, giving model number, serial number, and date of
purchase, and describe the nature of the defect. If damage was incurred during
transit to you, file claim with the carrier.
7

BK130823B
Table of contents
Other BrewTek Coffee Maker manuals
Popular Coffee Maker manuals by other brands
Tchibo
Tchibo Qbo ESSENTIAL Original instructions for use and warranty
Krups
Krups Nescafe Dolce Gusto Genio 2 Series Get me started
U-Line
U-Line ULABACKBARCOFFEE2 user guide

Philips
Philips Cucina HD 7524/6 Service manual

Breville
Breville Coffee Express user manual
Kalorik
Kalorik USK TKM 1 operating instructions
