brilong CA20 User manual
1
Wire-free Camera
CA20
User Manual
September 2018
www.brilong.com
Based on app version: 3.1.10 (9.1)
DOC. version 0.11

ii
Copyright © 2018 Brilong CO. All rights reserved.
All trademarks and brands mentioned in this user manual are the property of their respective owners.
No part of this user manual may be reproduced, distributed, republished, downloaded, displayed, posted,
stored in a retrieval system or transmitted in any form or by any means without prior written permission from
Brilong CO.
Though Brilong CO. has made every effort to ensure the accuracy of this document at the time of publication,
Brilong CO. does not assume any liability or obligation for the use of the information provided in this
document. In addition, the information provided in this document is subject to change without notice.

iii
Table of Contents
OPERATING ENVIRONMENT...........................................................................................................................................4
CAMERA OVERVIEW ......................................................................................................................................................4
ACCESSORIES........................................................................................................................................................................ 4
INSTALLING THE CAMERA ..............................................................................................................................................5
STEP 1/6: CONNECT THE CAMERA TO THE ACCOMPANYING USB CHARGER....................................................................................... 5
STEP 2/6: TURN ON THE CAMERA. ........................................................................................................................................... 5
STEP 3/6: INSTALL,LOG IN THE BRILONG HOME APP &CREATE A ROOM. ......................................................................................... 6
STEP 4/6: CONNECT YOUR MOBILE DEVICE TO THE CAMERA........................................................................................................... 8
STEP 5/6: FULLY CHARGE THE CAMERA.................................................................................................................................... 11
STEP 6/6: INSTALL THE CAMERA TO THE PLACE YOU WANT TO MONITOR......................................................................................... 12
If you want to use the wall mount............................................................................................................................. 12
If you want to use the garden stake .......................................................................................................................... 13
USING THE BRILONG HOME APP..................................................................................................................................14
LIVE VIEW.......................................................................................................................................................................... 15
MENU PAGE....................................................................................................................................................................... 16
SETTINGS PAGE ................................................................................................................................................................... 17
Device Information ..................................................................................................................................................................17
Notifications.............................................................................................................................................................................17
Wi-Fi Reset...............................................................................................................................................................................17
Battery Life...............................................................................................................................................................................17
Awake Duration........................................................................................................................................................................17
IR Setup....................................................................................................................................................................................17
PIR Setup..................................................................................................................................................................................17
Flip Setup .................................................................................................................................................................................17
Time Zone ................................................................................................................................................................................18
Power Line Frequency..............................................................................................................................................................18
IMPORTANT SAFETY NOTICES AND WARNINGS ...........................................................................................................19
FCC STATEMENT...........................................................................................................................................................20
CAUTION........................................................................................................................................................................... 21

4
Operating Environment
Operating temperature range: -20 to 60 °C (-4 to 140 °F)
iOS: 8.0 or above
Android: 4.4 or above
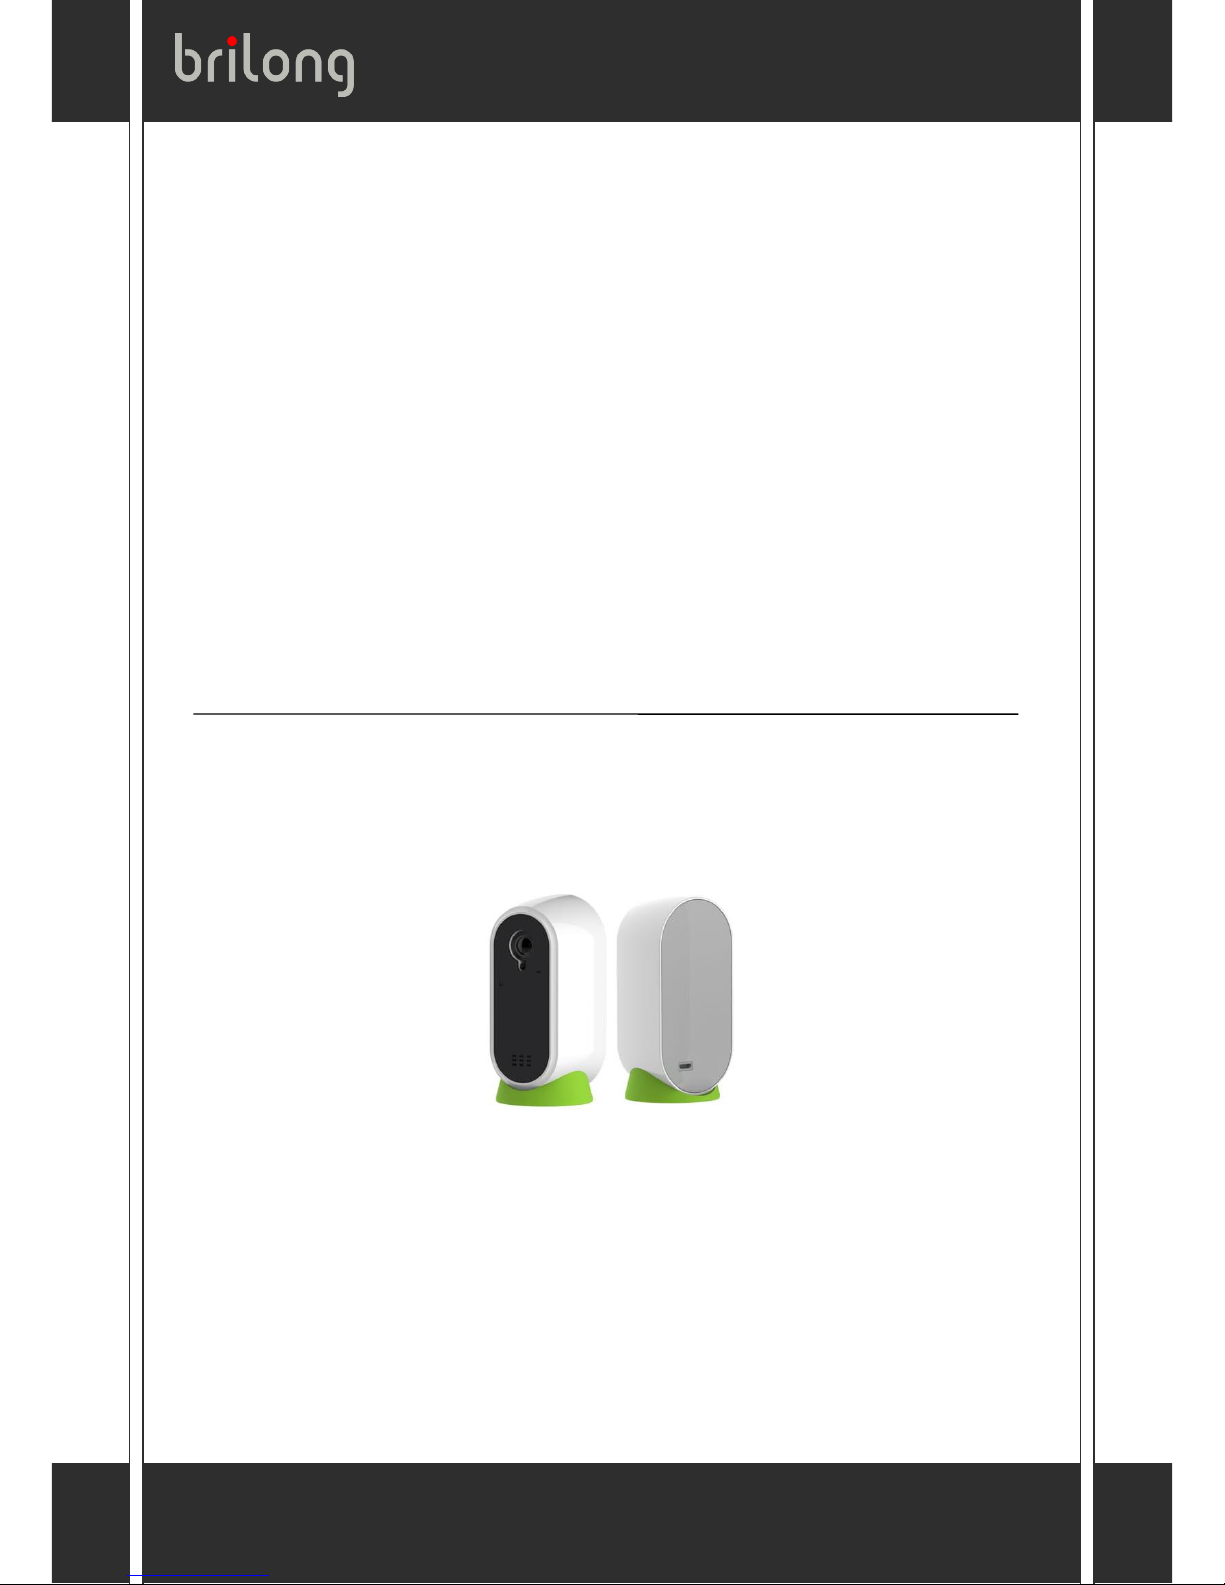
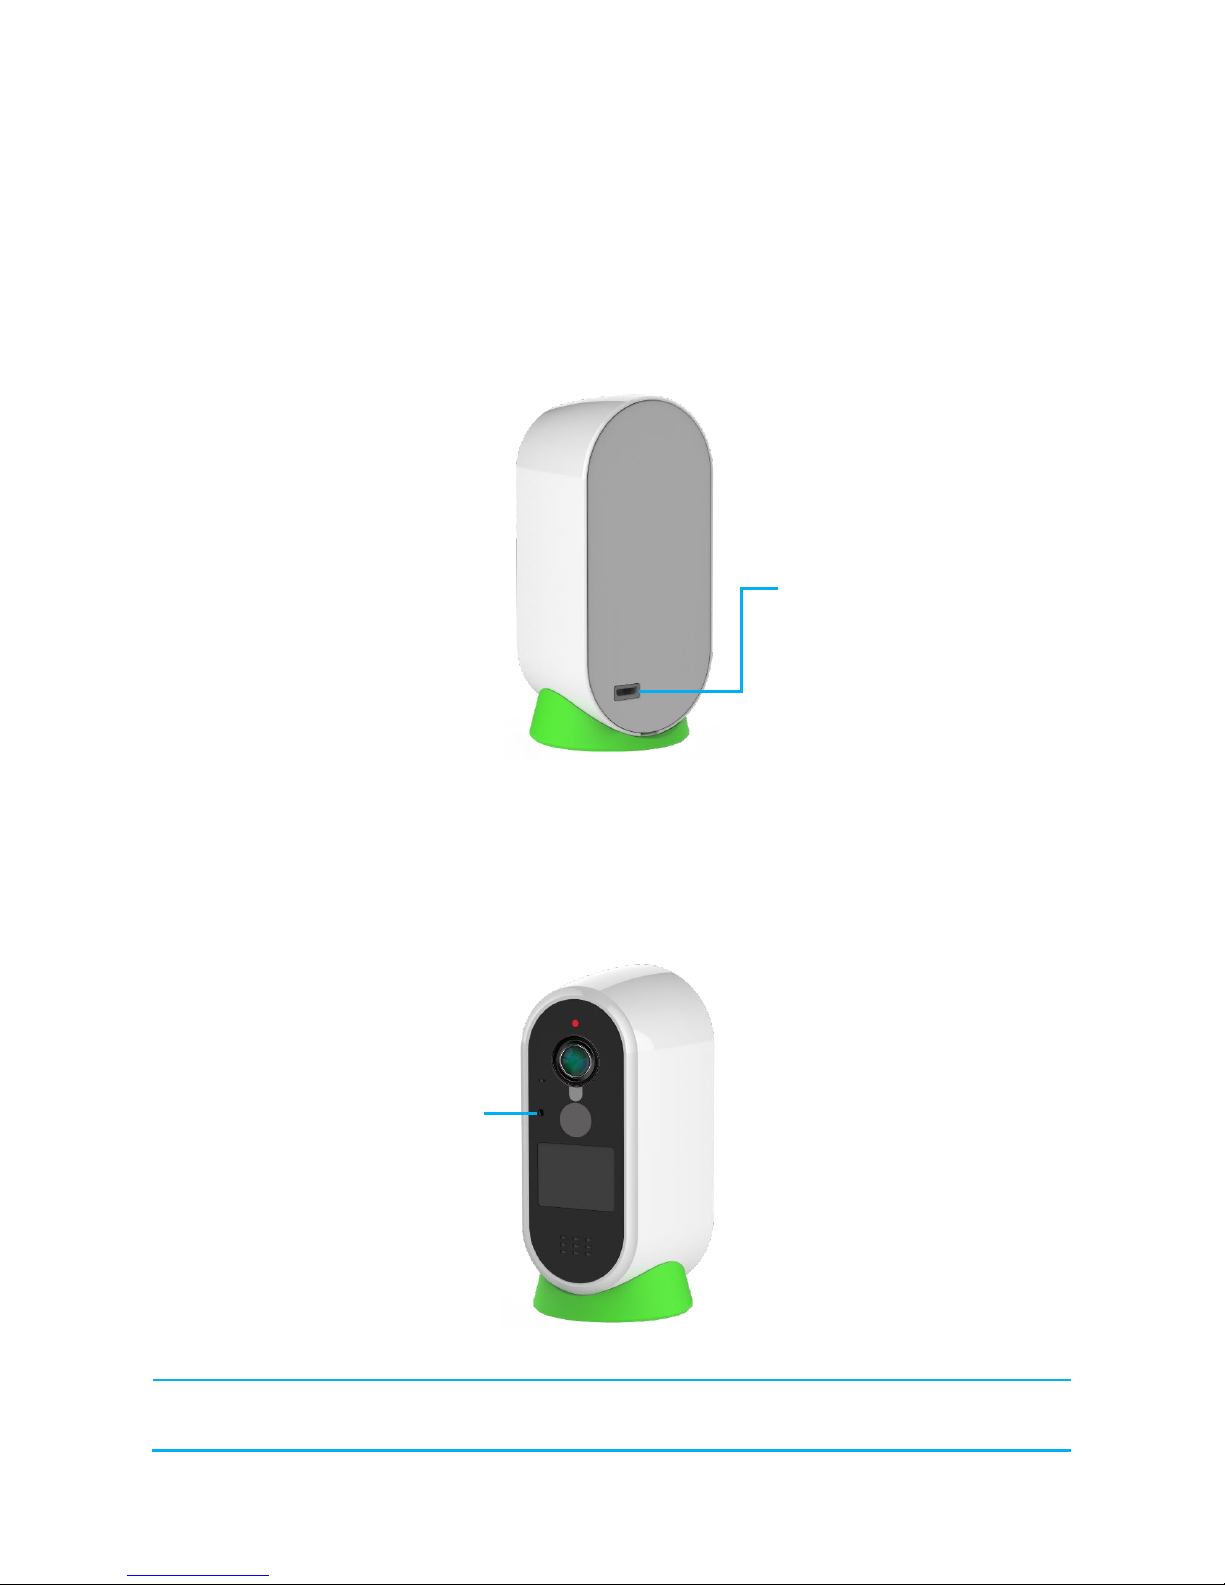
Camera overview
See the following images for the locations of main controls and components on the camera.
Accessories
The following two accessories are available for installing with the camera.
Wall mount:
Garden stake:
5
Installing the camera
Follow the steps below to install the camera before use.
Step 1/6: Connect the camera to the accompanying USB
charger.
Connect the camera to the accompanying USB charger via the accompanying Micro-USB cable to
make sure the camera has enough power during installation and setup.
Step 2/6: Turn on the camera.
1. Straighten an end of a paper clip.
2. Use the tip of a paper clip to hold down the reset button (for about 3 seconds) until the LED
indicator lights up in blue and starts flashing.
Note: If you want to shut down the camera at any time, use the tip of a paper clip to hold down
the reset button until the LED indicator goes off.
Micro-USB port
Reset button
6
Step 3/6: Install, log in the Brilong Home app & create a
room.
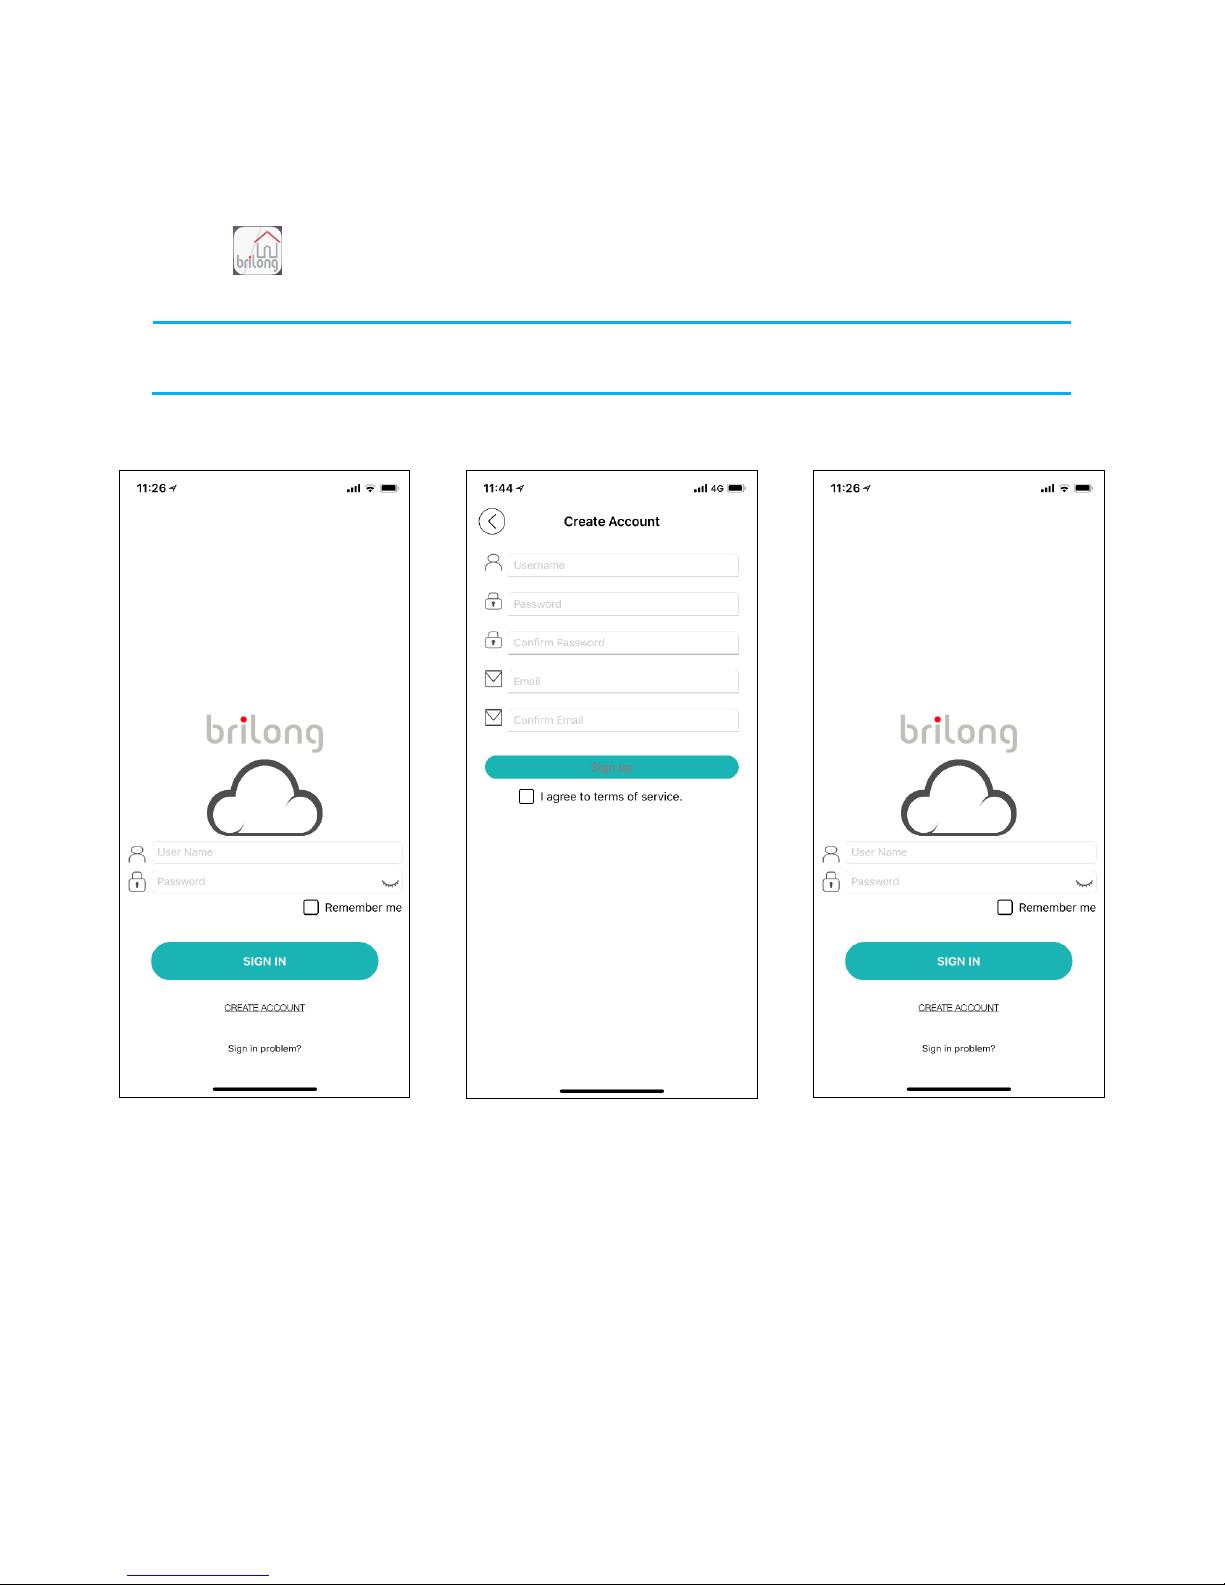
1. Go to the App Store or Google Play to download and install the Brilong Home app.
2. Tap to open the app.
3. Tap “SIGN IN” to log in the Brilong Home app with your Brilong account.
Note: If you do not have a Brilong account, follow the steps (1 and 2) below to register a new
account before login.
1
2
3
Enter your preferred username,
password, and email address.
Then tick to accept the terms of
service and tap “Sign up”.
Enter your username and password
to log in the app.

7
4
5
Enter the room name (and
descriptions; you can also take a
custom room thumbnail) and then
tap “Done”.
The room you added displays on
the home page.
If you want to add more
rooms, tap > Add/Edit
Room.
To add a device, tap >
Add Device.
8
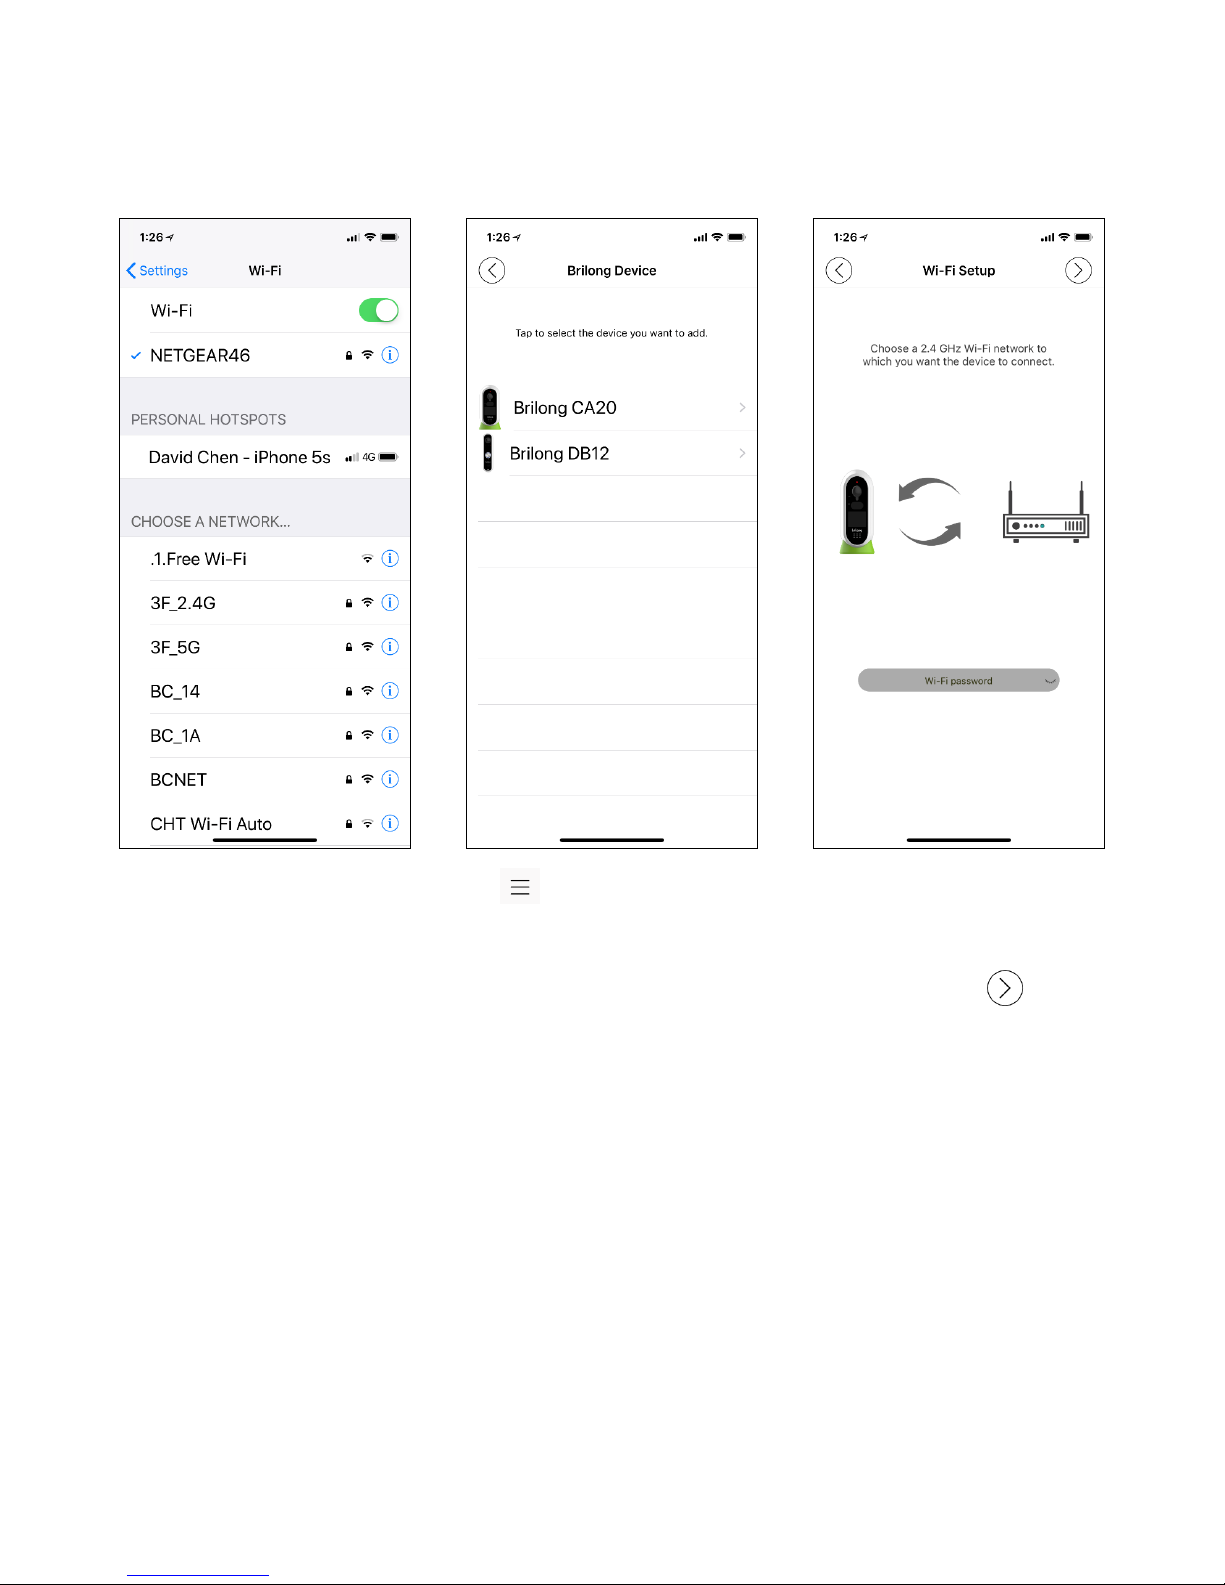
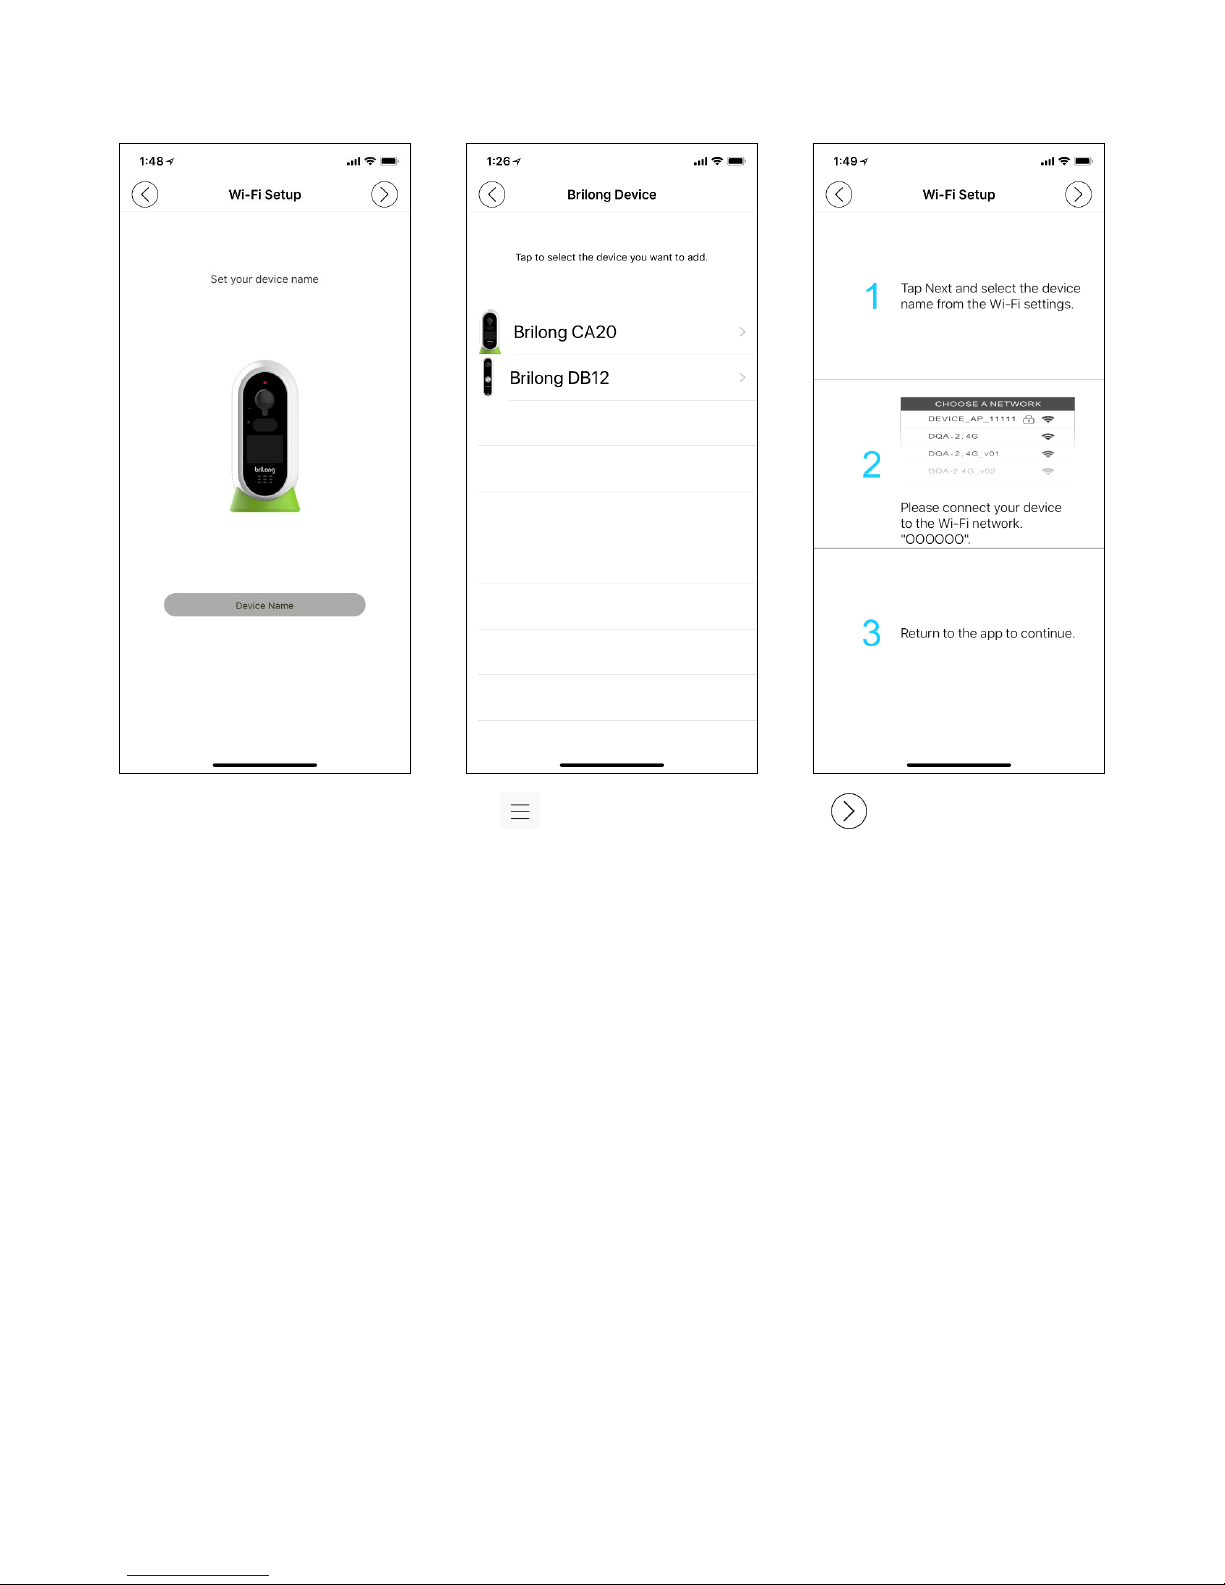
Step 4/6: Connect your mobile device to the camera.
1
2
3
Make sure your mobile device is
connected to a 2.4 GHz Wi-Fi
network. (This Wi-Fi network is also
to be used for connecting to the
camera later.)
Tap > “Add Device” >
“Brilong CA20”.
Enter the password of the 2.4 GHz
Wi-Fi network (you selected on Step
1) to which your mobile device is
connected. Then tap .
9
4
5
6
Enter the device name.
Tap > “Add Device” >
“Brilong CA20”.
Tap .
10
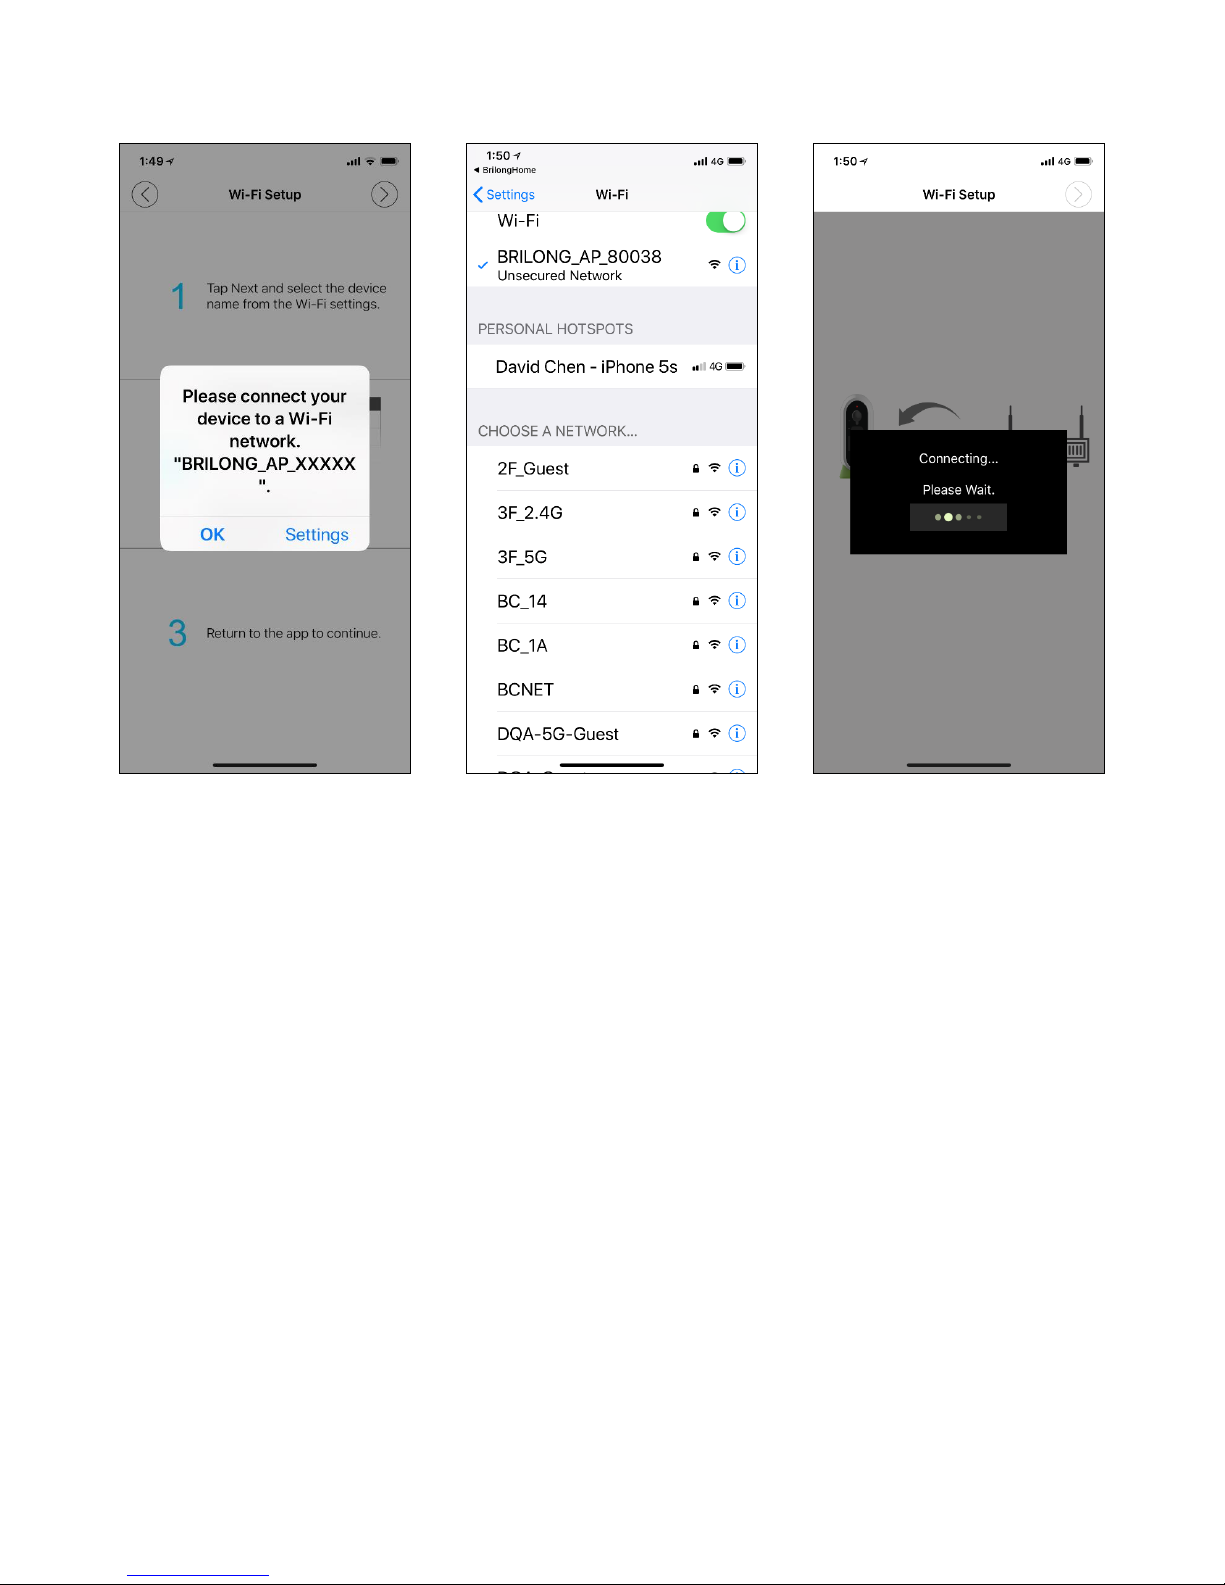
7
8
9
Tap “Settings”.
Tap the Brilong device (e.g.,
“BRILONG_ap_80038”) on the
Settings page of your mobile
device. Then, return to the
Brilong Home app.
Wait for the connection to complete.
Table of contents


