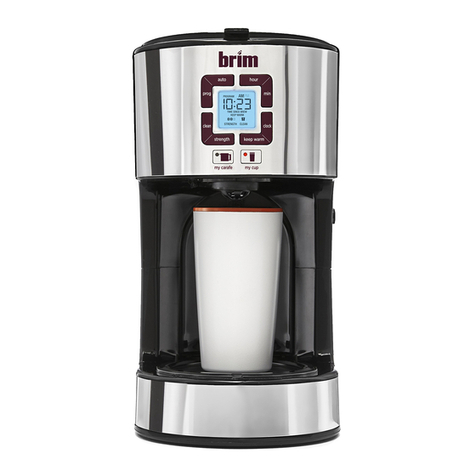
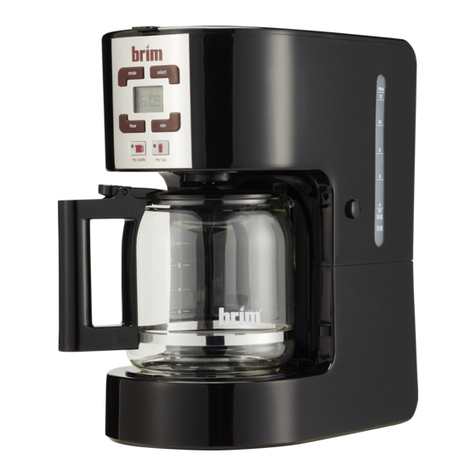
brim 50011 User manual

8-Cup Pour Over Coffee Maker {Instruction Manual
SO-314758_50011 BRIM 8c Pour over machine_IM.indd 1 2017-11-16 9:18 AM

SO-314758_50011 BRIM 8c Pour over machine_IM.indd 2 2017-11-16 9:18 AM

Important Safeguards .....................................................................................................2-4
Additional Important Safeguards .................................................................................5-6
Notes on the Plug................................................................................................................ 6
Notes on the Cord............................................................................................................... 7
Plasticizer Warning.............................................................................................................. 7
Electric Power ...................................................................................................................... 7
Carafe Safety Precautions................................................................................................. 8
Coffee Yield ......................................................................................................................... 9
Getting to Know Your 8-Cup Pour Over Coffee Maker................................... 10
Before Using for the First Time ..........................................................................................11
Pour Over. Optimized ........................................................................................................11
Brewing Coffee............................................................................................................. 12-13
Brewing a Second Decanter of Coffee ........................................................................ 14
SCA Gold Cup Standard.................................................................................................. 14
Hints for Great Tasting Coffee......................................................................................... 15
User Maintenance Instructions ....................................................................................... 15
Care & Cleaning Instructions.......................................................................................... 16
Descaling.............................................................................................................................17
Storing Instructions.............................................................................................................17
Warranty ........................................................................................................................ 18-19
Tasting Notes.................................................................................................................20-24
Table of ContentsTable of Contents
SO-314758_50011 BRIM 8c Pour over machine_IM.indd 1 2017-11-16 9:18 AM

2
IMPORTANT SAFEGUARDS
When using electrical appliances, basic safety precautions should always
be followed, including the following:
1. READ ALL INSTRUCTIONS.
2. Do not touch hot surfaces. Always make sure the silicone sleeve is on
the decanter when it is in use.
3. This appliance is not intended for use by persons
(including children) with reduced physical, sensory or
mental capabilities, or lack of experience and knowledge,
unless they have been given supervision or instruction concerning
use of the appliance by a person responsible for their safety.
4. Close supervision is necessary when any appliance is used by
or near children.
5. In order to minimize the risk of property damage, never place the
8-Cup Pour Over Coffee Maker under cabinets. Make sure the area
several feet above the 8-Cup Pour Over Coffee Maker is clear from all
furniture or cabinetry.
6. Do not use outdoors.
7. Unplug unit from outlet when the appliance is not in use, and before
cleaning. Allow unit to cool before putting on or taking off parts, and
before cleaning.
8. To protect against electrical shock, do not immerse cord, plugs, or
appliance in water or other liquids.
SO-314758_50011 BRIM 8c Pour over machine_IM.indd 2 2017-11-16 9:18 AM

3
9. Do not operate any appliance with a damaged cord or plug, or
after the appliance malfunctions, or has been damaged in any
manner. Return appliance to the nearest authorized service facility for
examination, repair or adjustment. NOTE: DO NOT ATTEMPT TO REPAIR
THE UNIT YOURSELF. THIS WILL VOID THE WARRANTY.
10. The use of accessory attachments not recommended by the
appliance manufacturer may result in re, electric shock or injury to
persons.
11. Never move the appliance by pulling the cord. Do not let the cord
hang over the edge of a table or counter or touch hot surfaces.
12. Stand the appliance on a table or at surface.
13. Do not use a cracked glass decanter.
14. Only use the glass decanter with this appliance. Handle with care as
the glass may become hot.
15. CAUTION! When full, the glass decanter can be heavy and after
brewing, it gets very hot! Avoid contact with the glass decanter. Use a
rm grip on the silicone sleeve to hold.
16. Never use your 8-Cup Pour Over Coffee Maker without water in the
water reservoir.
17. Do not place the appliance on or near a hot gas or electric burner or
in a heated oven.
18. The decanter is designed for use with this appliance. It must never be
used on a range top.
19. Do not set hot glass decanter on a wet or cold surface.
SO-314758_50011 BRIM 8c Pour over machine_IM.indd 3 2017-11-16 9:18 AM

4
20. Do not clean glass decanter with cleaners, steel wool pads, or other
abrasive material.
21. Press the Power button to turn the appliance OFF. Unplug the power
cord from the electrical outlet when the appliance is not in use, left
unattended, or when the decanter is empty.
22. Do not use this appliance for other than its intended use.
23. To reduce the risk of re, do not mount unit over or near any portion
of a heating or cooking appliance.
24. To reduce the risk of electric shock, do not mount over a sink.
25. To reduce the risk of re, do not store anything directly on top of the
appliance surface when the appliance is in operation.
FOR HOUSEHOLD USE ONLY
SAVE THESE INSTRUCTIONS
SO-314758_50011 BRIM 8c Pour over machine_IM.indd 4 2017-11-16 9:18 AM

5
ADDITIONAL
IMPORTANT SAFEGUARDS
WARNING: This appliance generates heat and escaping steam during use.
Proper precautions must be taken to prevent the risk of burns, res,
or other injury to persons or damage to property.
1. All users of this appliance must read and understand this Instruction
Manual before operating or cleaning this appliance.
2. The cord to this appliance should be plugged into a 120V AC
electrical outlet only.
3. Use water only in this appliance! Do not put any other liquids or
food products in this appliance. Do not mix or add anything to the
water placed in this appliance, except as instructed in the User
Maintenance Instructions to clean the appliance.
4. DO NOT attempt to move an appliance containing hot liquids. Allow
appliance to cool completely before moving.
5. Keep appliance at least 4 inches away from walls or other objects
during operation. Do not place any objects on top of appliance while
it is operating. Place the appliance on a surface that is resistant to
heat.
6. If this appliance begins to malfunction during use, immediately
unplug the cord. Do not use or attempt to repair the malfunctioning
appliance.
SO-314758_50011 BRIM 8c Pour over machine_IM.indd 5 2017-11-16 9:18 AM

6
7. If this appliance falls or accidentally becomes immersed in water or
any other liquid, unplug it immediately. Do not reach into the water!
Do not use this appliance after it has fallen into or has become
immersed in water.
8. The appliance must be left to cool down sufciently before adding
more water to avoid exposure to steam.
9. Always use fresh, cool water in your appliance. Warm water or other
liquids, except as listed in cleaning section, may cause damage to
the appliance.
10. DO NOT put decanter into a microwave oven.
11. DO NOT leave empty decanter on warming plate when appliance
is turned ON, as the decanter may crack or become otherwise
damaged.
Notes on the Plug
This appliance has a polarized plug (one blade is wider than the other).
To reduce the risk of electric shock, this plug will t in a polarized outlet
only one way. If the plug does not t fully into the outlet, reverse the plug.
If it still does not t, contact a qualied electrician. Do not modify the
plug in any way.
SO-314758_50011 BRIM 8c Pour over machine_IM.indd 6 2017-11-16 9:18 AM

7
Notes on the Cord
a) A short power-supply cord is provided to reduce risks resulting from
becoming entangled in or tripping over a longer cord.
b) A longer power-supply cord or extension cords are available and may
be used if care is exercised in their use.
c) If a longer power-supply cord or extension cord is used:
1) The marked electrical rating of the power-supply cord or
extension cord should be at least as great as the electrical rating
of the appliance;
2) If the appliance is of the grounded type, the extension cord should be
a grounding- type 3-wire cord; and
3) The longer cord should be arranged so that it will not drape over the
counter top or table top where it can be pulled on by children or
tripped over.
Plasticizer Warning
CAUTION: To prevent Plasticizers from migrating to the nish of the
counter top or table top or other furniture, place NON-PLASTIC coasters
or place mats between the appliance and the nish of the counter top
or table top. Failure to do so may cause the nish to darken;
permanent blemishes may occur or stains can appear.
Electric Power
If the electrical circuit is overloaded with other appliances,
your Conical Burr Grinder may not operate properly. It should be
operated on a separate electrical circuit from other appliances.
SO-314758_50011 BRIM 8c Pour over machine_IM.indd 7 2017-11-16 9:18 AM

8
Carafe Safety Precautions
1. Do not use a cracked or chipped decanter.
2. Do not use a decanter with a worn, torn rubber sleeve or without
the rubber sleeve properly attached.
3. This decanter is designed to be used only on the warming plate
of your 8-Cup Pour Over Coffee Maker. Do not use in a
conventional oven.
4. To avoid breakage, handle decanter with care. Avoid impact.
Glass will break as a result of impact. Use care when lling with water
to avoid hitting faucet.
5. Do not place hot decanter on cool or wet surface. Allow decanter
to cool before washing or adding liquids.
6. Do not set empty decanter on a hot heating surface.
7. Do not clean with steel wool pads, abrasive cleanser, or any other
materials that may scratch.
8. Do not bump or scratch the decanter. Remove decanter from the
warming plate to avoid burning or scorching. Never operate the
Coffee Maker with a decanter that has boiled dry.
9. Discard decanter if it is cracked, scratched, or heated while empty
for an extended period of time
SO-314758_50011 BRIM 8c Pour over machine_IM.indd 8 2017-11-16 9:18 AM

9
Coffee Yield
8-Cup Pour Over Coffee Maker: 8 (5 oz.) cups
NOTE: A 5-oz.cup is the American industry standard and is used by
most Coffee Maker manufacturers. To ll your favorite over-sized mug,
ll the 8-Cup Pour Over Coffee Maker reservoir with enough water for
3 to 4 cups (15 to 20 ounces).
NOTE: The amount of brewed coffee will always be less than the amount
of water placed into the water reservoir; as much as 10% may be
absorbed by coffee grounds and steam loss.
WARNING: TO AVOID THE RISK OF FIRE OR ELECTRIC SHOCK, DO NOT
UNSCREW THE UNDER SIDE COVER. THERE ARE NO USER-SERVICEABLE PARTS
INSIDE. REPAIR SHOULD BE DONE BY AUTHORIZED SERVICE PERSONNEL ONL
Permanent Coffee Filter Basket
The permanent laser etched stainless steel coffee lter takes the place of
disposable paper lters. Simply place the permanent coffee lter basket
into the lter basket holder. Use the handle tab to lift the lter basket of
used coffee grounds up and off the decanter.
SO-314758_50011 BRIM 8c Pour over machine_IM.indd 9 2017-11-16 9:18 AM

10
Getting to Know Your
8-Cup Pour Over Coffee Maker
Product may vary slightly from illustration
1. Water Reservoir
2. Water Reservoir Lid
3. Pour Over Shower Head
4. BREW/OFF Power Button
5. BREW/CLEAN power
Indicator Light
6. Base
7. Polarized Plug (not shown)
8. Warming Plate
9. Glass Decanter
10. Removable Silicone Sleeve
11. Non-skid Feet
12. Plastic Filter Holder
13. Silicone Filter Holder Stand
(not shown)
14. Permanent Filter with Tab
15. Measuring Scoop
16. 20 No 4 Cone
Coffee Filters
1
5
6
9
10
13
12
11
7
8
2
3
14
1516
4
SO-314758_50011 BRIM 8c Pour over machine_IM.indd 10 2017-11-16 9:18 AM

11
Before Using for the First Time
CAUTION: To protect against electrical shock, do not immerse the 8-Cup Pour Over Coffee
Maker or allow the power cord to come into contact with water or other liquids.
1. Remove all packing material and labels from the inside and outside of the
8-Cup Pour Over Coffee Maker.
2. Place the unit on a at, clean surface.
3. Before preparing coffee, thoroughly clean the glass decanter, lter holder and
permanent lter in hot, sudsy water. Rinse and dry. See Care & Cleaning Instructions
for a detailed description.
4. Clean the inside of the 8-Cup Pour Over Coffee Maker by brewing 2 full decanters of water
(see Brewing Coffee). Do not add the permanent coffee lter or ground coffee for this
initial cleaning.
NOTE: At the end of the rst cycle, allow 15 minutes for the unit to cool.
5. Brew a second decanter of fresh water.
6. Wait an additional 15 minutes to allow the unit to cool before brewing your rst decanter
of coffee.
Pour Over. Optimized
Visit www.brim.coffee for easy to follow step-by-step video tutorials.
We get it—you want pour over coffee in the comfort of your kitchen. And you want more
than a cup at a time. This is pour over, optimized. A thoughtfully designed shower head utilizes
pulse brewing to evenly water your coffee bed and achieve the perfect bloom. No paper
lter necessary. Our permanent ne-mesh lter allows essential coffee oils to pass through,
resulting in 8-cups of smooth, full-bodied coffee. A carafe of craft coffee without the fuss.
SO-314758_50011 BRIM 8c Pour over machine_IM.indd 11 2017-11-16 9:18 AM

1. Fill with Water
2. Add Filter
3. Add ground coffee
4. Brew 5. Remove Grounds
Brewing Coffee
1. Fill with Water: Remove the water reservoir lid. Use the decanter to pour the desired amount
of cold water into the water reservoir. Place back the water reservoir lid.
IMPORTANT: Before brewing always check to make sure that the water level is at least 5.5oz.
(add water if needed.) Never exceed the 8-cup ll line. NOTE: The amount of brewed coffee
will always be less than the amount of water place into the water reservoir; as much as 10%
is absorbed by coffee grounds and lter.
WARNING! This Coffee Maker is equipped with a WATER DRY ALARM. If the BREW/OFF power
button is pressed when the water reservoir is empty, 5 beeps will sound. Water must be
added to the water reservoir before the brewing process can begin.
6. Pour and enjoy!
SO-314758_50011 BRIM 8c Pour over machine_IM.indd 12 2017-11-16 9:18 AM

13
2. Add Filter: Add the lter with lter holder with the lter stand attached into the neck of the
empty decanter. Then nest the permanent coffee lter into the lter holder. The lter stand
helps the basket to stand by itself when adding lters, coffee, or after you have removed it
to set aside. It also helps to keep the heat in the carafe longer. NOTE: A paper lter may be
used for very ne grinds or for cleaner and sweeter tasting coffee.
3. Add ground coffee: approximately 1 level coffee scoop (included) is recommended for
each cup of coffee brewed. For stronger or milder coffee, adjust amount of ground coffee
to suit your taste. Place empty decanter with lters and ground coffee onto the warming
plate. Plug Coffee Maker into a 120V AC electrical wall outlet.
4. Brew: Press the BREW/OFF power button. The button will illuminate white as the Coffee
Maker begins the BREW cycle. Water will begin to visibly pump up and through the shower
head onto the grounds. NOTE: To interrupt the BREW cycle at any time, press the BREW/OFF
power button; then remove plug from wall outlet.
5. Remove used grounds: Upon completion of the BREW cycle, 3 beeps will sound. Wait at
least 1 minute until all of the brew dripping from the shower head into the decanter has
stopped. Carefully grasp the decanter’s silicone sleeve to remove from the warming plate.
CAUTION! When full, the glass decanter can be heavy. Use a rm grip on the silicone sleeve
to hold.CAUTION! After brewing, the glass decanter gets very hot! Avoid contact with the
glass decanter. Use the tabs on the lter holder and permanent lter to lift lters up and off
the top of the decanter. Set aside, dispose of used coffee grounds.
6. Pour and enjoy! Tilt the decanter slightly and pour hot coffee very slowly, so that the ow of
the brewed coffee does not exceed the width of the spout.
7. Replace the decanter with unused coffee onto the warming plate.
The 8-Cup Pour Over Coffee Maker will advance to a 30 minute KEEP WARM phase,
the BREW/CLEAN power indicator light will remain illuminated white. At the end of the
KEEP WARM phase, the Coffee Maker will beep 3 times and turn OFF automatically.
8. Press the BREW power button to turn the 8-Cup Pour Over Coffee Maker OFF when the
decanter is empty or when the unit is not in use; then remove plug from wall outlet.
IMPORTANT! When the BREW/OFF power indicator light begins to ash red and white, the
Coffee Maker is ready for descaling. Please consult the Descaling section of this Instruction
Manual for detailed procedures.
SO-314758_50011 BRIM 8c Pour over machine_IM.indd 13 2017-11-16 9:18 AM

14
Brewing a Second Decanter of Coffee
1. To brew another decanter of coffee, make sure the 8-Cup Pour Over Coffee Maker is OFF. It
is recommended that the 8-Cup Pour Over Coffee Maker be allowed to cool for 15 minutes
between cycles.
CAUTION: Failure to allow Coffee Maker to cool sufciently could cause hot steam
and spray when the water is added to the water reservoir. The hot steam can cause
severe burns.
2. Remove the lter holder and permanent coffee lter; discard used coffee grounds.
3. Rinse the glass decanter, lter holder and permanent lter in cool, clean water.
4. Following the instructions previously outlined in the Brewing Coffee section of this Instruction
Manual, add water to the water reservoir, use the coffee scoop to add ground coffee to
the permanent coffee lter, place the empty decanter on the warming plate. Press the
BREW/OFF power button. The button will illuminate white as the Coffee Maker begins the
BREW cycle.
SCA Gold Cup Standard
The 8-Cup Pour Over Coffee Maker can help you achieve the Specialty Coffee Association
Gold Cup Standard, it creates the perfect environment to brew Gold Cup coffee. You need
more coffee grounds to water ratio when preparing Gold Cup coffee versus a standard cup
of coffee. A standard scoop of coffee is 5g, the BRIM measuring scoop is 8.25g. The larger
scoops makes it easier to measure coffee grounds for the Gold Cup Standard to be brewed.
Either ll water to the 8-cup line on the water reservoir and add 8 level scoops of coffee, or ll
water to the optimum line and add just under 7 level scoops.
It’s as simple as that to enjoy the perfect Gold Cup Standard!
SO-314758_50011 BRIM 8c Pour over machine_IM.indd 14 2017-11-16 9:18 AM

15
Hints for Great Tasting Coffee
• A clean Coffee Maker is essential for making great tasting coffee. Regular cleaning,
as described in the Care & Cleaning Instructions and Descaling sections of this Instruction
Manual is highly recommended.
• Always use fresh, cold water in 8-Cup Pour Over Coffee Maker.
• Finer grinds promote fuller extraction and provide rich, full-bodied coffee. Regular grinds will
require slightly more coffee per cup to provide the strength of a ner grind.
• Store coffee beans or ground coffee in a cool, dry place. Once coffee has been opened,
keep it tightly sealed in the refrigerator or freezer to maintain freshness.
• For optimum coffee avor, buy whole beans and grind them to your liking,
just before brewing.
• Do not re-use coffee grounds since this will greatly impair coffee avor.
• Reheating coffee is not recommended. Coffee is at its peak avor immediately
after brewing.
• Small oil droplets on the surface of brewed, black coffee are due to the extraction of oil
from the coffee grounds. Oiliness may occur more frequently if heavily roasted coffee beans
are used. Over extraction may also cause oiliness, indicating a need to clean your
8-Cup Pour Over Coffee Maker.
User Maintenance Instructions
This appliance requires little maintenance. It contains no user-serviceable parts.
Any servicing requiring disassembly other than cleaning must be performed by a qualied
appliance repair technician.
SO-314758_50011 BRIM 8c Pour over machine_IM.indd 15 2017-11-16 9:18 AM

16
Care & Cleaning Instructions
1. Always make sure the 8-Cup Pour Over Coffee Maker is unplugged and the warming plate
is cool before attempting to clean.
2. After every use, remove the permanent coffee lter, discard used coffee grounds,
rinse thoroughly. Wash the lter holder and glass decanter in hot, sudsy water.
You can also remove the silicone sleeve to clean underneath it. The glass decanter,
lter holder and removable silicone lter stand, permanent lter, scoop and silicone sleeve
are all top rack dishwasher safe.
WARNING: To avoid breakage, handle decanter with care. Avoid impact. Glass will break as
a result of impact. Use care when lling with water to avoid hitting faucet.
3. Wipe the exterior with a damp cloth to remove supercial stains. For stubborn stains, use
a nylon or plastic pad with a non-abrasive cleanser. Do not use metal scouring pads or
abrasive cleansers.
4. When the BREW/OFF power indicator light begins to ash red and white,
the 8-Cup Pour Over Coffee Maker is ready for descaling.
SO-314758_50011 BRIM 8c Pour over machine_IM.indd 16 2017-11-16 9:18 AM

17
Descaling
Special cleaning of your 8-Cup Pour Over Coffee Maker is recommended depending on the
frequency of use and quality of water used in the unit. If water in your area is especially hard,
the following cleaning procedure should be performed more frequently, since minerals in water
can detract from the avor of the coffee and possibly lengthen brew time. While brewing, if
the BREW/CLEAN power indicator light begins to alternate from red to white, then the 8-Cup
Pour Over Coffee Maker should be descaled.
1. Fill decanter with 1 part white vinegar to 2 parts cold water. Pour water and vinegar solution
into the water reservoir.
2. Press and hold the BREW/OFF power button for 2 seconds until the BREW/CLEAN power
indicator light illuminates solid red. The 8-Cup Pour Over Coffee Maker will begin the CLEAN
cycle until all water has been circulated and the water reservoir is empty. The BREW/CLEAN
power indicator light will turn off when the descaling operation is complete.
NOTE: Press the BREW/OFF power button at any time during the CLEAN cycle to turn the
8-Cup Pour Over Coffee Maker OFF. When liquid stops dripping from the shower head into
the decanter, remove the decanter from the warming plate and allow liquid to cool for 15
minutes.
3. Rinse the unit by brewing a full decanter of cold water.
4. At end of BREW cycle, press the BREW button to turn the 8-Cup Pour Over Coffee Maker
OFF. Discard water in the decanter. Wash decanter, permanent coffee lter, and lter
holder in hot sudsy water. Dry parts thoroughly.
5. When Coffee Maker has cooled, wipe exterior with a dry cloth.
Storing Instructions
1. Unplug unit and allow to cool.
2. Store the 8-Cup Pour Over Coffee Maker in its box or in a cool, dry place.
3. Never store unit while it is still plugged in.
SO-314758_50011 BRIM 8c Pour over machine_IM.indd 17 2017-11-16 9:18 AM

Limited Two-Year Warranty
SENSIO Inc. hereby warrants that for
a period of TWO YEARS from the date
of purchase, this product will be free
from mechanical defects in material
and workmanship, and for 90 days in
respect to non-mechanical parts. At its
sole discretion, SENSIO Inc. will either
repair or replace the product found to
be defective, or issue a refund on the
product during the warranty period.
The warranty is only valid for the original
retail purchaser from the date of initial
retail purchase and is not transferable.
Keep the original sales receipt, as
proof of purchase is required to obtain
warranty validation. Retail stores selling
this product do not have the right to
alter, modify, or in any way revise the
terms and conditions of the warranty.
Exclusions:
The warranty does not cover normal
wear of parts or damage resulting
from any of the following: negligent
use of the product, use of improper
voltage or current, improper routine
maintenance, use contrary to the
operating instructions, disassembly,
repair, or alteration by anyone other
than qualied SENSIO Inc. personnel.
Also, the warranty does not cover
Acts of God such as re, oods,
hurricanes, or tornadoes.
SENSIO Inc. shall not be liable for any
incidental or consequential damages
caused by the breach of any express or
implied warranty. Apart from the extent
prohibited by applicable law, any
implied warranty of merchantability or
tness for a particular purpose is limited
in time to the duration of the warranty.
Some states, provinces or jurisdictions
do not allow the exclusion or limitation
of incidental or consequential
damages, or limitations on how long an
implied warranty lasts, and therefore,
the above exclusions or limitations may
not apply to you. The warranty covers
specic legal rights which may vary by
state, province and/or jurisdiction.
18
SO-314758_50011 BRIM 8c Pour over machine_IM.indd 18 2017-11-16 9:18 AM
Table of contents
Other brim Coffee Maker manuals
Popular Coffee Maker manuals by other brands

Russell Hobbs
Russell Hobbs RHCM47 Instructions and warranty

DeLonghi
DeLonghi Maestosa EPAM96X.75 Instructions for use

Bunn
Bunn Home Brewer use and care manual

Schaerer
Schaerer Coffee Club Daily Cleaning Procedure

Klarstein
Klarstein Espressionata Gusto manual

Rancilio
Rancilio Classe 8 S Use and maintenance