Bromic Heating Junior Marine Troubleshooting guide

Lido “Junior Marine”
(59LT-2)
Stainless steel model, two burners
and a griller with Thermoelectric
flame safety valve to all burners.
SUITABLE FOR USE
IN MARINE CRAFT,
CARAVANS OR
MOBILE HOMES
Lido “Junior Caravan”
(59LC-2)
Two burners and a griller with
Thermoelectric flame safety valve
to all burners.
SUITABLE FOR USE
IN CARAVANS OR
MOBILE HOMES
LIDO JUNIOR COOKER
BY BROMIC
INSTALLATION, INSTRUCTION AND
SERVICE MANUAL
25/10/2017 Version 1.1

2
CONTENTS
SPECIFICATION OF MODELS....................................................................................................... 3
WARNINGS........................................................................................................................................3
OPERATOR INSTRUCTIONS......................................................................................................... 4
CLEANING AND CARE OF THE COOKER................................................................................. 5
INSTALLATION INSTRUCTIONS..................................................................................................5-6
SERVICING INSTRUCTIONS......................................................................................................... 6
APPENDIX A.................................................................................................................................... 7
10 PHINEY PLACE, INGLBURN NSW 2565 AUSTRALIA
PH: 1300 276 642 FAX: (02) 9748 4289 EMAIL: sales@bromic.com.au WEB: www.bromic.com
Bromic Pty. Ltd and their appointed agents will not be liable in respect of any misuse, which is not in accordance with
the instructions and precautions specified in this booklet.

3
WARNINGS
“THE INSTRUCTIONS PACKAGED WITH THIS APPLIANCE CONTAIN IMPORTANT INFORMATION ABOUT
INSTALLATION AND USE”
“DO NOT USE OR STORE FLAMMABLE MATERIALS IN THE APPLIANCE STORAGE DRAWER OR NEAR
THIS APPLIANCE “
“DO NOT SPRAY AEROSOLS IN THE VICINITY OF THIS APPLIANCE WHILE IT IS IN OPERATION”
“DO NOT MODIFY THIS APPLIANCE”
‘DO NOT USE THIS APPLIANCE AS A SPACE HEATER.’
“UNSUITABILITY FOR USE IN MARINE CRAFT, CARAVANS OR MOBILE HOMES, UNLESS EACH BURNER
IS FITTED WITH A FLAME SAFEGUARD” SEE TABLE 1 ABOVE
GENERAL WARNING
• Do not store flammable materials in the cooker storage drawer.
• Do not move this appliance during operation (ie when the burner is alight)
• Do not use the appliance if it has a leak, or you smell gas or does not work properly
• Always use on a flat surface
• Always use well away from flammable materials and at least 400mm from walls or ceilings
• Never use a flame when checking for leaks. Always use approved methods when checking for gas
leaks
• Important keep away form children as some parts get very hot
• Remove transit packaging before use
• This stove is not designed for commercial use
• If the appliance is to be connected directly to gas cylinder, only use the AGA approved hose assembly
supplied with the appliance. “DO NOT USE ADAPTORS”
• Where an AGA hose assembly is used, the maximum hose length of the hose assembly is to be
1200mm. “Avoid twisting or kinking the flexible hose”
• Unsuitability for use in marine craft, caravans or mobile homes, unless each burner is fitted with a
flame safeguard ( see table 1)
• If the appliance is to be connected to a hose assembly, the supply connection point shall be
accessible with the appliance installed.
• Optional Seal Rail and Gimbal to be installed as per Appendix A
Model Approval
Number
Gas Type
&
Pressure
Injector
L Front
(small)
L Front Gas
Consumption
Injector
R Front
(large)
R Front Gas
Consumption
Injector
Grill
burner
Grill burner
Consumption
Each
burner
is fitted
with a
flame
safeguard
Lido
“Junior
Marine”
59LT-2
AGA
8080 G
LPG
(propane)
2.75 kPa
0.65 mm 5.7 Mj/hr 0.75mm 7.2 Mj/hr 0.63 mm 4.8 Mj/hr Yes
Lido
“Junior
Caravan”
59LC-2
AGA
8080 G
LPG
(propane)
2.75 kPa
0.65 mm 5.7 Mj/hr 0.75mm 7.2 Mj/hr 0.63 mm 4.8 Mj/hr Yes
TABLE 1 Specification of Models
Model Approval
Number
Gas Type &
Pressure
Flame
Safeguard
Stainless
Fascia
Stainless
Base
Gimble
& Pet
Holders
Barcode
Lido “Junior
Marine” 59LT-2
AGA
8080 G
LPG ( propane)
2.75 kPa
Lido “Junior
Caravan” 59LC-2
AGA
8080 G
LPG ( propane)
2.75 kPa
Lido “Junior
Camping” 59L-2
AGA
8080 G
LPG ( propane)
2.75 kPa

4
OPERATOR INSTRUCTIONS
HOTPLATE
The cooker is equipped with two burners; the control knob shows the location of each burner. Each
burner has a low position which is particularly useful for slow cooking or simmering.
TO LIGHT BURNERS
A) Marine Cooker “Lido Junior M” Model 59LT-2 & Caravan Cooker “Lido Junior C” Model 59LC-2
Select desire burner, depress knob and gently turn anticlockwise until full on. Light directly, depress knob
for 10 seconds and adjust flame, so that when cooking utensils is places centrally over the burner, the
flame does note extend beyond utensil base, large diameter utensils, ( greater than 200mm diameter)
must be allowed to protrude beyond the perimeter of the trivet, as this could cause over heating and
damage to the adjacent bench
GRILLER
A radiant griller burner is fitted in the top below the hob which provides even heat. The control knob can
be turned to high or low. A grill tray with handle and grid is provided. Simply place tray below the griller
to start cooking. Grill grid has a high and low position.
B) Marine Cooker “Lido Junior M” Model 59LT-2 & Caravan Cooker “Lido Junior C” Model 59LC-2
Depress control knob on right hand side of the control panel and turn anticlockwise to full on. Light
burner by lighting with a match directly to the burner, below the hob. Depress and hold knob for 10
seconds and then let burner warn up before cooking, Toasting of bread should be done in the high
position
If unusual problems are experience when operating the cooker, refer to installation instructions items 1 to
11.
Provided the cooker is used and cleaned on a regular basis as per the following instructions. The cooked
should be check by and authorized person every five (5) years
- FOR SERVICE AND REPLACEMENT PARTS CONTACT YOUR NEAREST CARAVAN SERVICE AND
SPARE PARTS DEALER OR YOUR PLACE OF PURCHASE.
CLEANING AND CARE OF THE COOKER
CLEANLNG THE HOTPLATE
After the hotplate has cooled remove the pan support and burners. The pan support can be washed in
hot water with detergent to remove grease and splashes. (Do not use abrasives or scouring types of
cleaners). After washing, rinse and wipe dry. It is preferable in the case of spill over to immediately clean
the spillage tray with a cloth, note, spill-over when baked are hard to clean.
CLEANING GRILLER
The grill pan and grid are washed rinsed and dried in the same way as a saucepan.
GENERAL
Do no steel wool, abrasives or caustic based cleaners on any part of the stove. Generally the stove is
readily cleaned with warm soapy water or detergent and a soft cloth, subsequently with a clean cloth to
remove any detergent.

5
INSTALLATION INSTRUCTIONS
1 This is a freestanding appliance and must not be built-in. In the event that the appliance is installed
near combustible material, the following minimum clearances must be maintained.
- a minimum distance of 200mm must be maintained from the centre of the top gas burners to any
combustible surface on each side and on the back of the cooker
2. Do not install the cooker below combustible materials - minimum clearance to overhead
cupboard 600mm.
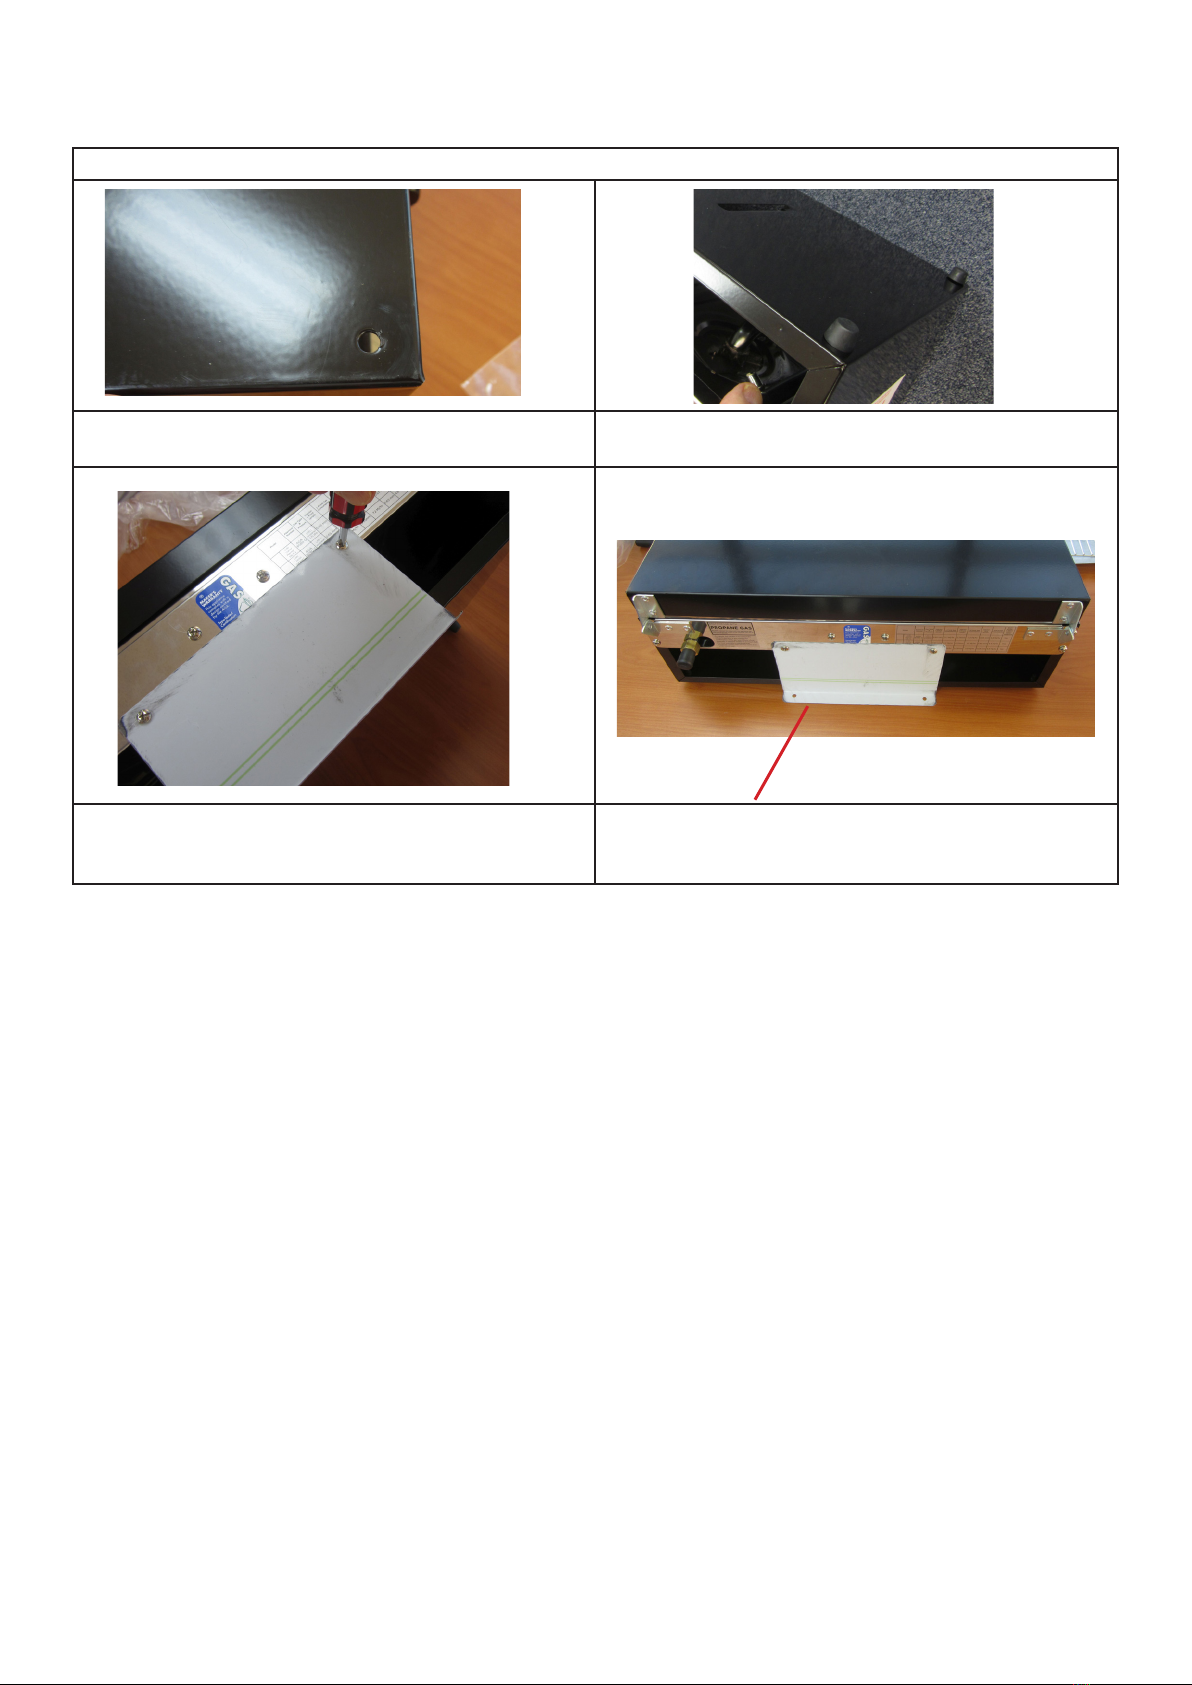
3. Check the “Gas Type” sticker attached to the cooker. Details of the injector size and gas used are
recorded on the rating plate located at the left hand rear next to connection point.
4. This appliance shall be installed in accordance with the installation requirements of the local authority
or the appropriate gas installation code AS5601. For installations in caravan, mobile homes & marine
vessels the cooker rear bracket is to be screwed in place to minimize movement and vibration. If the
appliance is not securely fixed, movement and vibration may result in strain on the appliance
connection which can result in a safety hazard (See Table 1).
5. Before installing the cooker consider the location of the gas supply and routing of gas line. Inlet
connection is at the left rear of the cooker, 60mm from left rear corner, 105mm from the floor. Overall
dimension of cooker
Width 480mm
Height 175mm
Depth 290mm
6. For LPG models the gas supply for the cooker must be regulator to a pressure of 2.75 Kpa. The gas
inlet connecting pipe has a (5/16” SAE) male thread. Where an AGA approved hose assembly is used
the maximum hose length of the hose assembly is to be 1200mm. The hose assembly is to be
restrained from accidental contact with the flue outlet of an under bench oven.
7. A manual shut for valve must be installed in the gas line, in an accessible position external to the range
so that in the event of an emergency or service, the gas supply can be shut o.
8. After installing the gas supply and making all connections, check thoroughly for possible leaks. Turn
all control knobs on the unit to “OFF” position, open the valve on the supply tank, using a soap and
water solution check each gas connection one at a time by brushing the solution over the connections.
The presence of bubbles indicates a leak. Tighten the fitting and re-check for leaks. If no bubbles are
detected proceed to point 9.
If bubbles still persist, turn o the gas supply and contact your place of purchase. DO NOT check for
leaks by using a lighted match or naked flame.
9. Turn on the appliance control valve and light each burner. Check for a clean blue flame without yellow
tipping. If burners show any abnormalities, check that they are located properly and in line with the
injector nipple.
10. Sometimes the burner will not ignite immediately and seems to “blow” slightly when they do not
ignite. This is usually due to air in the gas lines, which will clear within seconds.
11. If after following these instructions, satisfactory performance cannot be obtained contact the local
gas authority for advice and assistance.

6
Table 1 Installing Rear bracket
Remove from plastic bag four (4) black support feet and install into base of cooker
Using the supplied two screws and rear bracket
screw rear bracket into correct position
Photo of assembled cooker rear bracket
The cooker rear bracket (see table 1) is to be
screwed in place to minimize movement and
vibration

7
SERVICING INSTRUCTIONS
NOTE:SERVICING SHALL BE CARRIED OUT ONLY BY AUTHORIZED PERSONNEL,
A) Marine Cooker “Lido Junior M” Model 59LT-2 & Caravan Cooker “Lido Junior C” Model 59LC-2
To gain access to manifold and lubricate or remove controls or replace magnets
• Turno gas supply, disconnect cooker from the connection at the left rear of cooker.
• Remove control knobs by pulling o spindles and turn cooker upside down.
• Remove four screws holding grill section to hotplate section and remove grill section.
• Remove hotplate burners by unscrewing two nuts below burner bowl and remove burners
• Remove grill burner by removing two screw holding burner and reflector to the hob, unscrew gas
supply pipe or hose assembly to the grill injector. Remove three clamps holding gas cocks to the
manifold and lift out the manifold.
• Remove screws holding gas cocks to the control panel
• To lubricate gas cocks, take out screw on the side holding the plug in the body and remove plug ,
lubricate only with AGA approved lubricant
• Reassemble taking care that gas cock is correctly assembled.
• To replace gas cocks, remove two clamps holding gas cocks to the manifold and replace the gas cock.
• To replace magnet, unscrew aluminum nut, remove magnet and replace magnet and cap.
• To reassemble cooker and manifold, proceed in the reverse order
NOTE:SERVICING SHALL BE CARRIED OUT ONLY BY AUTHORIZED PERSONNEL.

8
Appendix A – Optional Sea Rail and Gimbal (where provided)
Remove the sea rail and gimbal for the packaging
Picture A: Fix the pot - fastening support (1)
with n°4 screws (2) equipped
Picture C: Pay attention to the DX and SX
positions.
Picture B: Fix the pot - fastening support (3)
with pommel (4)
This manual suits for next models
3
Table of contents
Popular Cooker manuals by other brands

Bosch
Bosch HLS59D3 1 Series user manual

Kuppersbusch
Kuppersbusch GEH 630.0 Instructions for use and installation instructions

Baumatic
Baumatic BCG520SL instruction manual

BLUE STONE
BLUE STONE ICB-6835 manual

Cannon
Cannon 4866200151-01 Use and Installation Instructions

Elba
Elba EEC 863 Instructions for the use