Broncolor LED F160 User manual

LED F160
Operating Instructions

Page 2
OPERATING INSTRUCTIONS | BRONCOLOR LED F160
Contents
1. SAFETY INSTRUCTIONS ......................................................................................................................................................... 3
2. PRODUCT ADVANTAGES ........................................................................................................................................................ 4
3. TECHNICAL DATA................................................................................................................................................................... 5
4. ACCESSORIES AVAILABLE ..................................................................................................................................................... 6
5. APPLICATION RANGE FOR THE BRONCOLOR LED F160 ....................................................................................................... 7
6. INITIAL OPERATION ............................................................................................................................................................... 7
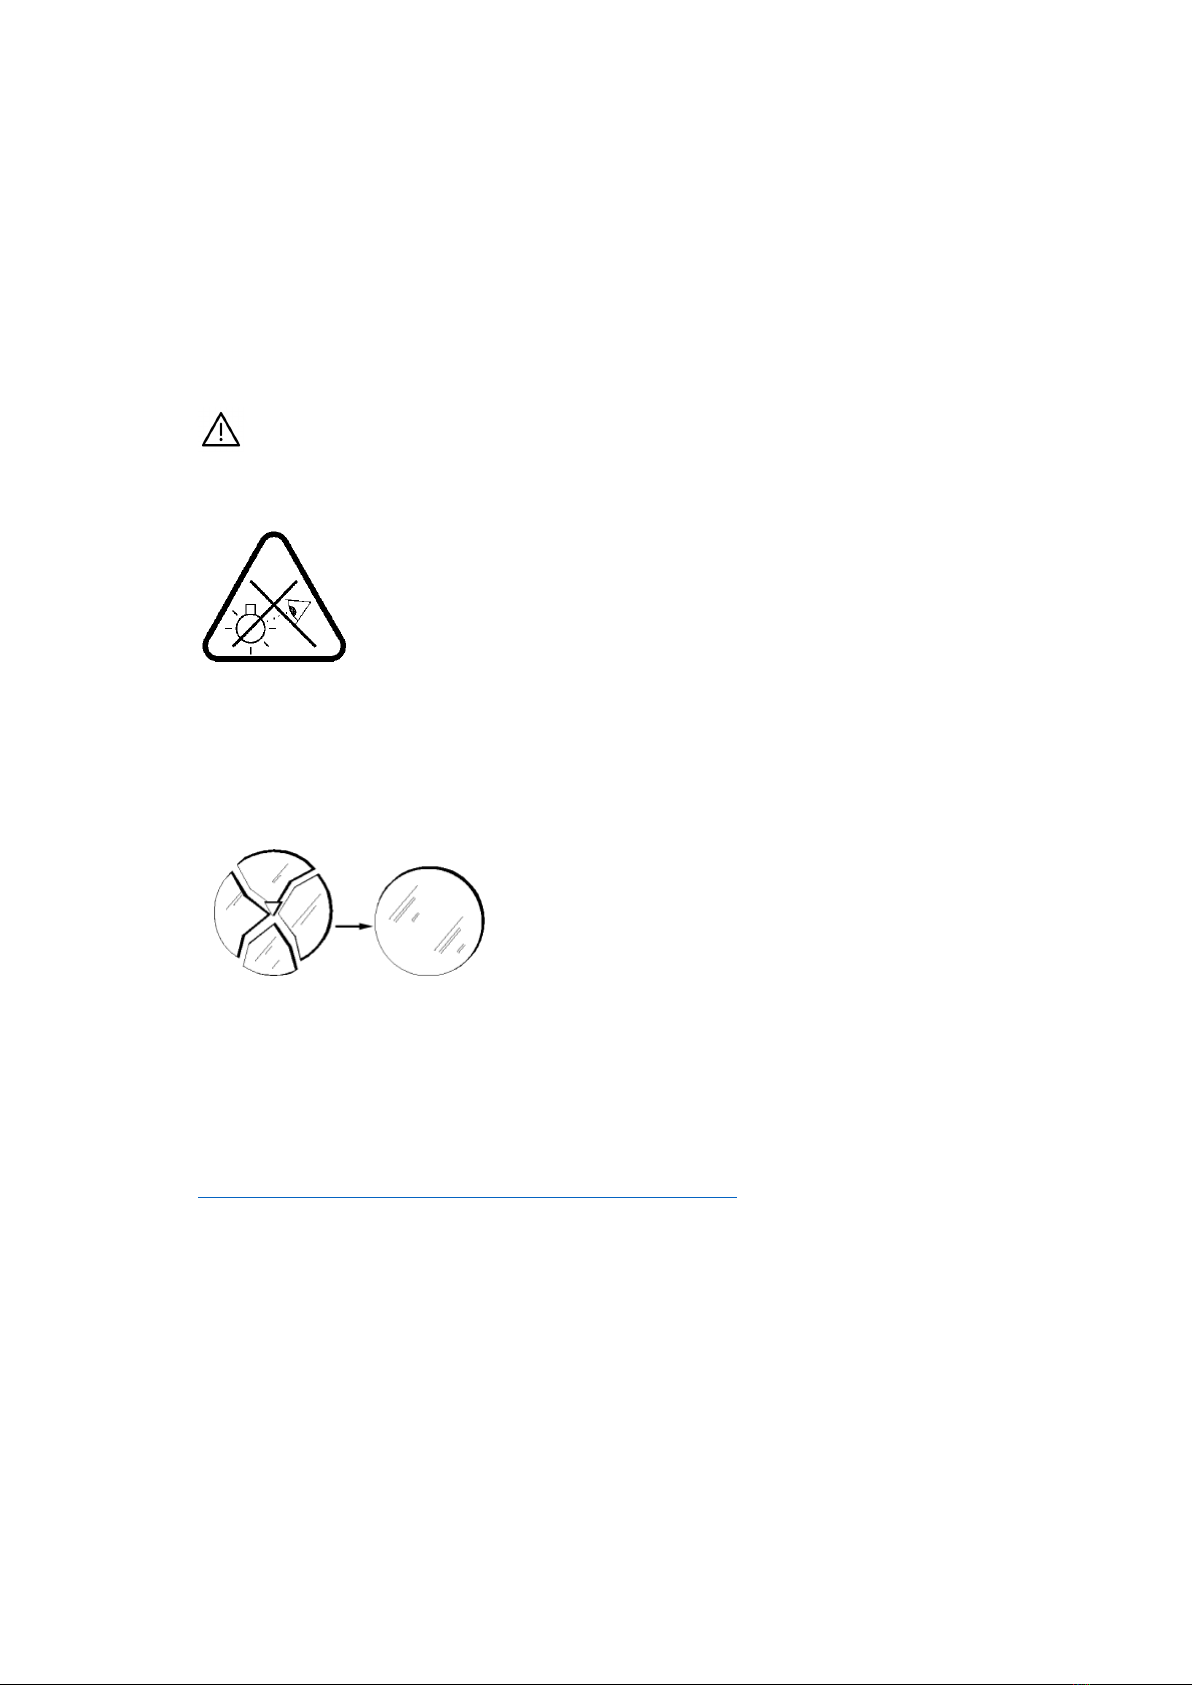
6.1 REMOVING AND ATTACHING LIGHT SHAPERS ...................................................................................................................... 7
6.2 MOUNTING AN UMBRELLA.................................................................................................................................................... 7
6.3 Switching the lamp on and off........................................................................................................................................................... 8
6.4 Use with a stand................................................................................................................................................................................ 8
6.5 Ceiling installation............................................................................................................................................................................. 8
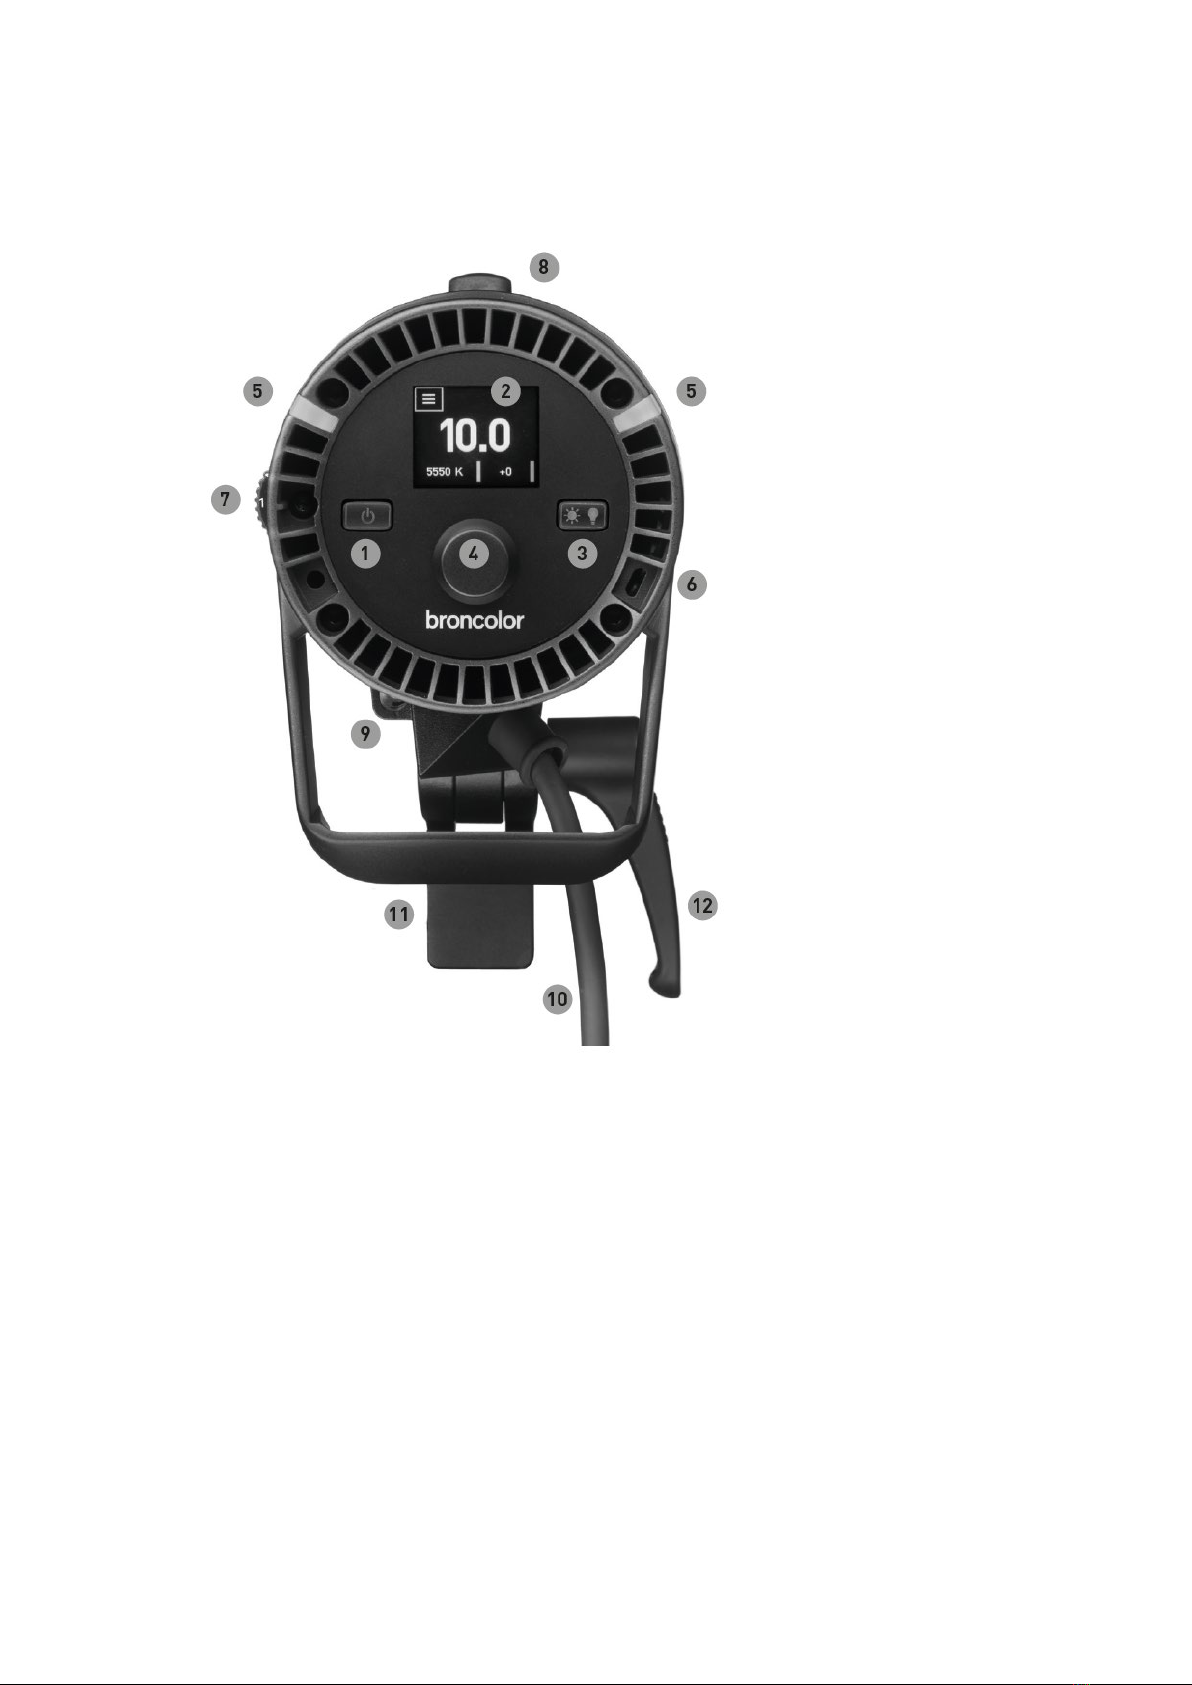
7. USER CONTROLS ................................................................................................................................................................... 9
8. OVERVIEW OF THE MAIN MENU FUNCTIONS ...................................................................................................................... 10
9. THE SUBMENU: STRUCTURE............................................................................................................................................... 12
10. THE SUBMENU: DETAILED DESCRIPTION........................................................................................................................... 12
10.1 Units .................................................................................................................................................................................................12
10.2 Cognition light ..................................................................................................................................................................................12
10.3 Lamp address...................................................................................................................................................................................12
10.4 WiFi...................................................................................................................................................................................................13
10.5 Display..............................................................................................................................................................................................13
10.6 Info....................................................................................................................................................................................................13
11. ERROR MESSAGES............................................................................................................................................................... 13
12. MAINTENANCE / REPAIRS ................................................................................................................................................... 13
13. NOTE ON ENVIRONMENTAL PROTECTION .......................................................................................................................... 13
14. WARRANTY ........................................................................................................................................................................... 14

Page 3
Before use
We are delighted that you have chosen the broncolor LED F160, which is high-quality in every respect. If handled properly, it will serve you
well for many years. Please read all of the information in these operating instructions carefully. It will give you important information on
the use, safety and maintenance of the device. Keep these instructions for use in a safe place and pass them on to subsequent users, if
necessary.
1. SAFETY INSTRUCTIONS
Do not look into the light source during operation!
Risk of injury to eyes!
A minimum distance of 20 cm must be maintained between the LED F160 lamp and inflammable respectively ignitable materials.
In case the diffusion attachment is damaged, the LED F160 lamp must not be operated.
The LED F160 lamp may only be operated by qualified staff, who had read and understood this operating manual completely.
The LED F160 lamp is designed for use in dry conditions and in an ambient temperature between -20 °C and +45 °C. It is suited
for indoor use.
Observe the safety instructions supplied and the safety instructions that apply to accessories.
Alternatively, you can also download the safety instructions for the broncolor LED F160 lamp from
https://www.broncolor.swiss/broncolor/products/downloads/safety-instructions/
DANGER!

Page 4
2. PRODUCT ADVANTAGES
•Compact dimensions
•Stepless power adjustment
•Colour temperature setting in increments of 50 Kelvin
•Manual focusing
•Absolutely flicker-free – even at high image refresh rates
•Li-Ion battery optionally available
•Excellent colour rendering index
•Constant light intensity over the entire colour temperature range and from lamp to lamp
•New freehand bayonet locking system
•Intuitive control menu
•Display very easy to read, even in bright ambient light
•Automatic display orientation
•Compatible with extensive broncolor light shaper range
•Broad radiation angle of the LEDs ensures an optimal illumination of the reflector

Page 5
3. TECHNICAL DATA
All of the dimensions above in millimetres
broncolor LED F160
Luminous flux
Typically 12000 lumens
Colour temperature
2800 to 6800 K (increments of 50)
Colour rendering index
Typically CRI 97+
Green/magenta correction (colour cast)
Control range -25 to +25
(limitation below 4000 K and above 5000 K)
Dimmability
100 to 6 % or f-stop 10 to 6.0
Update option
Via WiFi
Display
OLED 1.69 inch
Focusing
Manual, stepless
Use
(suited for indoor use)
- on stand
- floor installation
- ceiling suspension (separately available safety cable
mandatory, 33.173.00)
Weight LED F160 lamp
1745 g (3.85 lbs)
(Lamp incl. diffusion attachment and integrated pigtail)
Dimensions LED F160 lamp
Length*: 28.8 cm (11.3 in)
Height: 16.5 cm (6.5 in)
Diameter: 12.0 cm (4.7 in)
(* incl. umbrella reflector and protective cover)
Temperature range of use
-20 °C to +45 °C
Cooling
Active (temperature-controlled fan)
Cognition light
2 x top left/right
5 colours (blue, green, violet, yellow, turquoise)
Compatibility
Compatible with broncolor bayonet
Menu language
English
Power supply unit
80 to 264 VAC
Power consumption
Max. 160 watts
Length pigtail
1.5 m
Warranty period
Manufacturer’s warranty of 2 years from date of purchase
(for the first owner)
Item number
61.010.00

Page 6
4. ACCESSORIES AVAILABLE
Original broncolor accessories allow you to use your LED F160 lamp in an even more convenient and versatile way while further
increasing the product benefits.
Available lighting accessories
broncolor LED F160
Item
Item number
Safety cable for LED F160
33.173.00
Umbrella reflector Ø 120 mm
33.170.00
Protective cover for umbrella reflector Ø 120 mm
33.171.00
Diffusion attachment for LED F160
33.172.00
Power supply unit for LED F160
42252.00
Power cable for LED F160
Australia
41859.00
Denmark
41914.00
Europe
41854.00
GB and Hong Kong
41857.00
India
41858.00
Japan
41856.00
Neutral
39087.00
South Africa
41915.00
Switzerland
39084.00
USA
41855.00
Li-Ion battery 36 V XLR *
64.011.00
Charger for Li-Ion battery 36 V XLR
64.012.00
V-Mount stand clamp for Li-Ion battery 36 V XLR
64.014.00
Li-Ion battery 36 V XLR kit *
61.020.00
*
Please note:
After max. 5 months, Li-Ion batteries have to be recharged again. If the batteries are not charged they may fall into the status
of low discharge and in most cases, they cannot be charged again.
Recommended compatible broncolor accessories and light shapers
broncolor LED F160
Item
Item number
Octabox 75 (cm (2.5 ft))
33.600.00
L40 standard reflector
33.115.00
Honeycomb grids for L40
33.194.00
Umbrella silver/black Ø 105 cm (41.3")
33.570.00
Umbrella silver/black Ø 85 cm (33.5")
33.574.00
Softbox 35 x 60 (cm (1.1 x 2 ft))
33.560.00
Focus 110 umbrella silver/black Ø 110 cm (43.3")
33.576.00
Octabox 150 (cm (4.9 ft))
33.601.00
Beauty Dish reflector with textile diffuser
33.111.00
broncolor Flooter
32.431.00
Safety cable for LED F160
33.173.00
broncolor Speed Ring for Softbox / Octabox
33.401.00
as well as all broncolor softboxes and umbrellas
Please note:
The LED F160 is designed for use with light shapers. As a result, operation without a light shaper ("bare bulb") is not
recommended.

Page 7
5. APPLICATION RANGE FOR THE BRONCOLOR LED F160
The broncolor LED F160 is a very high-quality, compact and durable LED lamp for professional users. Its strengths particularly
come to the fore in product and portrait photography. It is an ideal match for the extensive broncolor light shaper range – this
enables creative and versatile work. The LED F160 lamp is also suitable for video and film applications. It is suited for indoor use.
6. INITIAL OPERATION
The safety instructions provided must be observed!
Remove all protective transport materials and the black protective cover from the umbrella reflector before switching on the
lamp.
6.1 REMOVING AND ATTACHING LIGHT SHAPERS
The LED F160 lamp is equipped with an innovative locking slider. By fixing it in the rearmost position, you now have both hands
free to remove or replace the light shaper safely and in a controlled manner.
To remove the light shaper, rotate it as far as it will go in one direction. Pull the locking slider back as far as it will go with one
finger and push the small locking pin down in the rearmost position. The slide will now remain in this position. Turn the reflector
further in the same direction until it is unlocked. You can now remove it carefully. Please take care not to damage or scratch the
diffusion attachment.
Attachment is also very simple:
Move the light shaper towards the LED F160 lamp from the front, align it with the bayonet recesses (small to small and large to
large), push it back as far as it will go and then release the locking mechanism by turning it slightly to the left or right. You will
hear a click. The light shaper is now securely attached.
6.2 MOUNTING AN UMBRELLA
If desired, insert the umbrella rod into the umbrella holder, which is located on the stand holder underneath the lamp.

Page 8
6.3 SWITCHING THE LAMP ON AND OFF
Firstly, connect the pigtail of the LED F160 lamp to the cable permanently attached to the power supply unit.
Now connect the supplied power cable to the power supply unit.
Then plug the mains plug into a suitable socket.
The display illumination is now activated and the LED F160 lamp is ready for use.
With a short press on the on/off button ( ), the LED lights up and can be switched off in the same way ("standby").
Unplug the mains plug from the socket to switch off the device. The display only goes out completely once the power supply is
interrupted. The mains plug is used as a disconnect device, the disconnect device shall remain readily operable.
6.4 USE WITH A STAND
If desired, mount the LED F lamp on a suitable stand. The stand mount is located on the underside of the device.
6.5 CEILING INSTALLATION
WARNING!
For ceiling installation, please observe the mounting instructions supplied with the accessory
"33.173.00 - Safety cable for LED F160 lamp", which is available separately.
The LED F160 lamp must NOT be mounted on the ceiling without the safety cable mentioned above!
The display of the LED F160 lamp has an automatic orientation. In overhead operation, the display automatically rotates by 180°.

Page 9
7. USER CONTROLS
The following illustration shows the user controls for the LED F160 lamp
(1) Light on/off
(2) OLED display
(3) Daylight (5500 K) and tungsten (3200 K) toggle key
(4) Control button/knob
(5) Cognition light
(6) Micro USB port
(7) Manual focusing wheel
(8) Locking slider
(9) Umbrella holder
(10) Pigtail to power supply cable
(11) Stand mount
(12) Clamping lever

Page 10
8. OVERVIEW OF THE MAIN MENU FUNCTIONS
Main menu view
You can always see the most important settings in the main menu view:
- The currently set power Control range: 10.0 to 6.0 / 100 % to 6 %
- The currently set colour temperature Control range: 2800 to 6800 Kelvin
- The currently set green-shift value Control range: -25 to +25
You can easily switch to the submenu via this button:
Power control
Position the focus (by turning the control button/knob) on the power indicator and briefly press it once.
The following illustration shows that the power value now has a full light blue background.
The power can now be changed immediately by turning the control knob to the left (power is reduced) or to the right (power is
increased). When you see the desired power value on the display, briefly click the control knob once to activate it. The focus
becomes visible again and the new power value has been accepted.

Page 11
Colour temperature control
Position the focus on the colour temperature field.
Perform the same steps as in the "power example" above.
Colour cast control (green-magenta shift)
Position the focus on the "green" field.
Perform the same steps as in the "power example" above.
How do I edit the other available functions?
All other settings must be made in the submenu ( ).

Page 12
9. THE SUBMENU: STRUCTURE
The submenu of the LED F160 lamp is divided into the following functions:
1. Units
2. Cognition light
3. Lamp address
4. WiFi
5. Display
6. Info
How do I switch back from the submenu to the main menu?
Set the focus on the small triangle in the upper left-hand corner by turning the control knob. Click the control knob to return to
the home screen.
10. THE SUBMENU: DETAILED DESCRIPTION
In this section, each available function in the submenu is explained in detail.
10.1 UNITS
This submenu allows you to select the preferred way of displaying the output: either in percentage ("%") or f-stops.
10.2 COGNITION LIGHT
The purpose of the Cognition light is to better differentiate between individual lamps when they are controlled by the "bronControl"
app. The assignment to a colour is determined by the respective lamp address:
Lamp address 1 blue
Lamp address 2 green
Lamp address 3 violet
Lamp address 4 yellow
Lamp address 5 turquoise
From lamp address 6, the colours repeat in the same order (starting with blue).
You can activate ("on") the Cognition light or deactivate ("off") it.
The "bronControl" app can be downloaded free of charge and is available for computers, tablets, and smartphones.
The following link will provide you with further information: www.broncolor.swiss
10.3 LAMP ADDRESS
Here, you can assign an address (1 to 508) to every lamp in use. Lamps with an identical address are clustered in the same group.
This means you can control all lamps within this group simultaneously.

Page 13
10.4 WIFI
Here, you can adjust the following values:
- switch on WiFi ("on")
- switch off WiFi ("off")
- perform a reset of the WiFi module ("reset")
- set the studio address
- activate automatic firmware updates ("Auto update") or disable them ("off")
Furthermore, the respective SSID the lamp is currently connected to, is being displayed here as well.
The studio address can have a value between 1 and 99.
10.5 DISPLAY
Adjusting the display orientation is the purpose of this submenu:
- "Auto": Thanks to a sensor, the display will rotate by 180 degrees as soon as the lamp is upside down
- "0 DEG": Now, the display will no longer rotate automatically (intended for stand mount)
- "180 DEG": Now, the display will no longer rotate automatically (intended for ceiling installation)
10.6 INFO
Here, you can read the firmware version currently installed on the device.
11. ERROR MESSAGES
If a device malfunction occurs, the two cognition lights will permanently light up red. The cause of the malfunction is shown as
plain text on the display.
12. MAINTENANCE / REPAIRS
Your broncolor LED F160 lamp is a precision instrument that will work without problems for many years with the appropriate
care. If you should nevertheless experience problems, please do not try to open the device to repair it yourself. Always leave
maintenance and repairs to the broncolor service centres.
13. NOTE ON ENVIRONMENTAL PROTECTION
This product must not be disposed of with normal household waste at the end of its life, but must instead be taken to a recycling
point for electrical and electronic equipment. The materials can be recycled according to their markings. You can make an
important contribution to protecting the environment by reusing the product, recycling the basic materials or reprocessing
redundant equipment in other ways. Please ask your local authorities or our sales partners regarding the appropriate disposal
point.

Page 14
14. WARRANTY
We provide a manufacturer’s warranty of 2 years from date of purchase (for the first owner) for the LED F160 lamp. This does not
include flash tubes, halogen bulbs, safety glasses, cables, batteries, rechargeable batteries and textiles. Faults that occur due to
non-observance of the safety instructions, improper handling, use of third-party accessories or unauthorised interven-
tions/modifications are excluded from the manufacturer’s warranty. We accept no liability for damage resulting from non-
observance of the safety instructions, improper handling, use of third-party accessories or unauthorised interven-
tions/modifications. In event of technical problems, please contact the nearest broncolor authorised service centre immediately.
Part numbers, product designations and the scope of delivery may vary from country to country. Detailed information can be
obtained from your broncolor sales partner. Subject to errors and misprints.

BA115.03 | 07/20
Bron Elektronik AG
CH-4123 Allschwil / Switzerland
www.broncolor.swiss
Other manuals for LED F160
1
Table of contents
Popular Dj Equipment manuals by other brands

Coemar
Coemar SoftLite Led VariWhite instruction manual

ADJ
ADJ 7PZ IP User instructions

Spark Fabrica
Spark Fabrica SPARK RAIN PRO user manual

Chauvet Professional
Chauvet Professional Ovation Cyc 3 FC user manual

Triton Blue
Triton Blue TR-LED1020 user manual

Blizzard Lighting
Blizzard Lighting SwitchBlade Micro manual